This site is supported by our readers. We may earn a commission, at no cost to you, if you purchase through links.

Most gardeners lose their first spring to guesswork—seeds started too late, beds that flood after rain, harvests that never quite match the kitchen’s needs. Spring rewards the prepared, and the difference between a productive plot and a frustrating one usually comes down to decisions made weeks before a single seed touches soil.
Knowing your last frost date, your soil’s pH, and which three meals you’d actually cook changes everything. This guide walks you through how to plan a spring garden from site assessment to your first harvest—so nothing gets left to chance.
Table Of Contents
- Key Takeaways
- Set Spring Garden Goals
- Assess Sunlight, Soil, and Drainage
- Build Your Planting Timeline
- Choose Spring Garden Plants
- Design Beds, Paths, and Spacing
- Prepare Soil Before Planting
- Start Seeds and Transplants
- Top 7 Spring Garden Planning Tools
- Maintain Your Spring Garden
- Frequently Asked Questions (FAQs)
- When should I start planning my spring garden?
- How do I plan my spring garden?
- What is the 3-hour gardening rule?
- What are common spring gardening mistakes?
- What companion plants work best together?
- How do you protect seedlings from pests?
- When should you start hardening off seedlings?
- What are the best organic fertilizers for spring?
- How do you manage garden watering schedules?
- How do I protect seedlings from late frosts?
- Conclusion
Key Takeaways
- Knowing your last frost date, soil pH, and which crops match your actual meals gives you a concrete framework before a single seed goes in the ground.
- Testing soil pH and drainage speed before planting prevents the most common root-zone failures that good compost can’t fix after the fact.
- Succession sowing fast-maturing crops like lettuce and radishes every 10–14 days is what keeps your kitchen stocked all season instead of delivering one overwhelming glut.
- Choosing disease-resistant varieties and pairing them with companion plants like marigolds and basil reduces intervention needs while protecting overall yield.
Set Spring Garden Goals

Before you put a single seed in the ground, it helps to get clear on what you actually want from your garden this season. A few honest decisions upfront will save you a lot of second-guessing later. Start with these five goal-setting steps to build a plan you’ll stick with.
These fruit garden planning tips can help you match your goals to your space before you commit to anything.
Choose Garden-to-table Priorities
Think of your spring garden as a meal plan with roots. Start by listing 5 core priorities — fresh herbs for daily cooking, quick-harvest greens for weeknight salads, or climbing beans for easy weeknight protein. Map at least three meals to specific crops, and aim for one small harvest every 7–10 days to keep your kitchen stocked consistently. Applying succession planting strategies can help you maintain this consistent rhythm of production.
Choose plants that pull double duty:
- Basil works in pasta, caprese, and garnishes
- Leafy greens suit salads, stir-fries, and soups
- Parsley carries tacos, soups, and grain bowls easily
That kind of multi-use plant thinking shapes smarter bed decisions before you touch the soil.
Review Last Season’s Results
Before you map out what’s next, it’s worth looking back. Pull out your garden journal from last season — the numbers tell a clear story.
Your total harvest hit 84 kilograms, with lettuce and spinach leading at 28 percent. Tomato yields dipped 14 percent, pest damage touched 9 percent of plants, and a rainy stretch cost six peak picking days.
Set Realistic Harvest Goals
Now that last season’s data is in hand, use it. Base your targets on a three-season average, not wishful thinking — a realistic range like 5–8 kg per bed accounts for weather swings. Match goals to your available space, labor hours, and storage.
Track everything in a simple chart so progress stays visible all season.
Plan Vegetables, Herbs, Flowers
Once your harvest goals are set, it’s time to decide what actually grows. Allocate each bed by crop group — at least one edible and one ornamental per space. Include pollinator-friendly flowers like marigolds or echinacea alongside vegetables to support yields.
For containers, pair herbs with compact annuals for both function and color.
A simple crop map by block or row keeps everything manageable.
Match Plants to Meals
Connecting your crop-to-plate planning early saves you from growing things you’ll never actually cook. If your meals lean on pasta and roasted vegetables, grow basil, oregano, and thyme.
Herb meal pairing shapes your garden layout as much as sunlight does. Let your weekly dinner habits guide your seasonal planting choices — your plate tells you exactly what belongs in the ground.
Assess Sunlight, Soil, and Drainage

Before a single seed goes in the ground, your garden needs a honest look — not a hopeful one. Sun, soil, and drainage are the three things that will make or break your spring plans, and most gardening missteps trace right back to skipping this step. Here’s what to check before you go any further.
Track Daily Sun Exposure
Before you put a single seed in the ground, know your sunlight. Most vegetables need six to eight hours of direct sun daily, and guessing wrong costs you an entire season.
Keep a sun diary for at least one week — logging start times, end times, cloud cover, and your garden’s location. Pair those notes with the daily UV index to understand not just duration, but intensity. Review your weekly totals to spot patterns and adjust your outdoor planting plans accordingly.
Identify Warm Microclimates
Walk your garden slowly on a cold morning — the spots that feel noticeably warmer are your warm microclimates. A south-facing wall can raise air temperatures 3 to 6°F, while stone or brick surfaces release stored heat overnight.
These pockets are ideal for warm-weather crops that need a head start, and they can meaningfully shift your planting window within the same USDA Plant Hardiness Zone.
Test Soil PH
Soil pH is the silent gatekeeper of your spring garden — get it wrong, and even the best compost won’t save you. Test soil pH before planting using a home kit or lab service, targeting 6.0 to 7.0 for most vegetables. Sample from several spots and composite them for an accurate, representative reading.
Check Drainage Speed
Poor drainage is one of the most overlooked threats to a healthy spring garden. Use a soil percolation test — dig a shoebox-sized hole, fill it with water, and watch the clock. Water should drain within four hours. Slower than that signals compaction or clay-heavy soil.
Raised beds naturally improve garden bed drainage, giving roots the oxygen and moisture balance they need.
Avoid Working Wet Soil
Timing is everything — and wet soil doesn’t wait for your schedule. Working saturated ground compacts the structure you’ve worked hard to build, trapping air pockets and stressing roots before anything’s even planted.
Do a quick soil moisture check: grab a handful and squeeze. If it clumps and holds shape, wait. Compaction prevention starts with patience.
Build Your Planting Timeline

Timing is everything in the garden, and getting it wrong by even a week or two can cost you an entire crop. Your planting timeline isn’t just a calendar — it’s the backbone of a productive spring season. Here’s how to build one that actually works.
Find Your Hardiness Zone
Your USDA Plant Hardiness Zone is the foundation of any smart spring garden plan. Enter your ZIP code on the official USDA Plant Hardiness Zone Map to find your exact zone. Keep these four essentials in mind:
- Zones 1–13 reflect minimum winter temperatures
- Subzone a vs. b fine-tunes plant survival odds
- Microclimates from elevation or water can shift your real-world zone
- Zone maps update periodically — climate change has nudged many boundaries northward
Calculate Last Frost Date
Once you know your hardiness zone, the next piece of the puzzle is your last frost date. Look it up using NOAA’s regional climate data or an online frost calculator with your ZIP code.
Don’t treat it as a hard deadline — build in a 7–10 day buffer after that date before moving tender plants outside.
Schedule Cool-season Crops
With your last frost date in hand, you’re ready to slot cool-season crops into the calendar. Direct sow peas, spinach, and lettuce as soon as soil reaches 40–50°F. For brassicas like broccoli and cabbage, start them indoors 4–6 weeks before last frost, then transplant once heavy frost danger passes.
- Sow root crops like carrots and radishes 2–4 weeks before last frost
- Start brassicas indoors early, then harden off for 7–10 days
- Keep soil temperature above 45°F for reliable germination
Time Warm-season Transplants
Once cool-season crops are in the ground, warm-weather crops like tomatoes, peppers, and eggplants are next. Move transplants outdoors only after nights stay above 10–15°C, with soil temperatures at 60°F or higher for strong root establishment.
Follow a transplant hardening schedule — starting with 1–2 hours of shade daily, then building up over 7–14 days before full outdoor placement.
Plan Succession Sowing
Succession sowing turns your garden into a steady supply machine rather than a one-time harvest. Sow quick-grow varieties like lettuce and radishes every 10 to 14 days, then layer in slower crops to create staggered harvest windows all season long.
- Direct-sow fast crops in bed utilization blocks
- Schedule transplants and seed starting around frost windows
- Set up a drip irrigation setup for consistent moisture
- Rotate crops between sowings to protect soil health
- Reserve space for late-season plantings
Choose Spring Garden Plants

Now that your timeline is set, it’s time to fill it with the right plants. Not every crop belongs in every garden, and spring gives you more options than you might expect. Here’s what to keep in mind as you build your plant list.
Cool-weather Vegetables
Some vegetables actually taste better after frost — kale sweetens, arugula turns peppery, and spinach survives down to 15°F. Plant these early; lettuce bolts above 75°F, so timing is everything.
| Crop | Key Trait |
|---|---|
| Spinach | Frost-tolerant down to 15°F |
| Lettuce | Bolts above 75°F — time carefully |
| Kale | Sweetens after frost exposure |
| Arugula | Peppery flavor develops with light frost |
| Swiss Chard | Productive between 40–75°F |
Root Crops and Greens
Root crops are worth mapping into your garden layout early. Direct sow carrots — in purple, red, or classic orange — alongside beets and radishes once soil hits 50°F.
Radishes harvest in 3–6 weeks, while parsnips need a full season in loose, well-drained soil. Beets store well at 32–40°F, and turnips complement your leafy greens with fiber and vitamin C.
Herbs for Spring Cooking
Fresh herbs are the fastest return on investment in any spring garden. Tuck in basil, chives, dill, mint, and parsley — and within weeks you’re folding chives into eggs, stirring parsley into soups, and dressing cucumber salads with dill. Mint cools drinks effortlessly, while basil lifts pasta sauces with its peppery warmth.
Fresh herbs are spring’s fastest reward, from chives in your eggs to basil lifting every pasta sauce
- Basil — sauces and salads
- Dill — fish and yogurt dressings
- Mint — teas and fruit desserts
Annuals Versus Perennials
Choosing between annuals and perennials is really a question of short-term color vs. long-term structure.
Annuals like petunias deliver bold blooms all season but need replanting each spring. Perennials like peonies establish slowly, cost more upfront, yet return reliably year after year with far less soil disturbance — a smarter investment once your beds are well-designed.
Disease-resistant Varieties
Picking disease-resistant varieties is one of the smartest moves you can make before planting. Tomatoes bred for late blight resistance, cucumbers with powdery mildew tolerance, and peppers carrying virus resistance all stay productive with far less intervention.
Pair them with crop rotation and healthy soil, and you’re giving every plant a fighting chance from day one.
Design Beds, Paths, and Spacing
A good layout is what separates a garden that works from one that just looks good on paper. Before you put a single seed in the ground, it pays to think through how your beds, paths, and plant placement all fit together. Here’s how to map it out so everything has room to thrive.
Map Available Garden Space

Before you plant a single seed, measure your yard dimensions precisely — sketch the full area on paper and convert it to a scaled grid.
Mark existing structures like sheds, fences, and paths so you don’t plan beds where access matters. Then identify shade zones and plot plant clearance around mature growth.
Whether you’re working with inground beds, raised beds, or containers, this map becomes your blueprint.
Place Tall Crops Strategically

Once your garden map is drawn, think about north border planting first. Tall crops like corn, sunflowers, and trellised beans belong along the northernmost edge so they don’t shade shorter neighbors.
Space them 2 to 3 feet apart for airflow, and install trellis poles 6 to 8 feet high to keep growth vertical and manageable throughout the season.
Plan Crop Rotation

Tall crops sorted, now think beyond this season. Crop rotation — shifting plant families across garden beds every 3 to 5 years — breaks pest cycles and protects soil health.
Slot legumes early in your sequence to fix nitrogen, follow with root crops like carrots to loosen compacted layers, and log each bed’s history in a simple record keeping tool.
Add Companion Plants

Rotation sets the stage — now let companion plants do the heavy lifting.
Tuck marigolds beside tomatoes to deter soil nematodes, and let basil handle pest control by repelling thrips and aphids nearby. Bush beans work as nitrogen-fixing companions, quietly enriching the soil. Nasturtiums lure aphids away, while borage and calendula draw pollinators in. Low-growing herbs double as living mulch, suppressing weeds between rows.
Space for Mature Growth

Every square inch counts more than you might think once your garden hits full stride.
Give indeterminate varieties 18–24 inches of width, and keep tall crops at least 3 feet from shorter neighbors to protect airflow and light. Canopy spread planning now prevents crowding later — perennials especially need room that respects their future root zones.
Prepare Soil Before Planting

Good soil is the foundation everything else depends on. Before you put a single plant in the ground, a few targeted steps will make the difference between struggling crops and a productive season. Here’s what to work through before planting day.
Add Finished Compost
Finished compost is your soil’s best spring investment. Work 1 to 3 inches into the top 6 to 8 inches of your beds before planting.
This boosts organic matter and microbial activity, releasing nitrogen, phosphorus, and potassium gradually as your crops need them. It also stabilizes pH and improves moisture retention — two things every spring garden depends on.
Improve Compacted Soil
Compacted soil pushes back — roots can’t penetrate, water pools, and yields drop.
Core aeration removes plugs to open air and water channels, while a broadfork loosens 12–18 inches without disrupting deeper layers.
Follow up with compost or aged manure to feed soil microbes and rebuild friable structure. Deep-rooted cover crops like daikon radish carve natural channels, doing quiet work below the surface.
Adjust Soil PH
pH sits at the heart of soil fertility — get it wrong, and nutrients lock up no matter how much you feed the soil.
- Test pH first, targeting 6.0–7.0 for most vegetables.
- Apply lime in fall or early spring — it needs 4–6 months to react fully.
- Use elemental sulfur gradually to lower pH; retest after 3–6 months.
Mix Organic Amendments
Think of organic amendments as your soil’s nutrition plan — each ingredient acts in a specific role. Compost mixing at two to three inches improves structure, adds beneficial microbes, and delivers steady nutrients. Layer in aged manure for a nitrogen boost, or blend in biochar for long-term carbon stability.
Aim for a balanced soil amendment ratio to avoid overloading any single nutrient.
Mulch After Planting
Mulching is the finishing touch your spring garden soil preparation deserves. Once you’ve planted, apply 2 to 3 inches of organic mulch — shredded bark, straw, or composted leaves all work well.
- Keep a 1–2 inch gap around stems to prevent rot
- Water deeply after applying to settle the mulch
- Use organic materials that improve soil as they decompose
- Maintain consistent depth for continuous weed suppression
- Replenish each season as mulch settles
Your soil — and your harvest — will thank you.
Start Seeds and Transplants

Getting your seeds started well is one of those things that pays off all season long. The steps below cover everything from your first indoor sowing to the moment transplants are ready for the ground. Work through them in order, and your seedlings will hit the soil strong.
Start Seeds Indoors
Getting seeds off to the right start indoors gives you a real head start on the season.
Fill your trays with a sterile seed-starting mix, sow at a depth of about twice each seed’s diameter, and keep soil temperatures around 70 to 75°F using a heat mat. Mist consistently to stay moist — never waterlogged.
Use Proper Seed Timing
Timing is what separates a struggling seedling from a thriving one. Cool-season crops like peas and spinach germinate well in soils between 40–60°F, while warm-season crops need at least 60–65°F.
Before sowing, test older seeds for viability — anything over two years old may underperform. A simple succession sowing schedule every 7–14 days keeps harvests steady rather than all arriving at once.
Provide Strong Grow Lights
Once timing is dialed in, your seedlings need one more thing to thrive: real light. A window rarely cuts it in early spring.
Full spectrum LEDs covering 380–780nm support every growth stage, and targeting a PPFD of 200–400 µmol/m²/s keeps young greens developing steadily without burning.
Position lights a hand’s width above trays, and dim them down for seedlings.
Harden Off Seedlings
Your seedlings have been growing strong under lights — now they need to meet the real world. Harden off over 7–14 days by starting with just one sheltered hour outside, then gradually building to a full day. Begin in shade, watch for wilting, and bring them in if temperatures drop below 45°F.
Direct-sow Hardy Crops
Not every crop needs a head start indoors. Hardy crops like peas, spinach, and carrots thrive when direct-sown into prepared spring soil.
Loosen the bed 6–8 inches deep, mix in compost, and sow as soon as the ground is workable. Match seed depth to size, keep the top 2 inches moist, and thin once seedlings hit 2–3 inches tall.
Top 7 Spring Garden Planning Tools
Having the right tools in your hands makes every step of spring garden planning faster and less frustrating. These seven picks cover the essentials — from soil testing to seed organization — so you’re set up before the first transplant goes in. Here’s what’s worth keeping close this season.
1. 2. Rapitest Soil Test Kit
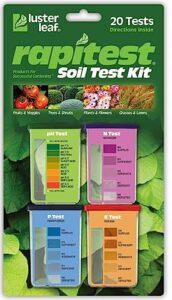
Knowing your soil’s pH and nutrient levels before you plant is one of the smartest moves you can make. The Luster Leaf Rapitest Soil Test Kit gives you that clarity fast.
It uses a patented color comparator and reagent capsules to test pH, nitrogen, phosphorus, and potassium — no lab required. With 20 total tests included, you can check multiple beds or containers. Just note that NPK tests need up to 24 hours of settling time.
| Best For | Home gardeners — beginners and veterans alike — who want a quick, affordable way to know exactly what their soil needs before planting. |
|---|---|
| Material | Plastic & Capsule |
| Skill Level | Beginner–Advanced |
| Primary Function | Soil Testing |
| Use Setting | Indoor & Outdoor |
| Setup Ease | Moderate |
| Reusability | Limited (Refills Needed) |
| Additional Features |
|
- Tests pH and all three major nutrients (N, P, K) without sending anything to a lab
- Comes with a pH preference guide for 450 plants, so you actually know what to do with the results
- Works for garden beds, raised beds, containers — pretty much anywhere you’re growing
- NPK tests can take up to 24 hours, so don’t expect instant answers on nutrients
- The test container openings are small and a little awkward to work with — expect some spillage
- Refill capsules for individual nutrients are tough to track down
2. Nazhura Dual Chamber Compost Tumbler
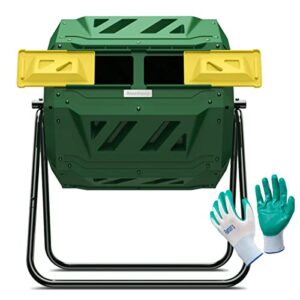
Good compost is the backbone of a fertile spring garden, and the Nazhura Dual Chamber Compost Tumbler makes that process genuinely manageable. Its two side-by-side chambers let you add fresh kitchen scraps to one side while the other batch quietly finishes — no waiting, no interruption.
Thick insulated walls retain decomposition heat, speeding breakdown even on cooler days. The rotating drum aerates materials without digging or turning by hand. At 36.5 inches tall, it’s easy to load without excessive bending.
| Best For | Home gardeners who want a low-effort, continuous composting setup that works through the seasons without a lot of manual upkeep. |
|---|---|
| Material | Plastic & Galvanized Steel |
| Skill Level | All Levels |
| Primary Function | Composting |
| Use Setting | Outdoor |
| Setup Ease | Complex |
| Reusability | Continuous Cycle |
| Additional Features |
|
- Two chambers mean you’re never stuck waiting — one side breaks down while the other keeps collecting fresh scraps.
- Insulated walls hold in heat, so decomposition keeps moving even when the weather cools off.
- The rotating drum does the aeration for you — no pitchforks, no digging, no mess.
- Assembly is a real chore — lots of small nuts and bolts, and the instructions lean heavily on tiny diagrams with barely any text.
- If your compost gets too wet, it can leak during rotation — something to watch with kitchen scraps.
- Full bins get heavy fast, and the small doors make loading and unloading more awkward than you’d hope.
3. Maotong Garden Drip Irrigation Kit
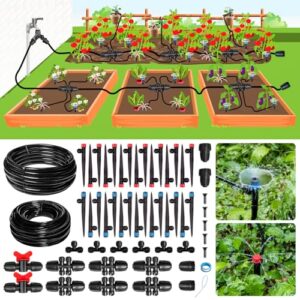
Consistent watering is where most spring gardens quietly struggle. The Maotong Garden Drip Irrigation Kit takes that pressure off by delivering water directly to root zones, cutting waste by up to 80 percent compared to overhead watering.
With 240 feet of tubing and both drip and misting emitters, you can customize flow for vegetables, herbs, and delicate seedlings alike — all from a single faucet connection, no special tools required.
| Best For | Home gardeners who want a hands-off watering setup for beds, vegetables, or flowers without dealing with complex installation. |
|---|---|
| Material | Polyethylene (PE) |
| Skill Level | All Levels |
| Primary Function | Drip Irrigation |
| Use Setting | Outdoor |
| Setup Ease | Easy |
| Reusability | Fully Reusable |
| Additional Features |
|
- Cuts water use by up to 80% by delivering water straight to the roots
- Comes with both stream and vortex emitters so you can dial in the right flow for each plant
- Two faucet connectors let you run two separate zones from one kit
- The 40-foot main line might not stretch far enough for larger garden layouts
- Vortex emitters can cause water to pool at the base if not positioned carefully
- New tubing has a noticeable plastic smell right out of the box
4. Rocklin Stand Up Weed Puller
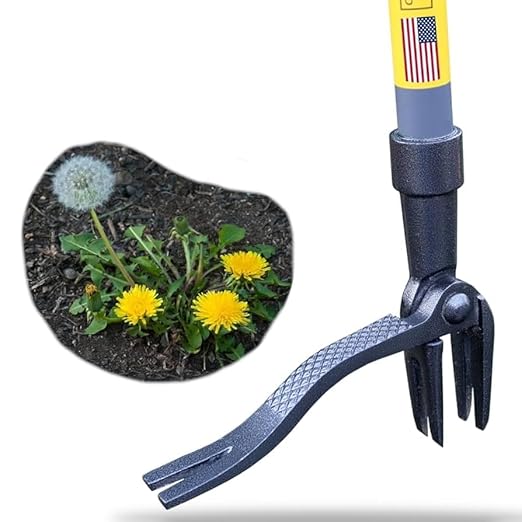
Weeding by hand is a back-breaking task that derails even the most motivated gardener. The Rocklin Stand Up Weed Puller solves that with a 48-inch handle and a four-claw steel mechanism that extracts taproots completely — dandelions, thistles, crabgrass — without bending or kneeling. Press the foot lever, twist, lift, and the weed comes out whole.
Note that you’ll need to clear claws manually after each pull, and apply thread locker to the handle sections to prevent loosening over time.
| Best For | Gardeners and homeowners who want to pull weeds without wrecking their back, knees, or hips. |
|---|---|
| Material | Hardened Steel |
| Skill Level | All Levels |
| Primary Function | Weed Removal |
| Use Setting | Outdoor |
| Setup Ease | Easy |
| Reusability | Fully Reusable |
| Additional Features |
|
- Pulls taproots out whole — no regrowth from leftover root fragments
- 48-inch handle means you stay upright the whole time
- The foot lever does the hard work in compacted or tough soil
- You have to clear the claws by hand after every single pull
- Handle threads can loosen over time without thread locker
- Struggles with weeds that have tangled, interconnected root systems
5. Scuddles Stainless Steel Garden Tool Set
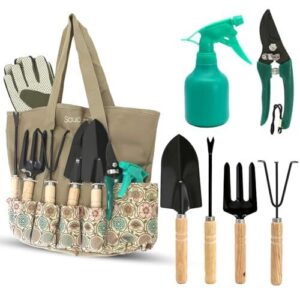
Every gardener needs a reliable hand tool set, and the Scuddles 7-piece kit delivers exactly that. Built with rust-resistant stainless steel heads and stored in a reinforced shoulder bag, it covers the essentials — shovel, fork, rake, transplanter, shears, and sprayer — all under two pounds.
It’s well-suited for planting, trimming, and bed prep. Just keep it away from heavy digging; under serious pressure, the lighter construction can bend.
| Best For | Casual gardeners, beginners, kids, and seniors who want a lightweight, all-in-one kit for everyday planting and light yard work. |
|---|---|
| Material | Stainless Steel |
| Skill Level | Beginner–Senior |
| Primary Function | General Gardening |
| Use Setting | Indoor & Outdoor |
| Setup Ease | Easy |
| Reusability | Fully Reusable |
| Additional Features |
|
- Full 7-piece set covers the basics — shovel, fork, rake, transplanter, shears, and sprayer
- Rust-resistant stainless steel keeps tools looking good over time
- Comes with a shoulder bag so everything stays organized and easy to carry
- Not built for heavy-duty digging or tough soil conditions
- Tools can bend or break under serious pressure
- Metal surfaces may scratch with regular use
6. Open Seed Vault Heirloom Vegetable Seeds
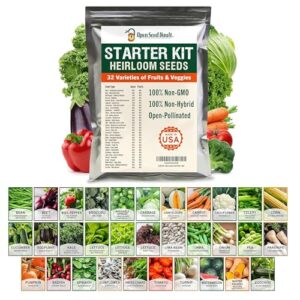
Once your tools are sorted, what you actually grow is the heart of it all. The Open Seed Vault gives you 32 heirloom, non-GMO vegetable varieties — greens, roots, and fruits — packed in resealable, waterproof mylar at $26.99.
Seeds are open-pollinated, meaning you can save them season after season without buying new stock. The included growing guide walks you through timing and soil basics, making it a solid starting point whether you’re a beginner or restocking a homestead.
| Best For | Beginners, homesteaders, and anyone who wants to grow their own food without starting from scratch every season. |
|---|---|
| Material | Mylar & Paper Packets |
| Skill Level | Beginner–Homesteader |
| Primary Function | Seed Growing |
| Use Setting | Indoor & Outdoor |
| Setup Ease | Easy |
| Reusability | Single-Use Seeds |
| Additional Features |
|
- 32 heirloom varieties cover a solid range — greens, roots, fruits — so you’ve got real variety in one kit
- Open-pollinated seeds mean you can save and replant year after year, which saves money over time
- Resealable mylar packets protect seed viability, and the growing guide makes it beginner-friendly
- Timing matters — if you plant outside your local growing season, don’t expect great results
- Soil quality and pest control are on you; the seeds can only do so much
- Long-term storage requires the right conditions, so tossing them in a junk drawer won’t cut it
7. NadaKin T Shape Plastic Plant Labels
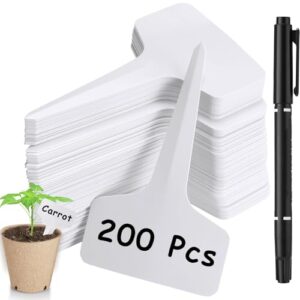
Once you’ve sourced great seeds, keeping track of what’s planted where becomes just as important. The NadaKin T Shape Plant Labels solve that quietly — no fuss, no guesswork.
Their T-shaped design pushes cleanly into soil or pots without tipping, and the polypropylene construction holds up through rain, sun, and multiple seasons.
The writing surface accepts pencil, marker, or ballpoint pen. Clean them off, reuse them. Simple, reliable, and exactly what a well-organized spring garden deserves.
| Best For | Gardeners and greenhouse growers who want a simple, reusable way to keep track of plant varieties, seedlings, and pot experiments without the mess or guesswork. |
|---|---|
| Material | PVC Plastic |
| Skill Level | All Levels |
| Primary Function | Plant Labeling |
| Use Setting | Indoor & Outdoor |
| Setup Ease | Easy |
| Reusability | Fully Reusable |
| Additional Features |
|
- The T-shaped design stays put in soil without tipping — no fussing with stakes that keep falling over
- PVC construction is waterproof and sunlight-resistant, so labels hold up through rain and full seasons outdoors
- Easy to clean and reuse, which saves money and cuts down on plastic waste over time
- The writing area is pretty small, so long plant names or detailed notes won’t fit comfortably
- You’ll need the right kind of marker to keep writing from smudging — not every pen will do the job
- At 4 inches tall, they may get buried or lost in larger garden beds with dense plantings
Maintain Your Spring Garden

Getting your garden in the ground is only half the story. Once things are growing, the real rhythm begins — and it’s simpler than you might think. Here’s what to stay on top of through the season.
Water Deeply in Mornings
Think of morning watering as your garden’s daily foundation. Water deeply and infrequently — aiming to saturate the top 6 to 12 inches of soil — so roots grow downward rather than hovering near the surface.
A drip line or soaker hose delivers moisture straight to the root zone, cutting evaporation and keeping foliage dry to reduce disease risk.
Monitor Pests and Diseases
Walk each bed at least once a week, scanning leaves for stippling, holes, or webbing — early signs are far easier to manage than a full outbreak.
Use a handheld magnifier to confirm what you’re seeing, then log the pest type, location, and damage level. That simple scouting record tells you what’s building before it gets out of hand.
Weed Before Plants Spread
Catching weeds early is one of the highest-leverage habits in spring gardening.
Pull seedlings before flowering — once they set seed, you’re fighting next season’s problem too. Apply 2–3 inches of organic mulch right after planting to block light and slow emergence. For persistent beds, a preemergent herbicide in early spring stops annual weed germination before it starts.
Repair Trellises and Beds
A wobbly trellis won’t survive a heavy crop load, so start with a trellis joint inspection — tighten loose connections using galvanized screws or metal brackets. Replace wooden slats that are cracked or split, and reinforce sagging sections with wire braces. Always wear protective gear when handling sharp edges.
Then reinforce bed corners with metal brackets, swap rotted boards for cedar, and apply fresh mulch after repairs.
Re-sow for Steady Harvests
Staggering your sowings is the simplest way to keep your kitchen stocked from spring through summer. Sow fast-maturing crops like lettuce and radishes every two weeks, and spinach or spring onions every three.
Keep a garden journal to track sow dates and harvest windows — those records help you close gaps before they open.
Frequently Asked Questions (FAQs)
When should I start planning my spring garden?
Start planning in late winter—ideally 8 to 10 weeks before your last frost date. That window gives you time for soil prep, seed starting, and building a realistic planting timeline before spring arrives.
How do I plan my spring garden?
Planning a spring garden means thinking ahead—soil prep, sunlight mapping, and seed starting all inform what you grow and when. Map your goals first, then let your space and schedule guide every decision.
What is the 3-hour gardening rule?
The 3-hour gardening rule advises skipping outdoor work between 11 a.m. and 2 p.m., when UV peaks and heat stress hits hardest — protecting both you and your plants.
What are common spring gardening mistakes?
Even experienced gardeners slip up every spring. The biggest culprits? Planting too early, skipping soil tests, and overwatering. Get those three right, and you’re already ahead of most.
What companion plants work best together?
Some plants are simply better together. Marigolds deter nematodes near tomatoes, basil repels aphids, and nasturtiums trap pests away from cucumbers — letting each plant pull its weight while protecting its neighbor.
How do you protect seedlings from pests?
Seedlings are vulnerable the moment they emerge. Use row covers to block beetles, place collars at soil level to stop cutworms, and check daily for chewing or stippling — catch problems early.
When should you start hardening off seedlings?
Start hardening off 7 to 14 days before your planned transplant date — once nighttime lows stay above 40–45°F for cool-season crops, or above 50–55°F for tomatoes and peppers.
What are the best organic fertilizers for spring?
Spring gardens thrive with organic fertilizer: compost boosts soil quality and organic matter, bone meal strengthens roots, alfalfa meal energizes seedlings, seaweed extract aids recovery, and worm castings deliver gentle, balanced fertilization.
How do you manage garden watering schedules?
Water is life, and wasting it is a slow garden killer. Water deeply in the morning, using drip irrigation or soaker hoses, and monitor soil moisture regularly to adjust with seasons.
How do I protect seedlings from late frosts?
Late frosts can blindside even seasoned gardeners. Cover seedlings with lightweight row covers and mulch the base — wet soil releases heat overnight, buying your plants a few extra critical degrees.
Conclusion
Test this theory in your own yard: the gardeners who harvest the most rarely work the hardest—they plan the smartest.
Learning how to plan a spring garden isn’t about an ideal outcome on day one; it’s about making smarter decisions before a single seed ever touches soil. Know your frost dates, feed your soil, and choose what you’ll actually cook. Do that, and spring stops being a gamble—and starts feeling like something you genuinely earned.
- https://www.bernsgardencenter.com/blogs/gardentips/spring-garden-prep-start-with-healthy-soil
- https://www.organicgrowersschool.org/blog/ask-ogs-preparing-soil-for-a-spring-garden
- https://www.mygardengeek.com/spring-garden-planning
- https://hgic.clemson.edu/spring-garden-preparation-how-to-prepare-garden-beds-for-spring-planting
- https://www.erynwhalenonline.com/plan-your-garden