This site is supported by our readers. We may earn a commission, at no cost to you, if you purchase through links.
The first warm days of spring reveal what winter left behind—a tangle of dead stems, compacted soil, and last season’s exhausted mulch that won’t support the vigorous growth you’re hoping for. Your garden beds need more than a quick cleanup; they need genuine renewal to become the productive, healthy spaces where your plants can thrive.
Renewing garden beds in spring isn’t just about aesthetics—it’s about rebuilding the foundation that determines whether your crops flourish or struggle through the season. By addressing soil health, clearing debris, and preparing the ground properly now, you’re setting up months of easier maintenance and better harvests.
The steps ahead will transform tired, depleted beds into fertile ground ready to support everything from tender lettuce seedlings to sturdy tomato plants.
Table Of Contents
- Key Takeaways
- Assess and Clear Garden Beds
- Test and Improve Soil Health
- Refresh Mulch and Protect Soil
- Plant and Space New Crops
- Maintain Beds Throughout The Season
- Frequently Asked Questions (FAQs)
- How to refresh garden beds for spring?
- How to refresh an old garden bed?
- Should I remove leaves from flower beds in spring?
- Do you have to replace soil in raised beds every year?
- When should I start preparing spring beds?
- How do I know if soil needs aeration?
- Whats the best mulch type for vegetable gardens?
- Can I reuse last years garden soil?
- How often should I test my soil?
- When should I start preparing beds in spring?
- Conclusion
Key Takeaways
- Spring garden bed renewal starts with clearing debris and weeds before they seed, then testing soil pH and nutrients to identify exactly what amendments your beds need for optimal plant growth.
- Adding 2-3 inches of compost annually rebuilds soil fertility and water retention without requiring complete soil replacement, while gentle aeration with a broadfork fixes compaction without disrupting beneficial soil life.
- Fresh mulch applied at proper depth (2-3 inches) blocks 90% of weed germination and cuts water evaporation by 60%, but keep it an inch away from plant stems to prevent rot.
- Weekly monitoring for pests and diseases paired with consistent deep watering (1-2 inches per week) prevents most problems before they spread, making maintenance easier throughout the entire growing season.
Assess and Clear Garden Beds
Before you plant anything new, you need to see what you’re working with. Winter leaves behind a mixed bag of debris, persistent weeds, and sometimes hidden problems that can sabotage your growing season.
Taking time now to assess and clear your beds sets the stage for healthier plants and fewer headaches down the road.
Remove Dead Plant Material and Debris
At the season’s start, clearing last year’s plant residues is your first line of defense against pest overwintering and disease prevention. Old stalks and leaves can harbor pathogens for years, directly impacting yield and structural safety of your beds. Consider that delaying garden cleanup can help local insect populations.
Here’s your spring cleaning checklist:
- Cut back dead stems and foliage to ground level
- Rake up fallen leaves and scattered debris
- Remove diseased material completely—don’t compost it
- Clear weeds and debris from bed edges and paths
- Check compost suitability before adding healthy plant matter
Pull Weeds Before They Seed
Once you’ve removed debris, turn your attention to weeds—especially before they scatter thousands of seeds. Hand-pulling is most effective in the early morning after rain, when roots lift cleanly.
Here’s your spring cleaning guide to weed control and seed dispersal prevention:
| Weed Identification | Seed Production | Disposal Methods |
|---|---|---|
| Common lambsquarters | 72,450 seeds/plant | Bag and trash |
| Dandelion | 15,000 seeds/plant | Never compost |
| Purslane | 52,300 seeds/plant | Remove before mowing |
| Pigweed | 117,400 seeds/plant | Pull before seed set |
Preparing garden beds with zero seed rain can reduce your next season’s weed bank by up to 93%. To achieve this, consider utilizing cultural weed control methods like mulching and irrigation. That’s long-term control that starts today—clearing weeds and debris now means dramatically less work tomorrow.
Inspect for Pest and Disease Issues
After clearing weeds and debris, scan your beds for signs of early pest prevalence and disease incidence. Visual inspection catches problems before they spread—look for aphids clustering on new shoots, chewed leaves signaling caterpillars, or spotted foliage hinting at fungal issues.
More than 60% of gardeners spot insect pests by late spring, so managing garden pests now protects plant health and maintains soil health all season long.
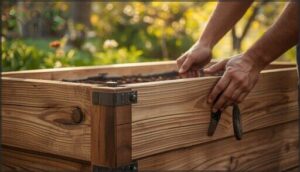
Evaluate Raised Bed Structure and Materials
Once pests and diseases are noted, turn your attention to the bed frames themselves. Check wooden raised beds for structural damage—boards showing soft spots or cracks signal wood decay from moisture exposure. Untreated pine may need replacing after five years, while cedar lasts decades.
Inspect metal alternatives for rust and tighten loose hardware. Strong frames prevent soil spills and support healthy roots all season.
Test and Improve Soil Health
Think of your soil as the foundation of everything that happens in your garden. Before you add anything new, you need to understand what’s already there and what might be missing.
Here’s how to assess your soil’s current state and give it exactly what it needs to support a thriving spring garden.
Use a Soil Test Kit for PH and Nutrients
Think of soil testing as your garden’s annual checkup—revealing hidden nutrient deficiencies and pH imbalances before they sabotage your harvest.
Home test kits offer reasonable accuracy for soil pH and basic nutrients, though professional labs deliver precision when you need exact fertilizer recommendations.
Testing every 2-3 years in sandy soils or 3-4 years in clay helps you catch problems early while reducing unnecessary fertilizer costs and environmental impacts.
Amend Soil With Compost and Organic Matter
By adding compost to soil, you’re unlocking significant benefits. Studies show just one ton per acre can raise organic matter by 10%, while every 1% increase stores an extra 16,500 gallons of water.
Adding compost to your soil boosts organic matter and can store thousands of extra gallons of water with every percent increase
Amending soil with compost fuels nutrient cycling, strengthens soil biology, and improves water retention.
Spread a 2-3 inch layer over beds, gently working it into the top few inches without disrupting existing soil structure.
Incorporate Organic Fertilizers as Needed
After amending soil with compost, applying organic fertilizer fine-tunes nutrient availability for spring crops. Choose fertilizers that match your plants’ needs—balanced vegetable blends or nitrogen-rich formulas work well for most raised beds.
- Boost your soil microbiome and nitrogen cycling
- Release nutrients steadily over months, not days
- Cut nitrogen runoff by 30% compared to synthetics
- Deliver sustainable nitrogen while building fertility
- Follow application best practices: 12–32 pounds per 100 square feet annually
Gently Aerate Compacted Soil Without Tilling
Compacted soil can cut root growth by up to 50%, but you don’t need a tiller to fix it. Manual aeration with a broadfork or digging fork lifts and loosens soil structure without flipping layers. For deeper compaction, try biological aeration—plant daikon radish to break through hardpan naturally. Liquid solutions and no-till benefits preserve your soil’s living network while DIY methods like aerator sandals handle smaller patches.
| Method | Best For |
|---|---|
| Manual aeration (broadfork, digging fork) | Immediate relief in top 4 inches |
| Biological aeration (deep-rooted crops) | Long-term repair down to 6–8 feet |
| Liquid solutions (enzymes, surfactants) | Large areas needing gentle treatment |
Refresh Mulch and Protect Soil
Mulch works like a protective blanket for your garden beds, keeping moisture in and weeds out. Over winter, it breaks down or becomes compacted, which means it’s time to refresh those layers.
Here’s how to get your mulch back in shape and ready to support healthy soil all season long.
Remove Old or Matted Mulch Layers
Before mulching garden beds with a fresh protective layer, check if your old mulch has become compacted or waterlogged. Matted mulch effects include reduced soil oxygen levels and poor water infiltration. It also creates a pest habitat and encourages disease overwintering.
If your mulch is crusted, moldy, or thicker than three inches, rake away the excess. This simple step restores soil moisture flow and prevents weather damage to young roots.
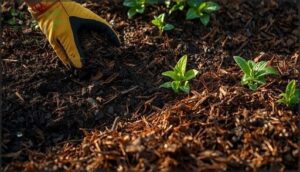
Apply Fresh Organic Mulch Evenly
Once you’ve cleared away the old layers, spread fresh organic mulch evenly across your spring garden beds for maximum weed suppression and soil temperature control.
Choose materials like straw, leaves, or small twigs—they decompose steadily, improving soil health while boosting mulch water retention.
Uniform coverage matters: gaps let weeds through, while even layers protect moisture and feed the living ecosystem below your plants.
Maintain Proper Mulch Depth and Placement
Getting your mulch depth just right protects plant roots without suffocating them. You’ll want to aim for a 2 to 3-inch layer around most garden plants, keeping mulch at least an inch away from stems to prevent rot.
- Fine mulches like shredded leaves need only 1 to 2 inches
- Coarse bark chips can reach 3 to 4 inches safely
- Anything deeper than 4 inches risks oxygen starvation
- Check monthly and fluff settled areas to maintain coverage
Use Mulch to Conserve Moisture and Suppress Weeds
Beyond spacing mulch correctly, your layer does two big jobs: locking in water and blocking weeds before they sprout. A proper 2- to 3-inch spread cuts evaporation by 60% and stops 90% of weed seeds from germinating by blocking sunlight.
| Mulch Material | Water Retention | Weed Suppression |
|---|---|---|
| Hemp bedding | 80% of applied water | Excellent |
| Grass clippings | 73% of applied water | Very good |
| Bark chips | 16% of applied water | Good |
Choose coarse organic mulches like shredded bark for best results—they won’t turn hydrophobic like newspaper can, and they maintain steady soil moisture between waterings.
Plant and Space New Crops
Now that your soil is healthy and your beds are mulched, it’s time to get plants in the ground. This stage is where your spring prep work pays off, but only if you plant smart.
The following steps will help you choose the right crops, space them properly, and give them the best start possible.
Choose Crops Suited for Spring Planting
Spring growing thrives when you match crop selection to your frost tolerance zone and climate considerations. Cool-season vegetables like spinach, peas, and lettuce handle temperatures down to 28–32°F, perfect for planting seeds and seedlings several weeks before your last frost date.
Factor in harvest timing and nutritional needs—fast-maturing radishes and greens reward you in 25–50 days, while incorporating crop rotation keeps spring garden beds healthy and productive.
Follow Correct Planting Depth and Spacing
You’ve picked your crops—now planting seeds and seedlings at the right depth sets the stage for strong root development and yield optimization. Depth consistency matters: lettuce needs just 6 inches, while tomatoes thrive at 18 inches for adventitious roots.
Proper spacing prevents overcrowding, improving soil tilth and seed germination. That attention to detail translates directly into healthier plants and bigger harvests throughout your growing season.
Protect Young Plants From Late Frosts
After your last frost date passes, keep row covers and frost cloths on hand—spring garden beds remain vulnerable. Young seedlings tolerate brief dips near freezing, but moderate freezes at 25–28°F cause serious damage.
Physical cover types like floating row covers trap warmth, offering 3–6°F protection and reducing cumulative growth reduction risks.
Check forecasts nightly, cover before predicted frosts, and remove covers promptly to avoid stunted growth from reduced light exposure.
Water Newly Planted Seeds and Seedlings Consistently
Right after you tuck seeds into your spring beds, consistent watering becomes your daily rhythm. Keep the soil moisture level steady—newly planted seeds need water once or even twice daily in warm, breezy weather to maintain proper moisture.
Light, frequent watering reaches the shallow root depth of seedlings without drowning them, while irregular delivery can halt germination and stress young plants before they gain strength.
Maintain Beds Throughout The Season
Once your beds are planted and growing, the real work begins. Keeping plants healthy through the season means staying on top of watering, weeds, and any problems that crop up along the way.
Here’s how to maintain your renewed garden beds from spring through harvest.
Water Established Plants Appropriately
Once your plants are established, they’ll perform best with one to two inches of water weekly, delivered in a single deep watering session. This encourages roots to grow downward and become more drought-tolerant.
- Check soil moisture by inserting your finger two inches deep—if it’s dry, it’s time to water
- Water early in the morning to reduce evaporation and allow soil moisture to penetrate thoroughly
- Use drip irrigation or soaker hoses to deliver water directly to root zones and save up to 60% water
- Apply mulch around plants to conserve soil moisture and reduce watering frequency
- Adjust watering based on weather—hot, windy days may require more frequent irrigation
Monitor for Weeds, Pests, and Diseases
Weekly monitoring can prevent 35% more pest infestations when you catch issues early. Walk your beds every few days, checking leaves for chew marks, wilting, or unusual spots—early detection saves entire crops.
| What to Check | Red Flags to Note |
|---|---|
| Weeds | New seedlings near drip lines, grass clumps |
| Pests | Aphid clusters, flea beetle holes, cutworm damage |
| Disease Symptoms | Yellowing leaves, wilting stems, fungal spots |
| Soil Conditions | Compaction, crusting, moisture imbalances |
Use digital tracking tools for weed identification and pest scouting—they’re 95% accurate and help you respond fast.
Prune Damaged or Diseased Growth
Snipping away diseased leaves before they spread pathogens can cut infection rates by up to 75% in your spring garden beds. Disinfect your tools between cuts using rubbing alcohol—this simple step stops disease from hitchhiking between plants and preserves soil health all season.
When you prune damaged growth, make clean cuts at the branch collar to promote faster wound closure and boost plant vigor.
Top-Dress With Compost Mid-Season
Halfway through the season, your soil’s nutrient reserves start running low—that’s when a quarter-inch layer of compost delivers a microbe boost and approximately 2 to 3 pounds of available nitrogen per 1,000 square feet.
This mid-season top-dressing enhances nutrient cycling while improving organic fertility, giving your plants a steady supply of food when they need it most.
Frequently Asked Questions (FAQs)
How to refresh garden beds for spring?
Start by removing dead plant material and weeds from your raised beds. Test your soil’s pH and nutrients, then add compost and organic matter to rebuild fertility before spring planting begins.
How to refresh an old garden bed?
Garden renewal starts with spring cleanup—remove dead plants and weeds, then focus on soil rejuvenation. Evaluate raised bed condition, amend with minerals and compost, while maintaining soil structure to prevent compaction.
Should I remove leaves from flower beds in spring?
You’ve probably heard you should clear every leaf from your spring garden beds—but doing so can actually slash beneficial arthropods by nearly half, strip soil carbon, and invite weeds back faster than you’d think.
Do you have to replace soil in raised beds every year?
You don’t need complete soil replacement in raised beds every year.
An annual refresh with 2-3 inches of compost maintains nutrient cycling and soil conservation, making full replacement unnecessary in most cases.
When should I start preparing spring beds?
The early bird catches the worm, especially during spring timing. You should prepare beds two to four weeks before your last frost date, once the soil reaches 50°F and crumbles easily in your hand.
How do I know if soil needs aeration?
If water pools after rainfall, your garden fork meets strong resistance at shallow depths, or plant roots grow stunted and twisted, your soil likely suffers from compaction and needs aeration.
Whats the best mulch type for vegetable gardens?
Think of mulch as your soil’s best friend: straw, shredded leaves, and compost are top choices for vegetable gardens, offering excellent weed suppression, moisture retention, and organic matter that enriches your soil as it breaks down naturally.
Can I reuse last years garden soil?
You can reuse last year’s garden soil if you refresh it with compost and amendments. However, nutrient depletion and pathogen control are real concerns—replace diseased soil completely to support sustainable gardening.
How often should I test my soil?
Healthy soil is the foundation of every thriving garden. Test your soil annually if you’re growing vegetables or intensively managing beds, and every three to five years for established perennial gardens with stable conditions.
When should I start preparing beds in spring?
You can start preparing your spring garden beds once nighttime temperatures stay above 50°F for seven consecutive days and soil dries enough to avoid compaction when worked.
Conclusion
Think of renewing garden beds in spring as writing the opening chapter of your growing season—every amendment, every handful of compost, every weed pulled shapes the story your plants will tell.
The work you’ve invested now creates soil that breathes, feeds, and sustains life through summer’s heat.
Your garden won’t just survive this season; it’ll reward your early efforts with abundance you can taste, share, and celebrate all year long.
- https://soiltesting.cahnr.uconn.edu/soil-testing-for-lawns-gardens-and-commercial-crops/
- https://www.skagitsoilsinc.com/how-mulching-can-reduce-weeds-and-retain-soil-moisture/
- https://pmc.ncbi.nlm.nih.gov/articles/PMC11533641/
- https://www.thrivelot.com/resources/how-crop-rotation-boosts-vegetable-yields
- https://today.oregonstate.edu/news/controlling-perennial-bindweed-takes-persistence


