This site is supported by our readers. We may earn a commission, at no cost to you, if you purchase through links.

Your cold frame can hit 90°F on a sunny spring morning while it’s still 45°F outside—and that’s a problem. Without proper airflow, your seedlings cook under glass, and moisture turns into a breeding ground for fungal diseases that can wipe out weeks of careful work.
Learning how to ventilate a cold frame isn’t just about cracking the lid open; it’s about reading temperature swings, managing humidity, and protecting your plants from stress.
Whether you’re manually adjusting vents each day or installing automatic openers that respond to heat, the right ventilation strategy keeps your growing environment stable. You’ll discover both hands-on techniques and automatic solutions that match your schedule, your climate, and the crops you’re nurturing.
Table Of Contents
- Key Takeaways
- Why Ventilation is Crucial for Cold Frames
- Manual Ventilation Techniques for Cold Frames
- Installing Automatic Ventilation in Cold Frames
- Designing and Maintaining Cold Frame Airflow
- Top Products for Effective Cold Frame Ventilation
- Frequently Asked Questions (FAQs)
- What happens if you don’t ventilate your frames?
- How do you keep heat in a cold frame?
- Do you need two window sashes for a cold frame?
- What is a cold frame?
- How do you insulate a cold frame?
- What is a cold frame in a garden?
- How do you build a cold frame?
- Can I use a thermometer inside my cold frame?
- Whats the ideal temperature range for most seedlings?
- How do I winterize my cold frame properly?
- Conclusion
Key Takeaways
- Cold frames can overheat dangerously fast—hitting 90°F inside while it’s only 45°F outside—so you need to crack the lid open when temperatures reach 50-55°F and monitor throughout the day to prevent heat stress and fungal diseases.
- Proper ventilation keeps humidity between 45-55% by moving air that dries foliage and prevents mildew, while also supporting healthy photosynthesis rates when you maintain daytime temperatures around 65-70°F.
- Automatic vent openers use thermal expansion in wax-filled cylinders to lift lids without electricity, giving you reliable temperature control for about $30-60 upfront if you can’t check your frame daily.
- Building smart ventilation starts with your frame’s design—use hinged windows along the top back edge, seal gaps with weatherstripping to hold heat when needed, and adjust your venting schedule seasonally from wide-open summer days to brief midday cracks in winter.
Why Ventilation is Crucial for Cold Frames
Your cold frame might be protecting your plants from frost and wind, but without proper airflow, it can quickly turn into a miniature oven that does more harm than good. Ventilation isn’t just a nice-to-have feature—it’s what keeps your plants from overheating, prevents disease, and creates the steady conditions they need to grow strong.
Without proper airflow, your cold frame can quickly turn into a miniature oven that does more harm than good
Let’s look at three key reasons why getting the air movement right makes all the difference in your cold frame’s success.
Preventing Overheating and Plant Stress
On sunny days, even cool outdoor air won’t stop your cold frame from overheating. Unventilated frames can run 10–20°F hotter than outside temperatures, and heat stress begins above 84°F. You’ll see these warning signs:
- Wilted or scorched leaves despite adequate water
- Slowed growth and reduced photosynthesis
- Flower or fruit drop in sensitive crops
- Soft, leggy stems from excessive warmth
- Temperature spikes reaching unsafe levels within hours
Proper ventilation timing and airflow impact prevent this damage. Cold frames also extend the growing season by keeping temperatures elevated.
Managing Humidity and Moisture Levels
High humidity inside your frame invites trouble. When moisture levels climb above 75%, disease risk jumps—downy mildew, botrytis, and rot thrive in stagnant, damp air. You’ll notice condensation pooling on the glazing each morning, a clear sign airflow effects aren’t keeping pace with soil moisture evaporation.
Proper ventilation lowers humidity to the 45–55% sweet spot, where environmental control and growing conditions support vigorous seedlings instead of fungal spores. To combat this, consider how vapor barriers help control condensation.
Supporting Healthy Plant Growth
When you regulate temperature inside your frame, photosynthesis rates climb and roots stay healthy. Air circulation between 18–21°C during the day fuels carbon gain in leafy greens, while cooler nights promote plant hardening—those sturdier stems you want before transplanting outdoors.
Disease prevention follows naturally: moving air dries foliage, cutting mildew risk and keeping your seedlings vigorous instead of leggy.
Manual Ventilation Techniques for Cold Frames
Manual ventilation gives you direct control over your cold frame’s temperature and airflow, which matters most during those unpredictable spring days when morning frost gives way to afternoon heat. You’ll need to develop a feel for when to crack that lid open and by how much, based on what your thermometer tells you and what the weather’s doing.
Let’s walk through the key techniques that’ll help you master this daily rhythm and keep your plants thriving.
When and How to Open The Lid

Opening your cold frame lid at the right time makes all the difference between thriving plants and stressed ones. Here’s how to nail the timing:
- Morning lid opening: Crack the lid when outside temperatures hit 10–13 °C (50–55 °F) on sunny days, ideally before 09:00, to prevent midday overheating.
- Midday venting: Widen the opening progressively as solar gain pushes interior temps above 21 °C (70 °F).
- Evening closure: Seal lids at twilight when frost threatens, usually below 0 °C (32 °F).
Use wooden props or bricks to adjust opening height from 2–30 cm, depending on weather conditions and seasonal timing.
Monitoring Temperature for Manual Venting

Before you lift the lid, check your thermometer—it’s the control center of manual ventilation. Max–min models track daily highs and lows, revealing whether you’re hitting ideal temperatures or missing overheating signs.
Place sensors at plant height for accuracy, then review readings every morning and midafternoon during peak solar gain.
Pair daily checks with forecast integration to anticipate rapid swings and adjust your venting schedule before growing conditions slip out of range.
Tips for Effective Daily Ventilation

Start every morning adjustments when outdoor air hits 4–7°C to prevent internal spikes above 21°C. Close afternoon closures before ambient temperature drops below 5°C to hold soil warmth overnight.
On humid days, crack the lid midday for air exchange that drops humidity levels by ten to twenty-five points.
Weather adjustments—smaller openings on windy days—and tool integration through daily thermometer checks keep ventilation responsive and effective.
Installing Automatic Ventilation in Cold Frames

If you can’t check your cold frame daily, automatic vent openers are a major advantage. These self-regulating devices lift your lid as temperatures rise, then close it back down when things cool off.
Let’s walk through how they work, how to adjust them, and whether they’re the right fit for your setup.
How Heat-Activated Vent Openers Work
Heat-activated window openers rely on thermal expansion inside a gas-filled cylinder or wax-filled tube. When temperatures reach about 65–85 °F, the wax expands roughly 5–20%, pushing a piston that lifts your cold frame lid with enough mechanical force to open it up to 12 inches.
This energy autonomy requires no electricity, and with proper care, the automatic vent opener delivers a service life of 7 years or more.
Adjusting and Maintaining Automatic Vents
Most automatic vent openers let you set the opening temperature between 60 and 77 °F, giving you adjustable settings for precise temperature control.
Once or twice per year, wipe the piston rod clean and apply a light oil—WD-40 works well—to keep seals healthy and extend greenhouse automation reliability.
If your vent stops opening fully, check for wax leaks; troubleshooting vents often reveals seal wear requiring cylinder replacement.
Pros and Cons of Automatic Vs. Manual Ventilation
Choosing between automatic ventilation and manual ventilation comes down to cost analysis, user convenience, and system reliability.
Automatic openers deliver precise temperature control and climate control without daily monitoring, but they cost $30 to $60 upfront with maintenance needs every decade.
Manual methods require zero equipment investment and offer full access flexibility, though temperature precision suffers when you forget adjustments.
Designing and Maintaining Cold Frame Airflow

Building a cold frame with good airflow starts long before you crack open a lid. The materials you choose, the way you hinge your windows, and how you adapt through the seasons all shape how well your plants breathe.
Let’s walk through the design decisions and maintenance habits that keep air moving and your crops thriving.
Choosing Materials and Construction for Ventilation
Your cold frame construction choices directly shape how well ventilation works. DIY vent design starts with picking materials that let you control airflow while holding heat when you need it. Here’s what’s important:
- Use 2-inch thick lumber for better insulation than 1-inch boards
- Apply weather stripping at joints to cut heat loss
- Seal board seams with latex caulant to block drafts
- Add Styrofoam in frame voids for year-round growing
- Place automatic vents on the back wall at 18 inches for best airflow
Frame sealing methods like caulking and weatherstripping slash your ventilation material costs by keeping warmth inside. When you build with insulation impact in mind, your automatic vent placement becomes more effective because the structure holds temperature steadier throughout the day.
Incorporating Hinged Windows and Access Points
When you build your cold frame, hinge the lid along the top back edge so it swings open for full ventilation and easy harvesting. Most DIY frames use three or more galvanized hinges spaced evenly across a window that’s about four feet long. That hinge placement lets you prop the lid open a few inches for gentle airflow or swing it wide on hot days.
Automatic openers attach right to your hinged windows, lifting lids up to eighteen inches as temperatures climb—no electricity needed. You’ll want sturdy props or stay bars to hold the lid stable when it’s partially open, preventing sudden slams in gusty winds.
Hinged windows give you the best access benefits: reach your crops without wrestling heavy panels, and adjust vents throughout the day. For weather protection, add a simple latch at the front to keep lids closed during storms, and check hinge screws each season since moisture can loosen them over time.
Seasonal Adjustments for Temperature Control
Your venting strategy changes dramatically with the seasons. In spring, crack lids when inside temperatures hit 65–70°F to prevent bolting.
Summer management means keeping frames wide open—interiors can soar 30–40°F above outdoor air.
As autumn arrives, gradually reduce ventilation when nighttime lows approach freezing.
Winter ventilation becomes brief: open only when sunny midday temperatures climb above 40°F, then close before afternoon cools.
Preventing Debris and Snow Blockages
Once you’ve nailed seasonal timing, don’t let debris undo your hard work. Snow, leaves, and twigs can clog ventilation openings or block sunlight entirely.
Prevent blockages by following smart maintenance protocols:
- Brush snow weekly to avoid heavy buildup on lids
- Rake leaf zones around your cold frame perimeter
- Install mesh screening over vents to filter debris
- Choose sloped roof designs that shed snow naturally
- Add protective covers during construction or storms
Structural reinforcement like raised vent hoods keeps airflow clear year-round.
Top Products for Effective Cold Frame Ventilation
Getting the most out of your cold frame means pairing good ventilation techniques with the right tools and resources. Whether you’re looking for expert guidance, ready-made structures, or monitoring equipment, a few well-chosen products can make temperature management far easier.
Here are some top picks that help you ventilate smarter, not harder.
1. The Year Round Vegetable Gardener

If you’re serious about season extension, Niki Jabbour’s “The Year-Round Vegetable Gardener” is the resource you need. This book delivers practical guidance on Northern Gardening techniques, with a clear emphasis on cold frame ventilation—essential for keeping your growing season strong.
Jabbour’s techniques cover everything from managing temperature swings to choosing automatic openers, ensuring you won’t accidentally cook your seedlings on a sunny February day. With detailed seasonal guidance and a genuine Book Overview of year-round production methods, it’s an indispensable tool for mastering cold frame care.
Best For: Gardeners in northern climates who want to grow fresh vegetables year-round and are ready to try intensive planting, cold frames, and season extension techniques.
- Covers critical details like cold frame ventilation and temperature management that prevent common mistakes like overheating plants
- Includes practical building plans for inexpensive structures and specific crop varieties suited for each season
- Offers succession planting schedules and crop rotation strategies that work for different experience levels
- Focuses heavily on northern climates, so gardeners in hot or dry regions will need to adapt the techniques significantly
- Assumes you already know basic gardening principles—complete beginners might feel overwhelmed
- The intensive planting and manual ventilation routines can be time-consuming if you’re not using automated systems
2. Growing Under Cover Vegetable Garden
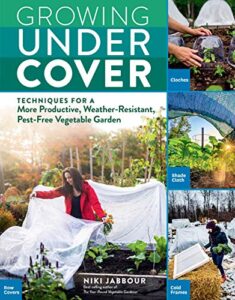
Protecting crops from Climate Conditions while Extending Harvest takes more than basic know-how—it requires Nik Schumacher’s “Growing Under Cover.” This guide hands you DIY Solutions for cold frame ventilation that actually work.
You’ll master temperature management for seedlings, adjust airflow to match your growing season rhythm, and tackle Pest Protection through proper ventilation techniques.
The Monthly Planner section keeps you on track year-round, offering specific timing for venting adjustments. Whether you’re troubleshooting overheating or fine-tuning humidity control, this book delivers practical strategies that transform your protected growing space into a thriving, well-ventilated production zone.
Best For: Gardeners who want to extend their growing season and protect crops from pests and weather using DIY structures like cold frames, hoophouses, and greenhouses with proper ventilation strategies.
- Provides specific temperature thresholds and ventilation timing (like opening vents at 60-77°F) so you know exactly when to act instead of guessing.
- Covers both automatic and manual ventilation systems with real-world details on cost, durability, and effectiveness for different setups.
- Includes a monthly planner that tells you what ventilation adjustments to make throughout the year, keeping you on track season by season.
- Requires space for raised beds or protective structures, which won’t work for apartment dwellers or gardeners with limited yard space.
- Focuses heavily on growing under cover, so traditional open-garden growers might find the advice too specialized for their needs.
- Effectiveness depends on your local climate—techniques that work in one region might need serious tweaking in areas with extreme heat or cold.
3. Advantek White Fir Cold Frame

You’ll find the Advantek White Fir Cold Frame compact yet functional—its 39-inch width suits small seedling batches perfectly. However, manual ventilation requires daily attention since the lock-open lid doesn’t support automatic cold frame ventilation systems.
Material quality concerns emerge in customer feedback: some report flimsy construction and poor heat retention that undermines temperature control. Chemical concerns about wood treatment may trouble organic growers.
Advantek assembly takes patience, often requiring a drill. If you’re committed to hands-on management and accept these ventilation limitations, it’s workable—but it won’t suit busy schedules.
Best For: Gardeners with small spaces who don’t mind daily manual ventilation checks and want an affordable entry-level cold frame for basic seedling protection.
- Compact 39-inch footprint fits easily on patios, balconies, or smaller garden areas
- Lightweight design at just 10.43 lbs makes it simple to move around your yard as needed
- Lock-open lid feature gives you quick access for watering and tending plants
- No support for automatic vent openers means you’ll need to manually adjust ventilation every day to prevent overheating
- Customer reports point to flimsy construction and poor heat retention that limits its effectiveness in colder weather
- Assembly can be frustrating and may require extra tools like a drill, plus some users worry about chemical treatments on the wood
4. La Crosse Wireless Weather Thermometer Station
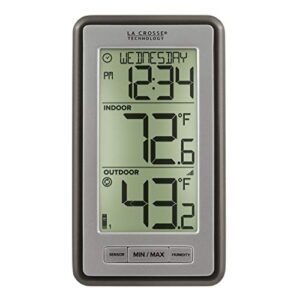
Wireless range up to 330 feet lets you monitor cold frame temperature from your kitchen—the La Crosse station tracks indoor and outdoor readings simultaneously. Sensor placement beside your frame captures real conditions, while data logging records daily highs and lows so you’ll catch overheating patterns.
Battery life reaches two years in the outdoor unit, and alert settings notify you when ventilation becomes urgent. Though it won’t replace a digital thermometer inside the frame itself, pairing both tools keeps you ahead of temperature swings, maintaining ideal growing conditions without constant trips outside.
Best For: Gardeners who want reliable temperature monitoring across multiple zones without running back and forth to check cold frames every few hours.
- Wireless range up to 330 feet means you can track cold frame conditions from inside your house, comparing indoor and outdoor readings on one display
- Two-year battery life in the outdoor sensor reduces maintenance trips, and the unit logs daily highs and lows so you can spot overheating trends over time
- Customizable temperature alerts notify you when thresholds are crossed, letting you ventilate before damage occurs instead of reacting too late
- The sensor measures air temperature near the cold frame rather than inside it, so you’ll need a separate thermometer placed among your plants for true internal readings
- Some users report shorter battery life than advertised and occasional syncing issues between the sensor and base station
- Lacks a secure wall-mounting system and may not hold up well in extreme weather, limiting placement options around exposed garden areas
Frequently Asked Questions (FAQs)
What happens if you don’t ventilate your frames?
Skipping ventilation turns your frame into a plant oven, causing overheating damage that strikes fast, even on cloudy days.
Humidity issues breed disease risks and soft growth that crumbles under frost damage.
How do you keep heat in a cold frame?
You can boost heat retention by using double-layer glazing, adding thermal mass like water jugs, sealing gaps with insulating material, lining walls with aluminum foil, and covering frames with blankets during freezing nights.
Do you need two window sashes for a cold frame?
No, a single sash works well for smaller cold frames. However, dual sash benefits include improved ventilation efficiency and easier access.
Two window sashes improve structural integrity while allowing independent manual ventilation techniques for maintaining ideal growing conditions.
What is a cold frame?
A cold frame is a low, box-like garden structure with transparent walls or a clear lid.
You can use it to protect seedlings, extend your growing season, and shelter cold-tolerant plant varieties year-round.
How do you insulate a cold frame?
Insulation materials like rigid foam, double glazing, and thermal mass work together to protect plants from frost damage while regulating temperature and humidity, maintaining ideal growing conditions inside your cold frame throughout winter.
What is a cold frame in a garden?
A cold frame is a low, transparent-roofed box that traps sunlight to create a warmer microclimate for seedlings and crops.
This simple structure extends your growing season by protecting plants from harsh weather.
How do you build a cold frame?
Building a cold frame sounds complex, but it’s surprisingly straightforward. Select rot-resistant frame materials like cedar, plan your size for reachability, and construct a sloped box with hinged lid—costs range from $30 to $
Can I use a thermometer inside my cold frame?
Yes, you should use a thermometer inside your cold frame. Temperature logging with digital or analog devices helps maintain ideal growing conditions through accurate thermal regulation. Wireless options allow remote monitoring of environmental factors without entering the structure.
Whats the ideal temperature range for most seedlings?
Think of it like Goldilocks—your seedlings need soil around 70°F (21°C) for germination, with daytime air temperatures between 65-70°F (18-21°C) for cool-season seedlings and slightly warmer for warm-season varieties.
How do I winterize my cold frame properly?
Start by sealing gaps with weatherstripping to maintain structural integrity. Add straw mulch for insulation methods, and brush off snow regularly. These steps protect plants from weather while extending the growing season through seasonal cold frame management.
Check for pest control issues.
Conclusion
Think of ventilation as the lungs of your cold frame—without it, everything suffocates. You’ve learned how to ventilate a cold frame through manual checks, automatic openers, and seasonal tweaks that keep temperatures stable and plants thriving.
Now it’s your turn to put theory into practice. Monitor daily, adjust as conditions shift, and trust your observations. Your seedlings won’t just survive under glass—they’ll flourish with every calculated influx of air you provide.
- https://savvygardening.com/cold-frame-gardening/
- https://www.finegardening.com/article/4-ways-to-use-a-cold-frame
- https://edis.ifas.ufl.edu/publication/AE030
- https://www.agtec.com/agtec-automatic-vent-opener-30-lbs
- https://fieldreport.caes.uga.edu/publications/B792/greenhouses-heating-ventilation-and-cooling/