This site is supported by our readers. We may earn a commission, at no cost to you, if you purchase through links.

Most gardeners who struggle with herbs aren’t planting the wrong things—they’re planting the right things at the wrong time. Rosemary baking in a waterlogged spring bed, cilantro bolting the moment July arrives, mint quietly colonizing everything within reach. These aren’t beginner mistakes; they’re what happens without a seasonal framework to guide your decisions.
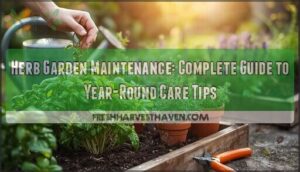
Growing seasonal herbs outdoors rewards the gardener who understands that each plant has a climate it was born for. Match that, and you’re working with nature rather than against it. The guides ahead cover everything from hardiness zones and soil prep to harvest timing and overwintering—so your herb beds stay productive across every season, not just one.
Table Of Contents
- Key Takeaways
- Choose Herbs for Each Season
- Match Herbs to Your Climate
- Pick The Best Outdoor Site
- Prepare Soil for Healthy Growth
- Plan Beds, Containers, and Spacing
- Plant Seeds, Starts, and Cuttings
- Water, Mulch, and Feed Properly
- Maintain Herbs Through The Seasons
- Prevent Pests, Disease, and Bolting
- Harvest, Preserve, and Overwinter Herbs
- Frequently Asked Questions (FAQs)
- What herbs can be planted in October?
- What herbs should never be planted together?
- Can herbs survive frost or cold snaps?
- How often should herb gardens be rotated?
- What herbs attract the most beneficial insects?
- Should herbs be fertilized before winter dormancy?
- How do you revive leggy or overgrown herbs?
- Can herbs grow well alongside vegetables and flowers?
- How do you revive an overgrown or woody herb plant?
- Which herbs attract pollinators to an outdoor garden?
- Conclusion
Key Takeaways
- Matching herbs to their season—cool-weather types like cilantro and parsley in spring and fall, heat-tolerant Mediterranean herbs like rosemary and thyme in summer—prevents most common growing failures before they start.
- Soil preparation matters as much as plant selection: aim for a pH of 6.0–7.0, fix drainage issues with compost or perlite before planting, and keep fertilizer light to protect essential oil concentration and flavor.
- Harvest woody herbs like rosemary and sage before 10 am when essential oil levels peak, cut no more than one-third of the plant at once, and prune every one to two weeks to keep herbs productive through the season.
- Perennial herbs like thyme, sage, and oregano survive winter with 2–4 inches of mulch over their crowns, while tender herbs like basil are best preserved by freezing in oil or water using an ice cube tray method.
Choose Herbs for Each Season

Not every herb thrives in every season, and planting the wrong one at the wrong time is a quick way to waste effort. Matching your herbs to the season is one of the simplest things you can do to set yourself up for a strong harvest.
Knowing which herbs belong to which season makes all the difference, and this guide to growing herbs in different seasons breaks it down clearly so nothing goes to waste.
Here’s how to pick the right herbs for each time of year.
Best Herbs for Spring Planting
Cool weather is your best ally in spring — chives push up early without fuss, and parsley tolerates cold soil well. Cilantro thrives now, but bolts fast, so successive sowing every two to three weeks extends your harvest.
Basil waits until soil temperatures clear 15°C.
Build your seasonal planting calendar around these windows, and early harvest becomes the reward.
Remember the basil sunlight requirement for ideal growth.
Heat-tolerant Herbs for Summer Beds
Once soil warms past 15°C, Mediterranean herbs take over where spring crops fade. Rosemary, thyme, and oregano are built for full sun and heat — their Essential Oil Boost actually intensifies as temperatures climb. Smart Microclimate Positioning near a south-facing wall amplifies this effect.
- Apply Heat-Resilient Mulch to moderate soil temperature
- Practice Root Depth Optimization through deep, infrequent watering
- Prioritize Leaf Scald Prevention by ensuring sharp drainage
- Space plants generously for airflow
Cool-season Herbs for Fall Growth
As summer heat fades, frost-tolerant varieties like parsley, cilantro, chives, and sage step in to extend your harvest windows well into autumn. These herbs actually develop richer fall leaf flavor in cooler soil — cold soil nutrition slows growth slightly, concentrating oils. Companion fall planting with sage alongside thyme works especially well.
| Herb | Frost Tolerance | Fall Benefit |
|---|---|---|
| Parsley | Light frost | Sweetens after chill |
| Cilantro | Moderate cold | Bolts less readily |
| Sage | Hard frost | Flavor intensifies |
Annual Vs Perennial Outdoor Herbs
Once fall herbs prove their worth, it helps to understand what separates short-lived annuals from long-returning perennials in your seasonal planting schedule for herb garden planning.
- Lifecycle Length: annuals like basil finish in one season; perennial herbs regrow yearly.
- Flavor Stability: perennials develop consistent, concentrated flavor over seasons.
- Root System Differences: perennials anchor deeply; annuals stay shallow.
- Replanting Frequency: annuals demand yearly effort; perennials reward patience.
Beginner-friendly Seasonal Herb Choices
If you’re just getting started, lean on fast germinating herbs like chives and dill—both forgive beginner mistakes and fit any seasonal planting calendar for herbs.
Easy starter mixes of basil, parsley, and mint offer frequent harvests with flexible soil tolerances.
Low pest herbs like oregano and thyme feature compact growth varieties that suit guidelines for beginning herb gardeners, planting annual, biennial, and perennial selections together.
Match Herbs to Your Climate

Picking the right herbs isn’t just about what you want to cook with — it’s about what your climate will actually let you grow. Your hardiness zone, sun exposure, and local humidity all shape which herbs will thrive and which will struggle through the season.
Here’s what to think about before you plant.
Using Hardiness Zones for Herb Selection
Your USDA Plant Hardiness Zone is the starting point for every smart herb decision. Zone-specific varieties perform reliably because their cold tolerance ratings match your actual winters.
In zones 3–5, lean toward chives and parsley; in zone 8 and above, rosemary thrives year-round.
Use zone mapping tools to confirm your location and factor in microclimate adjustments—a south-facing wall can shift your effective zone by half a step.
Mediterranean Herbs Vs Moisture-loving Herbs
Think of these two groups as opposites that demand different growing conditions. Mediterranean herbs like rosemary, thyme, and oregano concentrate essential oil levels in their leaves through drought stress, creating that bold flavor profile contrast you want in cooking. Moisture‑loving herbs like mint and cilantro need consistent watering and humidity considerations for herbs to stay tender.
- Root Architecture: Mediterranean roots reach deep for water; moisture‑lovers spread shallow and wide.
- Leaf Texture: Waxy, stiff leaves signal drought tolerance; soft, broad leaves need regular moisture.
- Growth Rate: Mediterranean herbs grow steadily in well‑draining soil; moisture‑lovers surge with consistent irrigation.
Match soil drainage to each group, and companion planting strategies with herbs become far more effective.
Full-sun Herbs for Hot Regions
If your summers run hot and dry, full sun herbs are your most reliable performers. Rosemary, thyme, sage, oregano, and lavender all hit peak flavor when they receive six hours of sun daily — that heat stress triggers an Essential Oil Boost in their leaves.
| Herb | Soil Preference | Key Need |
|---|---|---|
| Rosemary | Rocky Soil Mix, pH 6.5–7.5 | Root Zone Aeration |
| Thyme | Sandy, well-drained | Drought Ready Mulch |
| Sage | Gravelly, low fertility | Soil drainage improvement |
| Oregano | Lean, loose beds | Microclimate Shade in extreme heat |
| Lavender | Gritty, alkaline | Watering and moisture management in herb beds |
Space plants 12–18 inches apart, incorporate your seasonal planting schedule for herb garden planning, and avoid overwatering.
Partial-shade Herbs for Mild Climates
Not every garden spot gets wall-to-wall sun — and that’s actually fine for several culinary herbs.
Mint, parsley, cilantro, and lemon balm all perform well with three to six hours of morning sun preference and cooler afternoons.
cool root moisture with leaf litter cover, apply soil texture tweaks to improve drainage, and use companion shade plants like chives to fill gaps naturally.
When to Grow Tender Herbs Outdoors
Timing is everything with tender herbs. Basil needs soil at least 60°F before you transplant outdoors — your frost date timing and soil warmth threshold both matter here.
Once you’ve nailed the timing, harvesting fresh herbs daily keeps basil productive and primes you with plenty to freeze before the season turns.
Cilantro and parsley prefer the seed germination window around 50–65°F.
Use your seasonal planting calendar alongside plant hardiness zones to schedule post-frost transplants correctly, accounting for daylength considerations and frost protection when temperatures dip unexpectedly.
Pick The Best Outdoor Site

Where you plant your herbs matters just as much as how you care for them.
The right site sets your garden up for strong growth, better flavor, and fewer problems down the road.
what to look for before you put a single plant in the ground.
Sunlight Needs for Strong Flavor
Light duration matters more than most gardeners realize — herbs hit peak oil production when they get six to eight full sun hours daily. That consistent illumination drives herb flavor compound development in rosemary, thyme, and basil.
Morning light with afternoon shade suits cilantro well, reducing heat stress without sacrificing quality. Match each herb’s light requirements, whether full sun vs partial shade, and your harvests will taste noticeably better.
Air Circulation and Disease Prevention
Good air circulation does for your herb bed what ventilation strategies do for a building — it clears moisture and reduces disease pressure fast. Space plants to support airflow mapping across your layout, preventing humidity control problems where leaf wetness management matters most.
disease-resistant layout with consistent pruning and maintenance for maximum herb yield cuts pest and disease control for outdoor herbs substantially.
Avoiding Low Spots and Soggy Ground
Where air circulation leaves off, site grading takes over. If water pools after rain, roots suffocate fast.
Avoid low spots by elevating beds six inches above grade and sloping the surface one to two percent outward.
A French drain, swale design, or perforated pipe manages overflow reliably.
Well-draining soil, organic amendments, and smart ground cover pathways complete the fix.
Wind Protection for Tender Herbs
Once drainage is sorted, wind becomes your next site challenge. Tender herbs like basil and cilantro lose moisture fast under persistent gusts.
- Use windbreak plantings of evergreen shrubs to cut wind speed by up to 40 percent
- Install adjustable screens or bamboo panels as flexible barrier materials that shift with plant growth
- Arrange beds in staggered rows to disrupt direct wind channels
- Create microclimate pockets by surrounding vulnerable herbs with hardier companions
- Combine mulching practices for herb beds with raised beds to anchor soil and reduce evaporation
Easy-access Placement Near The Kitchen
Position your kitchen herb garden within six to eight steps of the door — close enough to snip rosemary mid‑stir.
Kitchen Path Planters along the entry keep low height containers at harvest height without bending.
A Rolling Herb Cart moves with your light.
Pull‑out Herb Trays and High Contrast Labels make your herb garden layout, for easy access practical for everyone cooking.
Prepare Soil for Healthy Growth

Good soil is the foundation everything else depends on. Get it wrong, and even the sunniest spot won’t save your herbs. Here’s what you need to know before you plant.
Ideal Soil PH for Most Herbs
Soil pH is the invisible dial controlling whether your herbs thrive or just survive. Most culinary herbs prefer a range of 6.0 to 7.0, where nutrient availability peaks.
Slightly acidic soil pH around 6.0 to 6.5 delivers real acidic soil benefits for basil, cilantro, and chives. Use pH testing methods like basic test kits before planting, then apply lime or sulfur adjustment techniques gradually for ideal herb growth.
Improving Drainage in Heavy Clay
Heavy clay holds water like a bathtub, which spells root rot for most herbs. Fix it by working 2–4 inches of compost into the top 12 inches, then perform core soil aeration every one to two years to open pore spaces.
For serious pooling, subsurface drainage pipes set in a gravel trench design with a permeable base layer redirect water reliably. Organic topdressing yearly keeps well-draining soil conditions stable.
Adding Sand, Gravel, or Perlite
Each amendment plays a distinct role in soil preparation for herb gardens.
Coarse builder’s sand (0.5–2 mm) follows Sand Ratio Guidelines of 10–30% of your mix, opening pore spaces without compacting.
A 2–4 inch Gravel Base Depth beneath raised beds supports Drainage Layer Design reliably.
Perlite Aeration Benefits shine in containers—use 10–30% for well-draining soil.
Avoid fine beach sand; it undermines the purpose entirely.
Using Compost Without Over-fertilizing
Compost is powerful, but too much turns a helpful amendment into a problem.
Compost Rate Guidelines and limit organic compost to about 1 inch per year per bed.
Before adding anything, do Nutrient Testing to check your baseline.
Use the Side Dressing Technique to avoid crown burn, and time applications away from harvest using smart Compost Timing — overfertilization risks in herb gardens are real and easy to prevent.
Mulch Choices for Moisture Control
Mulch is your herb bed’s best insurance against moisture loss and temperature swings. Choosing between organic vs inorganic options shapes how your soil performs all season.
- Mulch depth guidelines: Apply 2–3 inches; keep it away from stems to prevent rot
- Color impact on temperature: Dark bark warms spring soil; light gravel reflects summer heat
- Porous mulch benefits: Straw and bark chips allow rainwater through while limiting evaporation
- Seasonal mulch adjustments: Refresh organic mulch annually as it decomposes into soil-feeding matter
Plan Beds, Containers, and Spacing

How you organize your herb garden shapes everything from daily harvests to long-term plant health. The right setup depends on your space, your soil, and which herbs you’re growing.
Here are the key decisions worth thinking through before you plant your first stem.
Raised Beds Vs In-ground Planting
Raised beds give you drainage control from day one — no guesswork with native soil. They warm up faster in spring, which means earlier planting and better soil warmth for seedlings.
Built-in weed barriers cut labor efficiency losses substantially.
Yes, the cost comparison favors in-ground beds upfront, but raised beds pay back through less compaction and easier long-term soil preparation for herb gardens.
When Containers Work Best Outdoors
Containers shine when your soil is poor, your space is limited, or you’re renting. Pot Material Choice matters — light-colored pots with good Drainage Hole Design reduce Heat-Reflective Colors absorbing too much sun, keeping roots cooler by up to 10°F.
Wind Stabilization on exposed balconies, choose heavier fiberstone or resin.
Mobility Solutions like casters let you chase best sunlight all season.
Containing Invasive Herbs Like Mint
Mint is the garden’s most enthusiastic squatter — give it an inch and it’ll take your whole bed. Root Barrier Installation at least 12 inches deep stops rhizome spread.
Mint Containment Containers, like half-barrels, fully isolate roots. Edge Trenching Strategies and Vertical Mint Trellising reduce horizontal sprawl, while Quarterly Boundary Inspections catch breakouts early.
- Bury rigid plastic or metal barriers 12 inches deep
- Use wide, shallow trenches to intercept surface runners
- Grow mint in large pots or half-barrels for complete root isolation
- Train stems vertically on trellises to minimize ground coverage
- Schedule quarterly checks and reseal barrier gaps after frost heave
Spacing Herbs for Airflow and Growth
Once mint is contained, spacing the rest of your herbs becomes much easier — and it matters more than most gardeners expect.
| Herb | Spacing Between Plants | Notes |
|---|---|---|
| Rosemary/Sage | 18–24 inches | Woody stems need light on lower leaves |
| Basil/Oregano | 12–18 inches | Prevents leaf blight and mildew |
| Cilantro/Parsley | 6–12 inches | Encourages fresh shoot growth |
Follow Row Orientation north-to-south and use Plant Height Staggering — tall herbs like dill (18–24 inches) behind shorter thyme — to build a natural Vertical Tiered Layout. This spacing and planting density guideline for herb beds improves airflow, cutting mildew risk noticeably in humid summers. Apply Seasonal Gap Adjustment and Intercropping Spacing principles as plants fill in.
Simple Herb Garden Layout Ideas
A few simple layouts can transform how you grow and harvest herbs. Modular Raised Beds in 4×8-foot sections offer excellent soil control, while a Circular Bed Design with radiating spokes optimizes sun exposure across all plants.
For balconies, Vertical Shelf Planting maximizes limited space.
Whatever your setup, Pathway Width Planning — at least 18–24 inches — keeps your herb garden layout for easy access without disturbing roots.
Plant Seeds, Starts, and Cuttings
Getting herbs in the ground the right way makes everything easier from here on out.
Whether you’re starting from seed, picking up a nursery start, or propagating a cutting from an existing plant, each method has its own timing and technique.
Here’s what you need to know to get your herbs established successfully.
When to Sow Seeds Outdoors

Timing your seed starting comes down to two non-negotiables: frost date calculations and soil temperature thresholds. herbs germinate reliably between 18–24°C (64–75°F).
Cilantro prefers cooler soil; basil won’t cooperate below 21°C.
Use row cover warm-up techniques to advance planting by a week or two.
staggered planting schedule across spring extends your harvest window considerably, following seed germination best practices for herbs.
Transplanting Nursery Herbs Successfully

Nursery herbs are ready to move outdoors once roots circle the pot’s edge and daytime temperatures consistently stay above 50°F.
Follow a proper Hardening Schedule before transplant timing finalizes — gradual outdoor exposure prevents stem shock.
Dig holes matching the root ball depth, firm soil around the root zone for better root zone aeration, and water deeply.
Delay post-transplant feeding for two to three weeks.
Hardening Off Indoor-grown Seedlings

Think of hardening off as a trust-building exercise between your seedlings and the outdoors. Start with just one to two hours of bright indirect light daily, then apply a Gradual Light Increase of 30 to 60 minutes every few days.
Keep a Hardening Log to track progress, maintain Temperature Ramp-up above 50°F nights, and practice consistent Moisture Monitoring for Stem Strengthening before final transplanting.
Starting Herbs From Stem Cuttings

Stem cuttings give you free plants from herbs you already love.
Take 4–6-inch nonflowering shoots, strip the lower leaves, and dip the cut end in rooting hormone to speed root formation.
Tuck cuttings into a perlite-coir mix, cover with a humidity dome, and keep temperatures between 65–75°F.
Mint and basil root in one to two weeks; rosemary and thyme need three to six.
Planting Depth and Early Care

Depth matters more than most gardeners expect. Follow seed depth guidelines closely — tiny herb seeds like thyme sit barely beneath the surface, while larger ones go one to two times their diameter down.
For transplant ball placement, set the root ball just below soil level. Firm gently for air pocket elimination, mist with a gentle seedling mist, and watch for soil crust management needs if emergence stalls.
Water, Mulch, and Feed Properly

Getting water, mulch, and feeding right can make the difference between herbs that survive and ones that genuinely thrive. It’s less complicated than it sounds once you know what each herb actually needs.
Here’s what to get right.
How Often Outdoor Herbs Need Water
How often should you water? It depends on the herb, the season, and whether it’s in a pot or the ground. A quick soil moisture check—pressing your finger an inch into the soil—guides your irrigation interval guide better than any fixed schedule.
- Basil needs water every 1–2 days in summer heat
- Thyme and rosemary prefer drying out between deep soaks every 3–4 days
- Mint stays happy with watering every 1–2 days
- Containers follow a faster container drying rate, often needing daily checks
- Always adjust your rainfall adjustment plan after measurable rain
Deep Watering Vs Shallow Watering
Watering deeply—moistening soil to 6–8 inches—drives root development far below the surface, where moisture lingers longer and heat stress mitigation becomes natural rather than reactive.
Shallow watering keeps roots near the top, leaving herbs vulnerable when summer temperatures climb.
Slow, thorough irrigation also helps runoff reduction and preserves soil structure impact over time, keeping your watering schedule efficient and your drainage sound.
Early-morning Watering Benefits
Timing your irrigation right makes deep watering even more effective. Early morning hits a sweet spot for three reasons:
- Root Oxygen Boost peaks at dawn, improving Early Nutrient Uptake before heat slows absorption.
- Leaf Dryness Timing works naturally—foliage dries by midday, cutting fungal risk substantially.
- Soil Moisture Retention stays 30–50% higher than midday watering, making Energy Efficient Irrigation simple.
Your watering schedule just got smarter.
Mulching to Reduce Evaporation and Weeds
Once watering is dialed in, mulching locks that moisture in place. A wood chip barrier laid 2–4 inches deep blocks light so weed seeds don’t stand a chance.
Straw moisture retention works well in vegetable-adjacent herb beds, while bark weed control outlasts both across multiple seasons. Try a fabric mulch combo topped with organics for serious soil moisture management—grass clippings work too, but keep layers thin.
Light Feeding for Better Flavor
Feeding too much is the fastest way to water down your herbs’ flavor. Keep it light — here’s what actually works:
- Compost tea timing — apply in early spring for fresh leaf flavor without leggy growth
- Seaweed extract benefits — brightens citrus notes in basil and lemon balm
- Worm casting influence — feeds beneficial microbes that sharpen overall leaf quality
- Fish emulsion use — gentle nitrogen that helps vibrant leaves without blunting taste
Mineral reintroduction each fall rebuilds flavor compounds for next season’s harvest.
Maintain Herbs Through The Seasons

Herbs don’t ask for much, but they do ask for consistency across the seasons. A little attention at the right time — spring, summer, fall, and winter — keeps your plants productive and your harvests strong.
Here’s what to do during each phase of the year.
Spring Cleanup and Dividing Perennials
Spring is the reset button your herb bed has been waiting for.
Division timing matters here — split perennial clumps like chives, lavender, and sage just as new growth emerges. Do a root health check, discarding any soft or discolored tissue.
Follow clump size guidelines by keeping three to five healthy shoots per division. Sterilize tools before cutting, replant promptly, then handle post-division watering deeply to settle roots.
Summer Pruning and Flower Removal
Once herbs hit peak summer growth, strategic pruning and maintenance for maximum herb yield become your sharpest tool. Deadheading timing matters — cut spent flowers before seeds form to lock in essential oils and flavor. Heat adjusted pruning keeps plants productive without stress.
- Suckers removal redirects energy into dense, flavorful foliage
- Bloom energy conservation means richer harvests throughout summer
- Tool sterilization between cuts prevents disease spread
Fall Refresh and Final Harvests
Fall is your final window to lock in flavor before frost closes the season.
Time your Late Season Pruning two to four weeks before the first hard freeze, cutting perennials like sage, oregano, and thyme to their Flavor Peak.
Add Fall Soil Amendments and Cold-Weather Mulch, save seeds, then freeze or dry your harvest for storage.
Winter Protection for Outdoor Herbs
Winter doesn’t have to mean losing perennial herbs.
After the first hard frost, layer your beds with these defenses:
- Apply 2–3 inches of mulch around crowns, keeping it back from stems to prevent rot.
- Drape Frost Cloths or Protective Tunnels over tender plants when temperatures drop below freezing.
- Use Cold Frame Use or Heated Soil Mats for rosemary and thyme in colder zones.
Snow Cover Management matters too — a light snow layer actually insulates roots naturally.
Seasonal Task Checklist for Herb Beds
Think of this checklist as your herb bed’s rhythm keeper.
Each season, refresh mulch to the right depth, run your pest inspection routine after watering, and log harvest timing to spot yield patterns.
Update your seasonal planting schedule, sanitize tools between beds, and monitor soil moisture before irrigating.
These seasonal herb maintenance tasks — done consistently — are what separate a thriving garden from a struggling one.
Prevent Pests, Disease, and Bolting

Even the healthiest herb garden runs into trouble — pests show up uninvited, humidity invites mildew, and a single heat wave can send your cilantro straight to seed.
Knowing what to watch for makes all the difference between a thriving bed and one that slowly falls apart. Here’s what you need to stay on top of.
Common Herb Pests to Watch For
Even the healthiest herb bed can turn into a feeding frenzy without proper pest and disease management in herb gardens. Here’s what to watch for:
- Aphid Management: Aphids cluster on new growth, curling leaves on basil, oregano, and dill.
- Spider Mite Control: Spider mites cause stippling and bronzing on thyme and sage during hot, dry spells.
- Whitefly Monitoring: Whiteflies target parsley and cilantro, vectoring disease through sap feeding.
- Leaf Miner Damage: Translucent trails in dill and mint tissue reduce photosynthesis noticeably.
- Cutworm Prevention: Cutworms sever seedling stems at soil level overnight, toppling cilantro and basil instantly.
Natural Pest Control Methods
Once you’ve identified the usual suspects, it’s time to fight back — naturally.
Beneficial insects like lady beetles and lacewings do real work when you plant dill, fennel, or cilantro nearby. Companion planting strategies for pest control, such as pairing basil with tomatoes, add another layer of garden pest deterrence using aromatic herbs.
Physical barriers — row covers, diatomaceous earth, copper mesh — block pests before they settle. Neem oil and other botanical pesticides handle what slips through.
Regular scouting practices catch problems early, and habitat diversity keeps natural pest control using predators working season-long.
Preventing Mildew and Root Rot
Mildew and root rot share the same root cause: too much moisture in the wrong place. Test soil drainage before planting — water should percolate at least one inch per hour.
Space plants 12 to 24 inches apart for airflow gap management, water at soil level each morning, and keep mulch a few inches from stems.
Fungus-resistant varieties add a reliable last line of defense.
How Heat Triggers Bolting
Heat doesn’t just stress your herbs — it redirects them. Once daytime temperatures consistently exceed 28°C (82°F), a gibberellin surge triggers a hormonal shift that pushes plants from leaf production toward flowering.
Above 28°C, herbs stop growing for you and start growing for themselves
Root zone heat compounds this by disrupting nutrient uptake.
Daylength interaction accelerates the process further in cool-season herbs like cilantro.
Avoid temperature thresholds by mulching heavily, and never overfertilize — excess nitrogen speeds bolting fast.
Pruning to Keep Herbs Productive
Pruning is one of the most reliable pruning techniques for keeping herbs vigorous and flavorful.
Pinch for bushiness every two to three weeks, and always harvest first from outer stems to preserve plant shape.
Your cutting angle matters — a slight diagonal cut heals faster. Consistent pruning frequency of every seven to fourteen days promotes herb flavor development through pruning and extends productive leaf pruning cycles well into late season.
Harvest, Preserve, and Overwinter Herbs

Getting herbs from garden to table — and keeping them through winter — takes a little know-how but nothing you can’t handle. How you harvest, store, and protect your plants makes all the difference between flavors that last and herbs that don’t survive to next season.
Here’s what you need to know across each of those steps.
Best Time of Day to Harvest
Timing your harvest is where flavor really lives. The Morning Flavor Boost between 7–9 am captures peak essential oil concentration before Midday Heat Impact drives volatile compounds off the leaf. Dawn Dew Influence means waiting until dew evaporates first. Evening Aroma Retention and Late Afternoon Turgor make post-5 pm a solid backup for immediate kitchen use.
- Cut tender herbs like basil and cilantro before 10 am for sharpest flavor
- Woody herbs like rosemary and thyme hold well after morning dew dries
- Sage reaches peak fragrance in late morning when essential oils peak naturally
- Evening harvests improve Late Afternoon Turgor, ideal for same-day cooking
- Avoid midday cuts — heat accelerates wilting and dulls aromatic intensity
How Much to Cut at Once
Most herbs handle losing up to one-third of their foliage at once — that’s your ideal cut percentage for leafy varieties like basil, oregano, and chives. Rosemary needs lighter treatment; cap initial cuts at one-quarter and avoid old wood entirely.
Cutting stress management matters most in heat: drop to one-quarter, then.
regrowth interval guidelines — wait two weeks between heavy cuts, use clean sharp tools always.
Drying Hardy Herbs for Storage
Woody perennial herbs like rosemary, thyme, and sage practically dry themselves — their low moisture content makes them ideal candidates for herb drying techniques that preserve essential oils beautifully.
- Air Drying Techniques: Bundle 5–8 stems and hang in a cool, dark, ventilated spot
- Dehydrator Settings: Keep below 115°F (46°C) to protect volatile aroma compounds
- Oven Drying Tips: Use lowest temperature with the door ajar to vent moisture
- Airtight Storage Solutions: Pack into labeled glass jars, stored at 60–70°F away from light
Test moisture content by snapping a stem — it should break cleanly, never bend.
Freezing Tender Herbs for Later Use
Tender herbs like basil, cilantro, and chives don’t respond well to drying — Freezing is your best herb preservation technique here. The Ice Cube Method and Oil Freeze Technique lock in aroma beautifully; simply portion chopped herbs into trays with water or olive oil.
Flash Freeze Drying suits rosemary and thyme, while Blanching Freeze works well for chives.
Pesto Cube Storage keeps blended herbs ready for up to three months.
Overwintering Perennial Herbs Outdoors
Perennial herbs are tougher than most gardeners give them credit for. Sage, thyme, oregano, and chives handle dormancy well when you support them with smart mulching practices for herb beds.
Apply 2–4 inches of straw for snow insulation and root protection. Cold frame use extends your season noticeably.
Choose frost-resistant varieties, monitor dormancy through late winter, and select a ground cover that drains freely to prevent crown rot.
Frequently Asked Questions (FAQs)
What herbs can be planted in October?
In October, plant parsley, cilantro, dill, sage, and mint.
Cold-hardy herbs like thyme and rosemary establish well before frost, while root-cutting transplants and frost-ready varieties thrive with proper fall soil amendments.
What herbs should never be planted together?
Some herbs actively sabotage their neighbors. Rue stunts basil through allelopathic interference, mint triggers moisture competition, and fennel creates growth habit conflict that shades smaller plants. Keep these pairs apart.
Can herbs survive frost or cold snaps?
Ironically, a little cold can actually toughen your herbs up.
Frost-resistant species like thyme, sage, and chives handle cold snap timing well—especially with insulating mulches and proper hardiness zone tips guiding your choices.
How often should herb gardens be rotated?
Rotate herb beds annually at a minimum.
Use a four-bed cycle, grouping plants by family, and swap sections each season to break pest cycles, restore soil fertility, and keep your Annual Bed Rotation on track.
What herbs attract the most beneficial insects?
Dill, mint, and yarrow top the list. These hoverfly magnet herbs and bee-friendly blooms double as lacewing attractors and wasp host herbs, making them essential insect lure herbs for garden biodiversity.
Should herbs be fertilized before winter dormancy?
Yes, but keep it light. Apply a balanced slow-release fertilizer to the root zone four to six weeks before frost, mulch after feeding, and skip high-nitrogen products entirely.
How do you revive leggy or overgrown herbs?
Leggy herbs aren’t failing — they’re just asking for a reset. Cut stems back by one-third above a leaf node to trigger Basal Shoot Stimulation, then water deeply and mulch lightly.
Can herbs grow well alongside vegetables and flowers?
Absolutely — herbs and vegetables make natural companions.
Basil deters pests near tomatoes, rosemary repels insects, and companion planting with oregano attracts beneficial insects.
Smart intercropping through root zone harmony and pest deterrent planting boosts pollinator support across your whole garden.
How do you revive an overgrown or woody herb plant?
Think of a woody herb like an old tree—it needs a hard reset.
Prune back one-third, remove dead wood, apply balanced organic fertilizer, water deeply, and watch seasonal rejuvenation begin from healthy stems.
Which herbs attract pollinators to an outdoor garden?
Bee-friendly herbs like Thymus vulgaris, Origanum vulgare, and Rosmarinus officinalis deliver nectar-rich varieties across spring through fall.
Seasonal bloom sequencing with lavender, basil, and sage helps pollinator-friendly planting and strengthens garden biodiversity naturally.
Conclusion
What separates a thriving herb bed from a frustrating one? Timing, placement, and an understanding of what each plant actually needs.
Growing seasonal herbs outdoors isn’t about following rigid rules—it’s about reading your climate, respecting each herb’s natural rhythm, and adjusting as seasons shift.
You now have the framework to do exactly that. Put it to work, stay observant, and your herb garden will return something useful to your kitchen every single season.
- https://extension.uga.edu/publications/detail.html?number=B1170&title=Herbs%20in%20Southern%20Gardens
- https://hgic.clemson.edu/factsheet/herbs/
- https://digitalpubs.ext.vt.edu/vcedigitalpubs/6992314651966782/MobilePagedReplica.action?pm=1&folio=1
- https://www.bobvila.com/articles/growing-herbs-outdoors/
- https://gardenoutdoorhub.com/how-to-grow-herbs-outdoors/