This site is supported by our readers. We may earn a commission, at no cost to you, if you purchase through links.
Most gardeners pull root vegetables too early or damage them during harvest, cutting yields by up to 30% and watching crops rot in storage within days. You’ve invested months nurturing carrots, beets, and turnips—only to lose them because timing was off or handling went wrong.
The difference between a successful harvest and wasted effort comes down to knowing exactly when your roots are ready, how to extract them without scarring, and what happens in those first critical hours after pulling.
Proper harvesting of root vegetables isn’t complicated, but it does require following specific steps that protect your crop from soil to storage.
Table Of Contents
Key Takeaways
- Harvesting root vegetables at the wrong time or handling them roughly can cut yields by up to 30% and cause crops to rot within days, so timing and gentle extraction are critical to protecting your investment.
- Each root vegetable shows specific maturity signs—carrots need 0.75-1 inch diameter shoulders, beets reach golf-ball size at 1-3 inches, turnips mature at tennis-ball size, radishes take just 20-30 days, and parsnips require 100-120 days plus frost for sweetness.
- Proper storage conditions—32-40°F temperature with 90-95% humidity—combined with air-drying trimmed roots for 6-12 hours before storage can extend shelf life threefold and cut moisture-related disease by 85%.
- Using the right tools like garden forks for loose soil or Hori Hori knives for compacted ground, then sterilizing them between uses with 10% bleach solution, prevents disease spread and reduces crop damage to under 10%.
Signs Root Vegetables Are Ready to Harvest
Knowing when to pull your root vegetables from the ground makes all the difference between a crisp, flavorful harvest and one that’s woody or undersized. Each type of root vegetable shows specific signs when it’s reached peak maturity.
Perfect timing separates a crisp, flavorful root vegetable harvest from one that’s woody, undersized, or past its prime
Let’s walk through what to look for with carrots, beets, turnips, radishes, and parsnips so you can time your harvest just right.
Maturity Indicators for Carrots
Timing your carrot harvest correctly ensures you pull sweet, tender roots at their peak. Your carrots signal maturity through several clear indicators that you can check without disturbing the entire crop:
- Diameter: Shoulders reach about 0.75 to 1 inch wide at the soil line
- Days to maturity: Most varieties mature in 60 to 80 days after planting
- Foliage appearance: Tops grow bushy and reach 4 to 6 inches tall
- Color development: Crowns show full, uniform orange (or varietal color)
- Overmaturity signs: Cracking or splitting indicates harvest risk from delayed pulling
To soften the soil, water the patch deeply the day before harvesting.
Maturity Indicators for Beets
Beets signal maturity through visible beet shoulders pushing above the soil line and roots reaching 1 to 3 inches across—roughly golf-ball size. Most varieties mature 50 to 70 days after planting. Check foliage health; healthy greens usually mean good root development below.
One should also consider that harvesting beet greens can occur throughout the growing season. Delayed harvest into hot weather reduces sweetness and texture, so aim for timely pulling when color looks deep and shoulders swell evenly.
Maturity Indicators for Turnips
Turnips show maturity as roots push above the soil and reach 2 to 3 inches across—about tennis-ball size. Most cultivars mature 40 to 80 days after seeding. You’ll notice:
- Root diameter at ideal 2 to 3 inches prevents woody texture
- Foliage cues like vibrant green leaves signal active growth
- Texture changes occur when roots exceed ideal size
- Seasonal cues include light frosts improving sweetness
- Overmaturity signs appear as tough, fibrous flesh
Harvest promptly to avoid coarse, pungent roots.
Maturity Indicators for Radishes
Radishes mature quickly—usually 20 to 30 days—and you’ll spot their readiness through clear visual markers. Look for roots measuring 1 to 2 inches in diameter, with shoulders breaking the soil surface.
Leaf indicators like bright green, 6- to 8-inch tops signal proper development. Firm root texture confirms crispness, while dull color or sponginess warns you’ve waited too long.
Check often to catch peak vegetable maturity indicators.
Maturity Indicators for Parsnips
Parsnips require patience—100 to 120 days from seeding to maturity. Root size becomes your primary guide: look for 10- to 12-inch length and 2-inch diameter, with shoulders slightly protruding above soil. Foliage color shifts to yellow as roots mature.
Frost influence actually improves sweetness, so wait for one or two light frosts before harvesting. Varietal differences affect timing, but these vegetable maturity indicators work across types.
Step-by-Step Harvesting Techniques
Once you’ve confirmed your root vegetables are ready, it’s time to bring them out of the ground without causing damage. The right approach makes all the difference between a successful harvest and broken or bruised roots.
Here’s how to handle each step, from preparing the soil to pulling your crops safely.
Preparing Soil for Harvest
Before you pull a single carrot, check your soil conditions—proper soil preparation makes the difference between easy lifting and frustrating breakage. You’ll want soil moisture between 60% and 80% of field capacity so dirt crumbles cleanly off roots.
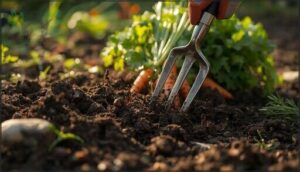
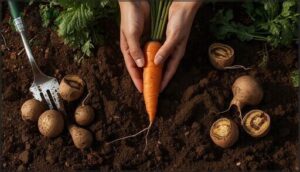
Loosen the soil around harvesting root vegetables to a depth of 8–10 inches using a garden fork, reducing compaction and removing stones or debris that could deform your crop.
Gentle Extraction Methods
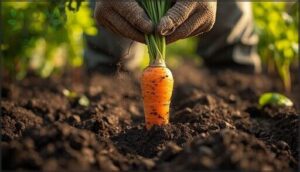
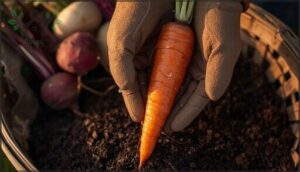
Once your soil is loose, grip the greens firmly at the base and lift straight upward—no twisting—to prevent root damage. Gentle root extraction lowers breakage rates below 3%, preserving shelf life and batch quality. Here’s how to master harvesting techniques:
- Pull vertically within 10-15 degrees for minimal scarring
- Use tool-assisted extraction for stubborn harvesting root vegetables
- Avoid excessive force to reduce fractures
- Handle roots carefully to maintain market acceptance over 94%
Best Weather and Timing for Harvest
Cool weather transforms your harvest from guesswork into precision. You’ll want to time harvests during dry conditions when soil moisture is manageable—usually early morning harvesting when plant water status peaks and field temperatures stay between 50 and 70°F.
Seasonal planning matters: schedule your best harvesting conditions in spring or fall when frost effects can even sweeten roots like parsnips and carrots, boosting flavor by triggering natural sugar conversion.
Preventing Damage During Harvest
Gentle harvesting starts with protecting the skin—your root’s first defense against rot. Train yourself to avoid scrapes and bruises, since even minor wounds double respiration rates and invite decay.
Sterilize harvesting tools between plants to prevent soil contamination and disease spread. Use appropriate extraction techniques: grip greens at the base, pull straight up without twisting, and never drop roots from height.
Each bruise cuts storage life dramatically.
Harvesting Tools and Their Proper Use
The right tools make all the difference when you’re pulling root vegetables from the ground. Using the proper equipment helps you extract your crops without breaking or bruising them, which means better storage and less waste.
Let’s look at the essential tools you’ll need and how to use them correctly.
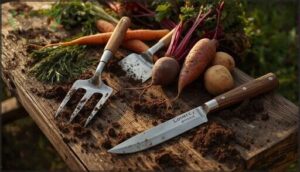
Garden Forks and Digging Forks
Regarding harvesting techniques without damage, your choice between a garden fork and digging fork makes all the difference. Here’s how to select the right tool:
- Garden forks boost fork soil aeration and cut root crop damage by 60% in light to moderate soils
- Digging forks penetrate heavy, compacted ground where garden forks can’t reach
- Field efficiency with digging forks reaches 94–96% in tough conditions
- Tool sterilization practices prevent disease spread between harvests
Both harvesting tools deliver results when matched to your soil type.
Hori Hori Knives for Root Vegetables
Where garden forks excel in loose soil, a Hori Hori knife tackles what they can’t—dense, compacted ground where roots hide deep. This Japanese harvesting tool’s curved blade and serrated edge penetrate hard soil with minimal root breakage. You’ll extract roots 20% faster than with a standard fork, and the dual-purpose design takes care of digging, slicing, and soil loosening in one motion. The pointed tip enters dense beds cleanly, protecting adjacent crops while maximizing your yield per square foot.
| Feature | Benefit |
|---|---|
| Serrated Blade Design | Cuts through compacted soil; under 10% crop damage |
| Depth Markings | Improves extraction accuracy by 30% |
| Ergonomic Handle | Reduces hand fatigue by 22% during long sessions |
| Tool Versatility | Replaces 3+ tools; 40% faster harvesting |
Cleaning and Sterilizing Tools
Now that you’ve got your roots out of the ground safely, don’t skip tool sterilization—it’s where disease prevention actually happens. After each harvesting session, clean your fork or Hori Hori knife with soap and water first to remove soil. Then disinfect using a 10% bleach solution for 10–15 minutes, or Lysol wipes for faster results.
This sterilization frequency prevents pathogen spread by 75% and keeps your next harvest disease-free. Commercial operations do this after every batch. Your tools deserve the same care your vegetables do.
Trimming and Handling Roots Post-Harvest
With your tools cleaned, it’s time to trim and handle your harvest properly—this step separates good yields from great ones. Remove leafy tops to less than one centimeter, which cuts moisture loss by up to 30% and reduces rot by 40%.
Use padded bins instead of hard containers to prevent bruising that accounts for 25% of losses. Air-dry trimmed surfaces for six hours before storage.
These practices boost shelf life dramatically and protect your investment.
Storing Root Vegetables for Maximum Freshness
You’ve done the hard work of harvesting your root vegetables, but the real test is keeping them fresh for months to come. The good news is that proper storage doesn’t require fancy equipment—just the right conditions and a little know-how.
Let’s walk through the specific methods that’ll help you store each type of root vegetable so nothing goes to waste.
Ideal Temperature and Humidity
Think of your storage environment as a climate control system—get it right, and your roots stay fresh for months. Keep temperatures between 32°F and 40°F, with humidity hovering around 90-95%. This balance prevents both shriveling and rot.
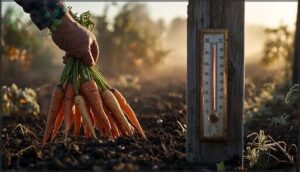
Use hygrometers and digital thermometers for real-time temperature monitoring and humidity control. Adjust seasonally to maintain these conditions.
Store sweet potatoes separately at 57-60°F to avoid chilling injury. Regular adjustment practices and monitoring prevent spoilage and extend your storage duration considerably.
Storage Methods for Carrots, Beets, Turnips, Radishes, and Parsnips
From root cellar setups to refrigerator storage, your choices shape root vegetable storage success. Carrots last 3–4 weeks chilled, while beets, turnips, and parsnips keep 2–3 weeks if tops are trimmed. For short-term storage, keep roots unwashed and dry.
Freezing methods—after blanching—extend storage duration for carrots and parsnips up to a year, preserving nutrition and texture.
Using Sand, Straw, and Containers
When you’re aiming for excellent root vegetable storage, sand moisture control and straw dryness are your best allies. Layering techniques—packing carrots upright in damp sand or spacing beets in straw—keep rot at bay.
Container ventilation matters, too; perforated bins help regulate humidity. Temperature monitoring is essential, so check often to maintain ideal conditions after careful soil preparation and harvesting techniques.
Preventing Rot and Disease in Storage
Although storing root vegetables seems simple, disease prevention hinges on careful steps. Storage sanitation, gentle handling to reduce mechanical damage, and regular checks all play a part. For best results, use these five strategies:
- Clean and disinfect storage areas.
- Handle roots gently to avoid bruises.
- Cure crops like onions before storage.
- Remove any decaying roots promptly.
- Monitor temperature and humidity closely.
Common Mistakes and Expert Tips
Even seasoned gardeners can run into trouble when harvesting root vegetables. Knowing what to watch out for can save you time and keep your crops in top shape.
Here’s what you need to keep in mind as you work through your harvest.
Harvest Timing Errors
Did you know harvesting root vegetables too early or late can shrink your yield by up to 30% and cut shelf life short? Pulling crops before peak ripeness means smaller roots and more culls, while waiting too long leads to tough texture, flavor loss, and increased disease risk.
Timing isn’t just a detail—it’s the backbone of successful root vegetable harvesting.
Improper Handling and Bruising
Ever wondered why a gentle touch matters? Impact damage during root vegetable harvesting can double storage decay rates, especially in bruise-susceptible varieties. Mishandling leads to unseen root damage that invites disease and shrinks shelf life.
Careful vegetable handling—like lowering drop heights and using cushioned bins—offers essential handling mitigation, protecting your crop from bruises and preserving your hard-earned harvest.
Overwashing or Storing Wet Roots
Wet storage is where most growers lose their harvest to preventable rot and waste. When you store roots without drying them first, microbial growth explodes—bacteria populations can spike over 200% within three days. Black root rot increases up to 40% in wet conditions, and overall rot rates climb 27% after just 40 days. Your shelf life shrinks dramatically too.
Dry your roots for 12–24 hours before storage. This single step cuts moisture-related disease by 85% and extends freshness threefold.
Monitoring and Maintaining Stored Crops
Now that your roots are dry and stored, the real work begins. Check your storage area every 1–2 weeks for soft spots, mold, or off-odors. Install a thermometer and hygrometer to track temperature and humidity—aim for 32–40°F and 90–95% humidity. Make sure ventilation prevents stagnant air. Remove any diseased roots immediately to stop rot from spreading.
Keep records of conditions and inspections. These simple habits cut storage losses dramatically and keep your harvest fresh for months.
Frequently Asked Questions (FAQs)
How do I know when soil is too wet to harvest?
As the saying goes, “measure twice, harvest once.” Check soil moisture with sensors or perform a hand test—soil shouldn’t form ribbons when squeezed.
Avoid harvesting after rain; wait 24 hours. Standing water, sticky boots, and compaction risks signal unsafe conditions for root vegetables.
Can I harvest root vegetables in stages or all at once?
You can harvest root vegetables in stages or all at once, depending on your storage capacity, weather conditions, and harvest timing goals.
Staggered planting and succession harvesting techniques extend your harvest intervals while maintaining quality.
What should I do with damaged roots during harvesting?
Sort damaged roots immediately—set them aside for quick use in the kitchen or compost.
Don’t store bruised vegetables with healthy ones, as disease spreads fast and ruins your entire harvest within days.
How often should I check stored roots for problems?
Check your stored crops every two to four weeks. Regular inspection frequency catches spoilage detection issues early, preventing storage rots from spreading.
Consistent monitoring of storage conditions ensures loss prevention and extends shelf life greatly.
Are there organic methods to prevent storage diseases?
Yes, organic mulches suppress disease by reducing soil contact, while essential oils like thyme oil provide natural fumigation. Crop rotation disrupts pathogen cycles, and microbial antagonists combat fungi. Gentle handling minimizes physical injury that invites infection.
Conclusion
Mastering the methods of proper harvesting of root vegetables means you’ll never watch months of work wilt in storage again. From recognizing maturity signs to handling crops with care, each step protects your harvest from field damage and storage rot.
Apply these techniques consistently, and you’ll pull perfect roots every time—firm, flavorful, and ready to last through winter. Your garden’s underground treasure deserves this level of attention and skill.
- https://extension.illinois.edu/news-releases/root-vegetables
- https://extension.sdstate.edu/harvesting-and-storing-root-vegetables
- https://jaragri.com/jar/index.php/jar/article/download/93/17
- https://postharvestinstitute.illinois.edu/about-us/what-we-do/
- https://www.uaf.edu/ces/publications/database/food/vegetable-storage.php

