This site is supported by our readers. We may earn a commission, at no cost to you, if you purchase through links.
That nursery seedling costing you $5 a pop? It grew from a seed worth less than a dime. The gap between those two numbers is exactly why seed starting trays for beginners turn out to be such a smart entry point into gardening.
A decent tray setup gets your tomatoes and peppers growing 4-8 weeks before the ground even thinks about warming up. You control the moisture, the depth, the temperature—no guesswork, no crossed fingers waiting on Mother Nature.
Grab the wrong tray, though, and you’re fighting root rot and leggy sprouts before you even hit your first true leaf. Let’s fix that, starting with the trays actually worth your money.
Table Of Contents
Key Takeaways
- Starting seeds in trays gives you a 4–8 week head start on the growing season while cutting per-plant costs from $4–6 for nursery starts down to roughly $0.10.
- Cell size matters most: smaller cells (4–32) suit large seeds and root space, while larger grids (72–200) maximize seedling density for budget-friendly, high-volume growing.
- Consistent moisture and warmth—through humidity domes, bottom-watering, and heat mats set at 70–75°F—prevent root rot and damping-off while building stronger root systems.
- Success depends on proper technique: pre-moisten soil, plant seeds at 2–3 times their width, provide 14–16 hours of light daily, and harden off seedlings gradually over 7–14 days before transplanting.
Why Beginners Need Seed Starting Trays
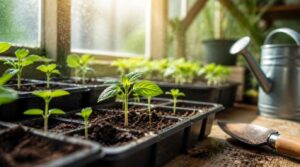
Seed starting trays give you a real head start on the growing season, and that head start pays off in ways you might not expect.
If you’re not sure where to begin, this step-by-step guide to planning a spring garden can help you time your seed starting just right.
From earlier harvests to sturdier seedlings, the right tray setup changes everything about how your garden performs. Here’s why every beginner needs one—and exactly what to look for.
Earlier Spring Planting
Four to eight weeks. That’s how much of a head start seed starting trays give you over waiting for soil to warm outdoors. Spring weather is fickle—air temperatures climb above freezing 5-10 days before your last frost, but late cold snaps still happen.
Starting indoors sidesteps that gamble entirely, letting cool-season crops and tender seedlings get growing while outdoor soil is still catching up. Utilizing early spring planting strategies can further extend your overall growing season.
Lower Transplant Costs
Beat the head start, then beat the price tag. Nursery starts run $4-6 each, but seeds cost pennies—your own trays drop per-plant costs to roughly $0.10.
Reusable plastic cells and cell propagation trays make that math even better across seasons, supporting bulk seedling production without repeat spending. Smart garden budget management, plain and simple: fewer dollars spent, more seedling success to show for it.
Better Germination Control
Saving pennies means nothing if seeds never sprout. Seed starting trays give you precise environmental control—consistent moisture, stable warmth, steady airflow.
- Humidity domes lock in moisture, preventing crusty, dry surfaces
- Bottom watering delivers water without disturbing tender roots
- Stable temperatures avoid shocks that delay sprouting for days
- Gentle airflow wards off damping-off disease
- 72-cell trays balance space with reliable, uniform germination
Stronger Garden Seedlings
Uniform moisture and warmth don’t just help seeds sprout—they build stronger root systems underneath. Trays encourage fibrous roots that boost nutrient uptake, even inviting mycorrhizal associations that lift phosphorus absorption up to 20%.
That root strength translates upward: thicker stems, better vigor, sturdier seedlings ready for transplanting. Think of it as gardening magic—strong foundations below mean resilient plants above, without the wobbly, leggy growth cheap setups produce.
Strong roots below build resilient, sturdy plants above, without the weak, leggy growth cheap setups produce
Small-space Seed Starting
Got a windowsill and big dreams? That’s plenty for urban seed starting. A single cell tray fits neatly on narrow ledges, letting apartment gardeners grow dozens of seedlings where a garden bed simply won’t fit.
Stack trays vertically or tuck microgreen trays between pots for smart vertical gardening. This kind of compact seedling management turns tight windowsill garden layouts into surprisingly productive nurseries for beginner gardeners.
Top 8 Seed Starting Trays for Beginners
Ready to pick your first tray? You’ve got options ranging from budget-friendly starter kits to self-watering systems built for busy schedules. Here are eight standouts worth your consideration.
1. Jiffy Seed Starting Tray
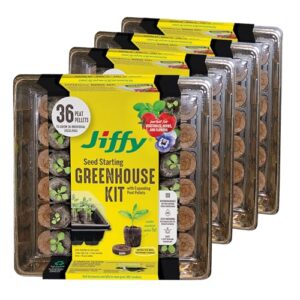
Peat pellets do the heavy lifting here — just add water and watch them swell into ready-to-plant pots. Each 36mm pellet holds its own weight in moisture, so seedlings get steady hydration without soggy roots. The included humidity dome traps warmth, creating that greenhouse effect you want during germination.
Best part? You transplant the whole pellet directly into soil. No root disturbance, no transplant shock. That’s a real win for tomatoes, peppers, and herbs that hate having their roots messed with.
| Best For | home gardeners and beginners who want an easy, mess-free way to start seedlings like tomatoes, peppers, basil, and flowers indoors. |
|---|---|
| Material | Plastic |
| Cell Count | 144 total |
| Reusable | Yes |
| Indoor Use | Yes |
| Root Protection | Reduces disturbance |
| Plant Types | Tomatoes, peppers, basil |
| Additional Features |
|
- Peat pellets expand with just water, making setup quick and beginner-friendly
- Humidity dome locks in warmth and moisture for stronger germination
- Pellets transplant straight into soil, so roots stay undisturbed
- Only suited for small seedlings, not mature or larger plants
- You’ll need to buy more peat pellets once the included ones run out
- Dome can trap too much moisture, so you’ll need to vent it to avoid mold
2. Park Seed Bio Dome Starter Kit
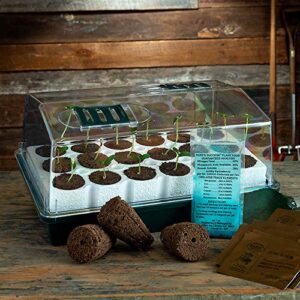
Ditch the guesswork with a soil-free system built for control freaks (in the best way). The Bio Dome swaps dirt for 80 sterile Bio Sponges, encouraging strong downward roots instead of that annoying spiral effect. Bottom watering wicks moisture up through the base—no more drowning or drying out sprouts.
The clear humidity dome has adjustable vents, so you dial in your own greenhouse effect. Two 40-cell blocks mean plenty of room to experiment.
With 80 total cells to fill, this beginner-friendly seed starting guide can help you choose seeds that thrive under steady moisture and warmth.
| Best For | Indoor gardeners and seed-starting beginners who want a nearly foolproof way to get plants going before the growing season kicks off. |
|---|---|
| Material | Polystyrene/Sponge |
| Cell Count | 80 blocks |
| Reusable | Yes |
| Indoor Use | Yes |
| Root Protection | Prevents spiraling |
| Plant Types | General seedlings |
| Additional Features |
|
- Bottom-watering system with Bio Sponges prevents both drowning and drying out, taking the guesswork out of moisture control
- Encourages strong, downward root growth, which makes for healthier plants and easier transplanting later
- Comes with two 40-cell blocks (80 sponges total), giving you plenty of room to start a whole season’s worth of seedlings
- Vents need to be manually adjusted or removed as seedlings grow, so it’s not fully hands-off
- Only works properly with lukewarm water, adding an extra step to your watering routine
- Small seeds may need extra care nestling into the moist media to germinate successfully
3. CowPots TV208926 Round Cowpot, 3
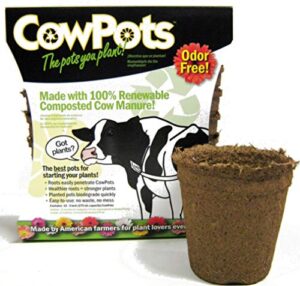
Cow manure, transformed into a plantable pot? That’s the quiet genius of the CowPots Round 3.
Made from 100% composted cow manure, each 3-inch pot decomposes right in the soil—roots push straight through the walls, so there’s zero transplant shock. No plastic, no waste, just organic matter feeding your garden as it breaks down.
Keep these dry between waterings, though. Get them too soggy, and they’ll turn to mush before your seedlings even sprout.
| Best For | Gardeners and seed-starters who want an eco-friendly, transplant-shock-free way to move seedlings directly into the ground. |
|---|---|
| Material | Composted manure |
| Cell Count | 12 pack |
| Reusable | No |
| Indoor Use | Yes |
| Root Protection | Eliminates transplant shock |
| Plant Types | Various vegetables |
| Additional Features |
|
- Fully biodegradable and made from 100% composted cow manure, adding organic matter to soil
- Eliminates transplant shock since roots grow right through the pot walls
- Great for seed starting and indoor winter gardening
- Can break apart or turn to mush if not handled carefully when damp
- Less sturdy than plastic pots
- Not suitable for hanging plant applications
4. Burpee Self Watering Seed Starter
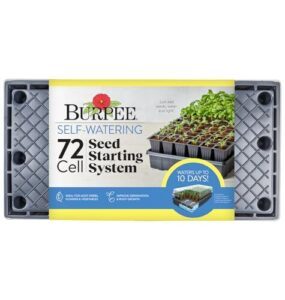
Forget daily watering duty. This kit uses a self-watering mat and reservoir to wick moisture straight to your 72 cells, so roots drink exactly what they need.
You’ll get coco coir pellets, plant stands, a humidity dome, and plant-o-gram markers included. Just add warm water slowly to expand the pellets first.
The raised edges contain spills, while drainage channels stop soggy roots. For beginners juggling busy schedules, this is practically foolproof.
| Best For | busy beginners who want an easy, low-maintenance way to start herbs, flowers, or vegetables indoors without worrying about daily watering. |
|---|---|
| Material | Plastic |
| Cell Count | 72 cells |
| Reusable | Yes |
| Indoor Use | Yes |
| Root Protection | Minimizes overwatering |
| Plant Types | Herbs, flowers, veggies |
| Additional Features |
|
- Self-watering mat and reservoir take the guesswork out of moisture control, protecting roots from overwatering
- Comes as a complete kit with coco coir pellets, plant stands, a humidity dome, and plant-o-gram markers for easy organization
- Raised edges and drainage channels help contain spills and prevent soggy, waterlogged roots
- Pellets need warm water added slowly to expand properly, adding an extra prep step before planting
- A heat mat is recommended for best germination results, which means an additional purchase for some users
- Designed strictly for indoor use, so it won’t work for outdoor seed starting
5. Burpee SuperSeed Windowsill Seed Starter
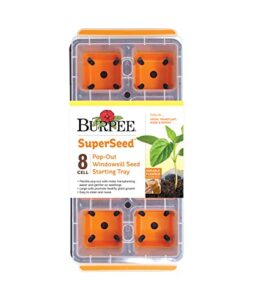
Got a sunny windowsill and zero counter space? This eight-cell silicone tray was built for exactly that. Each extra-large flexible cell pops out individually, sparing tender roots from tugging.
Molded corner slots boost drainage while a deep watering channel whisks away excess moisture—no soggy roots here. Raised edges stop spills, and side grips make pouring off water simple.
At 11.5 by 5-3/16 inches, it’s compact but mighty, perfect for eight strong seedlings like tomatoes or peppers before transplant day arrives.
| Best For | Urban gardeners and windowsill growers who want to start vegetable, herb, or flower seeds indoors without a full growing setup. |
|---|---|
| Material | Silicone |
| Cell Count | 8 cells |
| Reusable | Yes |
| Indoor Use | Yes |
| Root Protection | Reduces stress |
| Plant Types | Tomatoes, peppers, eggplants |
| Additional Features |
|
- Individual pop-out cells make it easy to remove seedlings without damaging delicate roots
- Built-in drainage design (corner slots, watering channel, raised edges) helps prevent soggy soil and spills
- Reusable, dishwasher-safe (top rack) silicone makes cleanup simple and cuts down on waste
- Limited to 8 seedlings per tray, so larger growing projects will need multiple trays
- Doesn’t include seed starting mix, water, or a light source—those are purchased separately
- Silicone can hold onto moisture, so extra care is needed to avoid overwatering
6. Bonviee clear seed starter trays
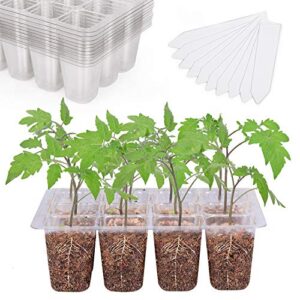
Silicone flexibility is great, but sometimes you just want to see what’s happening underground. That’s where Bonviee’s clear trays earn their spot.
Each 12-cell tray offers transparent walls for real-time root monitoring—no guessing games. The 5-pack kit bundles base trays and adjustable humidity domes, so moisture stays put while you watch germination unfold.
At 4.4 inches wide and 6.1 inches tall, they’re windowsill-friendly. Sturdy plastic construction means these trays survive season after season without cracking under pressure.
| Best For | gardeners and seed-starting enthusiasts who want to closely monitor root development and germination progress without disturbing their seedlings. |
|---|---|
| Material | Plastic |
| Cell Count | 144 total |
| Reusable | Yes |
| Indoor Use | Yes |
| Root Protection | Minimal disturbance |
| Plant Types | General seedlings |
| Additional Features |
|
- Transparent cell walls make it easy to track root growth and germination without digging around in the soil
- Built-in drainage holes in every cell help prevent overwatering and root rot
- Durable, reusable plastic design means these trays can be used season after season
- Clear plastic may show dirt, algae, or discoloration over time, making trays look less tidy
- Susceptible to cracking if handled roughly or dropped
- With 144 small cells to manage across 12 trays, keeping track of watering and labeling can get a bit tedious
7. Jiffy Seed Starting Tray Kit
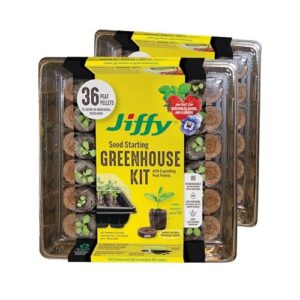
Watching roots through clear walls is neat, but sometimes you just want speed and simplicity. Jiffy’s kit delivers exactly that.
You get 36 expanding peat pellets, a watertight base tray, and a humidity dome—all in an 11x11x4.25 inch footprint. Soak the pellets, drop in seeds, and let capillary action do the work.
Best part? Pellets go straight into soil later, roots undisturbed. Some kits even toss in SUPERthrive for a growth boost!
| Best For | This kit is best for indoor gardeners who want a simple, no-fuss way to start vegetables, herbs, and flowers like tomatoes, peppers, basil, and zinnias on a windowsill or shelf. |
|---|---|
| Material | Plastic |
| Cell Count | 72 pellets |
| Reusable | Yes |
| Indoor Use | Yes |
| Root Protection | Supports root growth |
| Plant Types | Tomatoes, peppers, basil, zinnias |
| Additional Features |
|
- Includes everything needed to get started—72 peat pellets, 2 reusable trays, and humidity domes in one kit
- Peat pellets can go straight into soil later without disturbing roots, giving seedlings a smoother transition
- Compact 11 x 11 x 4.25 inch design fits easily in small spaces and is light enough (1.74 lbs) to move around
- Pellets require manual water activation, adding an extra prep step before planting
- Each tray is limited to 36 cells, which may not be enough for larger growing projects
- Best suited for small-scale indoor use, so it’s not ideal if you need to start a large number of seedlings at once
8. Park Seed Planting Block Refill Sponges
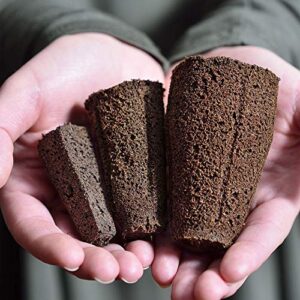
Already invested in a Bio Dome system? Skip buying new blocks and grab refill sponges instead—60 per pack, sized exactly for 60-cell setups.
Made from coconut coir, peat, and bio char, they’re enriched with oilseed extract for an early nutrient boost. Soak in warm water, and pre-drilled holes appear, ready for seeds.
They’re reusable, but disinfect thoroughly between crops. Great for lettuce, herbs, or hydroponic net cups—just trim if your container needs it.
| Best For | Growers who already own a Bio Planting Block system and want an affordable way to keep starting healthy seedlings without buying new blocks. |
|---|---|
| Material | Polyurethane |
| Cell Count | 60 sponges |
| Reusable | Yes |
| Indoor Use | Yes |
| Root Protection | Aids healthy roots |
| Plant Types | Herbs, lettuce, greens |
| Additional Features |
|
- Pre-drilled planting holes make seed placement quick and easy
- Enriched with oilseed extract to give seedlings an early nutritional boost
- Versatile enough to use in 2-inch net cups or hydroponic setups, not just planting blocks
- Requires thorough disinfection between crops to avoid contamination
- May need manual trimming to fit certain hydroponic containers
- Some users have reported inconsistent sponge counts per pack
Choosing The Right Tray Size
Not all trays are created equal, and cell size makes a bigger difference than you’d think. Pick one too small for your plant, and you’re setting yourself up for root-bound trouble down the road. Here’s how five common tray sizes stack up, so you can match the right cells to your seeds.
4. cell Tray Uses
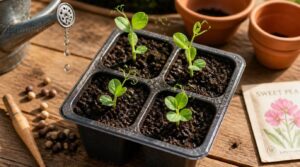
Four cells, zero chaos. These trays shine for sweet pea propagation and other large-seeded climbers needing room to stretch before transplanting seedlings.
- Sweet pea starts
- Species organization by tray
- Minimal root entanglement
- Small plot scaling
- Easy individual seedling maintenance
Since each cell tapers from 2⅜" to 1¼", roots grow freely—no tangled mess, just clean germination for beginner gardeners managing a handful of varieties.
32. cell Tray Uses
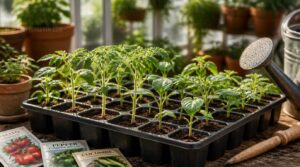
Ready to graduate from four cells to thirty-two? This tray size hits the sweet spot for tomato seedling propagation, plus peppers and cucumbers, giving roots 58-60mm of breathing room.
Herb garden starts and leafy greens transplant beautifully here too. Even succulent rooting space works, since the 50-63mm depth suits slow growers.
The 4×8 grid excels at batch germination techniques—multiple varieties, one tray, zero confusion for beginner gardeners.
72. cell Tray Uses
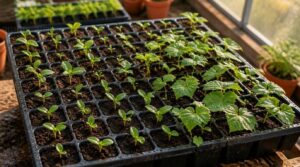
Sixty seedlings, one tray—that’s the magic of the 72-cell format, and it’s a workhorse for good reason.
- Sunflower growth space and vine crop suitability shine here
- 1½-inch cells (2¼" deep) give real root system stability
- Maximizing plant density fits a tidy 9×8 grid
For efficient greenhouse production, this cell size balances seed germination success with serious seedling management muscle.
128. cell Tray Uses
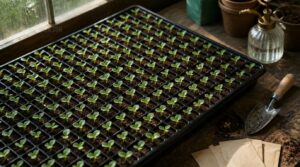
Need more room on the bench? A 128-cell tray packs an 8×16 grid into the same footprint, perfect for high-density trials without sacrificing quality.
Each 1-inch cell still delivers uniform moisture retention, so seedlings grow evenly. This layout suits compact bench management and bulk germination testing beautifully—ideal when you’re comparing varieties or planning smart seedling thinning strategies before transplant day arrives.
200. cell Tray Uses
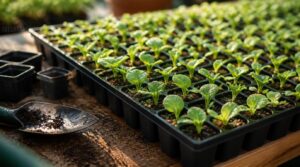
Tiny cells, huge payoff: 200-cell trays are your ticket to economical seedling production on a budget.
- Ideal for cole crops (broccoli, cabbage)
- Speeds lettuce germination
- Maximizes high-density sowing
- Saves bench space
- Cuts per-seedling costs
With 0.75-inch cells, you’ll churn out lettuce and cabbage starts fast, without crowding your grow space or your wallet.
Key Features Beginners Should Compare
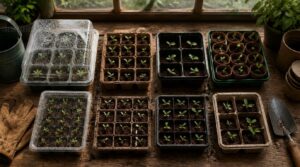
Picking the right size is only half the battle. What your tray’s made of, and how it grips moisture, can make or break your seedlings’ success. Here’s what to look for before you commit to a tray.
Cell Depth and Width
Millimeters matter more than you’d think in a seed tray.
Cell depth and width control root space optimization directly—shallow, narrow cells stunt growth, while balanced dimensions boost seedling vigor.
| Cell Type | Depth | Best For |
|---|---|---|
| Shallow | 0.25" | Fast warming |
| Standard | 0.375" | 72cell tray |
| Deep | 0.5" | Heavy seeds |
Moisture retention patterns shift with cell geometry, creating unique germination microenvironments across your tray.
Reusable Tray Materials
Buy once, use for years? That’s the promise of a well-made reusable tray.
Polypropylene stands out as the workhorse material—chemical-resistant, sturdy, and built to survive hundreds of wash cycles without warping.
- BPA-free safety for worry-free seed starting
- Silicone flexibility for easy seedling release
- Impact-resistant ABS blends
- Recyclable PP and HDPE
- Reinforced rims resisting cracks
Choose food-safe plastic trays, and you’re investing in genuine long-term sustainability for your propagation setup.
Biodegradable Tray Options
Prefer to skip plastic entirely? Peat, wood fiber, and bagasse pots plant right into soil, reducing transplant shock for good.
Bagasse (sugarcane byproduct) composts in 60-90 days commercially. Paper trays use biodegradable coatings for leak resistance. Biopolymers need industrial composting facilities to break down fully.
Plantable mesh pots offer a nice middle ground—roots grow straight through, no disturbance required.
Humidity Dome Benefits
Humidity domes turn your tray into a mini greenhouse. They trap warmth and moisture, creating a microclimate that speeds germination by 10-40%. Soil stays 2-6°F warmer, buffering cool drafts.
Consistent moisture prevents crusting, while vented lids curb mold and damping-off. Clear plastic lets you spot trouble early—gardening magic, minus the guesswork!
Bottom-watering Systems
Once your dome’s doing its job, let’s talk water. Bottom-watering systems use capillary action to pull moisture upward, keeping fragile stems dry and rot-free. Fine seed starting mix wicks fastest.
- Fill reservoir 1 inch deep
- Check daily for refills
- Watch for even soak-through
Media wettability matters—compacted soil resists uptake. A true self-watering system saves time and protects tender roots!
Starting Seeds Successfully Indoors
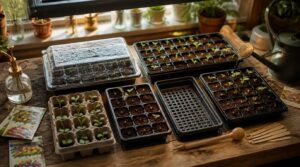
Owning the right tray is only half the battle—technique fills in the rest. From soil moisture to that final hardening-off stretch, small habits make or break your seedlings. Let’s walk through the five steps that turn your trays into a genuine seed-starting success story.
Pre-moistening Seed Mix
Damp, not soggy — that’s the golden rule before a single seed touches soil. Pre-moistening your seed starting mix prevents seed displacement and creates uniform germination conditions across every cell.
| Moisture Check | What You’re Looking For |
|---|---|
| Squeeze test | Holds shape, no dripping |
| Field capacity | 60-70% saturation |
| Texture | Damp sponge feel |
| Color | Darkened, not soaked |
| Drainage | No pooling at bottom |
Skip this step, and you’ll risk anaerobic conditions that rot seeds before they sprout!
Proper Seed Planting Depth
How deep should that seed go? Simple rule: plant at 2-3 times the seed’s width. Tiny lettuce seeds need just ⅛ inch; beans want 1-2 inches.
Sandy soil? Go slightly deeper. Clay-heavy beds? Slightly shallower prevents crusting.
Some seeds need light to germinate — press them in, don’t bury them. Too deep invites seed rot in your seed starting trays before sprouts ever emerge.
Light and Heat Setup
Why do so many seedlings stretch and flop over? Usually it’s weak light or shaky heat. Full-spectrum LED grow lights, run 14-16 hours daily, keep growth compact and sturdy.
Seedling heat mats hold soil around 70-75°F—use a thermostat probe in the mix, not the air, for accuracy. Raise lights to prevent scorching, and let a small fan balance humidity with fresh airflow across your 72-cell trays.
Watering Young Seedlings
Grab a spray bottle and give seedlings a gentle mist right at the soil line—no harsh streams allowed. Check moisture daily; water when the top ¼ inch dries out. Once roots establish, switch to bottom watering or a self-watering system.
- Mist until true leaves appear
- Water lukewarm, early morning
- Boost air circulation to prevent damping off
Hardening Off Transplants
Think of hardening off as your seedlings’ boot camp—skip it, and transplant shock will hit hard. Over 7-14 days, gradually increase outdoor exposure: start with 1-2 hours, adding an hour daily.
Ease into temperature acclimation and light shift together; filtered sun first, full sun later. Watch for wind exposure and pink stems—your readiness signal. Ease up on moisture management too. Your seedlings are almost garden-ready!
Frequently Asked Questions (FAQs)
How many seeds should you plant per cell?
One seed per cell for tomatoes and peppers, but two to three for lettuce or basil. Older seeds and low germination rates justify doubling up—thin to the strongest seedling once true leaves appear.
Can you mix different tray brands and sizes?
Yes, if outer dimensions match your rack—but watch for drainage mismatches, humidity dome fit, and material warping between brands. Mixed cell sizes also complicate transplant timing, so check stacking stability before committing your whole growing season to one setup.
Why does air-pruning help seedling root systems?
Picture roots hitting air instead of a wall, branching outward like tiny lightning bolts.
That’s air pruning in action: it stops circling roots, boosts oxygen uptake efficiency, and builds fibrous root architecture—fueling faster nutrient absorption and less transplant shock later.
What causes tangled or root-bound seedling roots?
Once roots hit container boundary contact, they shift from vertical growth to lateral root circling.
That dense root mass triggers oxygen depletion, poor nutrient uptake, and tangling—unless trays feature air pruning to redirect growth outward before seedlings turn rootbound.
How do small fans help seedling stem strength?
A gentle breeze does more than cool the air—it triggers thigmomorphogenesis, thickening stems and shortening growth. Oscillating fans also boost CO2 exchange and cut damping-off risk, giving your seedling nursery sturdier, wind-ready transplants before they ever meet the outdoors.
Conclusion
Your seedlings are about to turn over a new leaf, and it all starts in that tray. The best seed starting trays for beginners aren’t about fancy gadgets—they’re about giving roots room, steady moisture, and a fighting chance before transplant day.
Pick your cell size, keep that mix damp, and watch germination rates climb. That dime-sized seed you started? It’s now a thriving plant worth every penny. Grab a tray, get growing, and trust the process.
- https://www.plantingtrays.com/resources/selecting-the-right-seed-starting-cell-trays-667a9275b4a16.html
- https://migardener.com/blogs/blog/best-seed-starting-trays
- https://www.earthfoodandfire.com/the-best-seed-starting-trays-for-beginner-gardeners
- https://wholemadehomestead.com/8-best-seed-starting-trays
- https://www.nbcnews.com/select/shopping/best-seed-starting-trays-rcna149461