This site is supported by our readers. We may earn a commission, at no cost to you, if you purchase through links.
Move too soon, and tender roots snap before they ever touch soil. Wait too long, and stems turn leggy, cramped, and desperate for space. Every seedling tray tells a story if you know how to read it: leaf shape, root color, stem thickness, all whispering when the moment’s right.
Knowing when to transplant seedlings from trays separates gardeners who lose half their crop to shock from those who watch every plant take root without a hitch. Tomatoes and peppers don’t follow the same clock, and neither do their roots.
Here’s how to spot the signs your seedlings are ready, and move them with confidence.
Table Of Contents
- Key Takeaways
- Transplant Seedlings After True Leaves Appear
- Check Roots Before Transplanting
- Choose The Right Transplant Stage
- Prepare Seedlings for Moving
- Transplant Seedlings Step-by-Step
- Prevent Transplant Shock Outdoors
- Frequently Asked Questions (FAQs)
- When to transplant seedlings from seed trays?
- Can You transplant seeds from seed trays?
- Should I use seed trays when starting plants from seed?
- When should I transplant my seedlings?
- What common seedling transplanting mistakes exist?
- What seedlings do not transplant well?
- Is it possible to transplant seedlings too early?
- When should you start fertilizing seedlings after transplanting?
- What causes yellowing leaves after a seedling transplant?
- How do you prevent pests like aphids after transplanting?
- Conclusion
Key Takeaways
- Wait until seedlings show two to three sets of true leaves (not just cotyledons) and stand three to five inches tall with sturdy, upright stems before transplanting.
- Check roots before moving seedlings: healthy plants show white, dense root growth, roots reaching drainage holes, and quick-drying soil, while circling or brown, mushy roots signal problems.
- Prep properly by watering trays 1-2 hours beforehand, using gentle tools, handling seedlings by their leaves rather than stems, and planting at the same depth they grew in the tray.
- Prevent transplant shock by hardening off seedlings gradually over a week, transplanting on cloudy days, and keeping soil consistently moist afterward.
Transplant Seedlings After True Leaves Appear
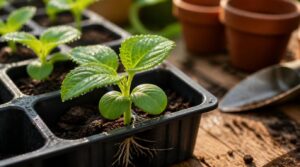
Timing is everything for moving seedlings, and true leaves are your best clue. They tell a different story than those first tiny seed leaves ever could. Here’s what to watch for before you make the move.
Once those true leaves unfurl, it’s time to thin your seedlings, and this guide to common seed starting problems and fixes can help you spot other timing mistakes before they set your plants back.
Two to Three True Leaf Sets
Two sets is your green light. Once seedlings show two to three true leaf sets, root systems have thickened enough and photosynthetic capacity has shifted to support transplant seedlings from seed trays without stalling seedling vigor. Nutrient demand changes here too, so don’t rush plants showing only one set. Wait for that second flush before moving them.
These first true leaves resemble miniature versions of the plant’s adult foliage.
Seed Leaves Versus True Leaves
Cotyledons are the rounded, simple leaves that appear first after germination, storing energy reserves rather than doing serious photosynthetic work.
True leaves look different, showing the plant’s actual leaf shape, deeper veining, and richer chlorophyll content.
That shift means seedlings lean on stored reserves early, then switch to true-leaf photosynthesis once transplant seedlings show real feeding capacity for growth ahead.
Typical Timing by Crop
Once true leaves show up, timing still shifts by crop. Tomato transplant windows run 6 to 8 weeks after germination; peppers stretch to 8-12 weeks.
Lettuce hits its rosette stage in 4-6 weeks, while cucumbers, sensitive to soil warmth, move at 3-4 weeks.
Squash follows its own germination stages, ready in just 2-4 weeks.
Avoid Moving Too Early
Patience pays off here. Jumping the gun exposes tender roots to temperature shock before they’ve had time to anchor in fresh soil, and that delay slows nutrient uptake right when seedlings need it most.
Rushed transplants also raise mortality rates, since fragile roots can’t yet handle unstable conditions. Watch for stunted growth as your warning sign, and give trays a few more days if the weather’s still swinging.
Check Roots Before Transplanting
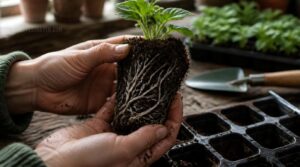
Leaves tell part of the story, but roots tell the rest. Before you commit to moving a seedling, take a quick peek below the soil line. Here’s what to look for.
Roots Circling The Cell
Pull that seedling out and check the root ball before you assume it’s ready. Roots naturally twist as they grow, a process called circumnutation, guided by microtubule alignment in the cells. In a cramped cell, this becomes tight spiraling, a rootbound sign. Cortical cell expansion gets restricted, stalling root development and healthy exploration once you transplant seedlings.
Roots Through Drainage Holes
Flip the seed tray over, and if you see roots poking through the drainage holes, that’s your cue. This growth pattern signals a healthy, expanding root system ready for more space.
Drainage holes themselves matter too, since proper sizing prevents root rot, flushes excess salts, and keeps roots respiring well. Don’t ignore clogged holes; they trap moisture and invite disease.
Soil Drying Too Quickly
Ever notice how some cells need water daily while others stay damp for days? That’s your root density talking. A packed root system pulls moisture fast, drying soil within hours.
If your plant’s roots are dense and thirsty, easing it into brighter light gradually—like this guide on transitioning shade-loving plants to more sun suggests—helps it adjust without stressing out.
Dense roots signal readiness. Sparse ones mean wait, mulch, and water less often—overhead sprinklers waste moisture; drip irrigation targets roots directly, building the density you’re watching for.
Healthy White Root Growth
White roots mean a living, working root system. Gently check the root ball before you transplant seedlings—brown or mushy roots signal trouble.
White roots signal a thriving system; brown or mushy ones warn you trouble is brewing below
| Color | Root Hair Density | Meaning |
|---|---|---|
| White | Dense | Strong nutrient uptake |
| Ivory | Moderate | Mild stress |
| Brown | Sparse | Root ball integrity compromised |
Good soil oxygen levels and mycorrhizal associations keep roots white, reducing transplant shock risk.
Choose The Right Transplant Stage
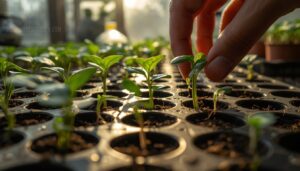
Roots tell part of the story, but timing the actual move takes a bit more judgment. Size, stem strength, and growth patterns all play a role in knowing when your seedlings are truly ready. Here’s what to look for before you commit to the transplant.
Three to Five Inches Tall
Three to five inches marks a sweet spot: enough foliage for strong juvenile vigor, roots still small enough to handle transplant shock.
At this height, expect 2 to 5 sets of true leaves and a compact growth habit—stems staying sturdy rather than stretched.
Stem diameter usually runs 2 to 4 millimeters, with short internode length keeping the plant tidy before you transplant seedlings from their trays.
Sturdy Upright Stems
A stem that stands tall without staking tells you it’s ready.
That strength comes from cellulose and lignin building thick cell walls, backed by steady turgor pressure and balanced nutrients like calcium and potassium.
- No drooping between waterings
- Resists gentle finger-flick tests
- Short internode spacing
- No stretching toward light
Weak, leggy seedlings signal poor hormonal regulation and little wind adaptation before you transplant seedlings outdoors.
Avoid Root-bound Seedlings
Roots that circle the cell tighten into a dense mat, causing root mass constriction that limits outward growth. This restricts nutrient uptake and creates moisture retention issues, since compacted roots monopolize water.
When potting up, gently tease circling roots apart before planting. This simple habit, along with timely pricking out, prevents root-bound stress and sets up healthier establishment once you transplant seedlings from their trays.
Watch for Leggy Growth
Legginess signals stress, not readiness. Weak, stretched stems mean insufficient light—test strength by gently pushing the stem; floppy ones need action, not transplanting yet.
- Pale, sparse leaves
- Hollow, bending stems
- Long gaps between nodes
- Stretching toward windows
- Thin, fragile growth
Boost light intensity, add airflow, and watch nitrogen levels before you transplant seedlings—correcting legginess now prevents fragile roots later.
Crop-specific Timing Differences
Not every seedling follows the same clock. Cool season crops like lettuce and cabbage tolerate cooler soil, while warm season needs push tomatoes and peppers toward 15–24 C.
Watch temperature threshold shifts closely, since humidity impact factors and crop maturity windows vary widely, too—what works for broccoli won’t suit cucumbers moving from seed trays after germination.
Prepare Seedlings for Moving
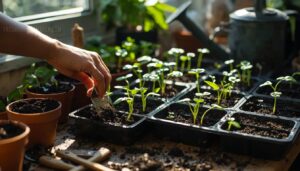
Once your seedlings pass the readiness test, don’t just yank them out and hope for the best. A little prep work now saves you heartbreak later, when roots snap or labels get lost in the shuffle. Here’s what you need to line up before you touch a single stem.
Water Trays Before Transplanting
Dry roots snap; wet ones slide free. Water your seed tray 1–2 hours before you transplant seedlings so soil clings to root balls.
- Capillary action draws moisture evenly
- Prevents transplant shock
- Reduces root damage
Skip porous trays—they wick moisture away, inviting root rot. Proper soil moisture beforehand keeps that humidity microclimate stable through the move.
Gather Gentle Lifting Tools
Grab tools that cradle, not crush. A trowel, spoon, or suction lifter loosens soil without piercing the root ball.
| Tool | Best For | Benefit |
|---|---|---|
| Trowel | General lifting | Broad support |
| Suction lifter | Delicate stems | Minimizes root damage |
| Micro tongs | Tight cells | Ergonomic grip |
Ergonomic grips reduce hand fatigue. Sanitize tools between uses to stop disease spread as you transplant seedlings.
Label Each Plant Variety
Mix-ups happen fast once several trays sit side by side.
Weather resistant plastic or metal tags hold up best outdoors, listing both cultivar and species genus. Try color coding by family for quick scanning, or RFID tags for larger collections.
Place labels at each plant’s base so they travel with root growth as you transplant seedlings from trays.
Prepare Pots or Garden Beds
Pick the destination before you pull a single seedling. Raised beds warm faster and drain better, since elevated soil sheds excess water away from roots.
In-ground beds need 6–12 inches of organic matter worked in first. For containers, check drainage holes are clear.
Whatever you choose, keep bed width to 24–36 inches for easy reach, and test soil pH beforehand.
Use Well-draining Soil Mix
Roots can’t grow where they can’t breathe. Enhancing root oxygenation starts with a mix of potting soil, compost, and perlite, roughly one part perlite to three parts base.
This mixture fights preventing soil compaction while managing pH levels near neutral. Compost adds organic matter benefits like steady nutrients. Before transplanting seedlings from seed trays, confirm drainage holes stay clear, since proper soil moisture management keeps roots healthy, not soggy.
Transplant Seedlings Step-by-Step
Now comes the moment you’ve been prepping for: the actual move. This part rewards a steady hand and a little patience, not speed. Follow these five steps in order, and your seedlings will barely notice they’ve changed locations.
Loosen Seedlings Carefully
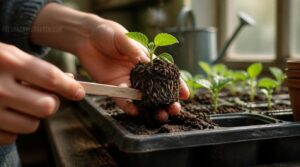
Slow down here—rushed extraction tears roots that took weeks to grow. Water trays 1-2 hours ahead so soil clings, not slips.
Use a blunt tool, like a popsicle stick or dibber, working horizontally in small sections. Avoid sharp metal edges that slice roots.
Keep the root ball intact, teasing gently, never twisting. This prevents transplant shock and root desiccation before seedlings even reach new soil.
Hold Leaves, Not Stems
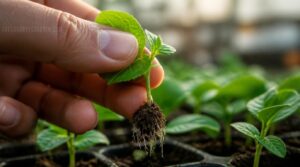
Grip leaves or soil, never the stem, since stems snap under pressure that leaves can absorb. Cradle a true leaf or petiole to distribute weight safely.
Limit handling to under 30 seconds per seedling—this curbs foliage desiccation and stress. Skip pinching leaf blades; crushed tissue invites disease and worsens transplant shock before roots even settle in.
Keep Roots Intact
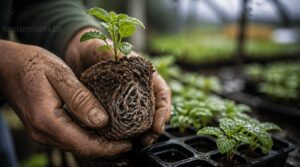
Keep the entire root ball intact as you lift each seedling from its cell—don’t shake off soil or tug loose roots. That soil layer protects fragile feeder roots from drying out during the move.
Work quickly and keep roots shaded. Minimizing root desiccation now prevents transplant shock later, so mist exposed roots lightly if planting gets delayed even a few minutes.
Plant at Proper Depth
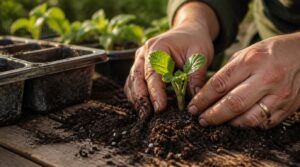
Depth matters as much as gentleness. Set the root ball at the same level it sat in the seed tray, with the crown just at or slightly above the soil line.
- Sandy soil? Plant a touch deeper for anchorage, especially with leggy stems
- Clay soil? Stay shallow to prevent stem rot
- Firm soil gently around the base
- Recheck depth if seedlings wilt afterward
Water Gently After Planting
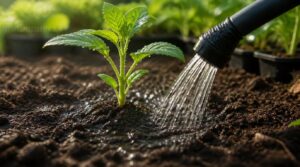
Once your seedling sits at the right depth, water becomes the final handshake between roots and soil. Aim for root zone saturation, not a quick splash—use a soaker attachment to avoid soil runoff and surface puddles.
| Do | Avoid |
|---|---|
| Water slowly, 6-8" deep | Heavy pours near the crown |
| Eliminate air pockets | Puddling around the stem |
This prevents transplant shock before it starts.
Prevent Transplant Shock Outdoors
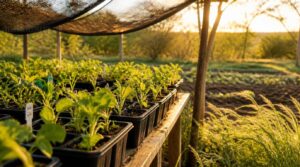
Moving seedlings outdoors isn’t the end of the job, it’s just a new phase. Your plants need time to adjust to wind, sun, and temperature swings before they’re left on their own. Here’s how to ease them into their new home without setting them back.
Harden Off for One Week
Sudden exposure shocks tender seedlings, so plant acclimation matters. Over seven days, gradually increase outdoor time, watch nighttime temperature dips, and use windbreaks against desiccation.
- Steadier growth rates
- Stronger root systems
- Fewer wilted leaves
- Real garden toughness
Skip this step, and even healthy seedlings can collapse under sun and wind stress.
Start in Sheltered Shade
Before any direct sun, give your seedlings a few days in sheltered shade—under a porch, tree canopy, or shade cloth. Diffuse light reduces leaf scorch and photooxidative stress, while cooler, humid conditions mitigate transpiration.
Good shelter site selection also buffers wind and temperature swings, easing plant acclimation. Pick a spot with airflow but no harsh afternoon rays, and let this microclimate management phase run 3–4 days.
Increase Sunlight Gradually
Fifteen to thirty minutes of direct sun is plenty to start. Add that increment every couple days, watching leaves for bleaching or limp stems—signs to pause.
Skip harsh midday heat and shelter from wind, which dries plants fast. Log each session; steady tracking builds real strength before the final move outdoors.
Transplant on Cloudy Days
Overcast skies are your best ally for the final move outdoors. Reduced transpiration rates and mitigating leaf scorch make cloudy days ideal for perfect transplant timing.
- Lower light cuts photosynthetic demand, easing transplant shock
- Cooler air keeps stable soil moisture longer
- Milder winds reduce physical stress
- Light rain afterward helps the acclimatization process naturally
Check forecasts for 24-48 hours of cloud cover before you transplant seedlings.
Keep Soil Consistently Moist
Freshly transplanted seedlings can’t tell you they’re thirsty, so watch the soil instead. Check the top inch daily, watering when it feels dry.
Drip irrigation or soaker hoses work best, delivering water straight to roots with little waste. A 2-4 inch mulch layer locks in moisture and steadies soil temperature. Stick to morning watering schedules, and consider a moisture sensor for precise aftercare.
Frequently Asked Questions (FAQs)
When to transplant seedlings from seed trays?
Like an old farmer checking his almanac, you’ll know your seed tray is ready once true leaves reach two to three sets, roots fill the cell densely, stems stand three to five inches tall, and moisture absorption speeds up between waterings.
Can You transplant seeds from seed trays?
Yes, you can transplant seedlings from trays once they show two to three true leaf sets, sturdy stems, and healthy roots. Timing depends on crop type, but proper technique boosts seedling survival rates and transplanting success a lot.
Should I use seed trays when starting plants from seed?
Funny enough, the seed tray you eyed at the garden center holds the answer: yes. Trays give germination humidity control, prevent seedling competition, and boost space efficiency—ideal for windowsills. Choose biodegradable pots to ease transplant shock later.
When should I transplant my seedlings?
Move seedlings once they’ve grown two to three true leaf sets past the cotyledons, stand three to five inches tall, and show sturdy stems. Check for circling roots in the seed tray, too, that’s your real timing cue for a healthy transplant.
What common seedling transplanting mistakes exist?
Common mistakes include improper planting depth, rough stem handling, and premature fertilizer use that burns roots.
Neglecting pest monitoring invites damping-off and yellowing leaves.
Rushed hardening schedules cause wilting and stress—leggy seedlings often result from inadequate light or delayed transplanting.
What seedlings do not transplant well?
Some seedlings simply won’t "root" for the move. Sensitive taproot crops like carrots and beets, plus high-sensitivity vegetables such as corn and cucumbers, favor direct sow over transplanting—root disturbance risks stunted growth, forked roots, and unnecessary plant stress.
Is it possible to transplant seedlings too early?
Yes — moving seedlings from a seed tray while only cotyledons show carries real risk. Survival rates drop, roots struggle to establish, and you’ll notice delayed growth, wilting, and heat shock vulnerability. Wait for true leaves before transplanting.
When should you start fertilizing seedlings after transplanting?
Wait until your seedlings show two true leaves, then feed with half-strength liquid fertilizer for two weeks.
Skip fertilizing sooner—new roots burn easily.
Organic options like diluted fish emulsion work well, supporting steady nutrient absorption without stressing fragile plant physiology during aftercare.
What causes yellowing leaves after a seedling transplant?
Root disturbance tops the list, alongside water stress, high soil pH locking out iron, and nutrient deficiency.
Transplant shock, wilting, and pest damage from aphids also trigger yellowing—your plant’s physiology reallocates resources under stress, so leaves pale before new growth resumes.
How do you prevent pests like aphids after transplanting?
Row covers, reflective mulch, and morning watering keep aphids away. Add companion planting with marigolds, encourage beneficial insects like lady beetles, and treat early signs with organic insecticidal soap to protect plant health naturally.
Conclusion
Roots don’t lie, and neither do leaves, stems, or timing. Knowing when to transplant seedlings from trays isn’t guesswork, it’s reading a plant’s own signals and answering them with confidence.
Every gardener who’s lost a tray to shock learns one lesson: patience beats haste. Check the roots, watch the leaves, choose calm, cloudy days for the move.
Master this rhythm, and your garden rewards you season after season with strong, unshaken growth.
- https://scottsmiraclegro.com/en-us/learn/gardening/how-to-transplant-seedlings-outdoors.html
- https://wiredhomestead.com/how-to-tell-if-seedlings-are-ready-to-transplant
- https://phsonline.org/for-gardeners/gardeners-blog/how-to-transplant-seedlings-outside-spring
- https://www.parkseed.com/blogs/park-seed-blog/are-my-seedlings-ready-to-transplant
- https://www.themarthablog.com/2024/02/transplanting-seedlings.html