This site is supported by our readers. We may earn a commission, at no cost to you, if you purchase through links.

Rosemary can hold its piney fragrance for a full year after harvest, but only if you dry it the right way. Hang it wrong, crowd the stems, or skip the airflow, and you’ll trade that lasting aroma for a moldy, flavorless disappointment. Herbs are forgiving plants, but drying them rewards patience and punishes shortcuts.
That’s the real appeal of air drying herbs in bundles: it’s simple, requires no equipment beyond twine and a warm room, and preserves essential oils better than most modern methods. Get the timing, bundling, and airflow right, and your kitchen herbs will taste like they were picked yesterday, months from now.
From choosing which herbs bundle well to nailing the cracker-dry test before storage, here’s what actually makes the difference.
Table Of Contents
- Key Takeaways
- Best Herbs for Air Drying Bundles
- Harvest Herbs at Peak Flavor
- Prepare Herbs Before Bundling
- Tie and Hang Herb Bundles
- Dry, Test, and Store Herbs
- Frequently Asked Questions (FAQs)
- What herbs can you air dry?
- How to bundle herbs for drying?
- How long do herbs need to air dry?
- What herbs should you not dry?
- How long does it take herb bundles to dry?
- Can you dry herbs without hanging them upside down?
- Whats the difference between drying and freezing herbs?
- How do you know when to replace old dried herbs?
- What equipment helps with drying large herb batches?
- Conclusion
Key Takeaways
- Woody herbs like rosemary, thyme, oregano, sage, and marjoram bundle and air dry best, while soft herbs like basil, mint, cilantro, and dill should be dried flat to avoid bruising and rot.
- Proper technique—bundles of five to six stems, hung upside down with 6 inches of clearance and steady airflow at 35-45°C and 45-60% humidity—prevents mold and preserves essential oils.
- Harvesting matters as much as drying: cut herbs 60-90 minutes after sunrise, just above leaf nodes, taking no more than a third of the plant at once for best flavor and regrowth.
- Before storing, herbs should pass the cracker-dry test (a clean snap, pale color, faded aroma) and then go straight into labeled, airtight glass containers kept in a cool, dark spot.
Best Herbs for Air Drying Bundles
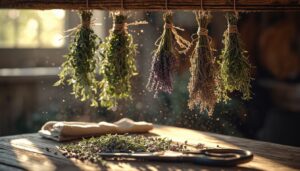
Not every herb takes to bundling the same way, and knowing which ones do will save you from moldy stems and wasted effort. Some plants practically beg to be hung and forgotten, while others need a gentler hand or a different method altogether. Here’s what to reach for, what to watch, and what to leave off the drying rack entirely.
For a full rundown of which varieties dry best this way, this guide to hanging herbs to dry properly breaks down spacing, timing, and airflow tips worth following.
Woody Herbs That Dry Well
Five herbs stand above the rest for air drying: rosemary, thyme, sage, oregano, and marjoram. Their low-moisture, woody stems hold structure during dehydration, unlike softer leaves.
- Rosemary keeps its piney aroma for a year
- Thyme dries fastest, ready in 10–14 days
- Oregano stores well for 9–12 months
Hanging upside down with steady airflow locks in flavor while preventing mold from moisture control issues. To make sure longevity, store your harvest in airtight glass containers to protect against light and humidity.
Herbs to Bundle Carefully
Rosemary, sage, lavender, thyme, and lemon verbena all bundle well, but each one asks for a slightly different touch.
Rosemary aroma retention stays strong throughout drying, while sage’s sturdy stems resist crumbling.
Lavender keeps its flower heads intact, releasing scent slowly.
Thyme sheds leaves easily, so handle it gently.
Lemon verbena’s flexible stems still hold tight when hung upside down.
Soft Herbs to Avoid Bundling
Basil, mint, dill, and cilantro don’t belong in tight bundles—their tender stems bruise and rot fast.
- Basil bruising risks from tight ties
- Cilantro moisture pockets trap dampness
- Mint stem fragility snaps under pressure
- Dill leaf shedding during handling
- Soft herb rot in crowded bunches
Lay them flat on mesh racks instead, giving each leaf room to breathe and dry evenly.
Flavor and Oil Retention
Why do woody herbs hold their aromatic punch so much longer than tender greens? It comes down to waxy leaf protection trapping essential oils against evaporation. Their thicker structure resists temperature-driven volatilization, while UV-induced oil degradation stays minimal when bundles hang shaded. Oils act as natural carriers for lipophilic compounds, preserving flavor retention in herb drying bundles long after harvest.
Harvest Herbs at Peak Flavor
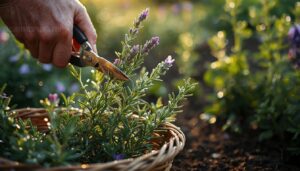
Great dried herbs start long before you ever hang a bundle—they start with how and when you cut them. Timing, technique, and a careful eye all shape how much flavor and color survive the drying process. Here’s what to keep in mind when you head out to harvest.
Morning Harvest Timing
Ever wonder why old-timers swear by picking herbs before coffee o’clock?
That’s because essential oils peak before the morning sun hits, so this step-by-step guide to air drying herbs recommends harvesting early and hanging woody stems like rosemary right away.
Sunrise harvest windows catch peak plant turgidity, when overnight moisture keeps leaves plump and essential oils concentrated. As morning dew evaporates, cooler air slows transpiration rates, locking in aromatic potency before midday heat drains it away.
Harvest herbs within 60-90 minutes after sunrise, while cell walls stay firm and fragrant for drying bundles.
Cutting Above Leaf Nodes
Where you place your shears matters as much as when you harvest. Cutting just above a leaf node wakes dormant buds, sparking lateral branching and denser growth on the next shoot.
A 45-degree angled cut sheds water and speeds node healing, while stripping too close invites rot. Nodes hold concentrated meristematic tissue, the plant’s real growth engine, so protecting them keeps your herbs thriving after each harvest.
One-Third Harvest Rule
A third is the magic number: never take more than that in one pass. This keeps perennial regrowth steady and cuts plant stress, protecting essential oil concentration and canopy airflow.
- Harvest outer growth first
- Log what you’ve cut
- Spread cuts across the week
- Skip stressed plants
- Favor sustainable yield planning
That restraint rewards you with fuller, more aromatic bundles later.
Pre-Flowering Herb Quality
Timing your harvest just before flowering captures herbs at their aromatic peak, when terpene development is nearly complete but not yet redirected into seed production. Nutrient shifts and steady turgor support resin gland growth.
| Stage | Aroma Quality |
|---|---|
| Early Veg | Mild |
| Pre-Flowering | Peak |
| Flowering | Declining |
| Post-Flower | Weak |
Removing Damaged Leaves
Not every leaf you harvest deserves a spot in the bundle. Before tying anything, scan each stem for brown spots, curling edges, or soft, mushy tissue—all signs of rot or disease that spread fast in humid conditions.
Snip damaged leaves with sanitized shears, cutting cleanly to avoid mechanical injury. This quality control step protects flavor, prevents cross-contamination, and keeps your dried herbs safe for culinary use.
Prepare Herbs Before Bundling
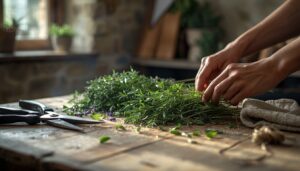
Once you’ve cut your herbs at their peak, a little prep work makes all the difference before they’re bundled up. This stage is about setting each stem up for clean, even drying, so mold and mustiness never get a foothold. Here’s what you’ll want to check off before tying anything together.
Rinse Only When Needed
Should you rinse your herbs before bundling? Only if they actually need it. Rinsing is a case-by-case decision, not a default step.
- Grit or dust from harvesting? Rinse briefly.
- Grown clean and pesticide-free? Skip it.
- Sturdy stems? Preserve oils, avoid rinsing.
- Dull, sappy leaves? A light rinse revives them.
Cool water only—never hot, which bruises leaves and strips aroma.
Pat Herbs Completely Dry
Once rinsed, don’t rush the next step. Surface moisture invites mold faster than almost anything else in the drying process, so pat each stem and leaf gently with a clean towel until truly dry.
Skipping this step traps water at the base of your bundle, encouraging leaf rot before airflow ever gets a chance to work its magic.
Strip Lower Stem Leaves
With dry stems in hand, clear the bottom few inches before tying anything. Bare stems mean fewer moisture pockets, better airflow through the bundle’s center, and less risk of rot where humidity lingers longest.
Stripped bases also curb pest hideouts and keep bundles hygienic. Think of it as clearing the runway—air needs a path to reach every leaf, preserving both aroma and color as your herbs cure.
Sort Stems by Size
Now grab a ruler and separate stems by length and thickness before tying anything. Uniform bundles dry evenly, since mismatched stems create uneven airflow pockets. Short stems dry fastest; long ones need breathing room.
Gently straighten any twisted or bent stems—irregularities throw off sorting accuracy. This small step saves woody herbs like rosemary and thyme from patchy drying later.
Check for Pests
Once your stems are sorted, take a slow look over each bundle before tying. Identifying droppings, frayed stems, or silk webs early prevents pantry moths from spreading to your whole harvest.
- Check undersides for shed skins
- Sniff for musty odors
- Remove any webbed or chewed stems
Sealing entry points and using cedar as a natural deterrent helps guarantee better herb quality control and postharvest handling.
Tie and Hang Herb Bundles
Once your herbs are clean, trimmed, and sorted, it’s time to turn them into proper bundles. How you tie and hang them matters just as much as how you prepared them, since small choices here affect airflow, color, and shape as they dry. Here’s what to keep in mind before you hang that first bundle.
Ideal Bundle Size
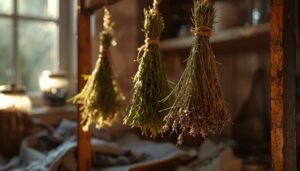
Five to six stems per bundle hits the sweet spot: enough for efficient hanging rack space, thin enough for airflow.
| Bundle Size | Drying Time | Risk |
|---|---|---|
| 3-4 stems | 3-5 days | More handling |
| 5-6 stems | 5-7 days | Balanced |
| 8+ stems | 7-10 days | Trapped moisture |
Stem density affects airflow gaps directly, so consistent sizing grips shrinkage and helps with larger batches.
Rubber Bands Versus Twine

Choosing between rubber bands and twine comes down to tension and elasticity. Rubber bands stretch as bundles shrink, keeping steady grip, but they degrade with heat over days.
Twine won’t stretch, so loose knots stay loose. Twine also concentrates pressure, risking stem bruising, while bands spread it evenly.
For setup speed, bands win hands-down when your hanging herb rack awaits.
Hanging Herbs Upside Down
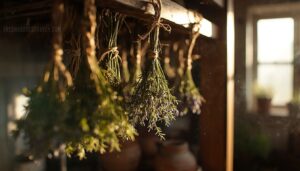
Turning your bundles upside down isn’t just tradition, it’s physics working in your favor. Gravity-driven moisture travels toward the exposed leaf tips instead of pooling near stems, which curbs mold growth while preserving color.
Keep bundle diameter under an inch for center airflow. As stems shrink, twine loosens naturally, so check tension every few days on your hanging herb rack to maintain that steady, mold-free dry.
Paper Bag Protection

Ever notice how a plain paper bag can outsmart mold better than fancy gear? Slip your bundles into a ventilated kraft bag, tips down, and it catches falling leaves while its breathable paper balances airflow with moisture control.
Good bags offer:
- Food-grade coatings safe for culinary herbs
- Reinforced, tear-resistant construction for handling
- Sustainable, recyclable materials
That combination keeps humidity, contamination, and mess in check.
Spacing for Better Airflow
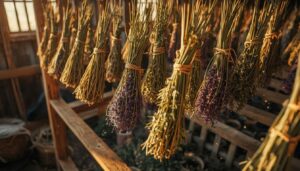
Crowding is the silent killer of a good herb harvest. Give each bundle 6 inches of clearance on every side, with 12 inches between neighbors, so moisture doesn’t migrate from one to the next.
Stagger your layout rather than lining bundles up like soldiers. On a drying rack or mesh hanging net, space layers 6 to 8 inches apart vertically, ensuring airflow reaches the whole canopy and prevents mold growth.
Dry, Test, and Store Herbs
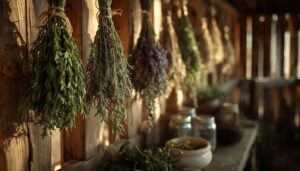
Once your bundles are hung, patience becomes your best tool, because the drying environment matters just as much as the harvest itself. You’ll want to know exactly what conditions to maintain and how to tell when your herbs are truly ready. Here’s what to watch for as your herbs move from fresh to fully preserved.
Best Drying Temperature
Temperature is the difference between vibrant herbs and hay-flavored dust. Stick to 35-45°C: basil and mint need 35°C to dodge browning, while rosemary and thyme handle 40-45°C. Cross 50°C and you’ll cook off volatile oils. Below 35°C, poor airflow invites mold.
Temperature is the line between vibrant herbs and hay-flavored dust—stay within 35-45°C or lose the oils that make drying worthwhile
Match temperature and airflow together—0.5-1.0 m/s keeps moisture evaporation steady without scorching flavor.
Humidity and Airflow Control
Pair heat with moisture removal, or your bundles just sit there sweating. Keep relative humidity between 45-60%; above 65%, mold risk climbs fast.
| Humidity Level | Risk |
|---|---|
| Below 35% | Brittle, oil loss |
| 45-60% | Ideal range |
| Above 65% | Mold, uneven drying |
A hygrometer (2% tolerance) plus gentle cross-ventilation and a dehumidifier keeps things steady.
Cracker-Dry Readiness Test
Getting the hygrometer reading right only tells half the story, so trust your hands next. Bend a stem: it should snap cleanly, not fold. Check visual color shifts toward pale khaki and a fading aroma.
- Snap test on three stems
- Rate brittleness 0-5
- Confirm color change
- Sniff for muted scent
- Rest 24 hours before storing
Airtight Jar Storage
Once your herbs pass the snap test, get them into airtight glass containers fast, since every hour in open air invites moisture back in. Glass beats plastic here because it won’t absorb odors or leach flavor over time.
Keep jars in a cool, dark cupboard between 50 and 60°F, away from sunlight, and check gasket seals regularly to maintain long-term freshness.
Labeling Harvest Dates
A jar without a label is just a mystery on a shelf. Write the date in YYYYMMDD format, add the herb name, and note the batch number for easy cross-checking.
- Date harvested
- Herb name/variety
- Batch number
- Harvest method
Use durable ink and color coding by month. Back up records digitally—your future self, mid-recipe, will thank you.
Frequently Asked Questions (FAQs)
What herbs can you air dry?
Woody herbs dry beautifully, tender herbs need extra care, and fragrant herbs reward patience.
Rosemary, thyme, oregano, and sage top the list, while lavender keeps its scent preservation for months.
Basil and mint, being softer, fare better dried flat.
How to bundle herbs for drying?
Sort stems by thickness before tying, then gather five to ten into bundles no wider than a quarter—this prevents moist pockets. Use natural twine, not rubber bands, and hang upside down so gravity pulls moisture toward leaf tips.
How long do herbs need to air dry?
Patience pays off: drying usually takes one to two weeks, depending on humidity and airflow speed. Texture testing tells the truth—leaves should crumble, stems snap clean. Rushing risks trapped moisture, mold, and a shorter shelf life.
What herbs should you not dry?
Skip soft-leafed herbs like basil, mint, and cilantro—their high moisture content invites tender leaf mold and microbial spoilage.
Bundling unsuitable species causes fragile stem breakage and rapid aroma loss, so lay them flat instead for even evaporation.
How long does it take herb bundles to dry?
Good things come to those who wait, and drying herbs is no exception. Expect 7 to 14 days for hardy stems, with humidity, airflow, bundle size, and stem thickness all shifting your timeline—smaller bundles in dry climates finish fastest.
Can you dry herbs without hanging them upside down?
Yes—flat drying works well for basil, cilantro, and other soft herbs. Use a mesh rack or wire cooling rack for single-layer airflow, keeping leaves from touching. This method controls humidity naturally, prevents mold, and preserves flavor just as effectively as hanging bundles.
Whats the difference between drying and freezing herbs?
Drying concentrates flavor, freezing preserves it; drying shrinks leaves, freezing keeps them plump. Air drying favors volatile oil preservation and long shelf life, while freezing locks in texture and brightness—better suited for tender herbs than woody ones.
How do you know when to replace old dried herbs?
Rub a pinch between your fingers: weak aroma or faded color signals it’s time to replace. Most herbs stay potent 1 to 3 years in airtight jars; beyond that, flavor and oils fade noticeably.
What equipment helps with drying large herb batches?
To scale up, "many hands" become mobile rack systems, commercial convection dryers, and humidity sensor technology, giving industrial airflow management the muscle to handle bulk processing across serious vertical space without sacrificing quality.
Conclusion
Snip it right, bundle it loose, hang it patient—these small acts decide whether your harvest sings or spoils.
Air drying herbs in bundles isn’t complicated, but it does demand attention: the right airflow, the right room, the right wait before the cracker-dry test tells you it’s ready. Do that, and your rosemary won’t just survive winter; it’ll taste like the garden never closed. That’s the quiet reward of doing this the right way.