This site is supported by our readers. We may earn a commission, at no cost to you, if you purchase through links.
Nearly 30% of U.S. botulism outbreaks trace back to one preventable mistake: improperly sterilized canning jars. Clostridium botulinum spores thrive in low-oxygen, low-acid environments—exactly the conditions your sealed jar creates—and the toxin they produce won’t announce itself through smell or taste. You could open a jar of green beans that looks and smells perfectly fine and still land in the ER.
That’s the unsettling truth behind home canning: your safety net is only as strong as your sterilization technique. Knowing how to sterilize jars for canning vegetables isn’t a formality; it’s the line between a pantry full of good food and a genuine health hazard. Get the process right, and you’ll seal in flavor, nutrients, and peace of mind—starting with the equipment you choose before you even fill a single jar.
Table Of Contents
- Key Takeaways
- Why Sterilizing Jars Matters for Canning
- Essential Equipment for Jar Sterilization
- How to Sterilize Jars Step by Step
- Adjusting Sterilization Time for Altitude
- Sterilizing Vs Sanitizing: Key Differences
- Signs You Skipped Sterilization Correctly
- Frequently Asked Questions (FAQs)
- How do you sanitize jars before canning?
- Does vinegar sterilize jars?
- What happens if you don’t sterilize your canning jars?
- Can you boil mason jar lids to sterilize them?
- Can I reuse jars from store-bought pickles or sauces?
- How long do sterilized jars stay sterile before filling?
- Can I sterilize jars in bulk ahead of canning day?
- Conclusion
Key Takeaways
- Only sustained boiling water (212°F for at least 10 minutes) reliably kills botulism spores; vinegar, dishwashers, and ovens don’t reach safe sterilization temperatures.
- Higher elevations require longer boiling times—roughly one extra minute per 1,000 feet—since water boils at lower temperatures as altitude increases.
- Jars must stay hot (180–200°F) until filling and lids should only be simmered at 180°F, not boiled, to avoid cracked glass and damaged seal gaskets.
- Low-acid vegetables (like green beans and corn) require pressure canning rather than water-bath canning, since their pH is too high for boiling alone to prevent botulism.
Why Sterilizing Jars Matters for Canning
Sterilizing jars isn’t a box to check before canning vegetables—it’s the step that decides whether your food stays safe or turns dangerous. Skip it, rush it, or fake it, and you’re gambling with everything from spoiled nutrients to a failed seal. Here’s exactly why this step carries so much weight.
For a deeper dive into proper jar prep and pressure timing, this guide on preserving excess garden vegetables safely walks through each step so nothing gets left to chance.
Preventing Botulism Risks
Clostridium botulinum spores survive unsterilized jars and thrive in low-oxygen, low-acid environments—exactly what canned vegetables provide. Sterilization delivers spore lethality that washing alone can’t achieve.
Skip this step, and you risk toxin production invisible to taste or smell. Watch for bulging lids, spurting liquid, or off odors afterward; discard immediately. Nearly 30% of U.S. botulism outbreaks trace back to improper canning methods. That statistic alone should keep you diligent. Infection can lead to serious botulism symptoms such as muscle weakness or breathing difficulties.
Protecting Nutritional Quality
Safety isn’t the only reason to sterilize—vitamin retention depends on it too. Contaminated jars invite spoilage organisms that degrade nutrients before you even notice.
Protect quality by:
- Minimizing heat sensitivity losses (vitamin C, folate)
- Reducing nutrient oxidation via proper seals
- Choosing fresh, high-quality ingredients
- Using clean sanitization techniques
- Storing jars in cool, dark environments
Ensuring a Proper Seal
Nutrient retention aside, a sterile jar sets the stage for a reliable vacuum seal—the real gatekeeper of food safety. Debris or grease on the rim disrupts contact, so wipe it clean before lidding.
Finger-tip tight bands let air vent properly; overtighten and you risk trapping it in. After cooling, check for lid flex—no give means a solid seal, ready for storage.
Essential Equipment for Jar Sterilization
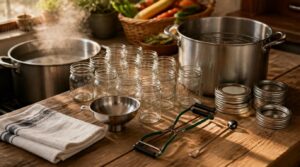
Sterilizing jars only works if you start with the right gear. Not every jar, lid, or tool on your shelf actually holds up to a rolling boil and a proper vacuum seal. Here’s what you need to check before you even fill a pot with water.
Choosing Mason-Type Jars
Not every jar in your cupboard belongs in a canner. Mason-type jars—thick, tempered soda-lime glass with standardized 70mm threads—are non-negotiable for canning equipment.
Choose regular mouth (2.375") for liquids, wide mouth (3") for chunky vegetables. Thicker sidewalls resist thermal shock; capacities from 4 to 64 ounces suit different batches.
Skip repurposed food jars: they lack the durability to sterilize canning jars safely.
Inspecting for Cracks and Chips
How closely have you actually examined that jar in your hand? Run your fingers along the rim first, feeling for burrs or uneven edges. Hold it to the light for hairline cracks, spiderweb patterns, or surface pits. Any crack crossing the jar’s width, or reaching the inner wall, means discard—no exceptions.
Jar integrity testing protects every batch you can.
New Lids Vs Reusable Bands
Which lid do you trust with your family’s dinner? When you sterilize canning jars, standard two-piece lids—flat lid plus screw band—remain the default. New flat lids are non-negotiable; reused ones risk seal integrity failure. Reusable gaskets (Tattler, Harvest Guard) offer:
Whichever lid style you choose, proper sealing only matters if you’re also following safe methods, so check out these tested canning recipes for preserving your harvest before you start.
- Multi-year use, cutting waste
- Lower long-term lid costs
- Required scalding before sealing
- Gasket inspection each cycle
Jar Lifters and Racks
Grab jars with a dedicated jar lifter, never tongs or bare hands, when moving them through boiling sterilizing fluid. Stainless steel resists corrosion; silicone grips cut heat transfer and improve control on wet glass. Adjustable jaws accommodate wide-mouth and regular jars alike.
Set a wire rack beneath jars to prevent direct pot contact and support proper drainage after the sanitization process—ergonomic grips reduce hand strain during repetitive lifts.
How to Sterilize Jars Step by Step
With your jars inspected and your equipment gathered, it’s time to put them to work. Sterilizing isn’t complicated, but it does demand precision at every stage, from that first wash to the final boil. Here’s exactly how the process unfolds, step by step.
Washing Jars and Lids First
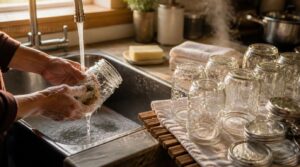
Skip washing and every later step is compromised. Wash mason-type jars and lids in hot, soapy water, rinsing thoroughly to eliminate soap residue risks. Use a non-abrasive pad for stubborn labels or hard water deposits. Wash hands first—hand hygiene matters as much as jar hygiene. Air-dry completely on a clean rack before sterilizing; damp jars invite contamination and undermine food safety protocols.
Boiling Water Bath Method
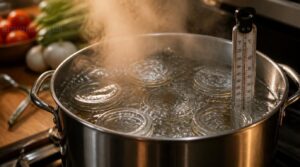
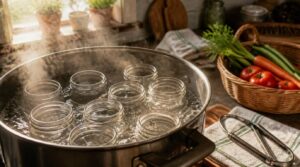
Water at a full rolling boil—212°F at sea level—does the actual sterilizing work here, not just hot tap water. Submerge jars completely, at least 1 inch over the tops, and keep that boil steady for consistent heat transfer.
4 essentials:
- Use a thermometer to confirm 212°F
- Keep jars upright on a rack
- Maintain water coverage throughout
- Never add cold jars—temperature shock cracks glass
Timing and Water Coverage
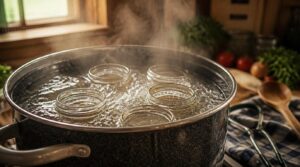
Ten minutes is your baseline once that rolling boil starts—start timing only after jars are fully submerged and bubbling, not before.
Maintaining water levels matters throughout; check periodically and top off with boiling water, never cold, to prevent thermal shock. Water clarity signals proper heat transfer, so replace cloudy water.
Consistent coverage plus full processing time equals reliable canning sterilize jars results.
Keeping Jars Warm Until Filling
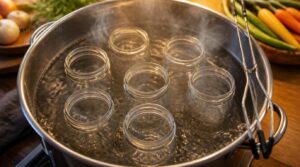
Once boiling water bath sterilization finishes, don’t let those mason-type jars sit and cool on the counter—thermal shock from sudden temperature drops cracks glass fast. Keep them submerged in that same simmering water, maintaining 180–200°F, until you’re ready to fill.
This temperature stability prevents cracking during filling and helps guarantee a proper vacuum seal formation, a cornerstone of home canning safety you can’t skip.
Boiling Mason Jar Lids
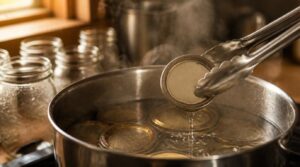
Lids need different treatment than jars: simmer them at 180°F (82°C) for 10 minutes—never a rolling boil, which damages the gasket. Handle hot lids only with tongs to avoid oil contamination from fingertips.
This gentle heat softens the sealing compound just enough to bond with mason-type jars, preserving seal integrity and preventing lid corrosion during storage.
Adjusting Sterilization Time for Altitude
Sea level instructions won’t cut it once you’re up in the mountains. Water boils at a lower temperature as elevation increases, which means those spores need more time to die off. Here’s exactly how to adjust your timing based on where you live.
Elevation and Boiling Point Changes
Because atmospheric pressure drops as you climb, water reaches its vapor pressure at cooler temperatures, roughly 1°F lower per 500 feet gained.
That shift matters for waterbath canning safety margins:
- Lower boil temps mean weaker spore lethality
- Standard sterilizing times fall short at altitude
- Every 1,000 feet demands added boiling minutes
Skipping this altitude adjustment when you sterilize jars leaves dangerous safety gaps.
Time Adjustments by Elevation
Add one minute of boiling time per 1,000 feet climbed; that’s the baseline altitude adjustment. Consult altitude adjustment charts rather than guessing, since microbial kill rates fall as boiling point drops.
| Elevation | Added Time |
|---|---|
| 1,000 ft | +1 min |
| 2,000 ft | +2 min |
| 4,000 ft | +4 min |
Low-acid foods demand extra caution—pressure canning with a calibrated pressure canner often replaces water-bath processing entirely at higher elevations.
3,000 Vs 5,000 Feet Examples
Two elevations, two different sterilize jars routines. At 3,000 feet, boiling point elevation drops slightly, so you’ll boil 13 minutes; at 5,000 feet, thinner air demands 15.
- 3,000 ft: 13 minutes, warmer air, faster kill
- 5,000 ft: 15 minutes, cooler temps, slower spore lethality
- Sea level: just 10 minutes baseline
High altitude sterilization isn’t optional guesswork—it’s math.
Sterilizing Vs Sanitizing: Key Differences
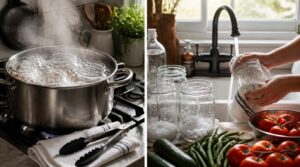
Sterilizing and sanitizing get used interchangeably, but they’re not the same process, and canning safety depends on knowing which one your recipe actually requires.
Vinegar, dish soap, and a quick hot-water rinse handle sanitizing just fine; they won’t touch bacterial spores the way a rolling boil does.
Here’s what separates the two, and when each one is enough to keep your jars safe.
Does Vinegar Sterilize Jars?
Vinegar alone won’t get you there. Household vinegar’s acetic acid concentration (~5%) can’t achieve spore inactivation—only sustained heat does that.
| Method | Sterilizes Spores? |
|---|---|
| Vinegar rinse | No |
| Boiling water bath | Yes |
| Pressure canning | Yes |
Use vinegar for sanitizing rinses only, then always follow with proper heat processing before you sterilize jars for canning vegetables.
When Sanitizing is Enough
Since you won’t sterilize jars for every recipe, knowing when sanitizing suffices matters. Cleaning is a first step; sanitizing follows.
| Surface Risk | Action Needed |
|---|---|
| Low-risk countertops | Sanitize only |
| Food-contact jars | Sanitize after cleaning |
| High-touch knobs | Stronger sanitizing |
| Ill household present | Disinfect fully |
Sanitizer contact time and elevation both affect microorganisms’ reduction—recheck labels at altitude for your sanitizing cycle.
High-Acid Vs Low-Acid Foods
Not every jar demands sterilization—your food’s pH level decides that. High-acid foods (4.6 or below) tolerate water bath canning; low-acid vegetables require pressure canning at 240°F+ to prevent botulism risks.
| Food Type | pH Range | Method Required |
|---|---|---|
| Tomatoes | ~4.6 | Water bath |
| Green Beans | >4.6 | Pressure canner |
| Berries | Low | Water bath |
| Corn | >4.6 | Pressure canner |
| Pickles | Varies | Depends on recipe |
Methods to Avoid
Skipping the stove for a shortcut? That’s how spore lethality fails. The oven method, dishwasher sterilization (even a hot sanitizing cycle), and microwaving don’t reach validated temperatures to sterilize bottles and jars.
| Method | Validated? | Risk |
|---|---|---|
| Oven | No | Uneven heat |
| Dishwasher | No | Inadequate water coverage |
| Boiling water | Yes | Minimal |
Incorrect lid reuse and thermal shock compound these unsafe sterilization alternatives.
Signs You Skipped Sterilization Correctly
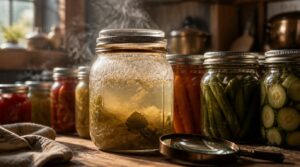
Skipping a step doesn’t always announce itself right away; sometimes the trouble shows up hours or days later. Your jars will tell you what went wrong, if you know what to look for. Here’s what to watch for once the canning’s done.
What Happens Without Sterilizing
Unsterilized jars invite trouble fast: microbial spoilage, gas production, and clouded brine. Worse, botulinum toxin forms without warning—odorless, invisible, deadly.
Unsterilized jars breed spoilage fast, and worst of all, invisible botulinum toxin that forms without any warning
Watch for:
- Fizzy or foamy contents
- Sour, off odors
- Dulled, mushy vegetables
Shelf life plummets, foodborne illness risk climbs, and pathogen inactivation never happens. Skipping this step isn’t a shortcut; it’s a gamble with contamination.
Spotting Seal Failures
A trained eye catches trouble before it spreads. Look for a bubble under the lid, cloudy liquid, or rust around the rim—each signals a broken hermetic seal. Domed lids that pop loudly while cooling mean vacuum failure, not success.
Check for dents, mismatched bands, or degraded rubber seals too; any of these prevent flat lids from compressing evenly against the jar.
Safe Storage After Canning
Once sealed, storage habits determine whether your effort holds. Keep jars in a cool, dark space between 50 and 70°F, away from sunlight and temperature swings.
- Label contents and canning date
- Remove bands to prevent rust
- Store upright, opened jars refrigerated
Check periodically for spoilage signs—bulging, leaks, off odors—since botulism prevention doesn’t end at the canner; it continues through shelf-stable storage.
Frequently Asked Questions (FAQs)
How do you sanitize jars before canning?
Wash mason-type jars in hot, soapy water, rinsing thoroughly to eliminate soap residue risks, then submerge them in boiling water for microorganism elimination. Inspect rims for microscopic cracks first; a jar lifter prevents thermal shock during transfer and handling.
Does vinegar sterilize jars?
Nearly 30% of U.S. botulism outbreaks trace back to improper canning. Vinegar only offers surface microbe reduction through acetic acid—it can’t achieve spore inactivation. That’s cleaning, not sterilizing. For true jar sterilization, rely on the boiling water method instead.
What happens if you don’t sterilize your canning jars?
Skip sterilization and you invite hidden microbial growth, fermentation gas buildup, and spoilage—plus toxin survival risks from botulism. Watch for bulging lids, off odors, or blurred vision and slurred speech, signs of foodborne illness demanding immediate discard.
Can you boil mason jar lids to sterilize them?
No — don’t boil mason jar lids. Boiling degrades the plastisol liner and weakens seal reliability. Simmer flat lids at 180°F for 10 minutes instead, keeping two-piece lids intact for your boiling-water canner without risking premature seal failure.
Can I reuse jars from store-bought pickles or sauces?
Store-bought jars often have thinner glass unsuited for boiling temperatures, plus lids that won’t form a reliable vacuum seal. Reserve them for dry pantry storage or fridge pickles instead—for actual canning, stick with true mason-type jars rated for heat processing.
How long do sterilized jars stay sterile before filling?
Picture a clean glass jar cooling on your counter, invisible microbes drifting in the surrounding air. That sterility fades fast—within about 20 minutes, uncovered. Keep jars hot, covered, and ready to fill immediately to prevent recontamination from surface microflora.
Can I sterilize jars in bulk ahead of canning day?
Yes — batch-boil mason-type jars in your boiling-water canner, then keep them hot until filling. This helps with bulk workflow efficiency but adds energy consumption tradeoffs; only skip pre-sterilizing if processing runs 10+ minutes for safe home food preservation.
Conclusion
A jar that looks spotless can still harbor spores strong enough to survive a weak boil; that’s the theory worth testing every single time you can. Knowing how to sterilize jars for canning vegetables means trusting the process, not your eyes or nose.
Ten minutes of rolling boil isn’t overkill—it’s insurance against a silent toxin. Master this one habit, and your pantry becomes a vault of safety, not a gamble dressed up as tradition.