This site is supported by our readers. We may earn a commission, at no cost to you, if you purchase through links.

Bury a tulip too shallow and frost will heave it right out of the ground by February. Plant it too deep and you’ll wonder all spring why nothing came up. The gap between success and a wasted bag of bulbs often comes down to a couple of inches.
Here’s the good news: how deep to plant fall flower bulbs follows a simple rule gardeners have used for generations. Measure the bulb, triple that number, and you’ve got your depth. Tulips, daffodils, crocuses, hyacinths, each has its own sweet spot, and getting it right sets up a spring display instead of a patch of bare dirt.
Table Of Contents
- Key Takeaways
- Plant Fall Bulbs Three Times Their Height
- Use Proper Depths for Large Bulbs
- Plant Small Fall Bulbs at Shallow Depths
- Match Planting Time to USDA Zone
- Prepare Well-Drained Soil Before Digging
- Dig and Fill Each Hole Correctly
- Orient and Space Bulbs Properly
- Choose Tools for Consistent Planting Depth
- Avoid Planting Bulbs Too Deep or Shallow
- Water, Mulch, and Protect Planted Bulbs
- Frequently Asked Questions (FAQs)
- Is it too early to plant fall bulbs?
- What happens if bulbs are not planted deep enough?
- What are the best flower bulbs to plant in the fall?
- How deep do tulip bulbs need to be planted in the fall?
- Which fall bulbs are naturally resistant to deer?
- How should I store bulbs before planting them?
- What should I look for when buying bulbs?
- Is it okay to fertilize bulbs at planting time?
- How long should foliage stay after bulbs bloom?
- Conclusion
Key Takeaways
- Measure your bulb from base to tip, then multiply by three to get the right planting depth—this simple rule works for nearly every fall bulb, from tulips to alliums.
- Depth needs vary by size: plant big bulbs like tulips 6-8 inches deep and daffodils 5-7 inches, while smaller ones, while smaller ones like crocuses and snowdrops only need 3-4 inches.
- Always set bulbs pointed-tip up on firm soil, then water thoroughly and add 2-3 inches of mulch to lock in moisture and protect against winter swings.
- Plant about six weeks before your first hard freeze, and don’t skip proper soil drainage prep, since bulbs planted too shallow risk frost heaving while those planted too deep face delayed emergence.
Plant Fall Bulbs Three Times Their Height
There’s one rule that solves most bulb-depth confusion before it starts. It’s simple math, not guesswork, and it works for nearly every bulb you plant. Here’s how to measure it out step by step.
Just measure the bulb’s height, multiply by three, and dig your hole to that depth—check this guide to fall bulb planting timelines to pair perfect depth with perfect timing.
Measure Bulb From Base to Tip
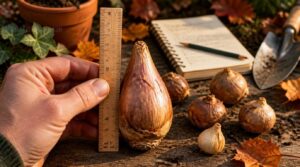
Grab a ruler before you dig. Base to tip measurement means end to end, excluding any base cap, for bulb length accuracy.
Record length data and compare packaging specs—labels can mislead, especially with vintage bulb sizing. Getting bulb size right now determines proper bulb depth later, since planting depth math starts with this one number.
Triple That Measurement for Depth
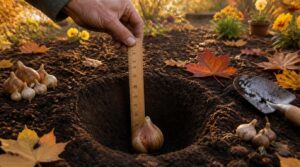
Once you have that base-to-tip number, multiply it by three. That’s the Depth Calculation Method behind fall bulb planting: a 2-inch bulb needs roughly 6 inches of soil coverage.
Skip the old two-to-three-times-their-depth guesswork—three times the bulbs height keeps emergence uniform across tulips, daffodils, and crocuses alike, with species depth variations noted on packets when they apply.
Measure Surface to Bulb Base
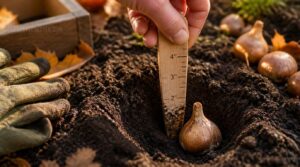
Here’s where accuracy matters most: measure from the soil surface down to the bulb base, not the top. A rounded base sits slightly deeper once buried. Soil surface fluctuations from rain or settling can shift depth by an inch, so mark your trowel for consistent depth marking before digging further holes.
Keep Pointed End Facing Upward

Once depth is set, orientation decides whether that bulb thrives. Bulb tip orientation always means pointed tip up, basal plate down. This alignment guides root development downward while directing shoots straight to the surface.
Upright growth benefits include stronger stems and better energy transfer efficiency, so your fall bulb planting rewards you with uniform bloom orientation come spring.
Check Package Instructions for Exceptions

Before you trust the three-times rule blindly, flip the package over. Some bulb varieties carry exceptions for raised beds, containers, or clay-heavy soils.
Watch for:
- Zone-specific depth shifts
- Container planting depth notes
- Pre-chill requirements for warmer zones
Planting too deep delays emergence; too shallow invites frost heaving. Labels settle that debate for you.
Use Proper Depths for Large Bulbs
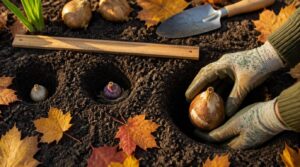
Big bulbs need a bit more room to work with underground. Depth changes depending on the type you’re planting, so it pays to know the numbers before you dig. Here’s what to aim for with each of the larger favorites.
Tulips: 6–8 Inches Deep
Tulip bulbs reward 6 to 8 inches of planting depth, pointed tip up. Larger Darwin hybrids need the deeper end for stability.
Loosen well-drained soil first, mixing in compost. Plant six weeks before your first hard freeze so roots establish. Water thoroughly afterward, then add mulch—this depth guards against frost heave while keeping bulbs cool through winter dormancy.
For specific variety guidance, consult planting depth recommendations to help growth and flowering.
Standard Daffodils: 5–7 Inches Deep
Give daffodils 5 to 7 inches of soil above the base, pointed end up. Lighter soils allow the shallow end; heavier ground calls for the deeper end.
Loosen soil well below that mark, mix in compost, and water immediately after planting to settle everything around the basal plate—no air pockets, no guesswork.
Hyacinths: 4–6 Inches Deep
Those fragrant spikes reward you for just a little extra care at planting time.
Set the bulb base 4 to 6 inches deep, pointed tip up, in well-drained soil.
- Shallower (4") suits milder climates, warmer soil
- Deeper (6") adds frost protection up north
- Water thoroughly right after planting
- Bloom timing improves with consistent depth
Large Alliums: Three Times Bulb Height
Ever seen a flower head the size of a softball floating on a bare stem? That’s your giant allium. Follow the three times bulb height rule here too, since these fleshy bulbs, often 2 to 3 centimeters wide, need room for a deep root system and sturdy stems.
Use well-drained soil. Larger bulbs correlate with fuller umbels and stronger stalks come bloom time.
Plant Small Fall Bulbs at Shallow Depths

Not every bulb needs a deep hole. Smaller varieties sit much closer to the surface, and getting that depth right matters just as much as it does for tulips or daffodils. Here’s how deep to go for each of these petite favorites.
Crocuses: 3–4 Inches Deep
Small doesn’t mean fragile. Crocus planting depth runs 3 to 4 inches, pointed end up, in well-drained soil to prevent rot. In heavier ground, stay near 3 inches.
- Loosen soil first
- Mix in organic matter
- Space bulbs 3 inches apart
Correct crocus spacing and depth together yield uniform, earlier spring emergence.
Grape Hyacinths: 3–4 Inches Deep
Crocuses get you started, but grape hyacinths keep the show going.
Plant them 3 to 4 inches deep, pointed tip up, in well-drained soil with organic matter mixed in. Space bulbs 3 inches apart. Water after planting, then only during dry spells. Add mulch for frost protection, and heavier soils call for the shallower end of that range.
Snowdrops: About 3 Inches Deep
Grape hyacinths like company, but snowdrops prefer to naturalize quietly under trees.
Plant bulbs about 3 inches deep, pointed tip up, in rich, well-drained soil with compost worked in. Space them 3 to 4 inches apart for good clumping. Water right after planting, then add a light 1-inch mulch layer to guard against winter swings.
Miniature Daffodils: Plant Shallower
Standard daffodils go deep, but their miniature cousins want a lighter touch. Plant these small bulbs 2 to 3 inches deep, tip up, in loose, well-drained soil enriched with compost.
Space them 4 to 6 inches apart for clumping drifts. Water in immediately, mulch lightly, and let foliage yellow fully before removing it.
Small Alliums: Follow Three-times Rule
Miniature daffodils go shallow, but small alliums play by their own rule: the three-times rule. Measure bulb height, then plant three times that depth, pointed end upward.
Space bulbs 3 inches apart in well-drained soil. Water thoroughly after planting to settle soil around roots, and use a bulb planter for consistent, evenly measured holes.
Match Planting Time to USDA Zone

Depth only tells half the story; timing finishes it. Your planting window shifts depending on where you garden, since soil temperatures cool at different rates across the country. Here’s how the schedule breaks down by USDA zone.
Zones 3–4: Early to Mid-September
If you garden in USDA zones 3 to 4, don’t wait around: early to mid-September is your window.
Soil at 4 to 8 inches deep should feel cool, not warm, so roots can establish before frost hits.
Plant into dry, workable soil, water deeply afterward, and add 2-3 inches of mulch to lock in moisture through early winter.
Zone 5: Late September to Mid-October
When autumn nights turn crisp, Zone 5 gardeners get a wider window: late September through mid-October. Aim for soil around 45–60°F, ideal for root growth.
Test soil pH (6.0–7.0 works best), work in compost, and space bulbs three widths apart. Water thoroughly after planting, then mulch 2–3 inches deep once temperatures cool further.
Zone 6: Plant During October
One month makes all the difference in Zone 6: October is your planting window, once soil cools but before hard freezes hit.
Prep well-drained soil, then follow this bulb depth guide:
- Tulips: 6–8"
- Daffodils: 5–7"
- Hyacinths: 4–6"
- Crocuses: 3–4"
Water immediately, mulch 2–3 inches, and mark each area before the ground freezes.
Zone 7: Late October to Mid-November
Zone 7 gardeners get a longer runway than their Zone 6 neighbors: late October to mid-November, right as soil temps settle into that 50-60°F sweet spot.
| Bulb Type | Planting Depth |
|---|---|
| Tulips | 6-8" |
| Daffodils | 5-7" |
| Hyacinths | 4-6" |
| Crocuses | 3-4" |
Water right after planting, mulch 2-3 inches, and add wire mesh if rodents are a problem.
Zones 8–11: Pre-chill 12–16 Weeks
No real winter? No problem. If you garden in USDA zone 8 to 11, fake one.
Chill bulbs 12-16 weeks at 35-45°F, away from ethylene-producing fruit.
- Tricks nature into believing frost happened
- Rewards patience with stronger spring blooms
- Protects tender roots from warm-soil rot
- Turns your fridge into a mini winter
Plant right after chilling, once fall temperatures finally cooperate.
Prepare Well-Drained Soil Before Digging

Good timing only pays off if your bulbs land in soil that drains well. Wet, compacted ground rots bulbs before they ever get a chance to root. Here’s how to get your soil ready before you pick up the trowel.
Choose a Well-drained Planting Site
Bulbs rot fast in soggy ground. Pick a spot where water never pools after rain, ideally with a gentle slope.
Check soil texture: sandy loam drains better than heavy clay. No slope? Build a raised bed instead.
Test drainage by digging a hole, filling it with water, and timing how fast it disappears.
Mix Compost Into Garden Soil
Good drainage starts with what you mix in, not just where you dig. Mix compost at a 1:2 or 1:3 ratio with native soil, working it 6 to 8 inches deep.
This organic matter boosts microbial activity, buffers pH, and balances moisture retention, sandy soils hold water better, clay drains faster. Nutrients release slowly over months, feeding roots long after planting.
Improve Drainage in Heavy Soil
Clay soil holds onto water like a stubborn houseguest, so bulbs need help draining before they rot.
- Work in 2–3 inches of coarse sand or grit to open pore spaces
- Add finished compost into the top 6–8 inches for better structure
- Build a raised bed 6–12 inches high with a gravel base and landscape fabric
These fixes keep roots breathing, not soaking.
Avoid Soggy or Compacted Areas
Squeeze a handful of soil before you plant. If it clumps into a ball and stays that way, skip working that spot today — wet ground compacts fast underfoot and under garden tools.
Dry conditions work best for digging. Waterlogged, compacted patches choke root growth and invite rot, so wait a day or two until the site crumbles loosely in your hand.
Loosen Soil Below Planting Depth
Once the site crumbles right, grab a garden fork and work 6 to 10 inches down—past your bulb depth. This breaks compaction, boosting root zone aeration and moisture drainage.
- Easier root penetration
- Faster water movement
- Better nutrient uptake
- Fewer rot problems
Mix in organic matter as you go. Consistent depth targeting here sets up everything that follows.
Dig and Fill Each Hole Correctly
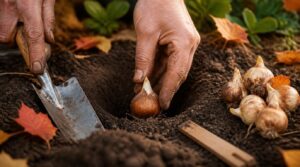
Once you’ve measured your depth and prepped the soil, the digging itself is where good technique really pays off. A few small habits, done right at this stage, set your bulbs up to root well and bloom on schedule. Here’s how to dig, place, and fill each hole so nothing gets left to chance.
Dig Holes to Measured Depth
A shallow hole is the top cause of weak spring blooms. Once you’ve measured bulb height and tripled it, dig holes to that exact depth, keeping the bottom level and firm so bulbs won’t tilt. Use a garden trowel with depth marks for accuracy.
Backfill loosely first, since soil settles, then recheck depth before placing bulbs in.
Set Bulbs on Firm Soil
Once your hole is dug to depth, don’t just drop the bulb in and walk away. Press it gently onto firm soil so the base plate makes solid contact—firm soil benefits include better soil stability, reliable bulb support, and even emergence come spring. Loose, fluffy soil invites tilting, which throws off your whole fall bulb planting effort.
Backfill Without Leaving Air Pockets
Once the bulb sits on firm soil, fill the hole in thin lifts, not one dump. Water lightly after each layer to settle grains and erase gaps. For clay, break up clods first; sandy soil, moisten slightly. Firm each lift before adding the next, so no hollow spots form near the base or crown.
Avoid Pressing Bulbs Too Hard
Squeezing a bulb into place can crack its neck or bruise the basal plate, the very spot roots emerge from. Use gentle contact, not force.
- Press only with your hand, never a tool
- Let soil cradle, not compress, the bulb
- Skip twisting or shoving into uneven soil
- Recheck upright position before backfilling further
Water to Settle Loose Soil
Think of water as the glue that locks bulbs into place. Pour it on gently, over 10 to 20 minutes, so soil settles without crusting or trapping air pockets.
| Soil Type | Watering Style | Settling Time |
|---|---|---|
| Sandy | Light soak | Quick |
| Loam | Steady soak | Moderate |
| Clay | Repeated light passes | Slower |
Avoid pooling — it invites waterlogging and delays emergence.
Orient and Space Bulbs Properly

Once your holes are dug, orientation and spacing decide whether your bulbs thrive or struggle come spring. A bulb planted upside down or crowded too close to its neighbors won’t perform the way you expect, even in perfect soil.
Here’s exactly how to position and space each bulb so your bed grows in strong and even.
Place Pointed Tips Facing Upward
Get this wrong, and your daffodils sprout sideways instead of up.
Pointy end up, always. This upright growth direction helps proper energy flow alignment, so shoots push straight toward the surface.
Before dropping any bulb in, check for:
- A visible point or tip
- A flatter, wider base
- No obvious growth eyes elsewhere
That’s your visual tip guidance for accurate bulb tip placement in every hole you dig.
Set Flat Basal Plates Downward
Once the tip points up, check the other end. That flat basal plate needs firm, downward soil contact for steady moisture retention and even root growth.
Downward placement stabilizes bulbs, guards against drying, and keeps soil temperature consistent through the fall planting window — small details that make a real difference at proper bulb planting depth across every USDA zone.
Space Bulbs Three Widths Apart
With basal plates settled, turn to spacing. Space bulbs three widths apart, measuring across each bulb’s widest point, not just guessing by eye.
This gap curbs disease spread, gives roots room, and lets foliage develop without shading neighbors. Works well in mixed borders, too. After planting, recheck spacing once soil settles from fall rains — a quick walk-through confirms your bulb spacing held through the season.
Space Hyacinths at Least Three Inches
Hyacinths need a bit more elbow room than most fall bulbs. Space them at least 3 inches apart — some growers push to 4-6 for fuller beds.
Good air circulation around hyacinths prevents rot in damp soil. Wider spacing also helps denser blooms design-wise.
- Measure bulb width first
- Add 3 inches minimum
- Adjust for bed density
- Check soil drainage
- Recheck after settling
Space Crocuses Three Inches Apart
Crocuses need less room than hyacinths but reward the same care. Space bulbs three inches apart for good clumping and naturalizing under trees.
| Bulb | Spacing | Depth |
|---|---|---|
| Crocus | 3 in | 3-4 in |
| Hyacinth | 3+ in | 4-6 in |
| Snowdrop | 3 in | 3 in |
Deer-resistant and low-fuss, crocuses fit any fall bulb planting plan after solid soil preparation.
Choose Tools for Consistent Planting Depth

Eyeballing depth works fine until you’re forty bulbs in and your arm forgets what six inches feels like. The right tool keeps every hole honest, whether you’re planting a few or a few hundred. Here are some options worth trying.
Eyeballing bulb depth works fine until your arm forgets what six inches feels like
Use a Marked Hand Trowel
Guessing depth wastes bulbs. A marked hand trowel shows soil depth right on the blade, so you’re not eyeballing anything when you plant bulbs this fall.
- No more damaged roots from guessing too deep
- No more frost-heaved bulbs from planting too shallow
- Confidence that every hole matches, hole after hole
Look for an ergonomic handle design for comfort, and clean the blade often so depth marks stay legible.
Try Flora Guard Bulb Planter
Twisting instead of stomping changes everything. The Flora Guard Bulb Planter uses a gear bottom for easy digging into clay, loam, or sandy soil, with a depth marker for precision.
Its ergonomic handle and rust resistant steel body hold up through a full afternoon of fall bulb planting, cutting the guesswork out of soil depth entirely.
Use Planters for Individual Holes
When one bed holds tulips, daffodils, and crocuses together, a bulb planter with individual holes keeps each species at its own correct depth.
Benefits include:
- Independent depth per hole
- Hole labeling system for mixed beds
- Root crowding prevention
- Batch planting efficiency across zones
- Easy maintenance hole access later
Use Augers for Mass Planting
Planting 200 tulips by hand? Your back will remind you for days.
A cordless auger with a 1.5-inch bit drills up to 40 holes per minute, using a depth control collar set to two-to-three times bulb height. Follow a guide string for spacing alignment, and loosen compacted soil first for clean, uniform holes.
Check Every Hole Before Planting
A rushed hole ruins a season’s bloom. Before you drop a single bulb, run a quick hole depth verification, check for uniform hole width, and press the sides for a soil firmness check. Then do an air pocket test and confirm crown depth.
- Uneven depths mean patchy, disappointing blooms
- Air pockets starve roots of contact
- Loose sides invite bulbs to tip
- Skipped checks waste your hard work
- Consistency rewards you every single spring
Avoid Planting Bulbs Too Deep or Shallow
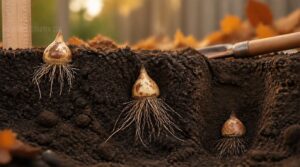
Even careful measuring can go wrong once the bulb hits the ground. A few inches too deep or too shallow, and your bulbs pay the price come spring. Here’s what happens when depth misses the mark, and how to catch it in time.
Deep Planting Can Delay Emergence
Can bulbs be planted too deep? Yes—extra soil slows root development, buffers temperature, and delays sprouting. Coleoptile vulnerability rises too.
| Depth Issue | Effect | Result |
|---|---|---|
| Excess soil | Soil moisture impact | Slower emergence |
| Cool subsoil | Temperature buffering | Delayed sprouting |
| Equipment accuracy influence | Uneven holes | Inconsistent Fall Bulb Planting |
Stick to two-to-three times their depth guidelines for reliable results.
Shallow Bulbs Risk Frost Heaving
Going too shallow causes its own headaches. Repeated freeze-thaw cycles trigger frost heaving, pushing crowns upward until tops sit exposed to cold and drying wind.
Wet, poorly drained soil worsens this by forming ice lenses beneath bulbs. Sticking to two-to-three times their depth and mulching once the ground freezes keeps bulbs stable through winter, whatever your USDA zone.
Exposed Bulbs Attract Hungry Pests
Frost heaving isn’t the only risk of a shallow hole. Exposed crowns invite squirrels, chipmunks, and other rodents hunting an easy meal, so treat proper depth as pest control, not just cold protection.
- Bury bulbs at two-to-three times their depth
- Skip surface fertilizer that draws digging animals
- Tamp soil firmly to discourage rodent access
- Add mesh for extra squirrel deterrent
Replant Before The Ground Freezes
Timing matters as much as depth. Aim to finish planting bulbs in the fall about six weeks before your first hard freeze, giving roots time to establish before soil locks up.
Match this window to your USDA zone, since cold stratification and pre-chill periods vary regionally.
Once ground freezes solid, digging risks root damage, so don’t delay past that point for frost heave prevention.
Recheck Depth After Soil Settles
Once the ground’s frozen, your job isn’t quite done. Soil Settling Effects can shift bulbs after rain or irrigation, lowering depth by 1-2 cm in heavy soil.
Recheck depth 1-2 weeks after planting:
- Check multiple holes, not just one
- Firm soil gently to avoid air pockets
- Note moisture-driven shifts
- Record adjustments for next season’s garden timing
Water, Mulch, and Protect Planted Bulbs

Getting the depth right is only half the job. Once your bulbs are tucked in, a few quick follow-up steps make sure they actually take root and survive the winter ahead. Here’s what to do in the hours and weeks right after planting.
Water Immediately After Planting
Don’t skip this step. Once you plant bulbs, give them a deep soak right away, a slow trickle for 15-20 minutes settles soil and closes air pockets around roots.
Morning irrigation works best in warm fall weather. Check soil moisture after two to three days; water again if the top inch feels dry. This post planting hydration jumpstarts bulb aftercare.
Apply Two-to-three Inches of Mulch
Once the soil’s watered, spread 2 to 3 inches of mulch over the bed. Shredded leaves or bark chips work well; they insulate soil, conserve moisture, and suppress weeds as fall turns to winter.
Keep mulch 2 inches from stems to prevent rot. Check depth after heavy rain, and top it off if it settles thin.
Add Bulb Food Only if Needed
Before reaching for the bag, check your soil test results. Bulbs pack enough stored energy for their first bloom, so fertilizer isn’t automatic. If phosphorus is genuinely low, work a slow-release bulb fertilizer into the hole. Otherwise, skip it. Rich, organic soil rarely needs supplementing. If you do fertilize, use a balanced fertilizer at the labeled rate to prevent nutrient burn.
Install Wire Mesh Against Rodents
Squirrels and voles love freshly turned earth almost as much as you do.
Wire mesh buried 15 cm deep and pinned with stakes every 30 cm gives lasting rodent protection. Choose galvanized or stainless mesh with 6–12 mm openings for a truly rodent resistant barrier that outlasts a decade in damp soil.**
Mark Each Planted Bulb Area
Come spring, will you remember exactly where every bulb went? Use stake color coding—one hue per bulb type—plus soil paint markers or biodegradable flags at bed edges.
| Marker | Best For | Notes |
|---|---|---|
| Stakes | Zone mapping | Meets contrast standards |
| Paint | Quick spotting | Fades seasonally |
| Flags | Bloom timing | Removable, first year |
Recheck during seasonal maintenance checks after soil settles.
Frequently Asked Questions (FAQs)
Is it too early to plant fall bulbs?
Like jumping into a pool before checking the temperature, planting too soon invites trouble. Wait until soil temperatures cool into the 60s, usually September in northern USDA zones, to avoid rot and support strong root development before frost.
What happens if bulbs are not planted deep enough?
Shallow bulbs face frost damage, root instability, and poor moisture regulation. Growth stalls, flowering delays, and pests target exposed bulbs.
Plant at two-to-three times their depth, matching your USDA zone’s timing, so bulbs break dormancy properly and root before hard freezes hit.
What are the best flower bulbs to plant in the fall?
Funny how the "best" bulbs are the ones you barely have to think about: tulip bulbs, daffodil bulbs, crocus bulbs, snowdrops, and allium bulbs, prized for deer resistance, naturalizing ease, and reliable spring color combinations.
How deep do tulip bulbs need to be planted in the fall?
Plant tulip bulbs 6 to 8 inches deep in fall, in well-drained soil, adjusting depth across USDA zones for proper frost protection, moisture retention, and root development—deer resistance improves too when bulbs sit deep enough to discourage digging.
Which fall bulbs are naturally resistant to deer?
Daffodils, alliums, hyacinths, and snowdrops top the deer-resistant list. Their lycorine and calcium oxalate make bulbs and foliage bitter or toxic, while grape hyacinths add extra coverage. Skip tulips in deer-prone yards; they’re a favorite snack.
How should I store bulbs before planting them?
Bulbs aren’t fine wine; they don’t improve with age in a dark closet. Dry them 1–2 weeks, then store in ventilated mesh bags somewhere cool (32-50°F) and dry, away from ethylene-producing fruit, until planting time.
What should I look for when buying bulbs?
Choose firm, plump bulbs free of mold or soft spots, sized appropriately for your USDA Hardiness Zone.
Favor deer-resistant, squirrel-resistant, such as daffodils or perennial bulbs like daffodils or alliums, and confirm proper storage conditions before planting for reliable, healthy blooms.
Is it okay to fertilize bulbs at planting time?
Yes, especially in nutrient poor soil. Work bone meal or slow-release bulb fertilizer into the top layer for phosphorus root growth, watering in after. Avoid nitrogen burn by skipping high-nitrogen blends at planting time.
How long should foliage stay after bulbs bloom?
Messy leaves aren’t a mistake, they’re energy storage in progress. Let foliage yellow and flop on its own, usually 4 to 12 weeks post-bloom depending on species, before you deadhead or tidy the bed.
Conclusion
A bulb is a promise buried in the dark, waiting for the right depth to keep it safe until spring calls it upward. That’s the heart of how deep to plant fall flower bulbs: give each one enough soil to shield it, not so much that it forgets which way is up.
Measure twice, plant once, and let winter do its quiet work. Come April, the ground keeps its promise.
- https://www.awin1.com/awclick.php?awinmid=67240&awinaffid=103504&clickref=homesandgardens-us-3198998859530186448&p=https%3A%2F%2Fwww.naturehills.com%2Fflower-bulbs%2Fflower-bulb-varieties%2Fdaffodil-bulbs
- https://click.linksynergy.com/deeplink?id=kXQk6%2AivFEQ&mid=36039&u1=homesandgardens-us-1113836842255324250&murl=https%3A%2F%2Fwww.burpee.com%2Fcatalogsearch%2Fresult%2F%3Fq%3DGladiolus