This site is supported by our readers. We may earn a commission, at no cost to you, if you purchase through links.

A single 5-gallon bucket can produce enough cherry tomatoes to stock your kitchen all summer—no yard, no tiller, no raised bed required. Container vegetable gardening has quietly become the most practical way to grow food in tight spaces, whether that’s a third-floor balcony, a concrete patio, or a sunny kitchen windowsill.
The catch is that pots behave nothing like garden beds, and most beginner failures trace back to a handful of fixable mistakes around sunlight, soil, and water.
Get those fundamentals right, and containers can actually outperform ground gardens by letting you control every variable. This guide walks you through each step, from choosing the right pot to harvesting your first crop.
Table Of Contents
- Key Takeaways
- Set Up Your Container Garden
- Choose Pots and Drainage
- Build The Right Potting Mix
- Pick Vegetables for Containers
- Start With Beginner-friendly Crops Like Lettuce and Herbs
- Grow Determinate or Dwarf Tomato Varieties
- Choose Bush Beans, Peppers, and Compact Cucumbers
- Plant Carrots and Other Shallow-rooted Crops in Smaller Pots
- Try Compact Kale, Spinach, and Basil for Steady Harvests
- Follow Spacing Guidelines for Single-plant and Multi-plant Pots
- Water, Feed, and Support Plants
- Water When The Top Inch of Soil Dries Out
- Water in The Morning to Reduce Evaporation and Disease
- Use Saucers, Drip Lines, or Ollas for Even Moisture
- Install Cages, Stakes, or Trellises at Planting Time
- Watch for Aphids, Then Treat With Water Spray or Neem Oil
- Harvest Often, Thin Crowded Seedlings, and Rotate Crops Yearly
- Top 5 Container Gardening Products
- Frequently Asked Questions (FAQs)
- What vegetables do not do well in containers?
- What vegetables grow well in a container garden?
- What vegetables grow best in container gardens?
- Can container gardens work in winter months?
- How often should containers be replaced yearly?
- What fertilizer schedule works best for containers?
- Can you grow perennial vegetables in containers?
- How do you prevent containers from overheating?
- Can containers be reused for multiple seasons?
- What winter storage options work for containers?
- Conclusion
Key Takeaways
- A 5-gallon pot with a soilless mix of coir, perlite, and vermiculite gives tomatoes and peppers everything they need to outperform a traditional garden bed.
- Matching your crop to the right sunlight window—6 to 8 hours for fruiting plants, 4 to 6 hours for leafy greens—is the single most important placement decision you’ll make.
- Watering in the morning, checking soil moisture daily, and feeding with liquid fertilizer every two weeks keeps container plants producing all season without burning out.
- Beginners should start with lettuce, herbs, or bush beans in 1- to 2-gallon pots, then scale up once they’ve got the basics of drainage, spacing, and harvest timing down.
Set Up Your Container Garden

Before your first seed goes into soil, a few setup decisions will shape everything that grows after. Where you place your containers, how you handle wind, and how close you stay to a water source all matter more than most beginners expect.
Smart container placement for herb gardens can mean the difference between thriving plants and a frustrating first season.
Here’s what to nail down first.
Match Crops to 6–8 Hours of Sun
Sun-Intensive Crops like tomatoes, peppers, and cucumbers need 6–8 hours of full sun daily to actually produce fruit worth harvesting.
Partial Shade Greens—lettuce, spinach, kale, Swiss chard—hit their stride with just 4–6 hours, making them ideal for trickier spots.
Heat-Resistant Herbs like basil handle strong sun exposure requirements well, too.
Matching crops to your balcony’s Seasonal Light Exposure is the first real decision you’ll make. Refer to the minimum sunlight requirements for precise guidance.
Pick South- or West-facing Spots for Best Light
Once you know your crops’ sunlight requirements for container plants, placement becomes your next big move. A south-facing spot delivers full sun from morning through afternoon — ideal for tomatoes and peppers. West-facing areas kick in strongly after 2 p.m., boosting ripening beautifully.
Quick sun path analysis helps you claim the best spot:
- South exposure maximizes daily light hours
- West exposure helps afternoon heat mitigation naturally
- Reflective mulch use bounces extra light onto lower leaves
- Seasonal shading strategies protect plants during summer peaks
Shield Pots From Wind and Heat Stress
Wind and heat can quietly undo all your careful placement work. That’s why microclimate optimization matters as much as sunlight requirements for container plants.
Use these strategies together:
| Problem | Solution | Benefit |
|---|---|---|
| Strong gusts | Windbreak Materials like lattice or grouped pots | Cuts wind speed ~40% |
| Overheated roots | Reflective Pot Coatings or light-colored containers | Lowers soil temps noticeably |
| Scorching afternoon sun | Shade Cloth Placement at 30–50% reduction | Protects foliage without blocking growth |
| Heat buildup underfoot | Thermal Insulating Pads beneath containers | Reduces heat transfer from surfaces |
| Dry air stress | Evaporative Cooling Trays with moist pebbles | Raises humidity around plants |
Tuck pots into part shade cooler spots during peak heat, and you’ll keep temperature regulation working in your favor all season.
Keep Containers Close to a Water Source
Once you’ve handled heat and wind, water access is your next power move.
Place containers within 6–12 inches of your source—proximity drip reduction is real. A gravity-fed irrigation setup or drip irrigation line saves daily effort, while shelf-mounted containers keep pots at hose height for better ergonomics.
Use watering schedule labels so nothing gets forgotten. Self-watering containers and ollas handle the rest.
Group Pots to Create Helpful Microclimates
When you group pots together, something surprisingly useful happens — the cluster acts like its own small ecosystem.
Thermal Mass Pairing darker and lighter pots moderates surface heat, while Shade Staggering taller plants behind shorter ones protects leafy greens during peak hours.
Cluster Airflow Management keeps outer pots breezy without battering inner ones.
Moisture Capillary Transfer between neighbors reduces watering frequency, and Companion Plant Zones draw beneficial insects across every pot.
Choose Pots and Drainage
The container you choose does more than hold dirt—it shapes how your plants grow, how often you water, and how much work you’re in for. Not every pot suits every vegetable, and the material matters just as much as the size.
Here’s what you need to know before you buy.
Compare Plastic, Fabric, and Terra-cotta Containers

Your container material shapes how much you water, how often you move pots, and how long everything lasts. Selecting Appropriate Container Materials comes down to three real choices:
- Plastic pots — lightweight (1–2 lbs), great water retention, but heat up fast in the sun
- Fabric pots — excellent temperature regulation, air‑prune roots, needs daily watering
- Terracotta pots — classic aesthetic appeal, natural breathability, but heavy and fragile
- Weight & Mobility — plastic wins hands‑down for rearranging your setup
- Durability & Longevity — plastic outlasts terracotta in freezing climates; fabric folds flat for storage
Material selection for container durability isn’t complicated — just match the material to your climate and lifestyle.
Match Pot Size to Each Vegetable’s Roots

Think of your pot as a root’s home — too cramped, and growth stalls fast.
Root depth guidelines matter here: shallow-rooted crops like lettuce need just 6–8 inches, while deeper roots need 12–16 inches.
Soil volume ratios and lateral spread limits shape how well each plant feeds itself.
Following container size guidelines for different vegetables gives every root the air-pruning benefits and pot diameter recommendations it needs.
Use 5-gallon Pots for Tomatoes and Squash

For tomatoes and squash, 5 gallons is your sweet spot. That soil mass gives you real root space optimization and natural soil heat buffering, keeping roots cooler on scorching days.
One plant per pot, elevated slightly for drainage, manages fruit load management without stress.
Stick to a clear nutrient release schedule — slow-release at planting, liquid feed every two weeks — and your container size works hard for you.
Use 1-gallon Pots for Lettuce and Spinach

Lettuce and spinach don’t need much room — a 1-gallon pot gives them just enough soil volume to thrive without wasting space. That compact pot size keeps temperature fluctuation low and maintains consistent leaf density from root to tip. Nutrient release stays efficient too, since there’s less soil to saturate.
- Plant 4–6 lettuce heads or 2–3 spinach plants per pot
- Use a coir-perlite mix for light, breathable soil
- Try companion planting basil alongside spinach for pest balance
- Water daily in heat; soil dries fast at this volume
- Harvest outer leaves first to extend your picking window
Make Sure Every Container Has Drainage Holes

drainage holes mean dead roots — it’s that simple.
For managing drainage and moisture in pots, Hole Placement matters: position openings along the bottom center for gravity-driven soil drainage. Follow Hole Size Guidelines of ¼ to ½ inch, and use a Hole Count Strategy of 3–6 holes for mid-size pots.
Preventing Clogs means checking regularly for root bits.
Need holes? DIY Drilling Tips: use a sharp bit for smooth edges that won’t damage roots.
Check Balcony Weight Limits Before Filling Pots

Good drainage protects your roots, but load limits protect your whole setup.
Most residential balconies handle roughly 255–408 kg per square meter, so pot weight adds up fast.
A single 5-gallon tomato container can hit 27 kg when watered.
Prioritize center placement for weight distribution and structural safety, and use a container size calculator or vegetable container size tool to plan your lightweight potting mix smartly.
Build The Right Potting Mix

What goes into your containers matters just as much as what grows in them.
The right potting mix keeps roots healthy, drains well, and holds just enough moisture without drowning your plants.
Here’s what you need to build one that works.
Skip Garden Soil in Containers
Garden soil might seem like the obvious choice, but it’s actually the wrong one for containers. In pots, it compacts hard, suffocates roots, and holds too much water—a recipe for rot.
That’s why a soilless potting mix is non‑negotiable. Skip the garden bed and avoid:
- Dense soil that cuts off root aeration
- Heavy clumps that block drainage holes
- Unsterilized dirt carrying hidden pests or disease
Mix Peat or Coconut Coir, Perlite, and Vermiculite
Once you’ve ditched garden soil, the right soilless potting mix gives your containers a real foundation. Blend equal parts coconut coir, perlite, and vermiculite—a sustainable substrate that nails pH neutrality right out of the gate.
Coir manages moisture buffering, perlite keeps root aeration strong, and vermiculite holds nutrients close. Together, this soil mix for container gardening stays light enough for weight optimization on any balcony.
Add Extra Perlite for Improved Drainage
That coir‑perlite‑vermiculite base is solid, but bumping perlite up to 20–30% of your potting mix takes soil aeration benefits to the next level. Granule size selection matters too—coarser perlite moves water faster through larger containers.
This perlite ratio optimization keeps drainage holes doing their job, preventing root rot before it starts, while still balancing moisture retention so roots never dry out completely.
Start With Slow-release Fertilizer at Planting
Before your first seedling goes in, mix a slow-release granular fertilizer into your potting mix using proper Buffer Zone Application — keep granules about an inch from tender roots to guarantee Salt Accumulation Control.
Root Zone Integration means spreading evenly through the top two inches, then watering to activate.
Choose a formula with Micronutrient Inclusion and a Release Duration Selection matching your crop’s growth period.
Feed Again Twice Per Month During Growth
Once your slow-release fertilizer starts fading around week six, your fertilization schedule needs a boost. Nail your Nutrient Timing with these four Growth Phase Adjustments:
- Feed every two weeks with a balanced fertilizer at half-strength for Fertilizer Dilution Rate control.
- Run Soil Moisture Checks before each feeding.
- Flush pots monthly for Salt Buildup Prevention.
- Switch to organic fertilizer when fruiting begins.
Use Mulch or Double-potting to Hold Moisture
Even a thin layer of the right material can stretch your watering schedule by days. Your Mulch Material Choices matter — straw, pine bark, and shredded leaves all work as a Moisture Buffer Layer across your soil mix for container gardening.
| Method | Key Benefit |
|---|---|
| Mulch Depth Guidelines (2–3 in) | Cuts evaporation, stabilizes temperature |
| Sphagnum Moss Layer | Transfers moisture steadily between pots |
| Double Potting Benefits | Extends watering intervals 20–40% |
| Moisture retention top-dress | Reduces daily soil checks needed |
Pick Vegetables for Containers

Not every vegetable plays well with containers, but plenty of them absolutely thrive. Picking the right crops from the start is what separates a frustrating season from a genuinely productive one.
Here’s where to put your energy first.
Start With Beginner-friendly Crops Like Lettuce and Herbs
Lettuce and herbs are the perfect entry point for beginner-friendly vegetable selections in container gardening. They’re forgiving, fast-growing, and practically teach you the basics — soil moisture, seed starting, harvest timing — without overwhelming you.
- Lettuce – ready in 45–60 days, ideal for succession planting
- Basil – pairs beautifully with tomatoes for companion planting
- Chives – thrives in small pots, harvest anytime
Grow Determinate or Dwarf Tomato Varieties
Tomatoes in containers aren’t a compromise — they’re a strategy. Determinate tomatoes grow to 3–4 feet, then stop, concentrating their energy into one solid harvest window. Dwarf varieties push that further, staying under 4 feet while still producing full-sized fruit with strong lodging resistance.
Determinate tomatoes are not a container compromise — they are a strategy, built to stop growing and start producing
| Variety | Container Size | Key Trait |
|---|---|---|
| Patio Choice | 5-gallon | 10 oz fruits, compact growth habit |
| Bush Early Girl | 5-gallon | Ready in 55 days, determinate timing |
| Tiny Tim | 1–2 gallons | Cherry-sized, under 12 inches tall |
| Red Robin | 1-gallon | Dwarf fruit size, sweet flavor |
| Roma VF | 5-gallon fabric | Paste type, nutrient intensity friendly |
Choose Bush Beans, Peppers, and Compact Cucumbers
Bush beans, peppers, and dwarf cucumbers are three of the hardest-working crops you can grow in containers.
For bean variety selection, bush types mature in 50–60 days and stay under 2 feet tall — perfect for a 2-gallon pot.
Peppers, regardless of pepper heat levels, thrive in 5-gallon containers with full sun.
Cucumber trellis options keep compact varieties like Spacemaster productive, with harvest timing strategies focused on picking every few days.
Plant Carrots and Other Shallow-rooted Crops in Smaller Pots
Carrots need at least 8–12 inches of depth for straight root development, so skip shallow bowls and grab a 1-gallon pot with good pot drainage.
Varieties like Little Finger or Napoli fit perfectly.
Mix in perlite for soil aeration and coir for moisture retention.
Thin seedlings to 2–3 inches apart for proper seed spacing, and try radishes nearby as a companion planting trick.
Try Compact Kale, Spinach, and Basil for Steady Harvests
If root crops feel like patience training, leafy greens are your reward. A single 10–12 inch pot holds 2–3 compact kale plants or 2 spinach plants, ready in 30–50 days.
Practice leaf rotation — harvesting outer leaves keeps central growth pushing forward.
For bolting control in heat, shade netting helps.
Tuck basil at the pot’s edge; that pot temperature buffer keeps all three thriving longer.
Follow Spacing Guidelines for Single-plant and Multi-plant Pots
Spacing is where most balcony gardeners quietly go wrong. Once your greens are thriving, it’s tempting to squeeze in one more pot — but pot diameter spacing and center-to-center distance matter more than you’d think.
- Single tomato or pepper pots need 18–24 inches of center-to-center distance for proper airflow gap management.
- Lettuce in 1-gallon containers spaces comfortably at 6–8 inches apart.
- Row layout planning works best with 12–18 inches between pot centers for consistent light and airflow.
- Companion plant pairing — like basil beside tomatoes — thrives when each plant holds a 4-inch soil radius minimum.
- Container capacity and container size guidelines for different vegetables directly affect how well dwarf and compact varieties perform.
Water, Feed, and Support Plants

Getting your plants to the finish line is really about three things: water, food, and structure. Once you’ve got the right crops in the right pots, how you care for them daily makes all the difference.
Here’s what to stay on top of to keep your container garden producing all season long.
Water When The Top Inch of Soil Dries Out
Your finger is your best tool here. Push it about an inch into the soil—if it feels dry, it’s time to water.
This top-inch moisture indicator keeps your watering schedule honest and facilitates root zone aeration, giving roots the oxygen they need between cycles.
Consistent soil moisture management means checking daily, especially in warm weather, since containers dry out fast.
Water in The Morning to Reduce Evaporation and Disease
Morning irrigation timing makes a real difference in your container garden. Watering at dawn lets the soil absorb moisture before heat peaks, cutting evaporation loss substantially.
It’s also your best disease risk mitigation strategy—foliage dry time increases when leaves aren’t sitting wet overnight, reducing fungal threats like powdery mildew. Dawn soil moisture gives roots a head start on a full day of growth.
Use Saucers, Drip Lines, or Ollas for Even Moisture
Three tools can take the guesswork out of soil moisture management: saucers, drip emitters, and ollas.
Saucers act as a small reservoir beneath your pots, slowing evaporation reduction at the drainage hole.
Drip system emitters deliver water straight to the root zone with minimal waste.
For olla positioning, bury a porous clay pot 2–3 feet apart, and implementing ollas for consistent moisture in container gardening becomes almost simple.
Install Cages, Stakes, or Trellises at Planting Time
Don’t wait until your tomato is flopping over the rim—install cages, stakes, or a trellis the same day you plant.
Stake depth guidelines, drive bamboo stakes 12–18 inches deep, keeping them 2–3 inches from the stem.
Cage material choice matters too; pick corrosion-resistant materials for long-term use.
Pre-assembly benefits are real: build lightweight frames beforehand, so trellis positioning and supporting and trellising container plants become easy, maximizing vertical space from day one.
Watch for Aphids, Then Treat With Water Spray or Neem Oil
Aphids are sneaky — they hide on leaf undersides and multiply quickly. Make Leaf Underside Inspection part of your weekly Aphid Scouting routine.
Spot a cluster? Start with a strong water jet in the morning — Water Jet Timing matters for drying leaves.
For bigger infestations, mix a 2–3% Neem Oil Dilution and spray every 7–14 days. Insecticidal soap works too.
Harvest Often, Thin Crowded Seedlings, and Rotate Crops Yearly
Frequent Harvests are your secret weapon — pick lettuce, beans, and tomatoes every two to three days to keep plants producing and prevent overripening.
Seedling Thinning is just as critical: crowded roots compete and lose. Pull weaker seedlings early so the strongest thrive.
Annual Crop Rotation between seasons promotes Disease Prevention and Continuous Yield, keeping your containers healthy and your harvests coming.
Top 5 Container Gardening Products
The right gear makes container gardening so much easier, and a few standout products consistently deliver results worth your money. Whether you’re just starting out or ready to level up your setup, these picks cover the essentials.
Here are five products that experienced container gardeners actually reach for.
1. Gardzen Fabric Grow Bags
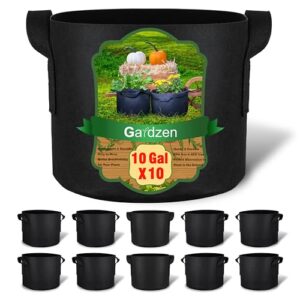
Fabric grow bags might just be the smartest upgrade you can make to a balcony garden.
The Gardzen 10-gallon bags are made from 300 g/m² BPA-free non-woven fabric that actively air-prunes roots, pushing plants to grow dense, fibrous root systems instead of circling dead ends.
Each bag drains quickly, so root rot stays off the table.
You get 10 bags for $26.99, and when the season ends, they fold flat and store in a drawer.
| Best For | Balcony and container gardeners who want healthier root development for tomatoes, peppers, or specialty crops without spending a lot. |
|---|---|
| Price | $26.99 (10-pack) |
| Material | Non-woven fabric |
| BPA Free | Yes |
| Reusable | Yes |
| Indoor Use | Yes |
| Eco-Friendly | Yes |
| Additional Features |
|
- Air-pruning fabric pushes plants to grow dense, fibrous roots instead of circling — that means stronger, more productive plants.
- Drains fast and breathes well, so overwatering and root rot are much harder to accidentally trigger.
- 10 bags for $26.99, and they fold flat at the end of the season — easy to store, easy to reuse.
- The fabric folds in on itself when you’re filling the bottom third, which makes getting the soil in there a bit of a hassle.
- Porous walls dry out faster than plastic pots, so you’ll need to water more often — especially in heat.
- Seams can start to give out after two or more years of heavy use, particularly if you’re moving them around a lot.
2. Emsco City Picker Raised Planter Box
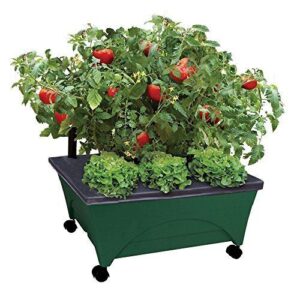
If portability matters to you, the Emsco City Picker ($42.99) earns its spot.
Four swivel casters let you chase the sun across your deck without repotting, and the built-in 2-gallon self-watering reservoir keeps roots consistently moist between fills.
An aeration screen beneath the soil layer means roots get oxygen, not just water. It’s BPA-free HDPE, UV-protected, and weighs just 5.5 pounds empty—light enough to move solo, sturdy enough to handle tomatoes, peppers, or strawberries.
| Best For | Urban gardeners with limited outdoor space who want a low-maintenance, portable growing setup for a balcony, rooftop, or small deck. |
|---|---|
| Price | $42.99 |
| Material | BPA-free HDPE |
| BPA Free | Yes |
| Reusable | Yes |
| Indoor Use | Limited |
| Eco-Friendly | Yes |
| Additional Features |
|
- Four swivel casters make it easy to follow the sun throughout the day without any repotting hassle
- The built-in 2-gallon self-watering reservoir keeps soil consistently moist, cutting down on how often you need to water
- BPA-free, UV-protected HDPE construction means it’s safe for growing food and built to handle outdoor conditions long-term
- The casters can be stiff and tough to roll, especially on uneven or rough surfaces
- In hot, exposed spots the soil can dry out faster than the reservoir can keep up, so you may still need to water manually
- Some units arrive with cosmetic damage like cracks, so it’s worth inspecting the box carefully when it shows up
3. Ynnico Self Watering Planters
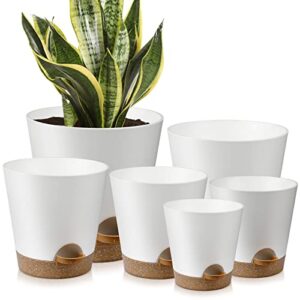
Where the City Picker manages mobility, the Ynnico Self Watering Planters ($19.97 for six) manage variety. You get six sizes—5" to 8"—so you can match each plant to the right root space without guessing.
The cotton wick system draws water up from a bottom reservoir, keeping moisture steady between your visits.
Lightweight polypropylene, built-in drainage holes, and a clean matte finish make these easy to arrange on any windowsill or shelf.
Just check the wick every few months—it can get musty and may need swapping.
| Best For | Plant lovers who want a tidy, low-maintenance setup for a mix of small to medium houseplants without spending much. |
|---|---|
| Price | $19.97 (6-pack) |
| Material | Polypropylene |
| BPA Free | Yes |
| Reusable | Yes |
| Indoor Use | Yes |
| Eco-Friendly | Yes |
| Additional Features |
|
- Six sizes in one set means you’re covered from tiny succulents to bigger leafy plants — no need to buy multiple packs.
- The bottom-wick watering system keeps soil consistently moist, so you’re not scrambling to water every other day.
- Clean matte white design fits just about any shelf, windowsill, or desk without looking out of place.
- The cotton wick can get musty after a few months and needs swapping out — a small but recurring hassle.
- No water level window, so you’re guessing when to refill the reservoir until you get a feel for it.
- The bottom tray can pop off if you pick the pot up carelessly, which gets annoying fast.
4. Harris Neem Oil Plant Spray
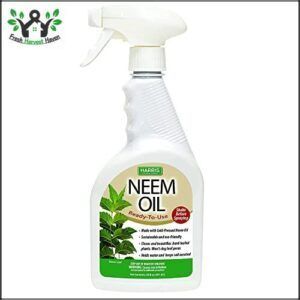
Once your plants are thriving, pests will come looking.
Harris Neem Oil Plant Spray ($14.99) is your first line of defense—cold-pressed, ready to use straight from the bottle, no mixing needed. It controls aphids, spider mites, and fungus gnats without harming your pets or beneficial insects.
Shake well, spray every 7 to 14 days in the early morning, and coat both sides of the leaves. One honest warning: the smell is strong, so crack a window if you’re working indoors.
| Best For | Plant lovers who want a safe, no-fuss pest control option that won’t harm kids, cats, or dogs. |
|---|---|
| Price | $14.99 |
| Material | Cold-pressed neem oil |
| BPA Free | Yes |
| Reusable | Yes |
| Indoor Use | Yes |
| Eco-Friendly | Yes |
| Additional Features |
|
- Ready to use straight from the bottle—no mixing, no measuring, just shake and spray
- Cold-pressed neem oil formula leaves a nice shine on leaves while keeping pests like aphids and spider mites in check
- Pet-safe and eco-friendly, so you’re not filling your home with harsh chemicals
- The smell is genuinely strong—think earthy and pungent—which can be rough in a small indoor space
- Easy to over-apply, and too much can burn delicate leaves or leave them looking greasy
- Some users find they still have pests after the first round, so repeat treatments are often needed
5. Heirloom Vegetable Garden Seeds Kit

Now that you’ve got pest control covered, it’s time to talk seeds.
The HOME GROWN Heirloom Vegetable Garden Seeds Kit ($34.99) gives you 55 non-GMO, open-pollinated varieties—over 28,000 seeds total—in double-sealed mylar packets built for long-term storage. Tomatoes, peppers, lettuce, carrots, and herbs are all in there.
It’s a solid starting point if you want variety without buying a dozen separate packets. Just check regional suitability first—not every variety thrives in every climate.
| Best For | Home gardeners and preppers who want a wide variety of heirloom seeds in one affordable, long-term storage kit. |
|---|---|
| Price | $34.99 |
| Material | Mylar packaging |
| BPA Free | Yes |
| Reusable | Yes |
| Indoor Use | Yes |
| Eco-Friendly | Yes |
| Additional Features |
|
- 55 non-GMO varieties and 28,000 seeds for serious variety at a great price
- Mylar packaging keeps seeds fresh for long-term storage and emergency prep
- Open-pollinated seeds mean you can save and replant them season after season
- Some buyers report missing seed packets in their kit
- Not every variety suits every climate, so do a little homework before planting
- Germination results can vary depending on your soil, moisture, and temperature conditions
Frequently Asked Questions (FAQs)
What vegetables do not do well in containers?
Large vines like melons, full-size squash, and sweet corn struggle most in containers. Their root systems simply outgrow any practical pot, leaving you with stressed plants and disappointing harvests.
What vegetables grow well in a container garden?
Funny enough, the best container crops are the ones that thrive on limits. Lettuce, herbs, tomatoes, peppers, bush beans, cucumbers, kale, spinach, and carrots all grow well in pots.
What vegetables grow best in container gardens?
Lettuce, herbs, tomatoes, peppers, bush beans, and compact cucumbers all thrive in containers.
Start with leafy greens and herbs if you’re new — they’re forgiving, fast, and fit in small pots easily.
Can container gardens work in winter months?
Winter? Don’t freeze up — your containers can keep producing!
Hardy greens like kale, spinach, and chard handle light frosts down to -10°C with mulch, frost blankets, and a sheltered south-facing spot.
How often should containers be replaced yearly?
Replace fabric grow bags every 1–2 seasons, plastic pots every 3–5 years, and terra cotta as soon as cracks appear. Swap out potting mix annually to keep soil fresh and disease-free.
What fertilizer schedule works best for containers?
Start with a slow-release fertilizer at planting, then add liquid feed every two weeks once plants are actively growing. Fruiting crops like tomatoes need weekly feeding at peak production.
Can you grow perennial vegetables in containers?
Yes, you can. Perennial vegetables like asparagus, rhubarb, sorrel, and perennial kale grow well in containers, returning year after year with the right pot size, soil mix, and consistent care.
How do you prevent containers from overheating?
Shade cloth dropped over pots during peak sun cuts surface temps by 10–15°F.
Light-colored or reflective mulch, fabric grow bags, and morning watering all keep roots cooler when heat builds fast.
Can containers be reused for multiple seasons?
Most containers can — and should — be reused. Thick plastic lasts 2–5 seasons, terra-cotta 5 or more, fabric bags 1– Just sanitize between seasons to keep pests and disease from carrying over.
What winter storage options work for containers?
Store containers in a sheltered spot, off the ground on pallets, with insulation panels along the walls to cut heat loss by up to 40 percent during cold spells.
Conclusion
Think of your container garden the way a chef thinks about a well-stocked pantry—everything within reach, nothing wasted. The most productive gardens aren’t always the biggest; they’re the best managed.
This container vegetable gardening guide gives you the tools to control soil, water, and light on your own terms, even with ten square feet of space.
Start with one pot, one crop, and build from there. The harvest follows the habits.