This site is supported by our readers. We may earn a commission, at no cost to you, if you purchase through links.

Most gardeners put beds to sleep in fall and don’t think twice until spring—but the soil never actually stops working.
Beneath a frozen crust, microbial communities keep cycling nutrients, structure either holds or crumbles, and whatever you do now quietly shapes what grows in March.
Dormant season garden soil health isn’t a backup task for slow weekends; it’s the foundation every spring harvest stands on.
Get the timing right, protect what’s living underground, and your beds wake up richer than when they went down.
Table Of Contents
- Key Takeaways
- Time Your Dormant Soil Care
- Clean Beds Without Disturbing Soil
- Test and Amend Winter Soil
- Protect Soil With Mulch and Covers
- Top 3 Soil Health Products
- Frequently Asked Questions (FAQs)
- How to condition garden soil after winter?
- What is the 3-hour gardening rule?
- When should you plant dormant plants?
- How do you care for a dormant plant?
- Do dormant plants need a lot of care?
- What happens if a plant goes dormant in winter?
- How does dormancy affect plants?
- When do plants come out of dormancy?
- How does winter rain affect soil nutrient leaching?
- Can beneficial microbes survive frozen soil temperatures?
- Conclusion
Key Takeaways
- Your soil keeps working all winter, so what you do in fall — testing pH, adding compost, fixing compaction — directly shapes how well your beds perform come spring.
- Timing is everything: wait until the top few inches are crumbly and thawed (not icy or soggy) before you clean, amend, or mulch your beds.
- Cover crops like hairy vetch and rye aren’t just placeholders — they fix nitrogen, prevent nutrient leaching, and build soil structure while everything else looks dormant.
- Leaving beds bare through winter invites erosion, compaction, and nutrient loss, so a 2–4 inch layer of organic mulch is the simplest insurance you can give your soil.
Time Your Dormant Soil Care

Getting the timing right is everything concerning dormant soil care. Do it too early and your soil isn’t ready; wait too long and you’ve missed your window.
Nail that sweet spot by following spring soil preparation timing and techniques before you pick up a single tool.
Here’s what to watch for so you can act at exactly the right moment.
Identifying Your Local Dormant Period
Your garden doesn’t just flip a switch in winter — it eases into dormancy based on your specific microclimate.
Use phenology observations like leaf drop and stem browning to confirm plants have truly gone dormant.
Soil temp sensors help you track when ground temperatures stay consistently below 40°F.
Combined with historical weather patterns and microclimate mapping, you’ll know exactly when dormancy begins in your beds.
Understanding winter dormancy in fruit trees can guide timing for pruning and fertilization.
Tracking First and Last Frost Dates
Once you know your dormant period, frost dates become your planning backbone.
Use Frost Date Calculators with your ZIP code to pull Historical Frost Data from 30–50 years of climate normals. Microclimate Monitoring and Frost Probability Models adjust those numbers further.
Keep a Garden Frost Journal to track actual events yearly:
- Note your first fall frost
- Record your last spring frost
- Log any microclimate surprises
Checking Soil Moisture and Plant Dormancy
Frost dates tell you when — but your soil tells you what’s actually happening. Push a moisture meter 8–12 inches down into your beds. If it reads dry, a light watering helps dormant roots stay stable.
Dawn temperature checks also reveal whether cool-season vegetables are truly dormant or just slowing down.
Watch for dormancy break indicators: swelling buds signal it’s time to shift your root zone monitoring routine.
Knowing When Beds Are Ready for Cleanup
Once your soil gives you the right cues, cleanup becomes straightforward. Press your fingers into the top 2–3 inches — your Bed Firmness Test.
If it’s crumbly and thawed, not icy or waterlogged, you’re good to go. That Thaw Depth Indicator matters more than the calendar. A healthy Surface Crust Condition means gentle raking won’t compact or damage what’s underneath.
Clean Beds Without Disturbing Soil
Once the growing season winds down, your beds need a reset — not a reckless overhaul. The goal is clearing out what doesn’t belong while leaving the soil structure exactly as it is.
Here’s how to do it right, step by step.
Removing Debris, Weeds, and Spent Crops

Think of your beds as a blank slate — what you leave behind now shapes what grows next spring. Start your fall garden cleanup by hand pulling weeds before they drop seeds, then chop spent crop residues into smaller pieces for faster breakdown.
If disease has been an issue this season, treating beds with a copper-based fungicide for vegetables before winter can help stop blight or mildew from carrying over into next year.
Practice residue segregation and tool sanitation between beds, and clear out debris cleanly without tilling. Smart weed management today means far less work later.
Composting Healthy Material Safely

Once your beds are cleared, healthy plant debris becomes your best free fertilizer. Smart composting starts with three steps:
- Balance your Green Brown Balance — equal parts coffee grounds or grass clippings with dry leaves.
- Practice Moisture Management — keep piles damp, not soggy.
- Use Aeration Techniques — turn every few days for Pathogen Prevention and Temperature Monitoring between 130–150°F.
Good organic matter builds real soil health.
Discarding Diseased Plant Matter

Diseased plants can’t go in the compost pile — not unless you’re sure it hits 130°F consistently. Bag infected material in sturdy bags, following your Municipal Disposal Guidelines for proper trash stream placement.
Always practice Tool Disinfection after handling sick plants.
Quarantine New Plants before mixing them into your beds.
| Action | Why It Matters | Example |
|---|---|---|
| Bagging Protocols | Stops spore spread | Double-bag tomato blight stems |
| Municipal Disposal | Safe pathogen removal | Check city green waste rules |
| Tool Disinfection | Prevents cross-contamination | Wipe shears with diluted bleach |
Gentle Raking and Surface Preparation

Once debris is cleared, reach for a narrow leaf rake and keep your Rake Angle Control shallow — tines just grazing the surface. This helps Soil Crust Prevention and avoids disrupting shallow roots.
Use a Surface Leveling Board to smooth uneven spots for better water distribution.
Proper Light Aeration Timing here sets up smooth Organic Matter Incorporation Techniques and soil testing steps ahead.
Test and Amend Winter Soil

Once your beds are clean, it’s time to actually look at what your soil needs — not guess. A simple test tells you exactly where your pH and nutrients stand, so every amendment you add does real work.
Here’s how to go from raw soil to a well-fed, well-structured foundation ready for spring.
Using Soil Tests for PH and Nutrients
Your soil can’t tell you what it needs — but a test can. Start with a solid sampling technique: pull from six to eight inches deep across multiple spots in the bed, then combine them.
Send it to one of the reliable soil testing labs, or use soil testing kits for quick estimates. You’ll get soil nutrient levels, pH interpretation guidance, and a clear starting point for soil testing and amendment planning.
Adjusting PH With Lime or Sulfur
Once your test results are in, the fix is straightforward.
If pH runs low, apply pelletized lime — around 40 to 60 pounds per 1,000 square feet, works well for most soils, though your Lime Rate Calculation depends on Buffer Capacity Assessment and Soil Texture Impact. Sandy beds respond faster than clay.
For high pH, Sulfur Application Timing matters: fall applications give soil bacteria all winter to work.
Always wear gloves — Safety Handling Practices aren’t optional here.
Adding Compost, Aged Manure, and Leaf Mold
Now that pH is dialed in, it’s time to feed the soil.
Spread 2–3 inches of compost — pay attention to Compost Particle Size, since finer material integrates faster.
Add well-rotted manure for solid Manure Nutrient Balance, and mix in leaf mold for its excellent Leaf Mold Moisture retention.
Work everything down 6–8 inches for proper Amendment Integration Timing and Application Depth Guidelines.
Applying Phosphorus and Potassium Amendments
Once your organic matter is in, phosphorus and potassium are next. Band Placement — setting nutrients 2–4 inches deep near roots — beats broadcasting every time.
Timing Strategies matter too: apply when soil isn’t frozen so nutrients actually move.
Run Rate Calculations from your test results, adjusting for soil type.
And always follow Environmental Safety guidelines — keep applications away from waterways.
Relieving Compaction and Improving Drainage
Once nutrients are in place, compacted soil stops them from reaching roots.
Core Aeration removes plugs 2–4 inches deep, opening channels for air and water. A Subsurface Tine breaks deeper layers.
Try Gypsum Application in clay-heavy beds, or add a Biochar Amendment to rebuild pore structure.
For persistently wet spots, French Drain Installation solves what amendments can’t — moving water out before it suffocates roots.
Protect Soil With Mulch and Covers

Once the soil is amended and ready, your next job is to give it a protective layer for the months ahead.
Mulch and cover crops do more than just sit on top — they actively work through winter to hold moisture, block erosion, and keep your soil biology humming.
Here’s how to choose and apply the right protection for your beds.
Choosing Mulch for Insulation and Moisture Retention
Not all mulch is created equal — and your choice matters more than you’d think.
For winter mulch insulation benefits, straw is breathable and affordable, making it a strong economic mulch option. Hardwood bark lasts two to four years with solid moisture retention.
Leaf mold quietly improves your mulch layer while boosting soil moisture retention.
Match your mulch material selection to what your beds actually need.
Applying 2–4 Inches of Organic Mulch
Spread your organic mulch evenly across beds, keeping it between 2 and 4 inches deep. That thickness is your sweet spot for soil moisture retention and soil temperature insulation without smothering roots.
Maintain mulch edge clearance around stems to prevent rot.
Follow mulch aeration practices by loosening any packed spots with a rake.
Mulch decomposition rate varies by material, but uniform mulch layer uniformity keeps mulching for winter soil protection working all season.
Planting Winter Cover Crops for Nutrient Cycling
Think of cover crops as your soil’s winter workforce. While beds rest, these plants keep nutrient cycling active underground.
- Nitrogen Fixation – Hairy vetch and crimson clover fix up to 120 lbs of nitrogen per acre through root nodules.
- Scavenging Residual Nitrogen – Rye and oats capture leftover soil nitrogen, preventing winter leaching.
- Biomass Accumulation – Dense growth builds soil organic carbon when incorporated as green manure.
- Root Network Development – Fine roots improve soil structure while supporting winter soil management tips you’ll appreciate come spring.
Preventing Erosion, Crusting, and Nutrient Loss
Bare soil in winter is an open invitation for trouble. Rain packs it tight, wind strips it bare, and nutrients vanish with every runoff. That’s why layering your defenses matters.
Bare winter soil invites destruction — rain compacts it, wind strips it, and nutrients vanish with every runoff
| Strategy | What It Does |
|---|---|
| Groundcover Placement | Shields surface, reduces runoff |
| Surface Roughening | Improves infiltration, resists erosion |
| Drainage Contouring | Directs water away from bare beds |
| Windbreak Installation | Cuts edge erosion on exposed beds |
| Nutrient Retention | Locks amendments in place through frost cycles |
Winter mulching, cover cropping, and smart soil amendment work together as your soil erosion control and soil compaction prevention toolkit.
Supporting Microbial Activity Through Dormancy
Your soil isn’t sleeping through winter — it’s running on a skeleton crew.
Keeping that crew alive comes down to three things: carbon source supply from leftover crop residues and compost, moisture retention through mulching, and temperature buffering that prevents hard freezes from wiping out seed bank preservation reserves.
Time your organic matter additions and microbial inoculants right, and microbial activity bounces back fast in spring.
Top 3 Soil Health Products
The right products can make your dormant-season soil work a whole lot easier. A few well-chosen tools and treatments will carry your beds through winter and set you up strong for spring.
Here are three worth keeping on your shelf.
1. MySoil Soil Test Kit
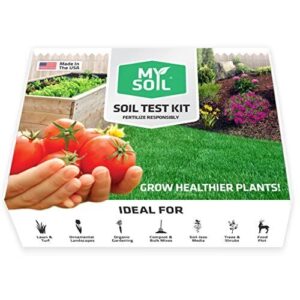
The MySoil Soil Test Kit takes the guesswork out of dormant-season prep. For $31.99, you get a complete kit that analyzes 13 plant-available nutrients plus pH — and results land on your online dashboard within 6–8 days.
Just collect a composite sample, drop it in the prepaid envelope, and the lab processes the rest. You’ll get clear recommendations on what to apply, how much, and when — making your fall amendments genuinely targeted instead of just hopeful.
| Best For | Homeowners, hobby gardeners, and small-scale growers who want precise, lab-backed soil data instead of guessing at fertilizer applications. |
|---|---|
| Organic Approved | Yes |
| Application Method | Mail-in kit |
| Garden Use | Lawn, garden, ornamentals |
| Seasonal Use | Year-round monitoring |
| Disease Support | No (nutrients/pH only) |
| Price / Size | $31.99 per kit |
| Additional Features |
|
- Tests 13 nutrients plus pH and delivers clear, actionable recommendations for both organic and conventional amendments
- Works for nearly any growing situation — lawn, garden, raised beds, hydroponics, houseplants, you name it
- At $31.99, it’s an affordable way to stop wasting money on fertilizers your soil doesn’t actually need
- Only available to U.S. customers — the prepaid envelope and account setup won’t work for anyone outside the States
- Results take 6–8 days, so it’s not the right tool if you need answers fast
- Won’t catch soilborne diseases or pathogens — it’s purely a chemical nutrient and pH analysis
2. Bonide All Seasons Spray Oil
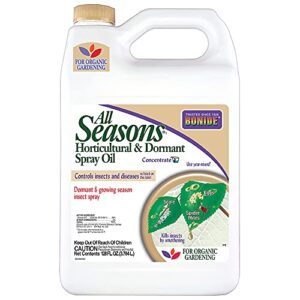
Overwintering pests don’t take a break — and neither should you. Bonide All Seasons Spray Oil is a paraffinic mineral oil concentrate that smothers insects, eggs, and fungal spores on contact, working during dormancy and the growing season alike.
controls aphids, scale, spider mites, and more on fruit trees, vegetables, and ornamentals.
Dilute it with water, spray thoroughly including leaf undersides, and apply in the early morning to avoid leaf burn.
It’s also approved for organic gardening programs.
| Best For | Home gardeners and orchardists who want a versatile, organic-approved spray that handles both pest control and fungal prevention across all seasons. |
|---|---|
| Organic Approved | Yes |
| Application Method | Dilute and spray |
| Garden Use | Fruits, vegetables, ornamentals |
| Seasonal Use | Year-round including dormant |
| Disease Support | Powdery mildew, leaf spot |
| Price / Size | 128 fl oz concentrate |
| Additional Features |
|
- Works year-round — dormant, delayed-dormant, and active growing season all covered
- Tackles a wide range of pests (aphids, mites, scale, whitefly) and common fungal issues like powdery mildew in one product
- Approved for organic gardening, so it fits into natural and chemical-free programs
- Can burn leaves if sprayed in hot, direct sunlight — timing your applications matters
- Rain within 24 hours can wash it off before it does its job
- Needs to be mixed precisely; getting the dilution wrong can hurt plant health or reduce effectiveness
3. Bonide Captain Jack Copper Fungicide
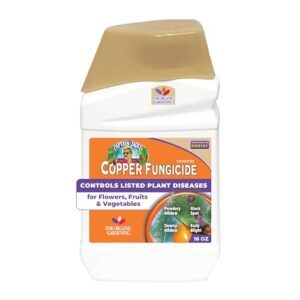
While spray oil controls pests, fungal disease is a different fight — and that’s where Bonide Captain Jack Copper Fungicide earns its place.
Its active ingredient, copper octanoate, forms a protective barrier on plant surfaces, stopping powdery mildew, blight, rust, and black spot before they spread.
It’s approved for organic gardening and safe to use right up to harvest day.
Apply it with thorough leaf coverage, top and bottom.
Reapply after heavy rain, since copper doesn’t hold up when washed off.
| Best For | Organic gardeners dealing with fungal disease on fruits, vegetables, roses, or trees — especially in wet, humid climates where mildew and blight are a constant battle. |
|---|---|
| Organic Approved | Yes |
| Application Method | Dilute and spray |
| Garden Use | Fruits, vegetables, ornamentals |
| Seasonal Use | Year-round up to harvest |
| Disease Support | Powdery mildew, blight, rust |
| Price / Size | 16 oz concentrate |
| Additional Features |
|
- OMRI-listed for organic use and safe to apply right up to harvest day
- Covers a wide range of diseases — powdery mildew, blight, rust, black spot, and more
- Won’t harm bees or butterflies when you follow the label directions
- The bright blue solution stains skin, clothes, and surfaces, so gear up before you spray
- Heavy rain washes it off, meaning you’ll need to reapply more often in wet weather
- Repeated use without rotating fungicides can lead to resistance over time
Frequently Asked Questions (FAQs)
How to condition garden soil after winter?
Roll up your sleeves — spring soil care starts with clearing debris, testing pH, and adding compost to wake up nutrients.
Light aeration and fresh mulch set your beds up for a strong season.
What is the 3-hour gardening rule?
The 3-hour gardening rule simply means spending at least three focused hours per week on garden tasks.
It keeps momentum steady, prevents work from piling up, and gives you enough time to actually notice what your garden needs.
When should you plant dormant plants?
Like a bear waking from winter sleep, dormant plants need the right moment to stir.
Plant them 2–6 weeks before your last frost date, when the soil tops 40°F and buds stay tightly closed.
How do you care for a dormant plant?
Care for a dormant plant by holding off on watering until spring, skipping fertilizer entirely, and clearing away dead leaves. Let it rest — that stillness is exactly what it needs.
Do dormant plants need a lot of care?
Think of dormant plants like bears in winter — they’re resting, not helpless. They don’t need much, just light protection, moisture checks, and clean surroundings to wake up strong come spring.
What happens if a plant goes dormant in winter?
When winter arrives, your plant hits pause. Its metabolism slows, growth stops, and energy moves into the roots for storage. Buds stay sealed until enough cold passes and warmth returns.
How does dormancy affect plants?
Dormancy is nature’s pause button. It slows growth, shifts hormones, and moves energy into roots — so your plant survives winter and wakes up stronger when warmth returns.
When do plants come out of dormancy?
Plants wake up when soil temperatures consistently top 40°F and days stretch past 12 hours. Watch for bud swell — that’s your clearest sign roots are stirring and spring growth is underway.
How does winter rain affect soil nutrient leaching?
Rain doesn’t just wet your soil — it carries nutrients down and out.
Nitrate moves fastest, but potassium and phosphorus follow in sandy or compacted ground, leaving less for your plants come spring.
Can beneficial microbes survive frozen soil temperatures?
Yes — beneficial microbes can survive frozen soil. Many enter low-metabolic states, form protective spores, or produce compounds like trehalose that shield their cells until warmth and moisture return.
Conclusion
Every seed you’ll ever grow is already betting its life on what you do this winter. Dormant season garden soil health isn’t maintenance—it’s an investment.
Test your soil, layer your mulch, and let cover crops quietly rebuild what summer spent.
The beds that look empty right now are the most important ones in your garden.
Tend them well, and come spring, you won’t just grow plants. You’ll grow results that feel almost easy.
- https://r.search.yahoo.com/_ylt=AwrPpj6u5Txn.QEAfL.zRwx.;_ylu=Y29sbwNzZzMEcG9zAzEEdnRpZAMEc2VjA3Ny/RV=2/RE=1733253807/RO=10/RU=https%3a%2f%2fwww.nrcs.usda.gov%2fconservation-basics%2fnatural-resource-concerns%2fsoils%2fsoil-health%2fsoil-health-assessment/RK=2/RS=1.OqQnV.CRdYUH7LgMwSUN2Ea.Y-
- https://rodaleinstitute.org/
- https://www.sare.org/
- https://union.ces.ncsu.edu/2019/01/row-cover-in-the-winter-garden/
- https://getchipdrop.com/