This site is supported by our readers. We may earn a commission, at no cost to you, if you purchase through links.

Most gardens don’t fail in a drought because of the plants. They fail because the soil wasn’t ready before the heat arrived. A bed that drains too fast loses moisture before roots can use it, while one that stays soggy after rain suffocates roots when temperatures climb.
Getting that balance right is the foundation of every drought-tolerant summer garden tip worth following. Soil, plant selection, and watering habits are all within your control.
Small, deliberate changes made now can keep your garden thriving through weeks of dry heat.
Table Of Contents
- Key Takeaways
- Assess Your Summer Drought Risk
- Build Moisture-Holding Soil
- Choose Drought-Tolerant Plants
- Select Deep-rooted Perennials for Summer Resilience
- Use Mediterranean Herbs Like Lavender, Rosemary, and Thyme
- Add Succulents for Water Storage and Texture
- Plant Ornamental Grasses for Low-water Structure
- Choose Drought-tolerant Shrubs for Year-round Interest
- Favor Native Plants Adapted to Local Rainfall Patterns
- Design Water-Wise Garden Beds
- Mulch to Reduce Evaporation
- Water Deeply and Efficiently
- Protect Plants During Heat Waves
- Top 10 Water-Wise Summer Crops
- 1. Rattlesnake Pole Bean Seeds
- 2. Green Striped Cushaw Pumpkin Seeds
- 3. Artichoke Green Globe Seeds
- 4. Burgundy Okra Seeds for Planting
- 5. Jalapeno Pepper Seeds for Planting
- 6. Armenian Pale Green Cucumber Seeds
- 7. Sow Right Swiss Chard Seeds
- 8. Sow Right Eggplant Seeds Collection
- 9. David’s Garden Heirloom Corn Seeds
- 10. Jerusalem Artichoke Tubers
- Maintain a Resilient Summer Garden
- Frequently Asked Questions (FAQs)
- Should I water my garden every day in 100 degree weather?
- What is the 3 year rule in gardening?
- How to prepare soil for drought tolerant plants?
- How to prevent pests in drought-stressed gardens?
- What are best fertilizers for drought-prone gardens?
- Can drought-tolerant gardens attract pollinators and wildlife?
- How to revive plants after prolonged drought stress?
- What container plants thrive with minimal summer watering?
- How often should I fertilize drought-tolerant plants?
- Can I grow drought-tolerant plants in containers?
- Conclusion
Key Takeaways
- Fixing your soil before heat arrives—loosening it 8–10 inches deep and mixing in compost—is the single most important step for keeping plants alive through summer drought.
- Deep, infrequent watering (every 2–3 days rather than daily) builds roots that reach moisture below the surface, where summer heat can’t touch them.
- Grouping plants by water needs, placing taller ones at the back, and laying 2–4 inches of organic mulch can cut your watering workload dramatically without sacrificing a good-looking garden.
- Native plants and deep-rooted perennials like purple coneflower and Russian sage need up to 40% less water once established, making plant selection your most lasting water-saving decision.
Assess Your Summer Drought Risk

Before you plant a single thing, your garden is already telling you what it needs.
The soil, the sun, and the space you have all point toward a plan—and refreshing spring garden layouts can help you read those signals before you dig your first hole.
Some spots bake all day, others drain poorly, and a few never seem to hold moisture at all. Here’s where to start looking.
Identify Full-sun, Reflected-heat, and Windy Garden Areas
Before you plant a single thing, walk your garden at noon and take notes. Sun exposure mapping only takes one afternoon, but it tells you everything. That microclimate zone analysis shapes every decision ahead.
- Full sun zones — spots baking in 6+ hours of direct light
- Reflected heat from light concrete or pale walls, raising temps 5–15°F
- Wind corridors with steady 8–15 mph airflow that pulls moisture fast
- Dense shade cutting sun below 3 hours daily
Test Soil Drainage Before Planting
Once you’ve mapped your sun and heat zones, test what’s underneath by conducting a percolation test. Dig a hole 12 inches deep and 12 inches wide, fill it, let it drain, then refill and track the drop over 60 minutes. That’s your percolation test.
Well-drained soil moves water at 0.5–2 inches per hour. Below that, soil compaction or clay texture signals you’ll need soil amendment before anything roots properly.
Understanding that soil texture predicts drainage speed can guide your amendment choices.
Check Soil Moisture at 2–3 Inches Deep
Once drainage rates tell you how fast water moves through, you need to know how much stays behind. The Finger Test Technique is your simplest tool: push a bare finger 2–3 inches into the soil.
Cool and slightly damp means you’re good. Dry or powdery means you need to water soon.
Use a soil moisture meter for a Spot Sampling Strategy across several bed locations—Moisture Trend Logging over weeks helps you catch patterns before stress shows.
Watch for Wilting, Leaf Curl, Scorching, and Slow Growth
Your soil moisture meter tells you what’s underground—but your plants tell you what’s happening right now. Wilting means turgor pressure has dropped fast, while leaf curl signals stomatal closure trying to slow water loss. Watch foliage color change, too: bronze margins and scorched tips mean heat stress is building.
Track growth rate slowing as an early plant stress indicator before visible damage sets in.
Note Slopes, Compacted Areas, and Runoff Patterns
Across your yard, slopes and compacted patches quietly shape where water goes—and where it disappears. Steeper sections speed runoff and increase erosion risk, making slope erosion control essential. Compacted zones block infiltration and push water sideways.
Walk your beds after rain and map the flow paths. This observation helps identify where moisture is lost or misdirected.
Apply runoff capture strategies like shallow swales, contour planting design, and micro-catchment balancing to retain moisture where roots need it most.
Build Moisture-Holding Soil

Good soil is the foundation everything else depends on. Before you plant a single thing, getting your soil right will save you a lot of watering headaches down the road.
Here’s what to work through to build a bed that holds moisture where your plants actually need it.
Loosen Compacted Soil 8–10 Inches Deep
Compacted ground is like a locked door for roots—they simply can’t get through. Loosen it 8–10 inches deep using a broadfork for subsoil aeration without wrecking existing structure. Early spring tilling works best when soil is moist but not soggy. Depth measurement matters here; shallow loosening won’t help much.
- Use a broadfork for tool selection: it reaches depth without over-disturbing the surface
- Target 8–10 inches consistently for deep root development
- Improve infiltration rates 20–40% through proper soil aeration
- Pair loosening with organic matter to stabilize the loosened zone
- Time early spring tilling when soil crumbles easily, not smearing
Mix Compost Into The Top 12 Inches
Mixing compost into the top 12 inches transforms how your soil holds moisture. Work in 1–2 inches of finished compost, and you’ll trigger a Microbial Activity Boost that speeds Nutrient Release Timing right when roots need it most.
This Root Growth Promotion happens because Improved Soil Structure creates looser, more porous layers.
Sandy beds gain real Soil Moisture Retention through this simple Soil Amendment.
Improve Sandy Soil for Better Water Retention
Sandy soil drains fast — sometimes too fast. Water slips right past roots before plants can use it. Fix that with these five targeted steps:
- Apply 2–4 inches of Organic Matter Layers using compost for Soil Structure Conditioning
- Add Biochar Incorporation at 2–5% by volume to boost soil moisture retention
- Use Zeolite Additives to trap nutrients and slow drainage
- Try Bentonite Integration at 5 lbs per 100 sq ft for micro-pore moisture capture
- Top with organic mulch to seal in your soil improvement gains
Improve Clay Soil for Better Drainage
Clay soil holds water like a clogged drain — and roots hate that. Gypsum Stabilization is key: apply 1–2 lbs per square yard to trigger Subsoil Flocculation, breaking clay into workable aggregates.
Follow with compost and a careful Sand Amendment Ratio — one part coarse sand or Perlite Integration to three parts clay. These soil amendment practices for moisture retention transform heavy soil into something roots can actually breathe in.
Aerate Beds to Reduce Runoff and Improve Infiltration
Even well-amended beds turns stubborn if air can’t move through them. Aeration breaks that cycle fast. For best results, aim for an Ideal Aeration Depth of 4–6 inches using the right Aeration Tool Selection for your bed size.
- Use a pitchfork for small beds — no soil mixing, just clean vertical channels
- Time it right: Seasonal Aeration Timing in early spring maximizes Root Development Benefits before summer heat arrives
- Run a simple infiltration test after: pour water and watch — healthy beds absorb it within minutes
Finish with mulching, keeping its benefits in mind by layering compost right after aerating to lock in those gains.
Choose Drought-Tolerant Plants

Good soil sets the stage, but the plants you choose make or break a drought-tolerant garden. Some plants are simply built to handle heat and dry spells better than others.
Here are the ones worth planting.
Select Deep-rooted Perennials for Summer Resilience
Deep root systems are your garden’s best insurance against summer drought.
Perennials like purple coneflower, Russian sage, and Yucca filamentosa push roots well past 30 cm, tapping subsoil moisture when the surface bakes dry. These native deep-rooted species establish within two to three years and need 20–40% less water after that.
Pair them using companion root stratification—shallow-rooted plants up front, woody perennials behind—for smarter low-water landscaping.
Use Mediterranean Herbs Like Lavender, Rosemary, and Thyme
Mediterranean herbs are natural allies in low-water landscaping. Lavender (Lavandula spp.), Rosemary, and Thyme thrive in full sun with lean, well-drained soil—no heavy feeding needed.
Their culinary applications are a bonus. Use companion plant strategies by pairing them near vegetables to deter pests.
Prune for bloom after flowering, and try container herb care if your soil stays too wet.
Add Succulents for Water Storage and Texture
Succulents take drought resilience a step further. Their fleshy leaf forms and columnar stems act as built-in hydration storage, keeping plants healthy through weeks without rain.
Geometric rosettes like Sedum and Agave create striking texture pairings alongside herbs. These waterwise plant choices require sharp drainage and minimal mulching to thrive.
Their bold succulent foliage adds structural impact that few drought-tolerant plants can match, enhancing garden design with enduring visual appeal.
Plant Ornamental Grasses for Low-water Structure
Ornamental grasses pick up where succulents leave off, adding movement and winter structural foliage to dry beds.
Blue fescue stays compact and icy-blue year-round, while Feather Reed Grass maintains its upright form even through cold months.
Both thrive in low-water landscaping, with deep roots optimizing soil stability and rhizome erosion control securing slopes.
Divide clumps every three to five years to sustain vigor and health.
Choose Drought-tolerant Shrubs for Year-round Interest
Shrubs anchor your dry garden with lasting structure. Evergreen structure comes from plants like Adam’s Needle Yucca filamentosa, holding form through heat and drought without complaint. For deciduous color, native shrub selections like flowering sagebrush shift beautifully with the seasons.
These deep root systems make them natural choices for drought-resistant structural shrubs. Low-maintenance pruning keeps them tidy, while heat-tolerant plants like lavender (Lavandula spp.) thrive alongside them.
Favor Native Plants Adapted to Local Rainfall Patterns
Native plants are simply built for where you live. Their rainfall-synced bloom cycles and native root networks do most of the heavy lifting without extra irrigation. Here’s what local natives bring to dry-summer beds:
- Tap deep soil moisture, cutting summer watering by up to 40 percent
- Boost soil microbial synergy, improving water uptake efficiency
- Support native pollinator support through drought spells
- Draw from local seed banks, ensuring climate-adapted landscaping
Design Water-Wise Garden Beds
A well-planned garden bed does more than look good — it works with you to save water. How you arrange your plants matters just as much as which ones you choose.
Here are six simple design moves that make a real difference.
Group Plants by Water Needs Using Hydrozoning

Hydrozoning groups drought-tolerant plants together and thirsty ones in their own zone. Start with zone mapping — sketch your beds, note sun exposure, and soil moisture sensors can validate your plan.
Separate valve control lets you tailor irrigation scheduling precisely.
Read plant water labels; they’ll tell you exactly where each one belongs.
Plant in Drifts of 3–7 for Visual Impact
Single plants scattered across a bed disappear. Plant in drifts of 3–7 and suddenly you’ve got massed texture, color blocking, and a low-maintenance garden that practically runs itself.
- Repeat the same drift pattern across your bed for rhythmic repetition
- Pair fine and bold foliage for contrast within each group
- Build height progression from front to back
- Set one tall focal anchor per drift
- Group planting for visual impact and water efficiency simplifies irrigation zoning
Place Taller Plants on The North or Back Side

Tall plants earn their place at the back. North side shading keeps shorter neighbors cool without blocking morning sun. That back row windbreak also acts as a thermal buffer, dropping soil temperature and cutting desiccating wind.
You get visual depth, a natural pest barrier, and cleaner irrigation zoning—all at once.
In a xeriscape garden, smart placement is free drought insurance.
Use Staggered Bloom Times for Seasonal Color

A well-timed garden never goes dark. Seasonal bloom sequencing keeps color moving from late spring through early autumn without extra watering.
- Early spring starters — pansies, hellebores, and narcissus open the season
- Midseason fillers — Coreopsis and Echinacea bridge the gap with pollinator-friendly blooms
- Late season highlights — asters and sedums carry drought-tolerant plants into fall
- Bloom overlap planning — pair varieties so peaks connect, avoiding color gaps
- Photoperiod selection — choose long-day, midseason, and short-day types for sequential waves
Create Shaded Microclimates for Heat-sensitive Plants

Color sequencing sets the stage, but heat management keeps it standing. A deciduous canopy filters intense afternoon sun while letting winter light through. Living pergolas and lattice coverings diffuse glare without cutting airflow. Reflective bed surfaces bounce radiant heat away from roots.
North-facing orientation suits salvias and other sensitive plants naturally.
These layered shade structures are your best tools for summer heat mitigation and shade management to reduce evaporation.
Reduce Thirsty Lawn Areas Near Garden Beds

Lawn areas near garden beds pull a surprising amount of water — and they compete directly with your drought-tolerant plantings. Swapping thirsty turf for lawn replacement plants, groundcovers, or permeable paving edges cuts that demand fast.
Pair soil grading adjustments with drip irrigation border strips to keep moisture where it belongs.
Low-water landscaping and strategic mulching finish the job.
Mulch to Reduce Evaporation

Mulch is one of the simplest things you can do to keep soil moisture from disappearing in summer heat. A good layer slows evaporation, cools roots, and cuts down how often you need to water.
Here’s what actually works.
Apply 2–4 Inches of Organic Mulch
Spreading organic mulch over your beds is one of the simplest things you can do before summer heat arrives. Aim for mulch 2 to 3 inches deep—up to 4 inches works well in exposed spots.
At that depth, mulch benefits your garden through moisture conservation, soil temperature regulation, weed suppression, and organic matter enrichment over time. Nutrient cycling improves too, as the mulch slowly breaks down.
Keep Mulch 2 Inches Away From Stems
Even the best mulch moisture barrier can backfire if you pile it against your plants. Keep mulch 2 to 3 inches away from stems—that gap is everything for crown ventilation and stem rot prevention.
Trapped moisture against bark invites disease and creates a pest habitat where insects overwinter. Pull it back, and your plants breathe easy all summer.
Use Straw, Shredded Leaves, Bark, or Composted Mulch
Not all organic mulches work the same way—and picking the right one makes a real difference.
- Straw — excellent moisture retention; light, fast to spread.
- Shredded leaves — slow decomposition feeds the soil all season.
- Bark — its durability benefits persist for years with minimal refresh.
- Compost — its nutrient timing improves water conservation and soil health.
Match your mulch to your plants and conditions.
Add Gravel Mulch Around Succulents and Mediterranean Herbs
Gravel mulch offers a distinct advantage over organic options—particularly around succulents and cacti or Mediterranean gardens—where it’s often the better choice.
Particle Size Selection matters: coarse gravel drains fast, medium gravel balances moisture. Gravel Color Choice affects heat; light tones stay cooler.
Edge Barrier Installation and Weed Barrier Integration beneath are essential to keep your gravel garden tidy. Seasonal Re-leveling is necessary as debris accumulates.
Refresh Mulch Before Peak Summer Heat
Don’t wait until summer hits hard—refresh your mulch layer before peak heat arrives. Aim for a 2 to 4 inch depth to boost moisture retention and reduce soil evaporation considerably.
Fresh mulch also delivers real visual bed renewal, keeps beds looking tidy, and creates a barrier that facilitates pest prevention.
In hot, dry weather, consistent mulching benefits every plant in your garden.
Use Ground Covers to Shade Exposed Soil
Ground covers do double duty that mulch alone can’t match. A dense canopy of spreading groundcovers like Thymus or Festuca cuts soil evaporation greatly while building a root network that locks topsoil in place.
Smart cover plant selection matters—canopy density determines how well shade management works. Prioritize species that balance coverage with airflow to maximize soil protection and plant health.
Time establishment for fall or early spring, and keep spacing open for airflow. This approach ensures a low-maintenance groundcover solution that practically runs itself, minimizing erosion and evaporation risks over time.
Water Deeply and Efficiently

How you water matters just as much as how often you do it.
Light, frequent sprinkling keeps roots shallow and thirsty — the opposite of what a drought-tolerant garden needs.
These habits will help you water smarter all summer long.
Water Deeply Instead of Lightly and Frequently
Think of your plant’s roots like they’re searching for a well—they’ll only go as deep as the water does. Shallow, frequent watering keeps roots near the surface, where heat wipes them out fast.
Roots only grow as deep as the water goes, so shallow watering builds shallow gardens
Deep watering techniques to promote root growth mean saturating the root zone to 6–8 inches. Water deeply but infrequently, and your plants will anchor themselves where summer heat can’t reach them.
Aim for 1–1.5 Inches of Water Weekly When Needed
One inch and a half of water weekly isn’t a guess—it’s your garden’s baseline. That translates to roughly 0.6–0.9 gallons per square foot across the root zone.
Here’s how to hit that target every week:
- Use soil moisture gauges at 2–3 inches deep for accurate moisture meter placement
- Verify totals with a rain gauge to avoid overwatering after rainfall
- Adjust for soil type—sandy soil drains faster, clay holds longer
- Practice weekly water budgeting by logging rainfall and irrigation together
- Use mulch for water retention to stretch every drop further
Irrigate Between 5 A.m. And 9 A.m
Timing your water matters as much as the amount. Cool morning watering—between 5 and 9 a.m.—gives roots a real head start. Early root activation happens right after sunrise when stomata open and plants drink efficiently. That dawn humidity boost slows evaporation, and calm wind timing means water lands where you intended.
Smart watering schedules with sensor scheduling prevent waste when rain arrives overnight.
Use Drip Irrigation or Soaker Hoses
Drip irrigation and soaker hoses cut water use by 30–50% compared to sprinklers. Water goes straight to the root zone—no waste, no wet foliage.
Proper emitter placement, pressure regulation, and filtration maintenance keep your system running clean. Timer automation manages scheduling so you don’t have to.
- Place emitters 2–4 inches from plant stems
- Use pressure regulators to prevent blown lines
- Clean filters monthly to prevent clogging
- Winterize by draining and storing hoses before frost
Avoid Overhead Watering During Hot Afternoons
Sprinklers running at noon are mostly wasted effort. Heat and wind drift pull moisture away before it reaches roots, and wet foliage under bright sun invites foliar scorch and disease pressure. Afternoon overhead watering also risks soil erosion on slopes.
Watering early in the morning, before 9 a.m., keeps water efficiency high and foliage dry where your drip irrigation leaves off.
Adjust Watering Based on Rainfall and Soil Moisture
Your schedule shouldn’t run on autopilot. After any measurable rain, pause irrigation for two to five days and confirm recovery with soil moisture sensors at two to three inches deep. Adaptive irrigation scheduling and weather-based automation let smart irrigation controllers adjust run times automatically.
Pair rain sensor integration with water budget tracking and rain barrels for complete control. This combination ensures irrigation occurs only when necessary, guided by real-time data.
Ultimately, the goal is to irrigate only when soil moisture thresholds actually call for it, eliminating wasteful practices and optimizing water use.
Protect Plants During Heat Waves

Heat waves hit fast and leave little room for mistakes. Even drought-tolerant plants can struggle when temperatures push past their limits for days at a time.
Here’s what you can do to keep your garden standing strong when the heat won’t quit.
Add Temporary Shade Cloth During Extreme Heat
A heat wave can cook your plants faster than you think. Shade cloths are your first line of defense. Choose UV protection-rated polyethylene mesh—30 to 50 percent density works well for most beds—and mount it 1.2 to 2.4 meters high for proper ventilation and airflow.
Consider these three steps for success:
- Select breathable Shade Cloth Materials rated for UV protection
- Secure edges with grommeted attachments for Wind Reinforcement
- Position cloth on the west side to cut peak afternoon heat, supporting evapotranspiration reduction
Water Early Before Temperatures Peak
Your best defense against summer heat stress starts before sunrise. Watering between 5 and 9 a.m. takes full advantage of dawn soil cooling and morning microclimate conditions — when temperatures are low and winds are calm. This timing ensures optimal conditions for early moisture penetration, which reaches roots before the day’s heat peaks, supporting sunrise water uptake and keeping plants turgid.
Skipping this window is one of the most common watering mistakes to avoid in summer.
Delay Transplanting During Hot, Dry Spells
Transplanting during a heat wave is asking for trouble. When Weather Forecast Alerts show sustained temperatures above 85°F for three or more days, delay transplanting. A quick Soil Moisture Pre-check at 2–3 inches will confirm what you already suspect: the soil dries out fast. Instead, keep transplants in Heat-Resistant Nursery Beds and follow a Staggered Transplant Schedule:
- Watch forecasts and wait for a cooler window
- Use Evening Planting when temperatures drop
- Water the hole deeply before setting roots in place
Avoid Heavy Pruning During Heat Stress
Pruning during a heat wave is like cutting your plant’s lifeline mid-crisis. Stick to Early Morning Pruning when temperatures are coolest. Use Clean Sharp Tools and Light Pruning Techniques—removing only dead or damaged wood keeps heat stress tolerance high. Never remove more than 20% of the crown in one session.
Focus on limited crown removal and avoid heavy structural shaping. After cuts, prioritize shade wound care—never seal wounds with heavy dressings. Always use clean, sharp tools to prevent tissue damage from dull blades.
| Do This | Avoid This |
|---|---|
| Early morning cuts | Midday pruning sessions |
| Limited Crown Removal | Heavy structural shaping |
| Shade Wound Care after cuts | Sealing wounds with heavy dressings |
| Clean Sharp Tools only | Dull blades that tear tissue |
Harvest Ripe Vegetables Promptly to Reduce Plant Strain
Ripe vegetables left on the vine are a hidden drain during heat waves. To mitigate this, adopt a Frequent Picking Schedule—checking crops every one to three days using Ripeness Visual Cues like color changes and firmness. Morning Harvest Timing minimizes stress for both plants and gardeners, while Sharp Cutting Tools ensure clean, efficient cuts.
Consistent monitoring prevents overripening and conserves resources. By reducing the number of fruits per plant—a Reduced Fruit Load—you significantly lower water demand during critical heat periods. This strategic approach maintains plant health and optimizes yields under stress.
Move Containers Into Afternoon Shade
Your containers are basically heat sponges in direct afternoon sun. Shade placement tactics—moving planters to the north side of a fence or under lattice between 1 and 4 p.m.—make a real difference.
This strategy can drop surface temperatures by up to 25°F, creating a cooling microclimate. As a result, shade-optimized watering every two to three days (instead of daily) becomes possible, reducing water use while protecting roots.
By maintaining cooler conditions, this approach delivers genuine heat stress relief for drought-tolerant plants, helping them thrive during peak temperatures.
Top 10 Water-Wise Summer Crops
Not every crop is cut out for summer heat, but some actually thrive when the rain stops showing up. These ten varieties have earned their spot in water-wise gardens through deep roots, tough foliage, and a natural ability to keep producing without constant irrigation.
Here are the crops worth planting when drought is part of the forecast.
1. Rattlesnake Pole Bean Seeds
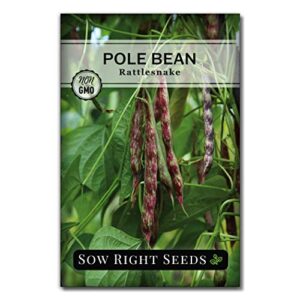
Few beans earn a spot in a drought-smart garden as naturally as Rattlesnake pole beans. These heirloom climbers tolerate brief dry spells once established, making them a solid pick for hot summers. Plant seeds one inch deep after your last frost, spacing them 4–6 inches apart in full sun.
They’ll sprint up a trellis to 8–10 feet and start yielding tender, sweet pods in 55–65 days.
Harvest every 2–3 days to keep plants producing through the season.
| Best For | Home gardeners who want a high-yield, visually striking bean that thrives in hot summers and doesn’t mind putting up a trellis. |
|---|---|
| Seed Type | Heirloom |
| Sun Requirement | Full Sun |
| Days to Harvest | 55–65 days |
| Drought Tolerance | Moderate |
| Planting Depth | 1 inch |
| GMO Free | Yes |
| Additional Features |
|
- Sweeter and more flavorful than anything you’d grab from a freezer bag — great fresh, roasted, or tossed in a casserole.
- Those purple-streaked pods are easy to spot at harvest time, so you’re not hunting through a wall of green.
- Vigorous climbers that produce abundantly all season long — plenty to eat fresh, freeze, or save seeds for next year.
- Germination isn’t guaranteed across the board — some buyers have had patchy results with only a portion of seeds sprouting.
- A few pods can turn out tough and stringy, which is a bummer when you’re expecting tender beans.
- Occasional seed mix-ups mean some plants may come up as plain green pole beans instead of the real rattlesnake variety.
2. Green Striped Cushaw Pumpkin Seeds
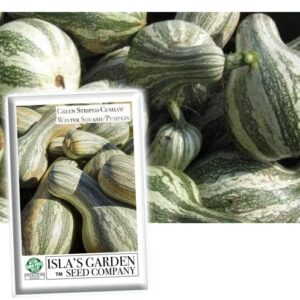
If you want something bigger and more dramatic than a pole bean, the Green Striped Cushaw pumpkin delivers. This heirloom squash grows 8–15 pounds per fruit and withstands summer heat well once established.
Plant seeds one inch deep after frost, spacing plants 36–48 inches apart in full sun. Vines sprawl 12–15 feet, so give them room.
Deep watering during fruit set keeps yields strong.
Expect harvest around 110–130 days. The dense orange flesh is worth every square foot.
| Best For | Gardeners with plenty of outdoor space who want a heat-tolerant heirloom squash for fall harvests, winter storage, or baking. |
|---|---|
| Seed Type | Heirloom |
| Sun Requirement | Full Sun |
| Days to Harvest | 110–130 days |
| Drought Tolerance | Moderate |
| Planting Depth | 1 inch |
| GMO Free | Yes |
| Additional Features |
|
- Produces large, flavorful fruits with dense orange flesh — great for pies and cooking
- Non-GMO heirloom variety that supports biodiversity and stores well through winter
- Thrives across a wide range of climates (Zones 3–10) and handles summer heat well
- Vines sprawl 10–15 feet, so small gardens or containers won’t cut it
- Takes 95–110 days to mature, which means a long commitment before harvest
- Needs consistent moisture — too much or too little water will hurt your yield
3. Artichoke Green Globe Seeds

Artichoke Green Globe is a perennial that keeps producing for up to five years from a single planting. Each plant requires about four feet of space and full sun. It’s a slow starter, but patient gardeners are rewarded every summer.
Sow seeds just a quarter-inch deep, or cold-stratify them in the fridge for two weeks to boost germination.
Expect buds in 65–75 days once established.
| Best For | Home gardeners with space and patience who want a long-lasting, low-maintenance crop they can harvest for years. |
|---|---|
| Seed Type | Heirloom |
| Sun Requirement | Full Sun |
| Days to Harvest | 65–75 days |
| Drought Tolerance | Moderate |
| Planting Depth | 0.25 inch |
| GMO Free | Yes |
| Additional Features |
|
- Produces for up to five years, so you plant once and keep harvesting
- Works across a huge range of climates (zones 3–10), so most gardeners are covered
- Buds are versatile in the kitchen—great for dips, pasta, pizza, and more
- Needs about four feet of space per plant and full sun, so small gardens won’t cut it
- Germination can be hit or miss—cold stratification helps but isn’t a guarantee
- In colder zones, plants may not survive the winter without extra protection or mulching
4. Burgundy Okra Seeds for Planting
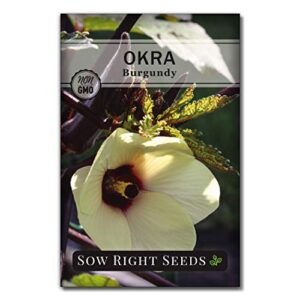
Burgundy okra is one of the most heat-loving plants you can grow, and it withstands dry spells better than you’d expect. Sow seeds about three-quarters of an inch deep once soil hits 70–80°F—soaking them overnight first speeds things up noticeably.
Space plants 12 inches apart in full sun. You’ll see pods ready to harvest in 50–60 days.
Pick them young, around 2–4 inches, and they stay tender. Regular picking keeps production going all summer long.
| Best For | Home gardeners who want a heat-tolerant, beautiful okra variety that doubles as an ornamental plant and works great as a teaching garden for kids. |
|---|---|
| Seed Type | Heirloom |
| Sun Requirement | Full Sun |
| Days to Harvest | 50–60 days |
| Drought Tolerance | High |
| Planting Depth | 0.75 inch |
| GMO Free | Yes |
| Additional Features |
|
- Heirloom, non-GMO seeds that you can save season after season — great for anyone who values biodiversity or wants to skip the seed store next year.
- Ready to harvest in just 50–60 days, with striking burgundy foliage and yellow flowers that make it as pretty as it is productive.
- Versatile in the kitchen — fry it, roast it, toss it in gumbo, or use it in Indian dishes.
- Germination can be hit or miss — some gardeners report low sprout rates, so you may want to plant extra seeds just in case.
- Needs consistently warm soil (70–80°F) and full sun to really perform, so cooler climates will struggle.
- Pod color isn’t always uniform — some come out red, orange, or green-striped instead of the deep burgundy you’d expect.
5. Jalapeno Pepper Seeds for Planting

Jalapeños earn their place in a drought-conscious garden. Start seeds indoors 8–10 weeks before your last frost—soil temps between 70 and 85°F keep germination moving. Don’t rush transplants outside until frost risk has truly passed.
These heirloom, open-pollinated seeds hit 3,500–8,000 Scoville units, so you get real heat. Space plants 18–24 inches apart in full sun.
Once established, jalapeños handle dry stretches well. Pick fruits at 2–3 inches long to keep plants producing all season.
| Best For | Home gardeners and spice lovers who want a reliable, heat-packed pepper they can grow, save seeds from, and use in everything from salsa to hot sauce. |
|---|---|
| Seed Type | Heirloom |
| Sun Requirement | Full Sun |
| Days to Harvest | 70–85 days |
| Drought Tolerance | High |
| Planting Depth | Surface sow |
| GMO Free | Yes |
| Additional Features |
|
- Heirloom and open-pollinated, so you can save seeds every year and never buy another packet
- Versatile heat (3,500–8,000 SHU) that works fresh, pickled, dried, or powdered
- Only $4.85 a packet with 75 seeds—hard to beat for the value
- Germination can be slow and unpredictable, sometimes taking 4–6 weeks instead of the usual two
- Plant size and pepper yield can disappoint if conditions aren’t dialed in
- Requires indoor seed starting and careful frost timing, which adds a bit of planning upfront
6. Armenian Pale Green Cucumber Seeds

Armenian Pale Green cucumbers thrive with surprisingly little fuss once the soil warms to 65°F. Direct sow seeds about half an inch deep after your last frost, thinning to one plant per foot.
These vines climb well, so give them a trellis — it keeps fruits straight and cuts disease pressure.
Harvest at 12–18 inches for that mild, burpless sweetness the variety is known for. Pick regularly and the plant keeps producing. Consistent moisture matters here; drought stress turns the flavor bitter fast.
| Best For | Home gardeners who want a fast-growing, mild cucumber that’s easy to eat fresh and works in almost any U.S. climate. |
|---|---|
| Seed Type | Hybrid |
| Sun Requirement | Full Sun |
| Days to Harvest | ~60 days |
| Drought Tolerance | Low |
| Planting Depth | 0.5 inch |
| GMO Free | Yes |
| Additional Features |
|
- Sweet, burpless flavor with no bitterness — great for snacking straight from the garden
- Matures in about 2 months and grows in most U.S. zones, so almost anyone can grow it
- Long, slender fruits stay clean and straight when trained up a trellis
- Germination can be hit or miss — some growers get nothing, others see great results
- It’s a hybrid, so seeds saved from your harvest won’t reliably grow the same plant next year
- Vines need consistent watering and some kind of support to stay manageable
7. Sow Right Swiss Chard Seeds
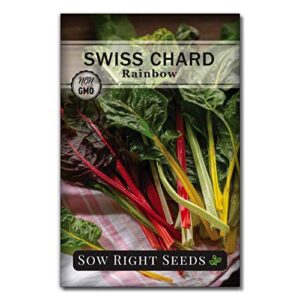
Swiss chard earns its place in any water-wise garden. Sow Right’s Rainbow Swiss Chard packs about 140 seeds per packet — enough to keep your table stocked all summer.
Sow seeds half an inch deep once the soil hits 70°F, spacing plants 12–14 inches apart. You’ll see seedlings in 7–14 days.
Start harvesting outer leaves at 55–65 days. The plant regrows after each cut, so one sowing goes a long way.
It withstands heat and mild cold without skipping a beat.
| Best For | Home gardeners of any skill level who want colorful, easy-to-grow greens that produce all season long. |
|---|---|
| Seed Type | Heirloom |
| Sun Requirement | Full Sun |
| Days to Harvest | 55–65 days |
| Drought Tolerance | Moderate |
| Planting Depth | 0.5 inch |
| GMO Free | Yes |
| Additional Features |
|
- About 140 seeds for under $5 — solid value for the harvest you’ll get
- Germinates in as little as a week and ready to eat in 55–65 days, so you’re not waiting long
- Handles both heat and cold well, and grows fine in containers or garden beds across most climates (zones 3–12)
- Some growers received mostly red stalks instead of the full rainbow mix as advertised
- Germination can be uneven — a few buyers had lower sprout rates than expected
- Needs full sun and the right soil temp (70–80°F) to really perform, so timing your sow matters
8. Sow Right Eggplant Seeds Collection
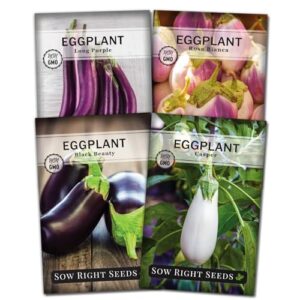
Eggplant loves heat, making it a natural fit for drought-stressed summer gardens. Sow Right’s Eggplant Seeds Collection offers four heirloom varieties—Black Beauty, Casper, Rosa Bianca, and Long Purple—in a single packet. Each contains approximately 400 non-GMO, fresh seeds.
Most varieties reach maturity in 70–85 days from transplanting and, once established, handle dry spells well.
Plant in well-drained, warm soil and water deeply once weekly until roots are established.
| Best For | Home gardeners who want a diverse mix of heirloom eggplants and appreciate solid growing support, especially beginners trying edible gardening for the first time. |
|---|---|
| Seed Type | Heirloom |
| Sun Requirement | Full Sun |
| Days to Harvest | 70–85 days |
| Drought Tolerance | Moderate |
| Planting Depth | 0.25 inch |
| GMO Free | Yes |
| Additional Features |
|
- Four classic heirloom varieties in one affordable $9.99 package — great value for experimenting with different flavors and textures.
- Comes with printed growing instructions, email support, and a germination replacement guarantee, so you’re not on your own if things go sideways.
- High-yield plants that work well in raised beds, garden rows, or containers throughout the whole growing season.
- Some buyers reported spotty germination, especially with the Rosa Bianca variety, so results can be hit or miss.
- Eggplant needs warm soil to thrive — not the best pick if you’re in a cooler climate without a greenhouse or row covers.
- Only three varieties are included despite advertising four, which limits options if you’re looking for something beyond the classics.
9. David’s Garden Heirloom Corn Seeds

Corn needs more space than most summer crops, but David’s Garden Heirloom Seeds make it worth the planning. These open-pollinated, non-GMO varieties mature in roughly 70 to 95 days and reach 5 to 8 feet tall.
Plant seeds about 1 inch deep, spaced 8 to 12 inches apart, in blocks for good pollination. Once established, many heirloom types thrive with standard garden moisture, requiring deep weekly watering.
The multicolor kernels are ornamental and edible — a genuine two-for-one.
| Best For | Home gardeners who want to grow a traditional, non-GMO corn variety with visual flair — great for small plots, school projects, or anyone curious about heritage seeds. |
|---|---|
| Seed Type | Heirloom |
| Sun Requirement | Full Sun |
| Days to Harvest | 70–95 days |
| Drought Tolerance | Moderate |
| Planting Depth | 1 inch |
| GMO Free | Yes |
| Additional Features |
|
- Open-pollinated and non-GMO, so you can save seeds season after season
- Multicolor kernels look stunning and taste great — genuinely ornamental and edible
- Low-maintenance once established; deep weekly watering is all it really needs
- One packet per purchase limits how much you can plant at once
- Heirloom varieties can be picky about soil and climate, so results may vary
- Takes up to 95 days to mature and needs block planting for good pollination — not ideal for tight spaces or quick harvests
10. Jerusalem Artichoke Tubers

Jerusalem artichoke tubers are one of the most self-sufficient crops you can grow. Plant a set of five tubers after the last frost in full sun, and they’ll reward you with edible roots and golden daisy-like flowers come fall.
Each tuber can multiply up to ten times in a single season. The flesh is nutty, slightly sweet, and packed with inulin — a prebiotic fiber that promotes gut health.
Ensure good drainage, or they’ll rot before they ever get started.
| Best For | Home gardeners who want a low-maintenance, perennial crop that doubles as an edible superfood and a pretty fall garden feature. |
|---|---|
| Seed Type | Heirloom |
| Sun Requirement | Full Sun |
| Days to Harvest | Perennial |
| Drought Tolerance | High |
| Planting Depth | 3–5 inches |
| GMO Free | Yes |
| Additional Features |
|
- One planting goes a long way — tubers can multiply up to 10x, giving you harvests for years
- Nutritious and versatile in the kitchen, with a nutty flavor and gut-friendly inulin
- The golden daisy-like flowers add real ornamental charm in fall
- Germination can be uneven — some tubers may take forever to sprout or skip it entirely
- They rot easily if the soil stays too wet or you plant them too early in the season
- First-year yields can disappoint, especially if you’re planting late
Maintain a Resilient Summer Garden

Getting plants in the ground is only half the job. The real work is keeping them strong through weeks of summer heat and dry spells.
Here’s what consistent maintenance looks like when you want a garden that holds up all season.
Water New Plants Weekly During The First Season
Every new plant you put in the ground needs consistent support that first season—roots simply haven’t spread far enough to find their own water yet. A weekly deep soak builds root zone saturation gradually and keeps early season moisture steady.
- Water at the soil line, not the foliage
- Irrigate early in the morning before heat peaks
- Use a moisture sensor for accurate soil moisture monitoring
- Run smart irrigation controllers on a weekly deep soak schedule
Extend Watering Intervals as Roots Mature
Root Depth Growth enables plants to establish deeper roots, which means they can access stored soil moisture more effectively. As roots mature, Mature Root Efficiency allows plants to sustain themselves with less frequent watering.
Gradually reduce watering frequency, guided by soil moisture monitoring, to encourage self-sufficiency. This Watering Interval Adjustment helps avoid overhydration while maintaining consistent root zone irrigation.
Deep watering every 10–14 days often strikes an optimal balance, ensuring plants receive adequate moisture without excess.
Prune Salvias, Catmint, and Similar Perennials for Rebloom
Once your watering intervals stretch out, it’s a good time to check your salvias and catmint. Light summer pruning—cutting salvias back to 6–12 inches above the soil—triggers a second bloom within 6–8 weeks. For catmint, trim by one-third to two-thirds after the first flush.
Good pruning timing keeps low-water landscaping looking fresh without stressing drought-resistant perennials. Follow up with post-prune mulching to lock in moisture.
Remove Spent Flowers to Reduce Plant Stress
Deadheading benefits go beyond looks. Once you’ve pruned your salvias, keep that momentum going—removing spent flowers redirects energy allocation away from seed production and toward root strength and rebloom stimulation. In hot, dry weather, that shift matters.
- Snip faded blooms weekly with clean bypass pruners
- Deadhead in the morning after dew dries
- Cut back to the next healthy bud or leaf node
- Clear debris from mulch to improve airflow and disease prevention
- Check stems for early stress signs while you work
Fertilize Lightly to Avoid Excessive Thirsty Growth
Think of fertilizer like water—more isn’t better in a drought. Use slow release fertilizer and keep your low nitrogen rates at 60–70% of normal. Split applications every four to six weeks prevents thirsty growth spurts.
A quick soil test provides guidance, eliminating guesswork. Mycorrhizal inoculation and organic fertilizers quietly improve soil health, reducing overall feeding needs.
Check Irrigation Lines, Emitters, and Mulch Depth Regularly
Once a month, walk your drip irrigation lines and look for wet patches or puddles — those are your line leak detection signals.
Test each emitter to catch any that under-deliver by more than 10 percent. Press a finger 2–3 inches into the soil for quick mulch moisture monitoring.
Top up the mulch if it has dropped below 2 inches.
Pressure valve checks keep drip systems running at 15–25 psi, where they belong.
Frequently Asked Questions (FAQs)
Should I water my garden every day in 100 degree weather?
Not necessarily. Daily watering often wastes more than it helps. In hot dry weather, deep watering every two to three days builds stronger roots than shallow daily watering.
What is the 3 year rule in gardening?
The 3-year rule means avoiding planting the same crop family in the same bed more than once every three years.
It facilitates pest disruption, nutrient cycling, and steady soil rejuvenation through simple family rotation.
How to prepare soil for drought tolerant plants?
To grow plants that shrug off summer heat, start with your soil. Loosen it 8–10 inches deep, mix in compost, and fix the drainage first.
Good soil does most of the work for you.
How to prevent pests in drought-stressed gardens?
Drought stress opens the door to pests fast. Keep foliage dry with drip irrigation, apply organic mulch, and use row covers during peak emergence.
Aphid monitoring weekly catches problems early.
What are best fertilizers for drought-prone gardens?
Slow-release nitrogen, balanced NPK ratios, organic amendments — these are your drought garden’s best allies.
Use osmotically protected fertilizers to prevent salt stress, and let soil microbes do the slow, steady feeding work.
Can drought-tolerant gardens attract pollinators and wildlife?
Pollinator-friendly dry garden plants like lavender, echinacea, and native clusters of coreopsis create nectar corridors that draw bees, butterflies, and hummingbirds.
Habitat layers and microhabitat features shelter beneficial wildlife all season, ensuring sustained ecological support.
How to revive plants after prolonged drought stress?
Think of reviving a drought-stressed plant like nursing someone back after a fever—go slow.
Start with controlled rehydration, watering deeply at the soil line each morning to reach the root zone without shocking the plant.
What container plants thrive with minimal summer watering?
Portulaca, Sedum Stonecrop, and Hens and Chicks (Sempervivum tectorum) handle summer heat well.
Use light-colored containers, coconut coir amendment, gravel surface mulch, and partial afternoon shade to keep roots cool.
How often should I fertilize drought-tolerant plants?
Most drought-tolerant plants need just one light feeding in spring. Use a slow-release fertilizer, and skip late-summer applications. Over-fertilizing pushes leafy growth that demands more water.
Can I grow drought-tolerant plants in containers?
Absolutely. Succulents like Sedum and herbs such as rosemary thrive in containers with the right potting mix, proper container size, and drainage solutions.
Group planters together for microclimate placement benefits and apply light mulching for soil moisture management.
Conclusion
Like a house built on solid ground, a drought-tolerant garden starts with preparation, not luck. The drought-tolerant summer garden tips in this guide work because they address the real reasons gardens fail: poor soil, wrong plants, and wasted water.
Fix those three things, and dry heat becomes manageable. Your garden won’t just survive summer; it’ll hold its ground while others wilt.
Start with the soil, choose wisely, and stay consistent.
- https://www.holods.com/blog/smart-summer-watering-techniques-for-homeowners-keep-your-garden-thriving
- https://gardenbetty.com/surviving-a-heat-wave-6-hot-weather-watering-tips/
- https://www.bbg.org/article/drought-proofing_your_garden
- https://fortcollinsnursery.com/fcn-blog/water-saving-techniques-in-the-heat-of-summer/
- https://www.gardenia.net/guide/drought-tolerant-gardens-plants-designs-care-guide