This site is supported by our readers. We may earn a commission, at no cost to you, if you purchase through links.

A single 5-gallon bucket can produce over 20 pounds of tomatoes in one season — no raised bed, no sprawling garden, no ground required.
Most people assume tomatoes need space to thrive, but the plant doesn’t care about your square footage; it cares about root depth, drainage, and consistent sunlight. That changes everything for apartment dwellers, renters, and anyone working with a patio or balcony.
Growing tomatoes in containers is less about making do with limited space and more about giving the plant exactly what it needs within a controlled environment. Get the fundamentals right, and your pot will outperform many in-ground gardens.
Table Of Contents
- Key Takeaways
- Choose Container-Friendly Tomato Varieties
- Pick Pots With Proper Drainage
- Prepare Lightweight Potting Mix
- Plant Tomatoes Deeply and Correctly
- Provide Sun, Water, and Fertilizer
- Support, Protect, and Harvest Tomatoes
- Top 3 Tomato Container Guides
- Frequently Asked Questions (FAQs)
- How many tomatoes can you grow in a 5 gallon bucket?
- Is October too late for tomatoes?
- How deep do containers need to be for tomatoes?
- How to successfully grow tomatoes in containers?
- Why put baking soda around tomato plants?
- What’s the best way to grow tomatoes in pots?
- How often do you put Epsom salt on tomatoes?
- Should you water tomato plants in containers everyday?
- Do you pick the yellow flowers off tomato plants?
- What is the best way to plant tomatoes in pots?
- Conclusion
Key Takeaways
- A 5-gallon bucket can yield over 20 pounds of tomatoes per season when you match it with a compact, determinate variety and get the fundamentals right.
- Your potting mix matters more than most gardeners realize — skip heavy garden soil and build a soilless blend with perlite and compost so roots can breathe, drain, and feed steadily all season.
- Consistent moisture is the single biggest lever you control: daily checks, base watering, and a steady feeding schedule every one to two weeks prevent most common problems like blossom end rot and fruit cracking.
- Planting deep — burying two-thirds of the stem — gives container tomatoes a stronger, more extensive root system that handles heat, wind, and drought far better than a shallow planting ever will.
Choose Container-Friendly Tomato Varieties

Not every tomato thrives in a pot — variety choice makes or breaks your harvest before you even buy a bag of soil. Some types stay compact and manageable, while others just keep climbing until they outgrow any container you give them. Here’s what you need to know to pick the right fit.
Dwarf and bush varieties like Tumbling Tom or Patio are natural container picks, and this guide to growing tomatoes from seed to harvest breaks down exactly which ones perform best in tight spaces.
Determinate Vs. Indeterminate Types
Think of tomato varieties as two personalities. Determinate types grow 3 to 4 feet, fruit all at once, then stop — perfect for pots with limited space.
Indeterminate types keep climbing past 6 feet all season. They provide continuous harvest cycles from summer until frost. They need larger containers and sturdy support.
For containers, determinate varieties simply ask less of you.
Dwarf and Bush Tomatoes
Dwarf and bush tomatoes are the sweet spot for container gardening. They stay 2 to 4 feet tall, fruit reliably, and don’t demand much from you. Cultivars like Tiny Tim and Patio Choice Yellow thrive in 3 to 5-gallon pots.
Don’t let their size fool you — flavor intensity holds up, and many carry built-in disease resistance too.
Cherry and Grape Varieties
If dwarf varieties are your foundation, cherry and grape tomatoes are where container gardening really rewards you.
Cherry tomatoes offer bright, high sweetness with thin skins — perfect for snacking straight off the vine. Grape tomatoes bring firmer flesh and thicker skins, making them easier to handle and great for roasting.
Here’s what sets them apart:
- Cherry flavor profiles lean sweet and aromatic, with juicy, soft flesh.
- Grape texture benefits include denser flesh that holds up to heat and handling.
- Color varieties span red, yellow, and orange — adding visual variety to any harvest.
- Culinary uses differ too: cherries shine in fresh salads, while grapes excel in sautéed or skewered dishes.
Both types grow vigorously in containers with quality potting soil and consistent watering tips applied — checking moisture daily keeps fruit development steady. Watch color development closely; harvest timing matters, so pick once fruit reaches its characteristic hue and yields gently to pressure.
Best Cultivars for Pots
Not all tomatoes earn their spot in a pot. The real container winners combine compact growth, reliable fruit set, and strong flavor — without demanding a garden bed to thrive.
| Trait | Top Cultivars |
|---|---|
| Flavor leaders | Sungold, Sweet 100 |
| Fast harvest | Early Girl |
| Compact growth | Patio Princess |
| Disease resistance | Celebrity |
| Cherry tomatoes | Sweet Million |
Match Variety to Space
Your space tells you what to grow — so listen to it.
Small pots under 5 gallons suit dwarf or compact determinate tomatoes perfectly. For balcony corners with vertical room, indeterminate varieties on stakes make the most of height without spreading wide. Tight windowsill? Stick to cherry types.
Match container size to growth habit, and your harvest almost takes care of itself.
Pick Pots With Proper Drainage

The pot you choose matters more than most people realize — it can make or break your harvest before the season even starts. Not every container does the job equally well, and size, material, and drainage all play a role. Here’s what you need to know before you buy.
Best Container Sizes
The right container size can make or break your harvest.
Cherry and dwarf varieties thrive in 3 to 5-gallon pots, while standard determinate types need at least 10 gallons. Indeterminate varieties demand 15 to 25 gallons to sustain a full season of growth.
When in doubt, size up — roots need room to breathe.
Five-gallon Bucket Limits
Five-gallon buckets are a popular choice, but they come with real limits. The usable root space is only about 1.5 to 2 gallons deep — not much room. Stick to one determinate plant per bucket, and choose compact varieties.
Filled buckets weigh 40 to 60 pounds, so position them carefully. In full sun, root zone temperatures can spike well past ideal levels.
Fabric, Plastic, Terracotta Pots
Each pot material has a real effect on how your tomatoes grow.
Fabric pots promote air pruning and dry out faster, which helps prevent overwatering. Plastic pots retain moisture longer and weigh less. Terracotta pots breathe well but dry out quickly and crack in freezing temps.
In hot climates, plastic or fabric generally outperforms terracotta.
Drainage Hole Requirements
Good drainage isn’t optional — it’s the difference between thriving tomatoes and rotting roots.
Place holes near the container’s base so gravity pulls water out fast. For 12 to 14-inch pots, use two to four evenly spaced holes. Larger planters need ½-inch openings; smaller pots do fine with ¼-inch holes. Check holes regularly — roots and mineral buildup clog them quickly.
Balcony and Patio Placement
Where you set your containers can make or break your harvest. Aim for a south-facing balcony to capture 6 to 10 hours of direct sunlight daily.
Keep pots at least 2 feet apart, away from wind-exposed railings. Place them near a water source, and always use drainage trays to protect your deck and manage runoff.
Prepare Lightweight Potting Mix

What’s inside your pot matters just as much as the pot itself. Garden soil seems like the obvious choice, but it’s actually too dense for containers — it compacts fast and suffocates roots. Here’s what to use instead.
Avoid Heavy Garden Soil
Garden soil is a trap. It looks rich and dark, but heavy garden soil in a container acts like a sponge that never fully wrings out — waterlogging roots and cutting off oxygen fast.
Here’s what it actually does to your plant:
- High clay content compacts in pots, destroying the pore spaces roots need to breathe.
- Poor soil drainage causes water to pool, triggering root rot within days.
- Dense soil structure limits microbial activity, quietly starving plants of available nutrients.
- Container weight skyrockets, making seasonal moves or repositioning nearly impossible.
That’s why soil mix selection matters before you ever drop a seedling in.
Use Soilless Potting Mix
A soilless potting mix solves what heavy soil can’t. These blends combine peat moss or coco coir for moisture retention, perlite for drainage, and composted matter for early nutrients.
Quality mixes target a pH of 6.0 to 6.5 — the sweet spot where tomatoes absorb nutrients efficiently. Coco coir-based options are also a solid sustainable choice, being renewable and highly porous.
Add Compost for Nutrition
Think of compost as slow-release nutrition — it won’t overwhelm roots but keeps feeding plants steadily throughout the season.
Mixing in two to four inches of finished compost gives your potting blend a full spectrum of nitrogen, phosphorus, potassium, calcium, and trace minerals. It also invites beneficial microbes that break down organic matter, making nutrients more accessible right where tomato roots need them most.
Improve Aeration With Perlite
Compost feeds your roots, but it can’t open up the soil. That’s where perlite steps in. Mix it at 10 to 30 percent by volume into your potting blend. This volcanic mineral creates air pockets that keep oxygen flowing directly to tomato roots, preventing the compaction that chokes growth inside containers.
Coarse-grade perlite works best — it resists collapsing under repeated watering while draining excess moisture fast.
Mulch for Moisture Control
Once your potting mix is ready, a thin layer of mulch becomes your best moisture ally. Spread organic mulch — straw or pine bark — in a 1 to 2-inch layer around the plant base, leaving a small gap near the stem.
This slows evaporation, stabilizes soil temperature, and reduces how often your watering routine demands attention.
Plant Tomatoes Deeply and Correctly
Planting day is more than just dropping a seedling into soil — how you do it shapes everything that follows. A few simple steps before and during planting can mean the difference between a struggling plant and one that takes off strong. Here’s exactly what to do.
Harden Off Seedlings First

Before your seedlings ever touch outdoor soil, they need a proper introduction to the outside world. Hardening off is the process of gradually exposing indoor-grown plants to real conditions — sun, wind, and temperature swings — so they don’t go into shock when transplanted.
Follow this 7-to-10-day gradual outdoor exposure schedule:
- Days 1–2: Set seedlings in a sheltered, shaded spot for 1–2 hours. A covered porch works perfectly. Check soil moisture twice daily — outdoor air dries pots faster than indoors.
- Days 3–4: Increase sun time to 3–4 hours, still avoiding intense afternoon sun. Sunlight acclimation starts gently — morning light is ideal.
- Days 5–6: Introduce light breeze by choosing a slightly more open location. Wind exposure strengthens stems slowly without snapping tender growth.
- Days 7–8: Allow 5–6 hours of direct sun. Watch for leaf scorch; if leaves pale or curl, step back a day.
- Days 9–10: Full temperature acclimation — leave seedlings out most of the day. If nights dip below 50°F, bring them in or use a frost cloth for frost protection.
Throughout this window, water deeply before each outdoor session to reduce transplant shock. Don’t let pots go light — evenly moist soil keeps roots stable and stress low.
Fill Containers Before Planting

Before you drop a single seedling into a container, the soil needs to be ready to receive it. Verify drainage holes are clear and unobstructed first — blocked holes cause root rot fast.
Fill your pot to within one inch of the rim, then press lightly to close air pockets without compacting. Finish with a thin compost layer on top for early nutrition.
Remove Lower Stem Leaves

Before the stem goes into the soil, strip away the lower leaves. Remove the bottom third of the stem’s foliage — clean cuts right at the node, using sharp, sanitized garden shears.
Buried leaves rot fast and invite early blight. This simple step concentrates plant energy on root development, giving your tomato a stronger, healthier start underground.
Bury Stems Deeply

Most gardeners don’t realize tomatoes are one of the few plants that actually grow roots straight from their buried stems. When transplanting seedlings, bury roughly two-thirds of the stem below the soil surface — right up to the first true leaves.
Tomatoes are rare plants that sprout roots from buried stems — plant two-thirds deep for a stronger foundation
- Stem burial depth directly controls how extensive your root system becomes
- A deeper root development boost means better water and nutrient uptake
- Wider root mass improves container stability in windy balcony spots
- More roots reduce transplant shock, helping seedlings recover faster after moving
- Moisture balance matters — keep buried sections evenly damp, never soggy, to prevent rot
Press potting soil gently around the buried stem, eliminating air pockets without over-compacting. This one step pays dividends through every stage of growth.
Water Thoroughly After Planting

That first watering after planting isn’t just routine — it’s your seedling’s lifeline.
Give the container a thorough initial soak, applying roughly one gallon of water directly at the base. Wait 30 minutes, then water again. This two-stage deep watering technique settles soil, closes air pockets around buried stems, and drives moisture down through the entire root zone.
Provide Sun, Water, and Fertilizer

Tomatoes are hungry, sun-loving plants, and in containers, they depend entirely on you to meet those needs. Getting the light, water, and feeding routine right is what separates a thriving plant from a struggling one. Here’s what your container tomatoes need to stay healthy from first flower to final harvest.
Six-plus Hours of Sunlight
Tomatoes need at least six hours of direct sunlight daily — no exceptions. South-facing spots capture the strongest peak sunlight intensity, often between midday and mid-afternoon. Here’s how sun exposure shapes your harvest:
- Full sun (6–10 hours) drives strong photosynthesis and fruit production.
- Partial shade (3–6 hours) slows growth and reduces yields noticeably.
- Seasonal sun variation means late spring and summer deliver the longest, most productive days.
- Shade from buildings or trees can silently steal hours without you realizing.
Track your daily sun hours using a sunlight calculator app or simply observe shadow movement across your chosen spot at three different times. In container gardening, microclimate matters — avoid walls that trap excessive heat above 90°F, which causes blossom drop.
Check Soil Moisture Daily
Sun keeps your plants alive, but consistent soil moisture keeps fruit from cracking. Check the top 1 to 2 inches of potting soil each morning — that’s your Morning Moisture Check. Dry, crumbly soil pulling away from container edges signals drought stress. A moisture meter at 6 to 8 inches confirms what your fingers suspect and enhances better soil moisture retention.
| Check Type | Dry Soil Indicators | Watering Schedule Adjustments |
|---|---|---|
| Morning Moisture Check | Pale, crumbly top layer | Water if top 2 inches are dry |
| Moisture Meter Use | Reading below 30% moisture | Cross-check with Sensor Calibration Tips |
| Hot Day Monitoring | Rapid surface drying | Check twice daily; increase irrigation |
| Self-watering Containers | Reservoir empties quickly | Refill daily during peak heat |
| Drainage Holes Check | Water pools at surface | Clear holes; refresh potting soil |
Water at Plant Base
Once you know the soil is dry, aim your watering can or hose at the base of the plant, not the leaves. Base watering keeps the root zone evenly hydrated, reduces foliar disease, and limits evaporation. It also encourages roots to grow deeper.
For steady consistent moisture levels, self-watering containers use a water-wicking effect to deliver moisture automatically between irrigation cycles.
Feed Every One to Two Weeks
Watering gets the soil ready, but feeding is what fuels real growth. Container soil loses nutrients fast, so a biweekly nutrient schedule keeps your plants consistently nourished without stressing the roots.
- Use a balanced liquid fertilizer like fish emulsion or seaweed extract every one to two weeks
- Apply only when soil is evenly moist to avoid fertilizer burn
- Alternate between organic fertilizer and synthetic feeds to diversify nutrient sources
Adjust Nutrients During Flowering
Once your tomatoes start flowering, it’s time to shift gears on plant nutrition. Reduce nitrogen and raise your phosphorus potassium ratio — a blend like 5-15-20 works well. This nitrogen reduction timing encourages blooms over leafy growth. Use water soluble fertilizers for even delivery, and add calcium to prevent nutrient deficiency.
| Nutrient Focus | Flowering Stage |
|---|---|
| Lower nitrogen | Reduces leafy growth |
| Higher phosphorus/potassium | Promotes bloom development |
Support, Protect, and Harvest Tomatoes

Getting your tomatoes to this stage is a real win, but the finish line still needs some attention. A little support, a watchful eye, and good timing at harvest can make the difference between a mediocre yield and a genuinely great one. Here’s what to focus on as your plants mature.
Use Cages or Stakes
Once your plant starts reaching upward, it needs something to lean on. Metal cages work best for determinate varieties — place them at transplant time to avoid disturbing roots.
For taller indeterminate types, use ladder-style stakes, 4 to 8 feet tall, secured with soft fabric ties. Adjust ties every one to two weeks as the plant grows.
Prune Suckers When Needed
Suckers are shoots that sprout from leaf axils — the joint where a branch meets the main stem. Left unchecked, they steal energy from fruit production.
Pinch them off by hand when small, ideally every one to two weeks during spring. For indeterminate varieties in containers, remove suckers below the first fruit cluster to keep growth focused and air circulating freely.
Watch Pests and Diseases
Even a thriving container garden can unravel fast once pests move in. Check leaf undersides weekly for spider mite webbing — fine silk threads with tiny stippling damage. Spot aphid clusters on new growth before they spread viruses.
If leaves show powdery white coating, that’s mildew. Remove infected leaves immediately and sterilize your pruning tools between plants to stop disease jumping.
Prevent Blossom End Rot
Blossom end rot isn’t a disease — it’s a calcium delivery failure. Moisture consistency is the real fix. When the soil swings from dry to soaked, roots can’t absorb calcium fast enough.
Water on a steady watering schedule, checking the top inch daily. Add crushed eggshells or gypsum at planting, and keep potting soil pH between 6.0 and 6.8.
Pick Before Heavy Rain
Rain is tomato’s worst enemy at harvest time. Once water floods the soil, fruit absorbs moisture fast and skin splits.
Pick ripe tomatoes before heavy rain arrives — even half-ripe ones. Clear drainage holes beforehand, mulch the surface, and move containers under shelter if possible. That one step protects weeks of careful growing.
Top 3 Tomato Container Guides
Good resources can make the difference between a frustrating first season and a genuinely rewarding harvest. Whether you’re just starting out or want to sharpen your technique, the right guide gives you a reliable reference all season long. Here are three worth keeping close.
1. Tomato Growing Answer Guide
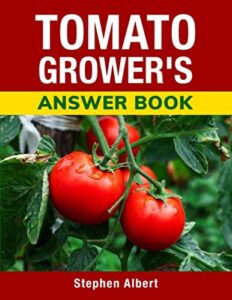
Want a single resource that answers nearly every question you’ll face while growing tomatoes? The Tomato Growing Answer Guide by Green Wagon Book delivers nearly 400 gardening questions and answers across 28 chronological growing sections — covering everything from seed starting to food preservation.
With 120 color photographs and 150 referenced varieties, it’s genuinely useful, not just decorative. Whether you’re troubleshooting pests or figuring out container sizing, this compact 104-page guide keeps practical answers close at hand.
| Best For | Anyone getting serious about growing tomatoes — from first-time gardeners to seasoned growers who want a reliable reference they can flip through all season long. |
|---|---|
| Language | English |
| Page Count | 104 pages |
| Skill Level | Novice to experienced |
| Planting Guidance | Seed starting and transplanting |
| Pest Management | Insect, animal, disease troubleshooting |
| Harvest Instructions | Harvesting guidance included |
| Additional Features |
|
- Nearly 400 Q&A entries organized by growing stage, so you can find exactly what you need exactly when you need it.
- 120 color photos and 150 variety references make it a practical visual guide, not just a wall of text.
- Covers the full journey — seed starting, transplanting, pest troubleshooting, harvesting, and even food preservation.
- Leans toward warmer climates, so gardeners in cooler regions may find some advice doesn’t quite fit their conditions.
- No coverage of greenhouse growing, which limits its usefulness if that’s your setup.
- The Q&A-only format works great for quick lookups but might feel choppy if you prefer reading straight through.
2. Vegetable Garden Almanac and Planner Guide
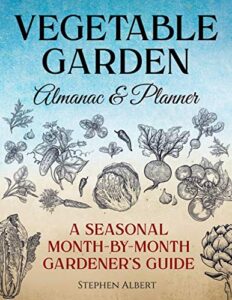
The Tomato Growing Answer Guide is great for troubleshooting, but what if you need a system — something that tells you when to act, not just what to do?
That’s where the Vegetable Garden Almanac and Planner earns its place. Spanning 210 pages, it maps out month-by-month sowing, transplanting, and harvest windows adapted to your climate zone, with over 24 charts and 6 customizable worksheets to keep your container tomato season running on schedule.
| Best For | Gardeners of all skill levels who want a structured, year-round planting system tailored to their US climate zone. |
|---|---|
| Language | English |
| Page Count | 210 pages |
| Skill Level | Beginner-friendly |
| Planting Guidance | Sowing and transplanting |
| Pest Management | Pest and disease management |
| Harvest Instructions | Harvesting instructions included |
| Additional Features |
|
- Month-by-month and seasonal guides take the guesswork out of when to sow, transplant, and harvest
- 24 charts and 6 customizable worksheets make it easy to track and personalize your garden plan
- Beginner-friendly language means you don’t need any prior gardening knowledge to get value from it
- No color photos — hand-drawn illustrations only, which may feel limited if you rely on visuals to identify plants or problems
- Focused on US climate zones, so it may not translate well for gardeners outside the country
- At just over 200 pages, it covers a lot of ground but may not go deep enough for experienced growers looking for advanced techniques
3. Kitchen Garden Grower Guide
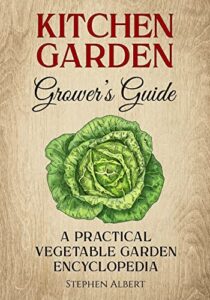
Planning what to grow is one thing — knowing how to bridge garden to kitchen is another. The Kitchen Garden Grower Guide fills that gap beautifully.
At 409 pages, it covers everything from soil preparation and frost-date charts to harvesting and food preparation, making it genuinely useful whether you’re picking your first ripe Sungold or troubleshooting blossom end rot mid-season. It’s the kind of reference you reach for before planting and again at the dinner table.
| Best For | Home gardeners of all skill levels who want a solid, no-fuss reference they can use from seed to supper. |
|---|---|
| Language | English |
| Page Count | 409 pages |
| Skill Level | Beginner to experienced |
| Planting Guidance | Planting and growing instructions |
| Pest Management | Troubleshooting reference |
| Harvest Instructions | Harvesting and storing covered |
| Additional Features |
|
- Covers the full growing cycle — planting, harvesting, storing, and cooking — so you’re not bouncing between five different books.
- Climate-specific guidance and frost date charts make it practical whether you’re gardening in Vermont or Vancouver.
- Useful for both beginners finding their footing and experienced growers who need a quick troubleshooting answer mid-season.
- Light on images and illustrations, so visual learners might find it harder to follow along.
- No built-in planner, so you’ll need a separate tool if you want to map out your growing season.
- Reads more like a reference manual than a story — great for looking things up, less enjoyable as a cover-to-cover read.
Frequently Asked Questions (FAQs)
How many tomatoes can you grow in a 5 gallon bucket?
One plant per bucket — that’s the sweet spot. A single tomato plant in a 5-gallon bucket usually yields 8 to 15 pounds per season with consistent care.
Is October too late for tomatoes?
October isn’t automatically too late. Success depends on your climate. Night temperatures above 10°C keep ripening going. Below that, fruit development slows sharply. In warm microclimates or with frost protection, you can still harvest.
How deep do containers need to be for tomatoes?
Roots need room to breathe. Aim for at least 12 inches deep for compact varieties. Indeterminate types do best in 18 to 24 inches. Deeper pots hold moisture longer and keep plants stable.
How to successfully grow tomatoes in containers?
Growing tomatoes in containers comes down to variety, pot size, and consistent care. Get those three right, and you’re already halfway to a harvest worth bragging about.
Why put baking soda around tomato plants?
Baking soda raises the leaf surface pH, making it harder for fungal spores to take hold. Think of it as a light shield — simple, cheap, and surprisingly effective against powdery mildew and early blight.
What’s the best way to grow tomatoes in pots?
The best way to grow tomatoes in pots starts with choosing the right variety. Dwarf and determinate types stay compact, while cherry tomatoes thrive and produce quickly — even in tight spaces.
How often do you put Epsom salt on tomatoes?
Apply Epsom salt every two weeks during the growing season, using 1 tablespoon per gallon of water. Skip it if your soil already has enough magnesium or leaves look healthy.
Should you water tomato plants in containers everyday?
Not always. Water when the top inch of soil feels dry — that might mean daily in summer heat, or every two to three days during cooler, cloudier stretches.
Do you pick the yellow flowers off tomato plants?
Sometimes, yes — but not always. Remove the first few early blooms to build a stronger plant. After that, let the flowers stay. They’re your future tomatoes.
What is the best way to plant tomatoes in pots?
Plant tomatoes deep — bury the stem up to the first set of leaves. Remove lower leaves first. This encourages stronger roots and a sturdier plant overall.
Conclusion
A single balcony with one well-fed pot can outgrow a backyard garden that’s been neglected all season long.
Once you truly understand how to grow tomatoes in containers — matching variety to space, building the right soil mix, and feeding consistently — the container stops feeling like a compromise. It becomes your most controllable growing environment.
The plant doesn’t need acres of ground. It needs you to get the basics right, and now you have exactly that.