This site is supported by our readers. We may earn a commission, at no cost to you, if you purchase through links.
 Your preparing garden for winter checklist starts with clearing diseased plants and dead material, then moves to soil preparation through mulching and composting.
Clean and store tools properly, leaving some areas wild for beneficial insects. Don’t forget to lower your mower, aerate compacted soil, and harvest remaining vegetables.
Smart winter prep means less spring cleanup and healthier plants. The secret lies in knowing which tasks actually matter and which ones you can skip without consequences, making smart decisions crucial for a successful garden, and understanding the value of proper preparation.
Table Of Contents
- Key Takeaways
- Winter Garden Preparation
- Soil and Bed Preparation
- Tool Maintenance and Storage
- Wildlife Support and Design
- Seasonal Lawn Care
- Frequently Asked Questions (FAQs)
- What is the 3 year rule in gardening?
- What month do you start a winter garden?
- What should you do to prepare your garden for winter?
- Are you supposed to cut back plants for winter?
- How to prepare vegetable beds for winter?
- How should I prepare my garden for winter?
- When should I start winterizing my garden?
- How to prepare garden soil for next year?
- When should I stop watering my garden before winter?
- How do I winterize my garden irrigation system?
- Conclusion
Key Takeaways
- Tackle diseased plants first – You’ll prevent problems from spreading by removing infected material completely, roots and all, before it can harbor diseases through winter.
- Protect your soil with organic matter – Add compost to beds, create leaf mold from fallen leaves, and plant cover crops to enrich soil naturally while preventing erosion.
- Maintain your tools properly – Clean, sharpen, and oil all equipment before storage so they’re ready for spring and last longer without rust damage.
- Support wildlife while prepping – Leave seed heads and stalks standing, create brush piles from debris, and mulch around perennials to provide habitat while protecting plants.
Winter Garden Preparation
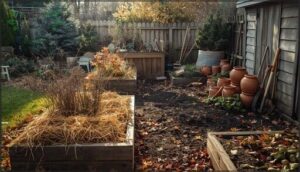
As temperatures drop and leaves start falling, it’s time to wrap up your garden’s growing season and prepare it for winter’s harsh conditions.
Smart fall preparation now means healthier plants, better soil, and less work when spring arrives.
Winter prep today saves you headaches tomorrow—healthier plants, richer soil, easier spring.
As temperatures drop and leaves start falling, it’s time to wrap up your garden’s growing season and prepare it for winter’s harsh conditions.
Smart fall preparation now means healthier plants, better soil, and less work when spring arrives, which ultimately leads to a garden with better soil.
Remove Dead Plants
Start your fall garden cleanup by tackling diseased plants first—they’re trouble waiting to happen. Remove these garden villains completely, roots and all, to stop diseases from camping out through winter.
Follow these steps for effective garden waste management:
- Pull diseased plants by the roots to stop disease spread
- Burn foliage from severely infected plants for disease prevention
- Remove plant debris to avoid pests
- Cut healthy plants at the base for easier disposal
- Clear annuals to refresh soil
Compost Disease-Free Plants
Transform garden cleanup into next year’s success story through strategic composting guidelines. You’ll turn autumn debris into nutrient-rich soil amendments while protecting garden health.
Turn today’s garden waste into tomorrow’s soil gold through smart composting choices.
Focus on safe materials only—healthy plant matter, disease-free leaves, and clean stems belong in your pile. Skip anything with visible rot, unusual spots, or pest damage to prevent disease spread.
Hot composting reaches temperatures above 131°F, killing pathogens and weed seeds. Mix green materials (fresh clippings) with brown ones (dry leaves) for faster breakdown. Composting fall leaves creates excellent soil conditioner.
Cold composting works too, but requires disease-free inputs since it won’t eliminate harmful organisms.
| Material Type | Safe to Compost | Action Needed |
|---|---|---|
| Healthy annuals | Yes | Chop before adding |
| Disease-spotted leaves | No | Burn or discard |
| Clean pruned stems | Yes | Break into small pieces |
| Pest-infested plants | No | Remove from property |
| Fall vegetable debris | Depends | Inspect carefully first |
Cleaning garden debris properly guarantees your compost benefits enhance soil health rather than introducing problems. Smart composting creates tomorrow’s garden gold. Preparing your garden also involves harvesting tender vegetables before the first frost.
Cut Back Herbaceous Perennials
Once you’ve composted healthy material, grab your pruners for perennial care.
Cut herbaceous perennials to ground level, leaving 2-3 inches of stem for winter garden prep.
These pruning techniques offer deadheading benefits and disease prevention while encouraging spring regrowth encouragement.
Clean tools between plants for tool sterilization – this simple garden bed preparation step protects your investment.
Prune Deciduous Trees
Dormancy pruning helps deciduous trees stay healthy through winter’s harsh conditions.
When trees enter their rest period, you can safely remove problem branches without causing stress.
Here’s your winter pruning checklist:
- Tool sterilization prevents disease spread between cuts and trees
- Branch selection focuses on dead, damaged, or crossing limbs first
- Safety gear protects you while working with sharp tools overhead
Skip wound sealing – trees heal better naturally.
This dormant pruning shrubs and tree and shrub protection method strengthens your landscape.
Soil and Bed Preparation
Your garden’s soil needs winter prep to bounce back strong next spring, and it’s easier than you think.
Focus on adding compost, mulching beds, and planting cover crops to protect and enrich your soil during the cold months.
Create Leaf Mold
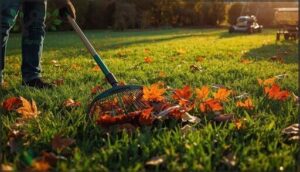
Collect those fallen leaves for your garden checklist and turn them into gardening gold through composting leaves. This leaf management technique creates rich leaf mold that’ll boost your soil’s health.
| Leaf Type | Decomposition Time | Best Use |
|---|---|---|
| Oak, Maple | 6-12 months | General soil amendment |
| Pine needles | 12-24 months | Acid-loving plants |
| Mixed deciduous | 4-8 months | Compost pile base |
Mold creation steps are simple: pile, moisten, wait. For speeding decomposition, chop leaves with your mower first.
Leaf mold benefits include better water retention and nutrients. Fall is also a great time to focus on soil pH adjustment for the next growing season.
Mulch Perennials
Your perennial bed-winterizing project starts with selecting the right organic mulches like wood chips, straw, or shredded leaves. Apply these winter garden preparation materials around your perennials using proper mulch timing—after the first hard frost but before ground freezes.
Follow these mulch depth guidelines for different perennial types:
- Apply 2-3 inches for tender perennials
- Use 4-6 inches for exposed root zones
- Keep mulch materials 2 inches from plant stems
- Choose organic mulches that break down slowly
- Refresh your winter garden checklist annually
This mulching approach protects roots from temperature swings while winterizing perennials effectively, which is a key part of maintaining a healthy garden by using the right mulch materials.
Prep New Garden Beds
Lasagna gardening transforms winter garden preparation into a simple layering process. You’ll create new raised bed areas by covering targeted spots with cardboard, then adding alternating layers of brown materials (leaves, straw) and green materials (compost, manure).
This weed suppression method eliminates digging while you amend soil naturally over winter. Consider suitable garden products for this method.
| Method | Materials Needed |
|---|---|
| Cardboard Base | Large cardboard sheets, newspaper |
| Brown Layers | Dried leaves, straw, wood chips |
| Green Layers | Fresh compost, aged manure |
| Top Layer | Quality topsoil, finished compost |
| Soil testing | pH strips, nutrient test kit |
Your garden beds will cook like lasagna all winter, creating rich garden soil by spring without backbreaking work.
Sow Cover Crops
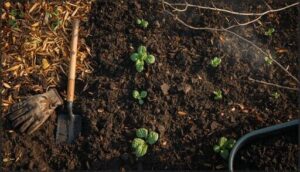
After preparing new garden beds, you’ll want to sow cover crops for ideal soil improvement and erosion prevention. Winter rye and clover excel at nitrogen fixation while providing excellent weed suppression.
These hardy crops protect your soil through harsh months, making spring garden soil preparation easier. They’ll naturally winter-kill, creating perfect organic matter for crop rotation.
- Winter rye reduces soil loss by 96% compared to bare ground
- Leguminous crops like clover add up to 110 pounds of nitrogen per acre
- Dense plantings suppress weeds by 80-90% during dormant periods
- Root systems improve soil structure and increase water infiltration by 25%
- Cover crop residue acts as natural mulch, reducing spring weed germination
Tool Maintenance and Storage
Your gardening tools work hard all season, so they deserve proper care before winter storage.
Clean, sharp tools last longer and make spring gardening much easier, while proper storage prevents rust and damage from freezing temperatures, and using clean tools is essential for the health of your garden.
Clean Gardening Tools
Your garden tools deserve better than being tossed in a corner until spring. Start your tool maintenance by removing all dirt and plant debris, then disinfect with a mild bleach solution to prevent disease spread.
Next, inspect wooden handles for splinters and treat them with linseed oil to prevent cracking. A specialized garden tool cleaner can help remove stubborn residue.
Here’s your tool cleaning checklist:
- Scrub and sanitize – Remove soil buildup and disinfect cutting surfaces with rubbing alcohol
- Oil metal components – Apply light machine oil to prevent rust formation during storage
- Check moving parts – Lubricate hinges, springs, and adjustable mechanisms for smooth operation
Sharpen Pruners
Once your tools are sparkling clean, it’s time to make them razor-sharp. Dull pruning shears crush stems instead of making clean cuts, which invites disease and slows healing.
Start by checking blade alignment—misaligned blades won’t cut properly no matter how sharp they are. Use a fine file or sharpening stone to restore the original sharpening angles, typically 20-25 degrees. Work slowly and maintain consistent pressure. Different pruner types may need slightly different approaches, but the basics remain the same. A quality sharpening stone is essential for this task.
| Sharpening Step | Best Tool | Key Tip |
|---|---|---|
| Remove nicks | Fine file | Light, even strokes |
| Restore edge | Sharpening stone | Maintain 20-25° angle |
| Final polish | Fine grit stone | Smooth, consistent motion |
| Test sharpness | Paper or soft wood | Should slice cleanly |
After sharpening, wipe blades clean and apply a thin coat of oil for rust prevention. Don’t forget handle maintenance—tighten loose screws and check pivot points. Well-maintained garden tools can last decades with proper garden tool care.
Apply Protective Coat
Protection creates a barrier between your tools and rust. After sharpening, apply a thin layer of oil to prevent corrosion during winter storage.
- Choose natural options like linseed or mineral oil for safe application
- Wipe down metal surfaces with an oiled cloth or rag
- Pay extra attention to joints and moving parts that collect moisture
- Store tools in a dry location away from dampness
This simple step extends tool life substantially, ensuring they’re ready for spring garden tasks, which is a critical part of maintaining your tools.
Store Hoses and Supports
Once you’ve oiled your tools, shift your attention to hose winterizing and support longevity.
Draining hoses completely prevents costly freeze damage that can split rubber and create spring headaches. Store them coiled in organized storage areas like sheds or garages.
Clean plant supports thoroughly, removing soil and debris that attracts pests. Protect materials by checking for rust spots and applying protective coatings where needed.
This garden structure maintenance guarantees everything’s ready when planting season returns. A key step involves protecting plants from frost using methods like burlap wraps.
- Disconnect hoses from spigots and drain completely
- Clean supports with wire brush, removing all debris
- Store everything in dry, accessible locations for spring
Wildlife Support and Design
Winter transforms your garden into a wildlife sanctuary when you leave natural elements in place.
This season offers the perfect opportunity to design spaces that support local creatures while planning improvements for next year’s growing season.
Leave Leaves and Stalks
Now that your tools are clean and stored, resist the urge to tidy everything.
Leave the leaves and stalks standing—they’re not garden clutter, they’re insect habitat goldmines.
These natural mulch layers provide wildlife benefits while slowly enriching your soil through decomposition.
Seed heads offer winter food for birds, supporting seed dispersal.
This simple garden winter preparation step transforms cleanup into soil enrichment effortlessly.
Create Brush Piles
Transform your fall cleanup into wildlife gardening gold by stacking fallen branches strategically.
Create brush pile size around 3-4 feet high, considering location considerations near garden edges for easy aesthetic integration.
Mix thick branches with smaller twigs for material diversity, ensuring wildlife benefits like shelter for birds and small mammals.
This garden winter preparation task turns debris into functional habitat, checking off your winter wildlife support goals while maintaining garden checklist efficiency.
Incorporate Hardscape Elements
Beyond brush piles, hardscape elements create year-round garden structure while supporting wildlife.
Install patios and paths using permeable materials that won’t crack in freeze-thaw cycles. Add retaining walls with crevices for beneficial insects to overwinter.
Position outdoor seating near bird feeders for wildlife watching. Consider water features with heaters to prevent freezing.
Garden lighting extends your winter enjoyment while sealing pavers protects hard surfaces from winter damage.
You can also enrich your garden by building compost heaps with kitchen scraps.
Prioritize Keystone Plants
Keystone plants form the foundation of thriving ecosystems, supporting biodiversity and creating habitat for countless species.
You’ll want to prioritize native selection when preparing garden beds, as these powerhouses host caterpillars that feed birds and boost plant diversity year-round.
- Choose native oaks, willows, or maples that support over 90% of regional pollinators and triple songbird diversity
- Leave seed heads and stalks standing through winter for cold weather gardening protection and wildlife shelter
- Plant keystone berry producers to increase winter bird visits by 120% while winterizing vegetable garden areas
Seasonal Lawn Care
Your lawn needs final preparations before winter sets in, just like the rest of your garden.
These four key tasks will keep your grass healthy through cold months and give you a head start on next spring’s growing season.
Gather Ripe Vegetables
Race against frost to save your season’s best produce. Harvest timing matters most—tender vegetables like tomatoes need picking before the first freeze, while hardy varieties like kale handle light frost beautifully.
Check each vegetable variety’s frost tolerance before deciding when to harvest.
Perfect your storage methods by understanding different ripening stages—green tomatoes ripen indoors while root crops store best in cool, dark places.
Master harvesting, storing, canning, pickling, drying techniques now.
Lower Mower Height
After gathering your vegetables, it’s time to give your lawn mower blades one final adjustment.
Lower your mowing height gradually during fall’s last few cuts, but avoid scalping risks that damage turf health.
This practice supports lawn winterization by preventing snow mold and fungal issues while encouraging stronger root development.
Different grass varieties require specific heights, so check your lawn’s needs.
Regular mowing frequency through fall maintains weed control and prepares your lawn care routine for winter dormancy.
Fertilize and Seed Bare Spots
Your lawn’s bare spots need attention before winter arrives. Soil testing reveals nutrient needs, while overseeding lawns fills gaps effectively.
Apply winter fertilizer containing phosphorus and potassium to strengthen roots. Choose cool-season grass seed for bare spot repair, ensuring good seed-to-soil contact.
Fall lawn care timing matters—fertilize 4-6 weeks before frost for ideal winter fertilizing results. Keep seeded areas moist but avoid heavy traffic.
This lawn winterization strategy reduces spring weeds and creates healthier turf next season.
Aerate High-Traffic Areas
High-traffic areas need compaction relief before winter hits.
Two quick passes with aeration tools create space for better water penetration and root growth.
Leave soil plugs on your lawn—they’ll naturally improve soil structure over time.
This garden winter preparation step gives grass roots room to breathe, setting up stronger turf for spring.
Your garden winterization checklist isn’t complete without addressing these beaten-down spots that need extra attention.
Frequently Asked Questions (FAQs)
What is the 3 year rule in gardening?
Picture your new plants like sleepy teenagers settling into dormancy.
The 3-year rule says plants "sleep" their first year, "creep" their second, and "leap" in their third year.
You’ll see modest growth initially as they establish roots before explosive blooming later.
What month do you start a winter garden?
You’ll want to start your winter garden in late August or early September. This timing lets cool-season crops like kale, spinach, and radishes establish before frost hits your area.
What should you do to prepare your garden for winter?
Harvest tender vegetables before frost, cut back diseased plants, mulch hardy crops, store root vegetables, add compost to beds, clean tools, and protect plants with covers or move containers indoors.
Are you supposed to cut back plants for winter?
It depends on the plant type.
Cut disease-prone perennials like bee balm and hostas after foliage dies.
But leave seed heads and stalks for wildlife food and shelter during winter months.
How to prepare vegetable beds for winter?
Like medieval serfs preparing for winter’s siege, you’ll need to clear out tender vegetables before frost hits.
Add compost, mulch beds with straw, and plant cover crops to protect soil nutrients and prevent erosion.
How should I prepare my garden for winter?
Start by harvesting tender vegetables before frost hits, then add compost to beds and cover with mulch.
Clean up diseased plants, store tools properly, and plant spring bulbs for next year’s garden.
When should I start winterizing my garden?
You’ll want to begin winterizing tasks in late summer through mid-fall, typically August through October.
Start harvesting tender vegetables before the first frost, then tackle soil preparation and plant protection as temperatures drop consistently, which involves complete concepts of preparation.
How to prepare garden soil for next year?
Think of your soil as a savings account – now’s the time to make deposits for spring’s rich dividends.
Add 2-3 inches of compost, plant cover crops like rye, and mulch beds to prevent erosion and weeds.
When should I stop watering my garden before winter?
You’ll want to stop watering most plants about 2-4 weeks before your first expected frost, but keep watering perennials, shrubs, and trees until they go dormant naturally.
How do I winterize my garden irrigation system?
Freezing temperatures can destroy your irrigation system faster than you can say "expensive repair bill.
Drain all hoses, shut off outdoor water valves, and blow compressed air through sprinkler lines to prevent costly winter damage.
Conclusion
Picture Sarah from Michigan who followed her grandmother’s preparing garden for winter checklist last fall.
When spring arrived, her garden bounced back faster than her neighbors’ plots. Your winter prep work pays dividends when growing season returns.
Complete your preparing garden for winter checklist now, and you’ll thank yourself later. These 25 tasks protect your investment, support wildlife, and set up next year’s success.
Start with the biggest jobs first, then tackle smaller details as time allows.
- https://www.wildflower.org/
- https://www.phytostudio.com/claudia-west
- https://blog.nwf.org/authors/mary-phillips/?_ga=2.187186477.469698733.1698170734-239510723.1685622606&_gac=1.249937268.1695737022.Cj0KCQjw2qKmBhCfARIsAFy8buKvS8ukFq1yw0CmR2ZfNoQRKEr966eeY3PXbAYmnI2K2r2NaKCS1OMaAvnKEALw_wcB
- https://plants.westwoodgardens.com/12170002
- https://www.uaex.uada.edu/environment-nature/soil/soil-test.aspx


