This site is supported by our readers. We may earn a commission, at no cost to you, if you purchase through links.
The difference between lackluster winter greens and a thriving cold-season harvest often comes down to preparation work done weeks before the first frost. Soil that’s tested, amended, and strategically enriched creates an environment where root crops deepen, brassicas sweeten, and leafy greens maintain their vigor through shortened daylight and dropping temperatures.
The steps you take now determine whether your winter garden merely survives or genuinely produces.
Table Of Contents
- Key Takeaways
- Assessing Your Garden Soil for Winter
- Setting Ideal Soil Conditions
- Amending Soil With Organic Matter
- Improving Soil Structure and Texture
- Preparing Garden Beds for Winter Planting
- Selecting and Applying Mulch for Winter
- Choosing and Planting Cover Crops
- Adjusting for Specific Winter Vegetables
- Protecting Soil and Plants From Frost
- Maintaining Soil Health Through Winter
- Frequently Asked Questions (FAQs)
- Conclusion
Key Takeaways
- Winter soil success depends on pre-frost preparation—testing and amending pH (6.0-7.0), balancing NPK nutrients, and improving drainage weeks before planting creates the foundation that determines whether crops thrive or merely survive cold conditions.
- Organic matter from compost and aged manure acts as slow-release nutrition while building soil structure that withstands freeze-thaw cycles, but timing and quality matter—fresh manure burns roots while properly aged amendments improve texture, water retention, and microbial activity throughout winter.
- Mulch serves dual protection by insulating soil against temperature swings and suppressing weeds, with 2-3 inches of straw or shredded leaves providing optimal frost protection without suffocating roots or inviting pest problems.
- Different winter vegetables demand specific soil conditions—root crops need loose, deep soil (10-15 inches) with moderate nitrogen and higher phosphorus, while leafy greens thrive in nitrogen-rich soil worked only 6-8 inches deep, making tailored preparation essential for winter garden success.
Assessing Your Garden Soil for Winter
Before you plant your winter vegetables, you need to know what you’re working with. Evaluating your soil’s current condition helps you identify what amendments it needs and what challenges you might face.
Here’s how to evaluate your garden soil and get it ready for the cold months ahead.
Soil Sampling Techniques
You’ll want to test your soil about four to six weeks before planting, giving yourself enough time to make amendments that really matter. Soil sampling provides the foundation for precise soil preparation, ensuring your winter vegetables get exactly what they need from the start.
Here’s how to collect accurate samples for lab analysis:
- Use a clean trowel or soil probe to gather samples from 6-8 inches deep
- Collect soil from five different spots across your garden bed
- Mix these samples thoroughly in a clean bucket to get representative data
- Remove any debris, then place about two cups in a lab-provided bag
- Label your sample with the location and date for proper result application
This systematic approach to soil testing gives you reliable data interpretation for adjusting soil pH and soil structure.
Visual Soil Condition Indicators
While lab results give you the numbers, your own eyes can tell you plenty about your soil’s readiness before you ever touch a test kit. Healthy soil preparation starts with visual observations that reveal critical details about soil structure and soil health at a glance.
These quick checks help you understand soil pH potential and identify problem areas requiring amendment before winter planting begins.
| Indicator | What to Look For |
|---|---|
| Soil Color | Rich, dark brown signals organic matter; pale gray suggests poor drainage |
| Texture Analysis | Crumbly, loose consistency holds shape but breaks apart easily |
| Moisture Levels | Slightly damp soil forms a ball without leaving mud on your palm |
| Compaction Tests | A trowel slides in smoothly; hard, resistant layers need immediate attention |
| Erosion Signs | Exposed roots or gullies mean you’ll need protective mulch coverage |
Setting Ideal Soil Conditions
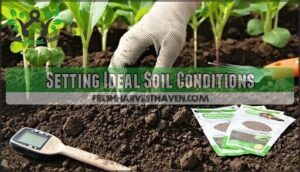
Once you’ve tested and understood your soil, it’s time to fine-tune conditions for winter success. The three critical factors you’ll need to adjust are pH balance, nutrient levels, and drainage—each one directly affects how well your vegetables can access what they need to thrive.
Let’s look at how to dial in each of these elements for ideal winter growing conditions.
Achieving Optimal Soil PH (6.0–7.0)
Most winter vegetables thrive when soil pH sits between 6.0 and 7.0, so soil testing is your starting point. If your soil pH drops below 6.0, you’ll face reduced nutrient availability and stunted root development.
Ground agricultural limestone is the go-to amendment for acidic correction—finer particles work faster, and you can raise pH by one unit with about 1.66 kg of lime per square meter in sandy loam. Organic amendments like compost and well-aged manure also help with pH balancing while enriching soil structure, though lime remains more efficient for significant shifts.
Understanding soil fertility management is vital for peak vegetable growth.
Balancing Nutrient Levels (NPK)
Once pH is balanced, you’ll want to focus on nitrogen, phosphorus, and potassium (NPK). Most winter vegetables need steady nitrogen for leafy growth, phosphorus for root development, and potassium to boost cold tolerance.
Compost and well-rotted manure supply all three while improving soil structure and encouraging nutrient cycling. If you’re dealing with potassium deficiency, wood ash or greensand can help, and legume cover crops offer natural nitrogen fixing.
Test nutrient levels regularly to maintain soil fertility throughout the season. Understanding proper fertilization techniques is essential for maximizing winter vegetable yields.
Ensuring Proper Soil Drainage
Without good drainage, even nutrient-rich soil can drown your winter crops before they get started. Soil structure and organic matter improve soil porosity and water infiltration, preventing waterlogged conditions that harm root development.
Test drainage with this simple approach:
- Dig a 12-inch hole and fill it with water for permeability testing
- Add compost or aged bark to boost soil drainage in heavy clay
- Install raised beds or drainage systems where water pools consistently
- Apply mulch to prevent soil erosion while protecting soil preparation efforts
Amending Soil With Organic Matter
Once you’ve set the right pH and nutrient levels, it’s time to enrich your soil with organic matter. Compost and manure work like a slow-release fertilizer, feeding your winter vegetables throughout the season while improving soil structure.
Here’s what you need to know about choosing and applying organic amendments effectively.
Benefits of Compost and Manure
Compost and manure work like a slow-release vitamin boost for your soil, feeding winter vegetables steadily while improving texture and water retention throughout the coldest months. Compost tea amplifies these benefits by delivering soluble nutrients and soil biota directly to root zones.
Different manure types—aged poultry, cow, or horse—offer varying nitrogen levels, so you’ll want to match them to your crops’ needs. These organic fertilizers establish microbe balance, creating a living system that processes nutrients efficiently.
Together, they transform tired earth into thriving soil, preparing it for sustained winter growth.
Choosing Quality Organic Amendments
Not all organic matter is created equal—you’ll need to spot the difference between well-aged, nutrient-rich amendments and those that could starve or harm your winter crops. Look for dark, crumbly compost with an earthy smell, not sour or ammonia-heavy odors.
Check manure types for proper aging—fresh manure burns roots, while well-rotted versions break down smoothly. Quality soil conditioners and natural additives should be free of weed seeds, contaminants, and unfinished materials that rob nitrogen during decomposition.
Application Techniques for Even Distribution
Spreading your amendments the right way makes the difference between a thriving winter garden and patchy, underperforming soil—here’s how you guarantee every square inch gets what it needs. Scatter compost or manure across your beds, then work it 8–10 inches deep using a spading fork or tiller for proper soil aeration and compost mixing.
Apply a 2–3 inch mulch layering after soil preparation to lock in moisture and prevent compaction, creating ideal soil structure for seed sowing and fertilizer spread throughout winter.
Improving Soil Structure and Texture
Good soil structure isn’t just about what’s in the soil—it’s about how everything fits together. When your soil particles bind properly and allow air and water to move freely, your winter vegetables can sink roots deep and pull nutrients efficiently.
Let’s look at three essential techniques to transform dense, lifeless soil into a thriving foundation for cold-weather crops.
Loosening Compact Soil
Compact soil acts like a locked door to your winter vegetables, blocking roots from spreading, water from draining, and air from circulating through the growing zone.
You’ll need to break up this compaction relief challenge through proper tillage methods before planting. Use aerating tools like a broadfork or garden fork to loosen soil 8-10 inches deep without destroying the structure.
This soil loosening process improves soil aeration and transforms heavy, dense earth into workable loamy soil that fosters healthy winter growth.
Incorporating Sand, Silt, and Clay
The secret to loamy soil lies in balancing the three fundamental particles—sand, silt, and clay—each bringing distinct benefits that work together to create the ideal texture for winter vegetables. Sand improves water infiltration and prevents waterlogging, silt holds nutrients and moisture, while clay binds particles into stable aggregates.
You’ll assess your existing soil texture first, then amend accordingly—adding sand to heavy clay soils or incorporating organic matter with clay particles into sandy grounds. This soil mixing approach strengthens aggregate stability and optimizes particle size distribution.
- Sandy soil (gritty texture) needs compost and clay to improve water retention
- Clay soil (sticky, dense) requires sand and organic matter for better drainage
- Silty soil (smooth, slippery) benefits from compost to boost soil structure
- Balanced loam maintains soil health with equal parts sand, silt, and clay
Proper soil preparation through texture adjustment ensures sturdy soil pH stability and winter vegetable success.
Tools for Effective Soil Aeration
Once you’ve balanced your soil texture, you’ll need the right tools to open up compacted layers and introduce oxygen deep into the root zone where winter vegetables will establish themselves.
Soil preparation requires selecting aeration methods that improve soil structure without destroying beneficial microbial communities, enhancing air circulation and root growth potential.
| Tool | Best For | Soil Loosening Depth |
|---|---|---|
| Broadfork | Deep aeration without turning | 12–18 inches |
| Garden Fork | Manual soil loosening | 6–10 inches |
| Soil Tillers | Large beds needing compost integration | 8–12 inches |
Mulching after aeration protects your improved soil health through winter.
Preparing Garden Beds for Winter Planting
Once you’ve enriched and loosened your soil, it’s time to shape your garden beds for winter planting. The way you prepare your beds—whether you till, build raised structures, or create in-ground rows—directly affects drainage, root development, and your ability to manage winter crops.
Let’s look at three practical approaches to get your beds winter-ready.
Tilling and Cultivating Methods
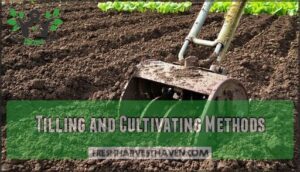
Proper tilling breaks up hardened soil, improves drainage, and gives your winter vegetables the loose, aerated foundation they need to establish strong roots. You’ll want to till 8 to 10 inches deep using a rototiller or broadfork, which provides adequate cultivation depth without damaging soil structure.
Time your tillage when the soil is slightly moist—not waterlogged—to prevent compaction. This deep tilling and careful soil turning create the aeration your winter crops need to thrive.
Building Raised or In-Ground Beds
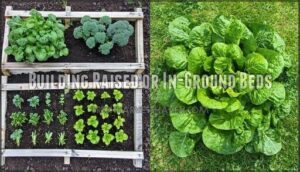
Choosing between raised or in-ground beds depends on your soil drainage, back comfort, and how much control you want over your growing conditions. Here’s how to make the right choice for your winter garden:
- Raised beds warm faster in spring, offer excellent drainage systems, and let you build custom soil structure from scratch using quality compost and organic matter.
- Frame materials like untreated cedar or composite lumber provide durability without chemical leaching into your prepared soil.
- In-ground beds work well if you’ve got decent native soil—just focus on bed construction that maintains proper soil depth of 8-10 inches.
- Bed layout should minimize compaction by keeping paths clear and mulching walkways to protect soil structure year-round.
Creating Planting Rows and Spacing
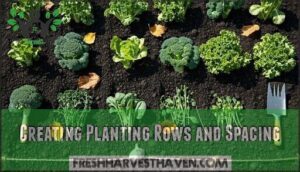
With your beds built and ready, laying out rows with proper spacing gives each winter vegetable room to develop strong roots without fighting its neighbors for nutrients and water.
Plan your bed layout using this guide, factoring in crop rotation to maintain soil structure and prevent nutrient depletion:
| Winter Vegetable | Row Spacing | Plant Density | Soil pH Needs |
|---|---|---|---|
| Kale & Greens | 18-24 inches | 12-18 inches apart | 6.0-7.0 |
| Carrots (root crops) | 12-18 inches | 2-3 inches apart | 6.0-6.8 |
| Broccoli | 24-36 inches | 18-24 inches apart | 6.0-7.0 |
| Garlic | 6-8 inches | 4-6 inches apart | 6.0-7.0 |
| Spinach | 12-18 inches | 3-6 inches apart | 6.5-7.0 |
Mark rows with stakes and string, then amend soil with organic matter before planting.
Selecting and Applying Mulch for Winter
Mulch acts as your winter garden’s first line of defense, shielding soil and roots from harsh temperature swings while keeping weeds at bay. Choosing the right material and applying it correctly makes all the difference in how well your winter vegetables perform.
Let’s look at the best mulch options, proper application depths, and how to optimize insulation and weed suppression.
Best Mulch Materials (Straw, Leaves, Compost)
Your choice of mulch can mean the difference between thriving winter crops and struggling plants, so let’s break down the top three organic options that work best in cold-weather gardens.
Straw offers excellent soil insulation while allowing air circulation, making it ideal for root crops. Shredded leaves break down slowly, adding organic matter throughout winter while suppressing weeds.
Compost provides immediate nutrients and improves soil preparation, though it’s less effective as winter covering alone—you’ll get better results layering it beneath straw.
Mulch Depth and Coverage Tips
Getting your mulch depth right isn’t guesswork—it’s about hitting a perfect balance that protects roots without suffocating them or inviting pests to nest. Apply 2-3 inches of straw or shredded leaves for ideal soil insulation and frost protection. This mulch thickness maintains winter mulching benefits while allowing moisture penetration.
For organic covers like compost, spread 1-2 inches first, then top with bulkier materials to balance nutrient delivery with effective soil preparation for your winter vegetables.
Mulching for Insulation and Weed Control
Beyond keeping the cold at bay, a well-placed layer of mulch acts as your soil’s bodyguard—locking in warmth, choking out weeds before they even think about sprouting, and creating a stable microclimate that lets winter vegetables settle in without stress. Here’s how organic mulching delivers dual protection:
- Weed suppression blocks light, preventing dormant seeds from germinating throughout winter
- Soil insulation stabilizes temperature swings that damage delicate root systems
- Layered mulch materials like straw over compost create barriers that discourage pest overwintering
- Winter groundcover reduces soil erosion from freezing rain and wind
- Strategic mulching simplifies spring soil preparation by smothering early-season weeds naturally
Choosing and Planting Cover Crops
Cover crops aren’t just a fall planting—they’re a strategic move to protect and nourish your soil while your garden rests. These hardworking plants prevent erosion, suppress weeds, and pump nutrients back into the ground before spring.
Let’s look at how cover crops benefit your soil, which varieties thrive in winter conditions, and the practical steps for getting them established.
Cover Crop Benefits for Soil Health
Cover crops aren’t just a winter blanket for your soil—they’re hardworking allies that fix nitrogen, prevent erosion, suppress weeds, and build organic matter while your garden rests.
Through nutrient cycling and ecosystem services, these plants improve soil structure and energize soil biota, creating a thriving underground community.
You’ll notice improved winter soil preparation and better crop rotation outcomes when cover crops decompose, feeding beneficial microorganisms that support your vegetable production.
Top Cover Crop Varieties for Winter
When evaluating cover crop selection for winter soil preparation, winter rye stands out as your reliable workhorse—it produces 3.2 to 5.1 tons per hectare of biomass and suppresses weeds by over 70%, offering outstanding soil erosion control while recovering quickly in spring.
Hairy vetch excels at nitrogen fixation, contributing 100 to 200 lbs/acre for improved soil structure and organic matter.
Tillage radish breaks through compacted layers with deep taproots, enhancing winter soil preparation before winterkilling naturally.
These cover crops support vigorous crop rotation strategies while building soil health.
Seeding and Managing Cover Crops
Once you’ve selected your cover crops, proper seeding and management turn potential into performance—getting the timing, depth, and density right makes the difference between a struggling stand and one that transforms your soil.
Follow these key practices for winter soil preparation:
- Broadcast seeds 4–6 weeks before first frost to establish strong roots
- Plant winter legumes at 1–2 inch depth for ideal germination
- Apply 50–100 lbs/acre seeding rate depending on cover crop selection
- Water immediately after seeding to activate soil microbes
- Terminate green manure in spring before crop rotation begins
Proper management ensures these living mulches build organic matter and protect soil health through winter.
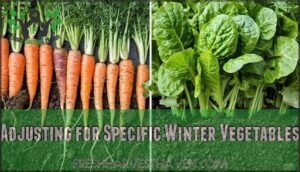
Adjusting for Specific Winter Vegetables
Not all winter vegetables need the same treatment, and recognizing those differences makes the work easier. Root crops, leafy greens, and perennials each bring their own quirks to the table. Here’s what you’ll want to adjust for each type.
Soil Needs of Root Crops
Root crops like carrots, beets, and turnips demand superior soil preparation because their success depends on what’s happening underground. You’ll need loose, well-aerated soil structure extending 10–15 inches deep to accommodate root depth and prevent misshapen vegetables.
Maintain soil pH between 6.0 and 7.0 for ideal nutrient uptake, while balancing nutrient levels with moderate nitrogen and higher phosphorus to support root development without excessive top growth.
Soil temperature and adequate soil microbes further boost performance, making crop rotation essential for preventing disease buildup.
Requirements for Leafy Greens
Leafy greens like spinach, kale, and lettuce thrive in nitrogen-rich soil that’s slightly less worked than what root crops demand. You’ll want soil pH between 6.5 and 7.0 to optimize nutrient uptake, while maintaining excellent water retention without waterlogging.
Focus your soil preparation on incorporating organic matter into the top 6–8 inches, which improves soil structure and aids steady soil aeration.
These winter vegetables benefit from consistent soil temperature and moisture levels that encourage rapid leaf development.
Special Care for Perennials and Herbs
Perennials and herbs demand a different approach since they’ll spend years—not just a season—in your soil. Focus on preparing perennials for winter and winterizing your garden with these essentials:
- Perennial pruning removes dead growth while protecting root crowns from cold damage
- Winter mulching provides soil insulation around established plants like sage
- Herb protection strategies differ—rosemary needs indoor shelter, while hardy thyme survives outside
- Frost resistance improves when you apply 3–4 inches of organic mulch for winter garden preparation
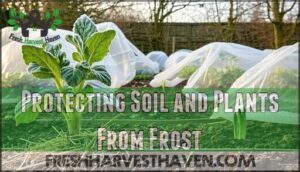
Protecting Soil and Plants From Frost
Once you’ve prepared your soil and planted your winter vegetables, the next challenge is keeping them safe when temperatures drop. Frost can damage both your plants and the soil structure you’ve worked hard to establish, so protection becomes essential.
Here are three practical strategies to shield your winter garden from cold weather extremes.
Frost Cloths and Row Covers
When winter temperatures threaten your carefully planted vegetables, frost cloths and row covers act as a protective shield, trapping heat and defending tender crops from freezing damage. You’ll find that lightweight spun fabrics work best for frost protection, while heavier row covers manage deep cold snaps.
Install winter hoops or cold frames over your beds to support the fabric and create insulating air pockets. These soil blankets don’t just guard against frost—they also extend your winter gardening season, allowing semi-hardy winter vegetables to thrive even when temperatures drop unexpectedly.
Watering Practices in Cold Weather
Your winter vegetables won’t thrive if you water them like summer crops—cold-weather irrigation demands a completely different rhythm and strategy. Follow these cold weather irrigation principles for effective freeze prevention:
- Water early morning when soil structure allows absorption before nightfall
- Check soil moisture 2-3 inches deep; winter soil preparation means watering only when truly dry
- Apply water directly to root zones for targeted drainage and frost protection
- Reduce frequency but maintain adequate winter moisture for soil insulation
- Avoid saturating beds before hard freezes to prevent root damage
Preparing for Heavy Snowfall
Heavy snow might seem like a cozy blanket for your garden, but without the right prep work, it can crush tender plants and suffocate your carefully amended soil. Reinforce frost protection with sturdy frameworks or hoop structures to manage snow load on vulnerable crops.
Strategic snowmelt strategies begin with proper soil preparation—apply compost before winter to maintain soil structure and prevent winter soil erosion. In cold climate gardening, healthy drainage channels redirect meltwater, protecting your soil health investment through spring thaw.
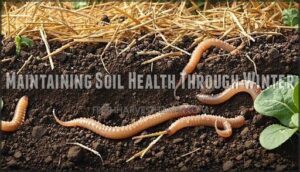
Maintaining Soil Health Through Winter
Once your winter vegetables are planted and protected, your job isn’t over—the soil beneath them needs ongoing care to stay healthy through the cold months. Winter can stress your garden’s foundation through erosion, compaction, and nutrient depletion if you’re not proactive.
Here’s how to keep your soil in top shape until spring arrives.
Preventing Erosion and Compaction
 View On Amazon
 - Apply 2–3 inches of straw mulch to reduce erosion risk by up to 60% and lower compaction from foot traffic by 35%.
- Plant winter cover crops that cut erosion rates by 80% while improving aggregate stability through strong root systems.
- Install designated pathways using mulch, mats, or planks to prevent compaction in planting beds—reducing structural damage by 47%.
- Avoid working wet soil, as compaction risk doubles when moisture exceeds field capacity.
- Minimize tillage to preserve natural porosity and maintain 12% higher infiltration rates during winter precipitation.
Winter Composting Strategies
Composting doesn’t stop when temperatures drop—in fact, cold-weather composting builds organic matter reserves that deliver spring nutrients exactly when your soil needs them most.
Layer carbon-rich winter mulch with kitchen scraps to maintain cold composting activity, even at reduced rates. You’ll boost soil health and carbon sequestration while creating valuable soil amendments.
Brew compost tea from finished batches to provide microbial inoculation during mild winter days, supporting biological activity until spring.
Planning for Spring Soil Recovery
Think of winter’s work as an investment that pays dividends in spring—the care you put into your soil now determines how quickly your garden rebounds when warmer days return.
Winter soil preparation is an investment that determines how quickly your garden rebounds when spring arrives
As soil temperature climbs, your winter covering protects organic matter while microbial balance reactivates naturally. You’re building soil renewal momentum before you even plant.
- Document current soil structure and compost applications to track winter improvements
- Schedule early spring fertilizers based on winter nutrient depletion patterns
- Monitor when soil health indicators signal readiness for cultivation and planting
Frequently Asked Questions (FAQs)
How do I prevent soil from freezing completely?
You can’t stop the freeze completely—that’s fighting Mother Nature with your bare hands. Thick Winter Mulching (3-4 inches of straw or leaves) insulates soil, moderating Soil Temperature swings and providing essential Frost Protection for overwintering crops.
Can I add lime during winter months?
You can apply lime during winter months, though it works slowly in cold soil. Testing soil pH first ensures proper lime application rates.
The freeze-thaw cycles actually help lime incorporate, improving soil amendments for spring planting.
What fertilizers work best in cold soil?
Granular bone meal and fish emulsion deliver slow-release nutrients that won’t shock roots in frigid ground.
These organic fertilizer options gently feed cold-climate crops while maintaining soil pH balance, unlike synthetic quick-release formulas that can damage frost-tolerant vegetables.
Should I water bare soil through winter?
Bare soil loses moisture slowly in winter, but occasional watering prevents it from becoming hydrophobic and maintains beneficial microbial activity.
Water when soil feels dry several inches down, focusing on frost protection and soil health rather than following a rigid schedule.
How often should I check winter soil?
Check soil moisture and structure every two to three weeks during winter.
Conduct soil testing for pH and nutrient levels mid-winter if planning spring adjustments, ensuring cold weather checks reveal frost impact on soil preparation.
Conclusion
The phrase "an ounce of prevention is worth a pound of cure" holds especially true when preparing soil for winter vegetables. The work you invest now—testing pH, building structure, enriching with organic matter—creates conditions that let cold-hardy crops thrive rather than simply endure.
Well-prepared soil doesn’t just support winter growth; it stores nutrients, resists compaction, and bounces back faster in spring. Your winter garden’s success starts beneath the surface, where thoughtful preparation transforms frozen ground into productive earth.
- https://www.nrcs.usda.gov/wps/portal/wcc/home/climateSupport/wetlandsClimateTables/growingSeasonDatesLength
- https://bonnieplants.com/blogs/garden-fundamentals/prep-soil-now-for-next-season
- https://publications.extension.uconn.edu/publication/soil-fertility-management-for-vegetable-farms/
- https://extension.oregonstate.edu/catalog/pub/em-9165-nutrient-management-sustainable-vegetable-cropping-systems-western-oregon
- https://extension.okstate.edu/fact-sheets/influence-of-ph-on-winter-canola-production-in-oklahoma.html

