This site is supported by our readers. We may earn a commission, at no cost to you, if you purchase through links.
Your soil tells a story every spring, and right now it’s probably saying it needs help. After months of winter freeze-thaw cycles, compaction from snow, and the decomposition of last season’s plants, your garden bed isn’t quite ready for those ambitious seed packets.
The good news? A handful of soil can reveal exactly what it needs—whether that’s organic matter to rebuild structure, aeration to break up compacted layers, or simply clearing away debris that’s harboring fungal spores.
Getting your soil right in these early weeks doesn’t just set you up for better germination rates; it builds the living foundation that determines whether your plants merely survive or genuinely thrive through summer’s demands.
Table Of Contents
- Key Takeaways
- Clearing and Assessing Garden Beds
- Improving Soil Fertility and Nutrition
- Adjusting Soil PH and Structure
- Managing Weeds and Preventing Compaction
- Sustainable Spring Soil Preparation Tips
- Frequently Asked Questions (FAQs)
- How do you prepare garden soil for spring?
- When should I start preparing my garden for spring?
- What is the best soil recipe for a vegetable garden?
- How to prepare soil for beginners?
- How do you prepare garden soil for spring planting?
- How do you amend garden soil in the spring?
- What should I add to raised bed soil in spring?
- How do you prepare soil for spring vegetable garden?
- When should I start prepping my spring garden?
- What nutrients to add to soil in spring?
- Conclusion
Key Takeaways
- Winter’s freeze-thaw cycles and plant decomposition deplete soil structure and nutrients, so test your soil 2-4 weeks before the last frost and amend with compost to rebuild the living ecosystem that determines whether plants thrive or just survive.
- Clearing debris reduces fungal contamination by 25%, while adding organic matter like compost boosts water retention up to 2.5 times in sandy soil and supports the microbe populations that naturally cycle nutrients through your garden.
- Soil compaction from foot traffic can increase density by 30% and starve roots of oxygen, but designated walkways cut compaction by 25-40% and preserve the pore space plants need to push deep roots.
- No-till methods preserve beneficial microbes and can boost soil organic matter by 30% within three years, while mulch and cover crops retain moisture, fix nitrogen naturally, and reduce your labor season after season.
Clearing and Assessing Garden Beds
Before you plant a single seed this spring, you need to know what you’re working with. Start by clearing your garden beds and taking stock of what last season left behind.
Here’s how to set the stage for healthy growth.
Removing Plant Debris and Rocks
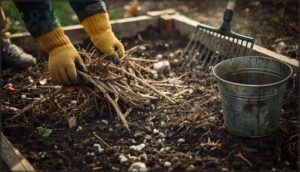
Before you plant anything, tackle the debris that winter left behind. Removing plant debris—dead stems, branches, and leaves—reduces fungal contamination by 25% and clears the way for healthy root growth. Remember that leaving some debris can provide valuable pollinator habitat.
Remove rocks larger than one inch, too, since they block water penetration and restrict development.
For a typical 200-square-foot bed, expect three to five hours of DIY labor or professional service costs around $1.50–$2.50 per square foot.
Identifying and Managing Harmful Fungi
Once you’ve cleared debris, inspect your beds for harmful fungi like honey fungus or Fusarium—silent threats that can devastate your soil ecosystem. Early detection matters because pathogens block nutrient flow and weaken plants fast.
- Remove infected material immediately and dispose by burning or landfill
- Try biological controls like Trichoderma or soil biofumigation with mustard cover crops
- Monitor moisture levels—overwatering creates conditions fungi love
To effectively manage honey fungus, understanding its honey fungus spread is vital for protecting your garden.
Assessing Soil Texture and Structure
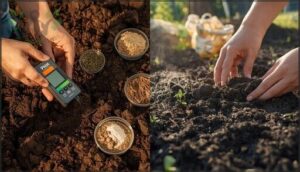
After addressing fungal threats, turn your attention to what lies beneath. Grab a handful of soil and assess its texture—is it gritty sand, sticky clay, or smooth silt? This simple Texture Analysis guides your soil amendment choices.
Check for compaction by pressing a spade 8 inches down. Good Structure Evaluation reveals drainage capacity and aeration needs, directly impacting root health and nutrient availability.
Improving Soil Fertility and Nutrition
Once you’ve cleared your beds and assessed the baseline, it’s time to feed the soil. Building fertility isn’t just about dumping fertilizer—it’s about creating a living system where nutrients cycle naturally and roots can actually access what they need.
Let’s walk through three practical ways to enrich your soil before planting season hits.
Adding Organic Matter and Compost
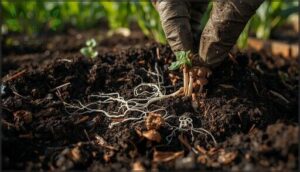
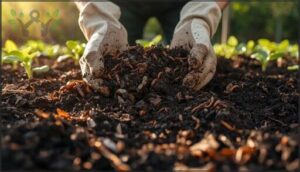
Adding organic matter like compost does more than feed your plants—it transforms your soil into a thriving ecosystem. You’ll improve soil health by boosting water retention up to 2.5 times in sandy beds while supporting microbe growth and carbon sequestration.
Organic fertilizers and compost benefits extend beyond immediate soil enrichment, building stable structure and reducing your need for synthetic inputs season after season.
Using Manure and Organic Amendments
Animal manure brings a steady stream of nitrogen, phosphorus, and potassium to your spring beds, with about 30% to 50% of organic nitrogen becoming available in the first year. These organic amendments also wake up soil microbes that improve structure and nutrient cycling.
- Apply fresh dairy manure at 75 pounds per 100 square feet for balanced nitrogen release
- Use poultry manure sparingly—150 g/m² before planting—to avoid burning plants
- Work manure 6 to 8 inches deep within 12 hours to prevent nutrient loss
Balancing Soil Nutrients (NPK)
Nitrogen fuels leafy growth, phosphorus strengthens roots and blooms, and potassium builds disease resistance—your NPK ratios determine whether plants thrive or struggle. Soil testing reveals nutrient deficiencies before you waste money on unnecessary fertilizer.
Leafy greens need high nitrogen (20-10-10), while tomatoes prefer balanced or phosphorus-rich blends (10-20-10).
Sustainable practices like targeted application and organic fertilizer improve crop yields without depleting soil nutrients or disrupting soil pH long-term.
Adjusting Soil PH and Structure
Getting your soil’s pH and structure right is like setting the stage before the show begins—everything that follows depends on it. If your soil is too acidic or alkaline, plants can’t access the nutrients they need, no matter how much fertilizer you add.
Let’s walk through two essential adjustments that’ll give your spring garden the foundation it deserves.
Amending Acidic or Alkaline Soils
Most vegetables prefer a slightly acidic to neutral soil pH (6.0-7.0). Soil testing reveals your starting point.
For acidic soils, lime application raises pH by neutralizing acidity—studies show pH increases of up to 18% with proper lime use. Alkaline soils benefit from sulfur application, which gradually lowers pH through microbial action.
Organic amendments like compost improve pH buffering, helping maintain stable conditions year-round.
Loosening and Aerating Soil
Soil compaction can push bulk density above 1.8 g/cm³, choking root growth and limiting water infiltration. That’s why aerating to 8-12 inches in spring matters—you’ll boost soil oxygen by up to 24.7%, energizing root respiration and microbial activity.
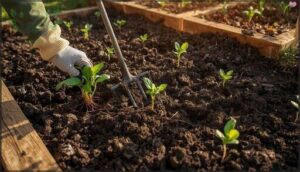
Use a digging fork for small beds or mechanical aerators for larger areas. Spring timing aligns with active growth, maximizing aeration benefits for soil structure and biology.
Managing Weeds and Preventing Compaction
Once your soil is loose and fertile, the next challenge is keeping it that way. Weeds compete for nutrients and water, while foot traffic and heavy tools can squeeze the life out of your beds.
Let’s look at three proven strategies to protect your soil structure and keep unwanted plants at bay.
Removing Weeds and Grass
Before you plant, getting rid of weeds and grass is essential—otherwise they’ll steal nutrients and water from your vegetables. Physical removal with a spade or sod cutter works fast, especially when the soil is slightly moist.
For a weedy garden, try soil smothering with cardboard and mulch; it takes longer but preserves soil structure. Organic herbicides and tillage offer alternatives, though controlling weeds early prevents headaches later.
Preventing Soil Compaction
Stepping on wet soil is like pressing down on a sponge—once compressed, pore space disappears and root growth stalls. Foot traffic can increase soil density by 30%, starving roots of oxygen and water.
Stepping on wet soil compresses pore space like a sponge, increasing density by 30% and starving roots of oxygen
- Designate permanent walkways to cut compaction by 25-40%
- Use stepping stones or gravel paths to reduce bed disturbance by over 50%
- Avoid working soil when waterlogged to prevent compacted clods
- Apply core aeration in spring to improve permeability by 15-25%
- Add 2-3 inches of compost to boost aggregation and loosen structure
Using Mulch and Cover Crops
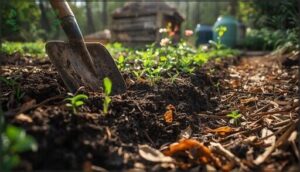
Beyond walking lightly, mulch and cover crops work overtime to protect your beds. A 2-3 inch layer of organic material blocks sunlight, cutting weed emergence while retaining moisture—up to 10% more water stays put.
Legume cover crops like clover fix nitrogen naturally, boosting available nutrients by 30-50 lbs per acre. Both tactics improve soil health, support nutrient cycling, and prevent erosion season after season.
Sustainable Spring Soil Preparation Tips
Preparing your garden soil doesn’t have to come at the expense of the environment or your water bill. A few smart, sustainable practices can actually improve your soil’s long-term health while reducing the work you’ll need to do season after season.
Here are three methods that bring both ecological and practical benefits to your spring garden prep.
No-Till and Low-Till Methods
Regenerative gardening starts with minimal disturbance—that’s where no-till and low-till techniques shine. No-till gardening preserves beneficial microbes and prevents erosion, boosting soil organic matter by roughly 30% within three years. Low-till methods work just the top inch, maintaining soil aeration without disrupting structure.
Both approaches pair beautifully with cover cropping and mulching, building healthier ground while cutting your labor and improving soil health season after season.
Waterwise Soil Practices
Water scarcity hits gardens harder each year, so prepare your soil to hold every drop. Amend with compost to improve soil texture and moisture management—sandy beds gain 30–50% better water retention.
Add organic mulch to cut evaporation by half. Plant native species and drought-tolerant plants that thrive with less irrigation.
Enhance your system with drip lines or soaker hoses, saving up to 60% compared to sprinklers while improving soil drainage and conservation.
Monitoring Soil Health Throughout Spring
Once your water systems are set, track soil health as spring unfolds. Test every 3–5 years to keep nutrient cycling sharp and pH levels stable. Sandy soils need checks every 2–3 years. Watch biological activity and soil microbes respond to warming temperatures:
- Use sensors to monitor moisture, pH levels, and compaction
- Add compost or soil amendments based on spring testing results
- Document changes to guide next season’s soil health strategy
Frequently Asked Questions (FAQs)
How do you prepare garden soil for spring?
You don’t need to overthink this. Start by clearing debris and rocks, then loosen compacted soil to eight inches depth.
Add compost for soil microbes, test pH levels, and remove weeds before spring tillage begins.
When should I start preparing my garden for spring?
Start preparing your garden when nighttime temperatures stay above 50°F for seven consecutive nights.
Watch for apple or pear blooms in mid-April to mid-May—nature’s signal that soil temperature allows healthy planting.
What is the best soil recipe for a vegetable garden?
A balanced mix of 40% topsoil, 40% organic compost, and 20% coarse sand creates ideal soil composition.
This blend ensures proper nutrient balance while improving soil pH and promoting soil health through rich organic matter content.
How to prepare soil for beginners?
First-time gardeners often feel overwhelmed, but preparing soil for planting boils down to simple steps: checking soil pH with testing kits, using compost, and amending soil while improving soil health through microbe management.
How do you prepare garden soil for spring planting?
Preparing soil for planting begins with clearing debris, checking soil pH, and improving soil health through spring composting.
You’ll amend soil using compost, plan your garden layout for crop rotation, and prevent soil erosion with mulch.
How do you amend garden soil in the spring?
You amend your soil by adding compost or aged manure to boost organic material and nutrients. Incorporate amendments into the top 8 inches, then test soil pH to adjust for best spring garden health.
What should I add to raised bed soil in spring?
Your raised bed might look fine, but after winter’s freeze-thaw cycles, it’s likely lost 10–30% of its volume.
Add compost amendments to restore levels, amend your soil with manure application, and consider soil testing for pH adjustment.
How do you prepare soil for spring vegetable garden?
Start by pulling out weeds and plant debris, then rake the surface smooth.
Add compost to boost the soil food web and nutrient cycling.
Water thoroughly and check your soil’s cation exchange capacity for best water retention.
When should I start prepping my spring garden?
You’ll want to begin soil preparation 2 to 4 weeks before your area’s last frost date. Check that your soil temperature reaches 50°F and moisture stays below 25% for ideal gardening conditions.
What nutrients to add to soil in spring?
Think of your soil as a bank account—nitrogen needs top it up after winter’s withdrawals.
A soil test reveals what’s missing: phosphorus addition for roots, potassium balance for resilience, and organic integration to rebuild the reserves.
Conclusion
The best garden soil is built, not bought—yet most gardeners skip the very work that makes buying amendments worthwhile. Test that handful of earth now, add what it’s missing, and give it two weeks to settle.
Your spring garden soil preparation determines whether roots push deep or struggle shallow, whether microbes thrive or merely exist. By planting time, you won’t just have better dirt—you’ll have created the living ecosystem your garden actually needs to flourish.
- https://farmonaut.com/usa/spring-gardening-guide-master-soil-prep-for-a-thriving-harvest
- https://nueces.agrilife.org/files/2025/02/Spring-Vegetable-Gardening-Article-2025.pdf
- https://www.mikesevergreen.com/landscaping-tips/spring-gardening-trends-in-2025/
- https://www.epicgardening.com/prepare-soil-for-spring/
- https://www.mordorintelligence.com/industry-reports/soil-amendments-market

