This site is supported by our readers. We may earn a commission, at no cost to you, if you purchase through links.
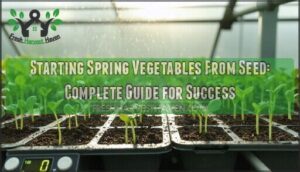
Use quality seed-starting mix in sanitized containers with drainage holes. Sow seeds at twice their diameter depth, maintain 65-75°F soil temperature, and provide 12-14 hours of light daily.
Keep soil consistently moist but not waterlogged. Once seedlings develop their second set of true leaves, begin weekly diluted fertilizer applications.
Gradually harden off seedlings over 7-10 days before transplanting outdoors. The secret lies in timing, temperature control, and understanding each variety’s specific germination requirements.
Table Of Contents
- Key Takeaways
- Planning Spring Vegetable Seeds
- Preparing Seeds and Containers
- Sowing Seeds Indoors
- Caring for Seedlings and Transplanting
- Tips for Successful Seed Starting
- Frequently Asked Questions (FAQs)
- When to plant seeds for spring vegetables?
- Can you just scatter vegetable seeds?
- How to start a spring vegetable garden?
- When should I start planning my spring garden?
- How to start seeding vegetables indoors?
- When should I start planting early-spring vegetables?
- When should you start a vegetable garden?
- When should I start a seed plant?
- Should you start seeds indoors in early spring?
- Should you start vegetables from seed?
- Conclusion
Key Takeaways
- Calculate your timing correctly – Count backwards from your last frost date to determine when you will start seeds indoors, giving yourself enough time for proper growth and hardening off
- Control temperature and light religiously – Maintain 65-75°F soil temperature and provide 12-14 hours of daily light to ensure strong germination and prevent leggy, weak seedlings
- Use proper seed-starting fundamentals – Plant seeds at twice their diameter in depth in sterile seed-starting mix with drainage holes, and keep soil consistently moist but never waterlogged
- Harden off gradually before transplanting – Spend 7-10 days slowly acclimating your seedlings to outdoor conditions to prevent transplant shock and ensure garden success
Planning Spring Vegetable Seeds
Successful spring vegetable growing starts with careful planning that considers your local climate and growing conditions.
You’ll need to determine your area’s last frost date, select appropriate seed varieties, and create a planting schedule that maximizes your harvest potential throughout the growing season.
Determine Last Frost Date
Your garden’s success starts with nailing down your last frost date—the critical threshold that separates winter’s grip from spring’s promise. This date marks when overnight temperatures consistently stay above 32°F, signaling safe planting conditions for tender vegetables.
Know your frost date—it’s the difference between garden success and spring heartbreak.
Here’s your frost date action plan:
- Check Weather Forecast tools like the National Weather Service for your zip code’s average frost dates
- Map your Climate Zones using USDA hardiness maps for regional baseline data
- Study local microclimates that affect your specific location’s temperatures
- Add a safety buffer of 10-14 days to protect against unexpected cold snaps
Your property’s unique features matter. South-facing slopes warm faster, while low-lying areas trap cold air longer. Stone walls and concrete surfaces create heat pockets that extend your growing season.
For seed timing, count backward from your final frost date. Cool-season crops like lettuce can handle light frost, but warm-season vegetables like tomatoes need consistent warmth. Smart frost protection strategies include row covers and cold frames for season extension. Understanding your frost date calculator is essential for determining the best planting times for your garden.
Choose Seed Variety and Quantity
Smart seed selection transforms your garden from ordinary to extraordinary. You’ll want disease-resistant varieties that thrive in your local conditions while delivering flavors you actually crave.
- Map your garden dimensions and order 20% extra seeds as insurance against germination failures
- Select a mix of direct-sow and indoor-start varieties based on your crop planning needs
- Prioritize high-quality organic seeds from reputable dealers to guarantee true-to-type plants
Quantity calculation matters—heirloom varieties like Cherokee Purple tomatoes offer unique flavors unavailable at nurseries. Focus on vegetable seed varieties your family enjoys eating, ensuring your harvest gets used rather than wasted.
Starting seeds indoors gives you access to specialty cultivars that elevate your starting spring vegetables from seed experience beyond basic grocery store options. To achieve superior results, consider seed starter guides for detailed advice on nurturing your seeds.
Plan for Succession Planting
Succession planting transforms your vegetable garden into a production machine that delivers fresh harvests continuously throughout the growing season. This seed starting tips strategy prevents the feast-or-famine cycle that plagues many home gardeners.
Garden Mapping becomes essential when implementing staggered planting schedules. Here’s your action plan:
- Plant Scheduling: Sow cool-season crops like lettuce, spinach, and radishes every 2-3 weeks from early spring through late summer
- Crop Rotation: Designate specific garden zones for different vegetables to maintain soil health and prevent disease buildup
- Harvest Timing: Calculate maturity dates and plan new sowings accordingly to guarantee continuous production
Your Seed Selection should focus on fast-maturing varieties for succession crops. Track soil temperature and local growing conditions to optimize transplanting seedlings timing. This systematic approach to starting spring vegetables from seed guarantees you’ll harvest fresh produce weekly rather than dealing with overwhelming gluts followed by empty garden beds. Understanding soil preparation tips is vital for a successful spring vegetable garden.
Order 20% More Seeds Than Needed
After mapping your succession planting schedule, you’ll need seed buffer to protect your investment. Purchase 20% more vegetable seeds online than your calculations require—this crop insurance prevents germination failures from derailing your spring garden.
When starting seeds indoors, unexpected challenges happen. Some batches won’t sprout, others might succumb to damping-off disease, and you’ll want backup plants for yield optimization. These extra seeds become your safety net, especially when experimenting with new varieties or testing different seed starting mix formulations.
Germination rates vary between seed lots, even from quality suppliers. Your seed selection strategy should account for this natural variation. Store surplus seeds in airtight containers in cool, dark locations to maintain viability for future seasons.
This approach transforms potential gardening frustration into flexibility. You’ll have replacement seedlings ready when needed, plus the freedom to expand successful plantings. Consider those extra seeds your horticultural insurance policy—a small cost that guarantees your seed starting tips lead to garden success.
Preparing Seeds and Containers
Success with spring vegetables starts with proper preparation before you even plant your first seed.
You’ll need the right growing medium, clean containers, and sanitized equipment to give your seedlings the best chance at healthy development.
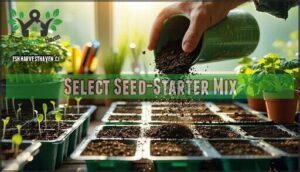
Select Seed-Starter Mix
Your seed starting mix determines whether you’ll watch seeds thrive or struggle. Commercial sterile mixes containing peat moss, perlite, and vermiculite create the perfect environment for indoor seed starting.
Here’s what makes quality seed starting mix work:
- Seed Quality protection through sterile, pathogen-free ingredients
- Mix Composition balancing drainage with moisture retention
- Soil pH neutral range (6.0-7.0) for ideal nutrient uptake
- Fertilizer Content light nutrition without burning delicate roots
- Moisture Levels consistent without waterlogging seedlings
Skip heavy garden soil that suffocates seeds. A proper seedstarter mix provides the lightweight structure young roots need.
Look for mixes labeled specifically for starting seeds indoors – they’re formulated without bark chunks or dense materials that block germination. You can also blend your own using equal parts peat moss, vermiculite, and perlite for reliable results. When selecting a mix, consider the benefits of a seed starter for superior growth.
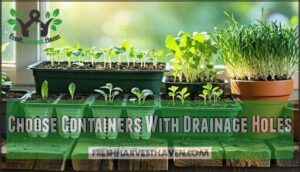
Choose Containers With Drainage Holes
Container selection determines your seedlings’ fate—choose wisely to avoid disappointing harvests.
Proper containers with drainage provide the foundation for healthy root development and successful indoor seed starting.
Without adequate drainage systems, even premium soil quality becomes waterlogged, leading to root rot and seedling failure.
- Drainage holes prevent waterlogging: Multiple quarter-inch holes guarantee excess water escapes, maintaining proper water management for developing roots
- Container materials matter: Plastic seed starting trays, recycled yogurt cups, or fiber pots all work when properly prepared with drainage
- Size affects root health: Choose containers 2-3 inches deep for most vegetables, allowing adequate space for root development
Using seed starting trays can substantially improve the chances of successful seedling growth.
Whether you’re using professional seed starting trays or repurposing household containers, proper drainage transforms ordinary containers into effective seedling nurseries for your spring garden.
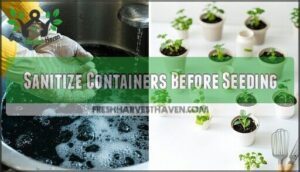
Sanitize Containers Before Seeding
Even pristine-looking containers can harbor deadly pathogens that’ll destroy your seedlings before they start.
You need proper container cleaning and sterilization methods to guarantee seed safety.
Mix one part bleach with nine parts water for effective disinfecting techniques.
Soak containers with drainage for ten minutes, then rinse thoroughly.
This simple sanitizing containers step eliminates fungal diseases that plague seed starting operations.
Different materials require specific cleaning solutions – plastic containers sanitize easier than porous terracotta.
After sterilization, let containers dry completely before sowing seeds.
This critical seedling care foundation prevents heartbreak later.
Proper container gardening techniques also involve choosing the right container size and material for ideal plant growth.
Sowing Seeds Indoors
Now that you’ve prepared your seeds and containers, it’s time to sow them properly. The depth and spacing you choose directly affects germination rates and seedling health.
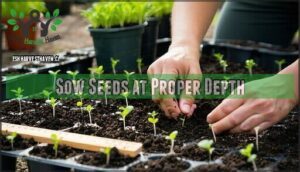
Sow Seeds at Proper Depth
Getting your seed depth right reveals the secret to successful germination. Too shallow and seeds dry out; too deep and they struggle to emerge. The golden rule: plant seeds at a depth equal to two to three times their diameter for superior results.
Understanding proper sowing techniques transforms your starting seeds indoors success:
- Large seeds (beans, corn) need ¾ to 1-inch depth for adequate moisture retention
- Medium seeds (brassicas) thrive at ¼ to ½-inch depth with consistent soil temperature
- Tiny seeds (lettuce, basil) require light surface coverage to maintain proper water levels
- Root crops benefit from precise seed depth to prevent forking and deformation
- Warm-season crops need deeper placement to access stable soil temperature zones
Your seed packets provide specific depth guidelines customized to each variety’s germination rates. Use your finger or a pencil to create consistent planting holes, ensuring uniform emergence timing across your seed starting trays.
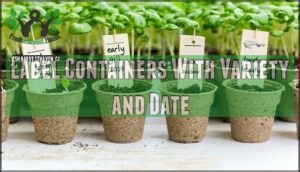
Label Containers With Variety and Date
With your seeds properly planted, thorough seed identification becomes your roadmap to gardening success.
Without proper container labels, you’ll face the dreaded mystery seedling dilemma that frustrates even experienced gardeners.
Here’s your systematic approach to foolproof labeling:
- Use waterproof markers with permanent ink that won’t fade under grow lights or humidity
- Include variety names and planting dates exactly as shown on seed packets for accurate date tracking
- Create garden mapping codes linking container positions to your planting layout
- Store backup labels in your seed starting supplies for replacements when needed
Professional gardeners know that variety coding prevents costly mistakes during transplanting season.
When starting seeds indoors, your labeling system becomes the foundation for successful seedlings care throughout the growing process.
Clear container labels eliminate guesswork, ensuring each variety receives appropriate care timing.
This organizational step transforms chaotic indoor seed starting into a streamlined operation where every plant’s identity and timeline remain crystal clear.
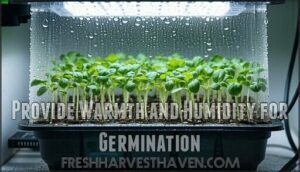
Provide Warmth and Humidity for Germination
Creating ideal warmth and humidity transforms your seed starting mix into a thriving germination chamber. Seed heating mats maintain soil temperature between 70-80°F, while humidity domes trap moisture around your containers.
You’ll want to achieve 75-85% humidity during germination for maximum germination rates. Understanding indoor seed starting techniques is vital for a successful harvest.
| Temperature Range | Humidity Level | Germination Time |
|---|---|---|
| 65-70°F | 70-75% | 10-14 days |
| 70-75°F | 75-80% | 7-10 days |
| 75-80°F | 80-85% | 5-7 days |
| 80-85°F | 75-80% | 5-8 days |
Monitor soil temperature with a thermometer—it’s more accurate than air temperature. Warmth levels should remain consistent day and night.
Once seedlings emerge, remove heating mats and reduce humidity to prevent damping-off disease. Your indoor seed starting success depends on this delicate balance of warmth and humidity that mimics nature’s perfect spring conditions.
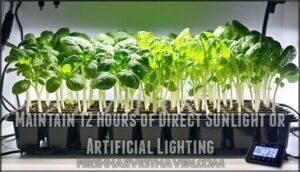
Maintain 12 Hours of Direct Sunlight or Artificial Lighting
Once your seeds have the warmth they need, proper lighting becomes the foundation of strong seedling development. Your seedlings require 12-16 sunlight hours daily for ideal growth, whether from direct sunlight through south-facing windows or artificial lighting systems.
Full-spectrum grow lights offer the best lighting options for seed starting indoors. Position LED grow lights 2-3 inches above seedlings, adjusting height as plants grow. Unlike fluorescent bulbs, LEDs provide consistent light intensity without excessive heat that can damage tender growth.
Monitor your seedlings for signs of inadequate lighting:
- Leggy, stretched stems reaching toward light sources
- Pale or yellowing leaves indicating poor chlorophyll production
- Weak, spindly growth that can’t support the plant
- Uneven development across your seed trays
- Slow germination rates and delayed growth patterns.
Use timers to maintain consistent photoperiods that mimic natural daylight cycles. Rotate seed trays weekly to guarantee even light distribution and prevent one-sided growth. Proper seedling light requirements mean your plants develop strong stems and healthy root systems before transplanting outdoors, which is crucial for their healthy development and strong growth.
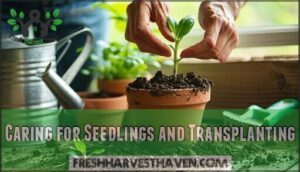
Caring for Seedlings and Transplanting
Once your seedlings emerge, they’ll need consistent daily care to develop into strong transplants ready for the garden.
You’ll monitor their water needs, provide proper nutrition, and gradually prepare them for outdoor life through a process called hardening off.
This process will help your seedlings become strong and resilient, and it is an essential step in their development.
Water Seedlings Daily and Fertilize After Germination
Your seedlings need consistent moisture and nutrients to develop strong root systems and healthy foliage. Check soil moisture daily by inserting your finger into the growing medium—it should feel like a wrung-out sponge.
Your seedlings crave that perfect wrung-out sponge moisture—neither drowning nor thirsting for success.
Use these seedling care tips for ideal water management:
- Apply room-temperature water using bottom watering methods to prevent damaging delicate stems
- Begin fertilizing with diluted liquid fertilizer two weeks after germination when true leaves appear
- Monitor soil moisture levels twice daily, especially during warm weather when evaporation increases
- Choose balanced fertilizer types with equal nitrogen, phosphorus, and potassium ratios for steady growth
Proper watering and nutrition directly impact germination rates and overall plant vigor during this critical seed starting phase.
Rotate Seedlings for Even Sunlight Exposure
Your seedlings need consistent light exposure to develop properly. Seedling rotation prevents lopsided growth and weak stems that lean toward light sources like desperate sunflowers chasing the sun.
Rotate your containers daily—just a quarter-turn does the trick. This simple practice guarantees uniform leaf development and maximizes photosynthesis rates across all foliage.
Without rotation, you’ll end up with crooked plants that topple over when transplanted.
Whether using direct sunlight or artificial lighting, consistent seedling rotation creates sturdy plants with balanced growth patterns.
Your vegetables will develop strong root systems and resilient stems, setting them up for successful garden life ahead.
Transplant Seedlings When Roots Emerge
Your seedlings’ roots dancing through drainage holes signal it’s time for their next act. Root Development accelerates when plants outgrow their starter homes, demanding immediate attention to prevent stunted growth.
Watch for these Transplant Timing indicators:
- Roots emerging from container bottoms like enthusiastic explorers
- 2-4 true leaves displaying mature characteristics
- Stems gaining structural integrity and height
- Rapid soil moisture depletion requiring daily watering
- Leaves beginning to overlap within current containers
Seedling Care during transplanting seedlings requires surgical precision. Grasp stems gently—never pull roots—and slide plants from containers using a butter knife. Fresh potting mix in larger containers provides essential Soil Acclimation space for continued Root Development.
Position each seedling at identical depth as before, firming soil without compacting. This transplant shock prevention technique maintains seedling vigor while encouraging robust root systems. Proper seedling transplantation establishes foundation for successful Garden Placement later.
Harden Off Seedlings Before Planting in Garden
Once your seedlings have developed strong root systems, seedling acclimation becomes your next priority. Begin hardening off by placing transplants outside for one hour in morning sun, then gradually increase outdoor exposure by 2-3 hours daily.
This seedling hardening off process prevents transplant shock when moving to permanent garden locations. Monitor temperatures carefully—anything below 45°F requires bringing plants indoors.
Seedling transplantation succeeds when you’ve properly conditioned plants through this garden preparation phase. The following schedule outlines a recommended approach:
| Day | Outdoor Time | Light Exposure | Temperature Range |
|---|---|---|---|
| 1-2 | 1-2 hours | Morning shade | Above 45°F |
| 3-4 | 3-4 hours | Partial sun | Above 50°F |
| 5-7 | 6-8 hours | Full sun | Above 55°F |
| 8-10 | All day | Full exposure | Above 60°F |
| 11-14 | Overnight | Complete transition | Garden ready |
This transplant timing strategy using proven seed starting techniques helps your vegetables thrive outdoors.
Tips for Successful Seed Starting
While you’ve established the fundamentals of indoor seed starting, these advanced techniques will maximize your germination rates and produce stronger seedlings.
Proper lighting, timing, and environmental control separate successful gardeners from those who struggle with weak, leggy plants, and are key to achieving the desired outcome with stronger seedlings.
Provide Full-Spectrum Grow Lights
Within the domain of indoor seed starting, full-spectrum grow lights transform your seedling success from guesswork into scientific precision.
These LED powerhouses deliver the complete light spectrum your plants crave for maximum photosynthesis and vigorous seedling growth.
Here’s your roadmap to LED benefits and seedling boost mastery:
- Select true full-spectrum LED grow lights covering 400-700 nanometer PAR range with UV and far-red wavelengths
- Position lights 4-6 inches above seedlings, adjusting height as plants stretch toward their artificial sun
- Run lights 14-16 hours daily using timers to maintain consistent photoperiods for indoor gardening success
- Monitor plant response – leggy stems signal insufficient light intensity, while leaf burn indicates excessive proximity
Distance matters critically in your light spectrum strategy.
Too far creates weak, stretched seedlings; too close scorches delicate leaves.
Full-spectrum grow lights outperform standard LEDs designed for human vision.
These specialized systems optimize photosynthetic efficiency while minimizing energy waste, creating controlled environments that nurture vigorous seedlings ready for spring transplanting.
Your investment in quality lighting pays dividends in stronger, healthier plants.
For maximum growth, consider using full spectrum lights to enhance photosynthesis and plant development.
Sow Seeds in Small Batches for Continuous Supply
While many gardeners plant their entire seed collection at once, staggered planting transforms your spring garden into a productivity powerhouse.
Start with 25% of your spring vegetable seeds every 2-3 weeks to create a continuous harvest that prevents feast-or-famine cycles.
Your batch size should match your family’s consumption rate—no point growing vegetables from seed if they’ll rot on the vine.
This succession sowing technique extends your harvest window from weeks to months, making seed starting incredibly efficient.
Planting frequency depends on the crop’s maturity time.
Quick-growing lettuce needs weekly sowings, while slower tomatoes require monthly starts.
The succession benefits are clear: you’ll enjoy fresh spring vegetables throughout the season instead of dealing with overwhelming gluts.
To guarantee the best results, consider cold stratification methods for certain seeds.
Think of it as your garden’s insurance policy—if one batch fails, others follow.
This methodical approach guarantees steady production while maximizing your garden space and seed investment.
Monitor Soil Temperature for Optimal Germination
Soil temperature acts as the master control switch for seed germination, directly influencing whether your spring vegetables will thrive or struggle. Most garden seeds require soil temperatures between 65-80°F for ideal germination, with warm-season crops preferring the higher end of this range.
Heating mats placed beneath seed trays can raise soil temperature by approximately 10 degrees, creating ideal conditions for temperature-sensitive varieties. Soil thermometers provide accurate readings at 2-4 inch depths, helping you determine perfect planting timing.
Temperature consistency matters more than occasional peaks—fluctuating temperatures can delay or prevent germination entirely. Monitor your seedling location throughout the day, as temperatures can vary substantially between morning and afternoon.
- Use probe-type thermometers for accurate 2-4 inch depth readings
- Place heating mats under trays to maintain consistent warmth
- Check temperatures both morning and afternoon for daily variations
- Wait until soil reaches 5°F above minimum requirements for better germination speed
Proper temperature monitoring transforms unpredictable seed starting into a reliable system for producing robust spring vegetable transplants.
Avoid Overcrowding and Maintain Air Circulation
Once you’ve achieved ideal soil temperature, proper spacing becomes your next victory condition.
Overcrowding creates a breeding ground for damping-off disease and stunts seedling development through resource competition.
Smart spacing and airflow management prevent these common pitfalls:
- Thinning seedlings early eliminates weak competitors and strengthens survivors
- Spacing guidelines guarantee adequate nutrients and light reach each plant
- Air circulation using gentle fans reduces humidity-related fungal problems
- Disease prevention improves when seedlings aren’t touching each other
- Sturdy growth develops when roots have room to expand properly.
Your seedling environment thrives with intentional spacing—giving each plant breathing room creates healthier, more resilient transplants for garden success.
Frequently Asked Questions (FAQs)
When to plant seeds for spring vegetables?
Start cool-weather crops like broccoli and cabbage 6-8 weeks before your last frost date. Plant warm-weather varieties like tomatoes and peppers 1-2 months before frost ends for ideal timing.
Can you just scatter vegetable seeds?
You can’t just scatter most vegetable seeds effectively.
Root crops like carrots and radishes need proper spacing, while beans require specific depth.
Strategic placement guarantees better germination rates and healthier plants.
How to start a spring vegetable garden?
Choose disease-resistant varieties suited to your climate. Start warm-weather crops like tomatoes indoors 1-2 months before last frost. Direct sow cool-weather vegetables like peas earlier outside.
When should I start planning my spring garden?
Planning your spring garden should begin 8-12 weeks before your last expected frost date.
Check historical frost data, order seeds early, and create a planting schedule to maximize your growing season success.
How to start seeding vegetables indoors?
Picture tiny seeds transforming into vibrant seedlings under your watchful care.
Fill clean containers with sterile seed-starting mix, plant seeds at proper depths, provide warmth and 16 hours of light daily, then water gently.
Provide sterile seed-starting mix to ensure healthy growth.
When should I start planting early-spring vegetables?
Start cool-weather crops like broccoli and cabbage 6-8 weeks before your last frost date. They’ll handle light frosts just fine, giving you that early harvest advantage.
When should you start a vegetable garden?
Timing depends on your location’s last frost date and what you’re growing.
Start cool-season crops like lettuce, peas, and radishes 2-4 weeks before your last frost date.
While warm-season vegetables like tomatoes and peppers need soil temperatures above 60°F after all frost danger passes.
When should I start a seed plant?
Seed-starting schedules synchronize seamlessly with spring’s arrival.
You’ll start warm-weather crops like tomatoes and peppers 6-8 weeks before your last frost date, while cool-weather vegetables need 4-6 weeks indoors for ideal transplanting success.
Should you start seeds indoors in early spring?
Yes, you should start seeds indoors during early spring for warm-weather crops like tomatoes and peppers.
Begin 1-2 months before your last frost date to give seedlings time to develop strong roots and prepare for outdoor transplanting.
This allows the seedlings to grow and become robust enough to thrive when moved outside.
Should you start vegetables from seed?
Picture tiny seeds transforming into abundant harvests in your hands.
You’ll save money, access diverse varieties, and control quality from germination to plate.
Starting vegetables from seed offers unmatched variety and freshness.
Conclusion
Success blooms from preparation—starting spring vegetables from seed transforms scattered packets into thriving garden abundance.
You’ve mastered timing calculations, soil temperature control, and proper germination techniques.
Remember that consistent moisture, adequate lighting, and gradual hardening-off create resilient transplants.
Monitor your seedlings closely, adjust environmental conditions as needed, and trust the process.
With these proven methods for starting spring vegetables from seed, you’ll enjoy earlier harvests and greater variety in your garden.
- https://www.themarthablog.com/2021/03/starting-vegetables-and-flowers-from-seed.html
- https://www.themakermakes.com/blog/starting-vegetable-seeds-indoors-why-what-you-need-and-how
- https://cultivate.caes.uga.edu/vegetable-garden-seed-starting/
- https://longwoodgardens.org/blog/2021-02-25/how-grow-early-spring-vegetables
- http://extension.uga.edu/

