This site is supported by our readers. We may earn a commission, at no cost to you, if you purchase through links.
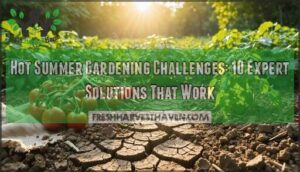
 Summer gardening soil preparation starts with clearing debris and loosening compacted earth while it’s warm and workable.
Test your soil’s pH and drainage—clay needs organic matter like compost to improve structure, while sandy soil requires materials that retain moisture.
Add 2-3 inches of compost or aged manure, working it 6-8 inches deep.
Don’t forget to remove weeds and level your beds for even water distribution.
The secret isn’t just what you add, but when and how you mix it in for maximum root penetration and nutrient availability, which helps with even water distribution.
Table Of Contents
- Key Takeaways
- Soil Preparation Basics
- Ideal Soil Composition
- Soil Nutrition Management
- Adding Organic Matter
- Maintaining Soil Quality
- Frequently Asked Questions (FAQs)
- How to prepare soil for summer vegetables?
- When should I start preparing my garden soil?
- What is best to put on soil before planting?
- Should I fertilize my garden soil before planting?
- How to prepare soil for summer?
- What do I add to my garden soil before planting?
- What is the best way to prepare vegetable garden soil?
- When is too late to start preparing garden soil?
- Should garden soil be replaced or just amended?
- How deep should soil be tilled for vegetables?
- Conclusion
Key Takeaways
- Start by clearing debris and loosening soil 8-12 inches deep – You’ll create the foundation your plants need by removing rocks and old vegetation, then breaking up compacted earth when it’s workable but not waterlogged.
- Test your soil’s pH and add 2-3 inches of compost or aged manure – You can’t fix what you don’t know, so test first, then work organic matter into the top 6-8 inches to improve drainage and provide steady nutrients.
- Level your beds and ensure proper drainage – You’ll prevent water pooling and create consistent planting depth by using rake techniques that encourage gentle slopes without causing erosion.
- Time your soil prep 2-4 weeks before planting – You’ll give organic amendments time to decompose and integrate properly, setting up your summer vegetables for maximum root penetration and nutrient availability.
Soil Preparation Basics
Before you plant your summer vegetables, you’ll need to create the ideal foundation for healthy root growth and thriving plants.
Proper soil preparation involves clearing debris, loosening compacted earth, leveling your garden beds, and removing unwanted vegetation that competes for nutrients, which is crucial for healthy root growth.
Clearing Debris and Rocks
Before you begin your summer soil prep, start with thorough Debris Identification to spot problem areas.
Clear your garden systematically using these steps:
- Tool Selection matters – use garden rakes for leaves and twigs, shovels for larger items, and wheelbarrows for efficient transport
- Surface Clearing should include removing branches, trash, and old mulch that can harbor pests or diseases
- Rock Repurposing turns obstacles into assets – save rocks for garden borders or pathway markers
Consider various rake options for different tasks.
Focus on Waste Disposal by composting healthy plant material while discarding diseased plants away from your garden soil. This garden soil preparation creates the clean foundation your summer gardening tips recommend for successful planting.
Loosening Soil for Root Development
After clearing debris, break up compacted earth to reveal your garden’s potential. Deep tilling to 8-12 inches creates the foundation your plants crave. This process transforms dense, stubborn soil into a welcoming environment where roots can spread freely. Consider soil tiller availability for larger areas.
Root aeration improves when you loosen soil properly. Your tilling methods should focus on breaking up hard-packed layers without overdoing it. Mix in soil amendments like compost during this step for maximum benefit.
| Soil Depth | Root Benefit | Plant Impact |
|---|---|---|
| 8-10 inches | Basic penetration | Adequate growth |
| 10-12 inches | Deep exploration | Stronger plants |
| 12+ inches | Maximum spread | Exceptional yields |
Compaction prevention starts with proper summer soil prep. Work when soil feels like a wrung-out sponge—moist but not soggy. Drainage improvement follows naturally as you create pathways for water and air. Your garden soil preparation sets the stage for thriving plant roots all season long.
Leveling Garden Beds
After loosening your summer garden soil, proper leveling creates the foundation for healthy plant growth.
Use rake techniques that pull soil toward low spots while breaking up clumps. A steel rake works best for creating smooth, even surfaces across your garden bed.
Pay attention to gentle slopes that encourage water runoff without causing erosion control issues. Avoid soil compaction by placing boards under your feet when working wet areas.
Proper leveling guarantees consistent planting depth and prevents water from pooling around plant roots.
Well-leveled beds make preparing soil summer tasks like seeding and transplanting much easier throughout your summer garden prep process.
Removing Existing Vegetation
With your garden bed leveled, tackle existing vegetation through strategic weed identification and root removal.
Cut Bermuda grass with a sod cutter or manually pull stubborn weeds by their roots.
For large areas, try soil solarization—cover problem spots with clear plastic for 6-8 weeks to cook weeds naturally.
Avoid herbicide use that damages beneficial soil microbes.
Manual removal works best for soil preparation, ensuring your summer gardening efforts start clean.
Proper soil improvement begins with eliminating competition in your garden bed.
Ideal Soil Composition
Understanding your soil type is essential for summer gardening success, as different soils require specific preparation methods to create ideal growing conditions.
You’ll need to identify whether you’re working with clay, sandy, or loamy soil to determine the best amendments and techniques for your garden beds.
Loamy Soil Characteristics

Loam soil represents the perfect balance for your summer garden.
This loam composition combines equal parts sand, silt, and clay, creating ideal soil structure for plant growth.
Its exceptional water retention prevents drought stress while maintaining proper soil drainage.
The loose texture promotes healthy microbial activity and guarantees excellent nutrient availability.
With superior soil pH buffering capacity, loam soil provides the foundation every gardener dreams of achieving.
Clay Soil Improvement

Clay soil presents unique challenges, but you can transform it with the right approach.
Mix 2-3 inches of compost into your topsoil for organic incorporation. Apply gypsum amendment at 10-15 pounds per 100 square feet to improve drainage solutions.
Avoid excessive tilling practices that destroy beneficial microbes and worsen compaction prevention. These soil preparation techniques create better soil drainage for summer success.
Adding organic matter can further loosen dense clay.
Sandy Soil Enhancement

Since sandy soil acts like a sieve, losing water and nutrients quickly, you’ll need strategic organic amendments to transform this challenging soil texture.
Adding compost or aged manure dramatically improves water retention while reducing nutrient leaching by up to 40%.
Here’s your soil improvement summer action plan:
- Mix 2-3 inches of compost into topsoil to combat soil compaction
- Apply mulch layers to slash evaporation rates by 60%
- Add clay minerals to boost nutrient-holding capacity by 25%
This approach prevents wind erosion while creating thriving growing conditions.
Soil Type Determination

You can easily identify your soil type through simple hands-on testing. Start with the jar test: mix soil with water, let it settle, and observe the layers.
| Test Method | What You’ll Discover |
|---|---|
| Feel Test | Sandy soil feels gritty; clay soil sticks together |
| Jar Test | Shows soil texture through particle separation layers |
| Drainage Test | Reveals how quickly water moves through your soil |
| pH Strip Test | Indicates soil acidity levels for nutrient availability |
Understanding soil properties helps you choose the right amendments for ideal plant growth.
Soil Nutrition Management
Your summer garden’s success depends on understanding and managing soil nutrition effectively.
You’ll need to balance primary nutrients, adjust pH levels, and apply the right amendments to create an environment where your plants can thrive throughout the growing season, which is crucial for the garden’s overall success.
Primary Nutrients for Plant Growth

Your plants need three main nutrients to thrive this summer.
**Feed your summer garden with nitrogen, phosphorus, and potassium—the trio that transforms seeds into thriving harvests.
Nitrogen fuels leafy green growth, making it perfect for lettuce and spinach.
Phosphorus strengthens root systems and encourages flowering—think tomatoes and peppers.
Potassium acts like a plant’s immune system, helping resist disease and drought stress.
Watch for yellow leaves or stunted growth, which signal nutrient deficiencies.
Choose balanced fertilizer types based on soil testing results to give your summer garden the nutrients it craves.
PH Level Adjustment

Now that you understand your plant nutrients, let’s tackle soil pH balance—the foundation that determines whether those nutrients actually reach your plants.
Soil pH sets the stage for plant vitality—balance it right for lush, thriving growth all season long.
Most vegetables thrive in the ideal ranges of 6.0-7.0 pH. Start with soil testing using digital meters or test kits for accurate readings.
Test annually at 4-6 inch depth across different garden areas, since pH varies between beds. To accurately measure soil acidity, consider using a reliable pH meter.
For acidic soil below 6.0, apply ground agricultural lime at 4-8 pounds per 100 square feet. Dolomitic lime works well for magnesium-deficient soils.
For alkaline soil above 7.0, use elemental sulfur—one pound per 100 square feet lowers pH by approximately one unit.
Testing frequency matters because rainfall and irrigation affect pH seasonally. Apply amendment types several weeks before planting for best results.
Remember, pH testing reveals whether nutrients stay locked up or become available to hungry plant roots.
Nutrient Amendment Application

Three essential steps transform your soil test results into garden success. Apply organic fertilizer types based on specific deficiency symptoms identified through soil testing. Work amendments into the top 6-8 inches of soil 2-4 weeks before planting, allowing proper nutrient mobility and soil fertility development.
A key consideration is adjusting soil pH for ideal nutrient availability.
Key soil amendment summer strategies include:
- Choose slow-release organic options for sustained soil nutrition
- Time soil amendments application with seasonal planting schedules
- Match fertilizer ratios to your garden’s specific nutrient needs
- Monitor soil nutrients summer levels to prevent over-fertilization.
Proper application timing prevents nutrient runoff while supporting healthy plant development.
Adding Organic Matter

Adding organic matter transforms your soil from basic dirt into a thriving foundation for healthy plants.
You’ll want to choose the right amendments and apply them at the best time to maximize their benefits for your summer garden.
Types of Organic Amendments
Compost benefits shine as your soil’s best friend, containing 1.5-2% nitrogen for steady plant growth.
Manure application delivers balanced nutrients—cow manure offers 0.6% nitrogen, while poultry manure packs triple the punch.
Peat alternatives like leaf mold boost moisture retention by 50% without environmental concerns.
Green manure cover crops fix 60-120 pounds of nitrogen per acre naturally.
Amendment timing matters—apply these organic soil prep materials when soil’s workable but not waterlogged for ideal summer soil health.
Benefits of Compost and Manure
Your soil gets a major upgrade when you add compost and manure.
These organic matter powerhouses boost microbial activity, creating a thriving underground network that feeds your plants.
Water retention improves dramatically while soil structure becomes looser and more workable.
This nutrient cycling process releases food slowly, giving plants steady nourishment all season.
You’re practicing sustainable gardening by recycling waste into soil amendments that enhance soil health naturally.
How to Add Organic Matter
Adding organic matter to your garden beds transforms poor soil into a thriving foundation for summer planting soil. Start by spreading a 2-4 inch layer of compost or aged manure across your prepared beds.
Work this amendment into the top 6-8 inches using a garden fork or cultivator, creating ideal soil structure for root development. Compost application works best when you mix thoroughly rather than simply layering on top.
This soil conditioning process helps break up compacted earth while feeding beneficial microorganisms. For a nutrient boost, consider using DIY liquid solutions.
- Watch rich, dark compost crumble between your fingers as you blend it with existing soil
- Notice how your garden fork slides effortlessly through newly conditioned earth that once fought back
- Feel the difference as organic matter transforms heavy clay into workable summer soil mix
Timing of Organic Matter Application
Perfect timing makes all the difference for your summer planting soil success. Seasonal Application works best when you add aged manure and compost during fall months, giving your summer soil mix maximum Decomposition Timeline benefits.
This Amendment Impact creates better Nutrient Availability by spring planting time.
Timing is everything—add organic matter early to give your garden the strongest start for a bountiful summer harvest.
Spring applications work too, but wait 2-3 weeks before planting to allow proper soil decomposition.
Your soil conditioning summer strategy should include regular Application Frequency—add fresh organic matter annually since microbes continuously break down last year’s additions.
Fall timing gives you the biggest payoff for next season’s growth.
Maintaining Soil Quality

Once you’ve prepared your soil foundation, maintaining its quality throughout the growing season becomes your next priority. Regular maintenance keeps your plants thriving and your garden productive all summer long.
Mulching and Weed Control
Once you’ve enriched your soil with organic matter, smart mulching becomes your secret weapon against weeds.
Spread a 2-3 inch layer of organic mulches around your plants to create an effective barrier that blocks sunlight from reaching weed seeds.
Mulch Types and their benefits include:
- Straw and hay – excellent for vegetable gardens and easy removal
- Wood chips and bark – long-lasting inorganic mulches for perennial beds
- Compost and leaf mold – double-duty nutrition while suppressing weeds
- Grass clippings – free option that decomposes quickly for soil enrichment
Proper Mulch Depth prevents most Weed Prevention issues while improving Watering Impact by reducing evaporation.
This soil preparation guide step saves hours of future maintenance work.
Regular Soil Maintenance
Throughout the growing season, consistent soil testing summer practices help you catch problems early.
Check pH levels and soil moisture monthly, then adjust your watering practices accordingly.
Light cultivation promotes soil aeration while preventing compaction prevention from foot traffic.
Regular crop rotation and organic matter additions support healthy microbial activity.
Remove debris promptly for effective pest management and erosion control.
To further enrich the soil, consider adding organic matter.
These summer soil care habits create the foundation for thriving plants and productive harvests season after season.
Avoiding Over-Fertilization
Your garden’s health depends on striking the right balance with fertilizers—too much creates nutrient toxicity and fertilizer burn that damages plants more than neglect ever could.
Soil salinity from over-fertilization blocks water uptake, while excess nutrients leach into groundwater, causing water pollution.
Smart summer soil care starts with understanding what your plants actually need.
- Use a soil test kit every spring to check soil nutrients before adding anything
- Follow fertilizer package directions exactly—more isn’t better
- Choose slow-release formulas that won’t overwhelm your plants
- Watch for yellowing leaves or stunted growth indicating problems
- Test again mid-season if plants show stress signs
Testing frequency matters more than fertilizer quantity.
Soil testing summer gardens prevents costly mistakes and keeps your plants thriving naturally.
Soil Health Monitoring and Adjustment
Monitor your soil health regularly using a soil test kit every season to catch problems early.
Testing frequency should align with your garden’s needs—annual tests work for most home gardens.
Watch for deficiency symptoms like yellowing leaves or stunted growth, which often signal pH imbalances or nutrient shortages.
Amendment timing matters: apply corrections during soil preparation for best results.
Use targeted remediation strategies based on test results rather than guessing.
To understand recurring patterns in soil health, consider using thematic analysis methods on your soil test data.
This approach guarantees long-term impact on soil nutrients and moisture management while preventing costly mistakes.
Frequently Asked Questions (FAQs)
How to prepare soil for summer vegetables?
About 80% of vegetable gardens struggle with poor soil structure.
You’ll want to clear debris, loosen soil 8-12 inches deep, mix in 2-3 inches of compost, and level your beds for ideal drainage and root growth.
When should I start preparing my garden soil?
You should start preparing soil 2-4 weeks before your last expected frost date. This timing allows organic matter to decompose properly and soil to settle before planting season begins.
What is best to put on soil before planting?
You’ll want to add 2-4 inches of compost or aged manure to your beds. This organic matter improves drainage, water retention, and provides essential nutrients for healthy plant growth.
Should I fertilize my garden soil before planting?
Sure, fertilizing before planting seems logical, but here’s the twist: test your soil first. You might already have enough nutrients! Apply balanced fertilizer only if soil tests reveal deficiencies.
How to prepare soil for summer?
Clear debris and rocks, then loosen soil 8-12 inches deep.
Mix in 2-3 inches of compost or aged manure, level with a rake, and make certain proper drainage for healthy summer growth.
What do I add to my garden soil before planting?
Before you plant, your garden’s hungry soil needs feeding.
Add 2-4 inches of compost or aged manure, then mix in balanced fertilizer based on soil test results for ideal nutrient levels.
What is the best way to prepare vegetable garden soil?
Test your soil’s pH and nutrient levels first.
Clear debris, loosen soil 8-12 inches deep, then mix in 2-4 inches of compost or aged manure.
Level the surface and you’re ready to plant.
When is too late to start preparing garden soil?
Patience pays off – it’s never too late to prep your soil.
You can improve garden beds throughout the growing season by adding compost, testing pH, and working amendments into the ground.
Should garden soil be replaced or just amended?
You should amend existing soil rather than replace it completely. Adding 2-4 inches of compost, aged manure, or organic matter improves structure and fertility without the expense of total replacement.
How deep should soil be tilled for vegetables?
Deep roots need room to breathe and flourish.
Till your vegetable garden soil 8-12 inches deep to create the perfect foundation.
This depth allows roots to penetrate easily while ensuring proper drainage and nutrient access for healthy growth.
Conclusion
Taking care of your garden’s foundation now won’t be something you’ll regret later.
Proper summer gardening soil preparation sets the stage for a thriving garden that rewards your efforts with abundant harvests.
You’ve learned the essential steps: clearing debris, testing pH, improving soil structure, and adding organic matter.
Remember that healthy soil creates healthy plants, and healthy plants resist pests and diseases better.
Your garden’s success starts beneath the surface, so invest time in these preparation steps for long-term growing success.