This site is supported by our readers. We may earn a commission, at no cost to you, if you purchase through links.
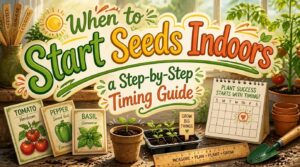
Six weeks before your last frost, tomato seedlings should already have their true leaves and a sturdy stem — miss that window, and you’re buying transplants at the garden center instead of growing your own. Timing makes the difference between a harvest in early July and one that limps in come August.
Every crop runs on its own clock. Celery wants 10-12 weeks indoors before it’s ready for the garden; peppers need heat and patience; peas, meanwhile, would rather skip the indoor stage entirely and go straight into cold soil.
Knowing when to start seeds indoors turns guesswork into a repeatable system — count backward from your frost date, match each crop’s timeline, and you’ll have stocky, root-strong seedlings ready the moment the weather cooperates.
Table Of Contents
- Key Takeaways
- Why Start Seeds Indoors
- Find Your Last Frost Date
- Indoor Seed Starting Timeline
- Best Seeds to Start Indoors
- Seeds Better Direct-Sown Outdoors
- How to Start Seeds Indoors
- Top 5 Seed Starting Items
- Frequently Asked Questions (FAQs)
- Can I start seeds indoors?
- When should I plant seeds?
- When should I start seedlings indoors?
- How do I start seedlings indoors?
- Which seeds should not be started indoors?
- Why is replanting seeds illegal?
- What are some common mistakes when starting seeds indoors?
- Which flower seeds can I plant in October?
- How to plant seeds indoors?
- What are different ways to start seeds indoors?
- Conclusion
Key Takeaways
- Count backward from your last frost date using each crop’s specific timeline—6-8 weeks for tomatoes, 10-12 weeks for celery—to know exactly when to start seeds indoors.
- Starting seeds indoors saves money, extends your growing season, and gives you access to far more crop varieties than store-bought transplants offer.
- Taproot and fast-germinating crops like carrots, beets, peas, radishes, cucumbers, and squash should be sown directly outdoors since transplanting disturbs their roots and causes stunted growth or transplant shock.
- Success depends on using a sterile seed-starting mix, proper sowing depth, consistent warmth (70-80°F), 14-16 hours of light, and careful bottom-watering to prevent damping-off and overwatering.
Why Start Seeds Indoors
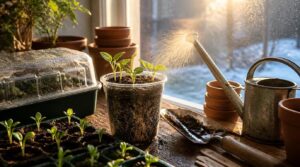
Starting seeds indoors hands you the reins on your garden months before the soil ever warms up. It’s not just an early head start—it’s a smarter, cheaper, more controlled way to grow. Here’s exactly why so many gardeners swear by it.
Timing matters most with this method, so pairing your indoor start dates with a Zone 5 winter gardening calendar keeps every seedling on schedule for transplant.
Extend Your Growing Season
If your last frost date is weeks away, seed starting indoors lets you jump the gun. A tomato started 5–6 weeks early and hardened off properly can fruit weeks sooner outdoors.
Using succession planting benefits allows you to maintain a steady flow of crops.
Pair that head start with cold frames, row covers, or mulching, and you’ll stretch harvests on both ends—spring and fall—turning a short season into a genuinely long one.
Grow More Crop Varieties
Nursery-store six-packs rarely offer more than a handful of tomato or pepper types. Starting your own seeds cracks that door wide open — heirlooms, drought-tolerant hybrids, disease-resistant lines, all in one seed-starting chart.
That’s biodiversity benefits in action: staggered maturity dates spread your harvest, hedge against weather, and tap specialty markets while supporting genetic conservation across your whole vegetable production schedule.
Save Money on Transplants
A single tomato transplant can run $4–6 at the garden center; a packet of seeds costs about the same and yields dozens. Community plant swaps and cutting propagation stretch that savings further, often for free.
Add bulk nursery discounts, homemade compost tea, and rain barrel irrigation, and your seed-starting kit pays for itself well before the last frost date arrives.
Control Early Seedling Growth
Beyond savings, starting seeds indoors hands you the reins on early growth conditions. You control regulating soil temperature with heat mats, optimizing light intensity at 100–200 μmol/m²/s, and airflow for strengthening seedling stems.
That means preventing damping-off, managing humidity near 50–70%, and steady temps—no surprise frosts or heat spikes messing with germination like outdoor sowing risks.
Plan Garden-to-table Harvests
Mapping your seedstarting chart to actual dinners turns indoor sowing into a real strategy, not just a hobby. Match sowing dates to frost dates and meal planning crops for continuous harvest windows.
- Tomatoes for sauces
- Basil for pesto
- Lettuce for salads
- Peppers for roasting
- Herbs near the kitchen door
Prioritize crop versatility, then plan preservation methods for surplus. Garden planning software helps track it all.
Find Your Last Frost Date
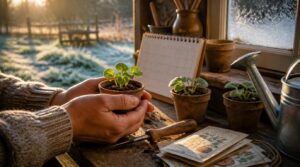
Every seed-starting schedule hinges on one number: your last frost date. Get this wrong, and you’re either coddling seedlings indoors for weeks past their prime or setting tender starts outside to face a killing frost.
Get your last frost date wrong, and seedlings either wait too long indoors or face a killing frost outside
Here’s how to pin down that date with confidence, from broad averages down to the quirks of your own backyard.
Check Local Frost Averages
Every garden calendar starts with one number: your average last frost date. Weather stations track this yearly, but microclimate variance means your yard might differ by a week or more from the nearest station.
Cross-check regional data sources—NWS, extension offices, private sites—for frost probability. Climate change is nudging dates earlier in many regions, so verify annually before building your seedstarting chart.
Use USDA Zone Guidance
Right behind frost dates sits your USDA Hardiness Zone, a tool built from 30 years of winter lows that sharpens crop scheduling. Check zone subdivisions (7a vs. 7b) for precision — recent climate shifts pushed many regions half a zone warmer.
Remember, map accuracy has hardiness limitations: it ignores summer heat and microclimate impact, so use it alongside frost data, not instead of it, for true garden readiness.
Count Backward by Crop
Your last frost date isn’t one-size-fits-all — it’s a starting line, and maturity date math tells you where to stand.
Subtract each crop’s days-to-transplant from that date: tomatoes need 6-8 weeks, peppers 8-10, brassicas 4-6, celery a hearty 10-12.
This custom crop offset approach beats guesswork, giving each seed packet its own unique launch date on your calendar.
Adjust for Microclimates
Your yard isn’t one climate — it’s several. South-facing walls trap heat, running 3-6°F warmer, while windbreaks from hedges cut frost risk on chilly nights. Sunlight hour shifts of 1-2 hours and drainage microclimates in low spots change everything too.
Warm pockets (urban heat islands included) let you push heat-lovers 2-4 weeks earlier — shift your 6-weeks-prior countdown accordingly, adjusting seedling transplant timing to match your actual conditions, not just your climate zone selection.
Mark Your Planting Calendar
Once you’ve done the math, get it out of your head and onto paper — or better, a digital garden planner that sends reminders.
Mark 6 weeks prior to your last frost date for tomatoes, note transplant day 7 to 10 days before the final frost, and pencil in successional sowing strategies. Track harvest windows and adjust for microclimate date adjustments as you go.
Indoor Seed Starting Timeline
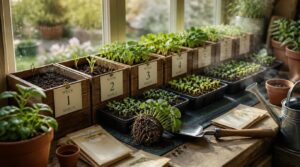
Once you know your last frost date, the real work is counting backward from it. Every crop has its own countdown, and starting too early or too late can set your seedlings up for trouble. Here’s how that timeline breaks down, week by week.
10–12 Weeks Before Frost
Twelve weeks out is your longest lead time, reserved mostly for slow-growing, long-season crops like celery and celeriac. These stubborn germinators demand extended indoor duration before they’re transplant-ready. This window suits winter planning preparation too—map your seed-starting guides now.
- Celery/celeriac (10–12 weeks)
- Onions from seed
- Some perennial flowers
Careful early seedling management here pays off with sturdy stock come hardening-off season.
8 Weeks Before Frost
Eight weeks out is your latest practical start date for warm-season vegetables that need real size before transplanting. Seedling height goals land around 4–6 inches, with sturdy root systems and true leaves developing under 14–18 hours of light and steady 65–75°F warmth.
Watch nightly temperatures closely — this window still carries frost risk, so don’t rush hardening off.
6–8 Weeks Before Frost
This is your sweet spot for tomatoes and most warm-season staples, giving seedlings enough runway to build strong roots before transplanting. Counting backward from your last frost date, sow now under 14–16 hours of light and 70°F warmth.
Germination rates climb when you’re consistent — check your seed starting mix daily, keep it damp, not soggy, and watch those first true leaves emerge like tiny miracles.
4–6 Weeks Before Frost
Cold-tolerant crops like broccoli and cabbage get their start here — sow now, keep the mix evenly moist, and watch for germination within 7-10 days.
This window also kicks off seedling hardening off: short outdoor stints, 1-2 hours in a sheltered spot, building toward full sun exposure. Mulch nearby beds for insulation, and mind frost protection tactics if a late cold snap threatens tender growth.
Transplant After Frost Passes
Once frost danger truly passes and overnight lows hold steady above freezing, it’s time to move hardened-off seedlings outside for good. Check soil temperature hits 50°F at root depth first, then transplant on a calm, overcast day.
Water deeply right away, mulch around each stem, and keep watching that 10-day forecast — a late cold snap still means covering up to avoid transplant shock.
Best Seeds to Start Indoors
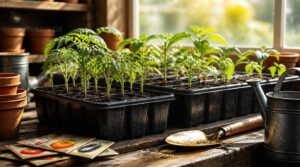
Not every seed deserves a head start indoors, but some crops practically beg for one. These are the plants that reward your patience with earlier harvests and sturdier growth once they hit the garden. Here’s your rundown of the best candidates for that indoor jumpstart.
Tomatoes and Peppers
Tomatoes and peppers are the classic gateway crops for indoor sowing — both warm-season vegetables that demand heat to wake up. Aim for ideal germination temperatures of 70–85°F; a heat mat helps here.
Once true leaves show, watch for yellowing, a common nutrient deficiency sign, and give peppers extra calcium to head off blossom end rot later.
Eggplant and Basil
If you love Mediterranean cooking, this duo earns its spot on the seed-starting tray. Give eggplant a full 8 weeks before frost, sown in a sterile seed starting mix at 75–90°F for good germination; basil follows a similar timeline.
Grow them as companions later—basil’s aroma helps deter pests, and its peppery leaves pair beautifully with roasted eggplant’s creamy texture.
Broccoli and Cabbage
Here’s your cool-season powerhouse duo: broccoli and cabbage, both Brassica oleracea, thrive on early indoor starts.
- Sow 6–8 weeks before frost
- Germinate at 75–90°F
- Rich in vitamin C, K, and glucosinolates
- Transplant once true leaves appear
Broccoli’s sulforaphane and cabbage’s fiber reward patient gardeners—true nutrient rich benefits worth the wait. Handle seedlings gently when transplanting; their taproots dislike disturbance.
Celery and Celeriac
Patience pays with celery and celeriac—both slow starters needing 10–12 weeks indoors before frost, at 75-90°F.
| Trait | Celery | Celeriac |
|---|---|---|
| Flavor | Crisp, aromatic | Earthy, nutty |
| Storage | Weeks | Months |
Use a sterile seed-starting mix, keep evenly moist, and expect leggy seedlings—normal for this finicky duo. Soil pH 6.0-7.5 suits both.
Flowers Needing Early Starts
Want early color splashed across your beds the moment frost lifts? Vegetables aren’t the only seedlings worth starting indoors.
- Pansies: sow at 1/16–1/8 inch depth, 10–12 weeks ahead
- Sweet peas: prized for fragrance, started 6–8 weeks out
- Alyssum: forms a low carpet, tiny seeds barely covered
- Dianthus and Nemesia: border color and cool preferences, 8–10 weeks
Check your seed packet instructions—germination timing varies by variety.
Seeds Better Direct-Sown Outdoors
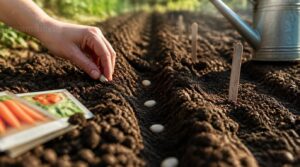
Not every seed belongs in a tray under a grow light. Some plants root so fast and dislike disturbance so much that starting them indoors just sets you up for problems later. Here’s a look at which crops do best when you sow them straight into the garden bed.
Carrots and Beets
Carrots and beets are taproot crops, so skip the seed starting trays entirely and sow them straight into garden soil.
Transplanting disturbs their taproot, causing forked or stunted roots — poor root shape optimization. Carrots deliver beta carotene for eye health; beets bring folate and potassium. Their pigments (orange carotenoids, red-yellow betalains) signal real nutrient density. Roast both together with citrus for a simple, earthy pairing.
Peas and Radishes
Same rule applies here: peas and radishes skip the trays and go straight into the ground, since both germinate fast and resent root disturbance.
- Radishes mature in 18–25 days — a quick win
- Peas fix nitrogen, feeding nearby crops
- Trellis peas vertically to boost yields
Pair them for companion planting benefit — staggered harvests, better soil, less wasted space in your cool-season bed.
Cucumbers and Squash
Cucumbers and squash sprawl fast once roots take hold, so skip seed starting indoors entirely — direct-sow after soil hits 60–95°F.
Vining stems stretch 6–8 feet, and bees handle pollination once flowers open. Space plants 12–18 inches apart, mulch to manage soil moisture, and watch for cucumber beetles and powdery mildew as vines mature.
Dill and Parsley
Herbs follow their own logic: dill and parsley both carry taproots that resent disturbance, so skip seed starting indoors and sow directly once soil is workable.
Dill’s feathery fronds bring anise-lemon brightness to fish and dressings; parsley’s clean, peppery leaves anchor gremolata. Surface-sow parsley shallowly — germination is slow — and succession-sow dill, since it bolts fast in heat.
Avoid Transplant Shock
When taproot crops get transplanted, their roots snap and stall, triggering real transplant shock.
Skip it entirely: direct-sow instead. If you must move seedlings, transplant in late afternoon, water deeply first, and manage moisture closely afterward.
- Handle roots minimally
- Shade plants for a few days
- Water consistently for two weeks
Proper seedling hardening off and gradual sun exposure keep root systems stable and stress low.
How to Start Seeds Indoors
Once you’ve settled on your timeline, the real work begins in your hands and under your grow lights. Getting seeds to sprout into strong, healthy transplants takes more than luck—it takes the right mix, the right container, and a bit of know-how at each step.
Here’s exactly how to set your seedlings up for success, from the soil line down to the watering can.
Choose Sterile Starting Mix
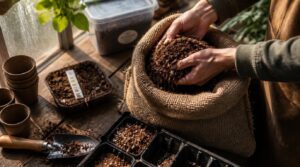
Skip garden soil — it’s compacted and pathogen-prone. Instead, grab a sterile seedstarting mix: peat or coir, perlite, and vermiculite for fine texture and drainage vs. moisture balance.
Coir needs added fertilizer since it holds water but skips nutrients. Keep nutrient load light (pH 5.5–6.5) to avoid burning roots, and store any organic growing media sealed to dodge contamination.
Select Trays or Containers
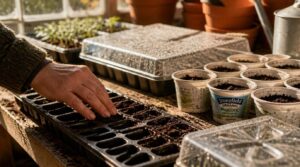
Once your mix is ready, the container holding it matters just as much. Plug trays or cell trays with clear domes limit root disturbance and lock in humidity. Recycled yogurt cups work too, if drainage holes are present.
- Drain holes: 3–4 mm
- Tray depth: 2–3 inches
- Material: BPA-free plastic
- Spacing: prevents crowding, cuts damping-off risk
Sow at Proper Depth
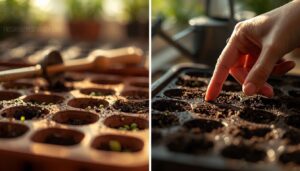
Depth is a numbers game: plant twice the seed’s diameter deep, no more. Tiny lettuce seeds barely need covering—light soil dusting prevents desiccation while letting germination energy reserves do their job.
Larger bean or squash seeds go 1–2 inches down. Soil texture matters too; sandy mixes allow slightly deeper sowing. Test depths side-by-side in your seed starting mix to see what actually works.
Manage Light and Warmth
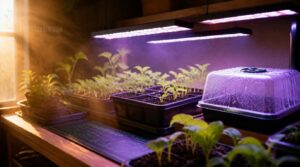
Seeds need warmth and light working together, not one or the other. Set a heat mat to 70°F under trays for even germination, then switch to LED grow lights 4–6 inches above seedlings for 14–16 hours daily.
South-facing windows offer bonus warmth, but grow lights prevent legginess better. Keep a clear dome on for humidity control until sprouts appear, venting occasionally to stop damping-off.
Water Without Overwatering
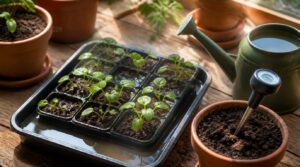
More seedlings die from soggy roots than from thirst, so let a moisture meter guide you instead of guesswork.
Check 2–3 inches deep; water only when it reads low. Try bottom watering—set trays in a water bath and let soil wick moisture upward, staying damp like wet sand, never saturated.
Use room-temperature water to prevent shock, and confirm soil drainage works before sowing, preventing root rot outright.
Top 5 Seed Starting Items
Good gear makes the difference between fussy seedlings and sturdy ones ready for the garden. You don’t need a shed full of supplies—just a handful of reliable tools that handle drainage, humidity, and labeling right. Here are five items worth adding to your setup.
1. Bootstrap Farmer Propagation Tray System
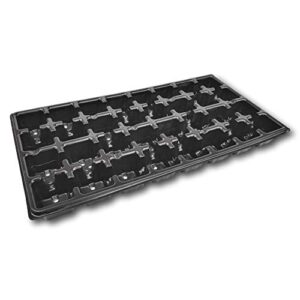
Scaling up matters once you outgrow windowsill trays. Bootstrap Farmer’s modular flood-and-drain racks expand shelf by shelf, roll on casters for easy maintenance, and let you set different water levels per level.
Reinforced 1020 trays resist warping under heavy loads, while 6500K LED lighting keeps seedlings stocky instead of leggy. A reservoir up to 38 gallons feeds the whole rack, and glue-free construction means fewer leaks — practical if you’re chasing serious, repeatable harvests season after season.
| Best For | Commercial growers and serious propagators who need a durable, reusable tray system for starting large batches of vegetable, ornamental, or clone seedlings. |
|---|---|
| Material | BPA-free polypropylene |
| Fits 1020 Trays | Yes |
| Reusable | Yes |
| Weather Resistant | Moderate |
| Primary Use | Seed starting |
| Package Quantity | 2 trays + 2 domes |
| Additional Features |
|
- Extra-thick BPA-free polypropylene resists cracking and warping, even with repeated commercial use
- Humidity domes create a stable moisture and temperature pocket, cutting down on watering frequency and labor
- Deep 32-cell inserts encourage stronger root development and work with soil, coco coir, or rockwool
- Fixed 32-cell layout won’t suit plants that need larger individual growing spaces
- Trays require assembly before first use and must be cleaned by hand, since they aren’t dishwasher safe
- The overall footprint can feel bulky for smaller indoor grow setups
2. Bootstrap Farmer 1020 Seedling Tray
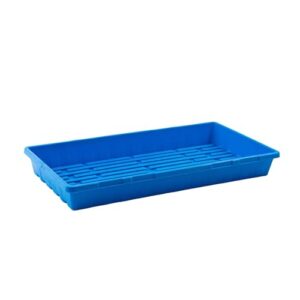
Not every setup needs a full rack — sometimes one solid tray does the job. The Bootstrap Farmer 1020 fits standard cell inserts and domes, holding a 2.5-inch water reservoir in its watertight, no-hole base for reliable bottom-watering.
Reinforced sidewalls resist flexing under saturated media, so trays won’t buckle mid-transport. BPA-free polypropylene shrugs off cracking season after season. At 21.1 by 11 inches, ten come per pack — plenty for staggered sowings without hunting down replacements each spring.
| Best For | growers of microgreens, wheatgrass, and fodder who want a durable, single-tray bottom-watering setup without the hassle of double-stacking. |
|---|---|
| Material | BPA-free polypropylene |
| Fits 1020 Trays | Yes |
| Reusable | Yes |
| Weather Resistant | Yes (UV caution) |
| Primary Use | Bottom watering |
| Package Quantity | 10 trays |
| Additional Features |
|
- Rigid BPA-free polypropylene resists cracking, even under saturated media
- Watertight, no-hole base holds a 2.5-inch reservoir for reliable bottom-watering
- Reinforced lip and sidewalls keep trays from flexing or spilling during transport
- Lack of drainage holes may not work for growers who need excess-water runoff
- Fixed 1020 dimensions won’t fit non-standard trays or larger setups
- Needs to be kept out of direct sunlight to prevent UV degradation over time
3. Bootstrap Farmer Clear Cloning Dome
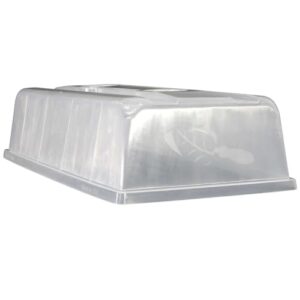
That watertight base pairs perfectly with a dome on top, and Bootstrap Farmer’s Clear Cloning Dome is built for exactly that. Made from BPA-free plastic, it fits any standard 1020 tray at 21.25 by 11 inches, with 5.5 inches of interior clearance for taller seedlings.
Two adjustable vents let you dial in humidity as germination progresses, cutting condensation that invites mold. The easy-grip handle means you can check on your tiny miracles without disturbing them one bit.
| Best For | Home growers and small commercial operations raising microgreens, wheatgrass, fodder, or seedlings who need reliable humidity control during germination. |
|---|---|
| Material | BPA-free clear plastic |
| Fits 1020 Trays | Yes |
| Reusable | Yes |
| Weather Resistant | Moderate |
| Primary Use | Humidity control |
| Package Quantity | 2 domes |
| Additional Features |
|
- Adjustable humidity vent with an easy-grip handle makes it simple to manage moisture without disturbing seedlings
- Reinforced rim resists buckling, so trays can be stacked without deforming the dome
- Clear, BPA-free plastic lets light through while still shielding seedlings from contaminants
- Only fits standard 10 × 20 (1020) trays, so it won’t work with other tray sizes
- No built-in drainage, meaning moisture has to be managed within the tray itself
- Clear plastic may yellow over time with extended seasonal use
4. Kinglake Plastic Garden Plant Labels
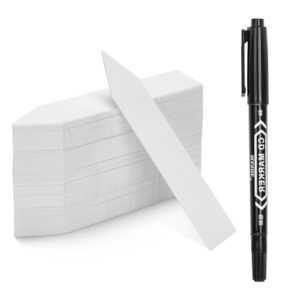
Once your dome comes off and seedlings crowd the tray, you’ll need a way to tell your Cherokee Purple from your Roma. Kinglake’s white PVC labels handle that job well — 4 inches long, pointed for easy soil insertion, with a matte finish that grips pencil or marker without smudging.
They’re rust-proof, wipe clean between seasons, and won’t snap like cheap wooden stakes. At 100 per pack, you’ve got plenty for successive plantings and thinning rounds alike.
| Best For | Home gardeners and greenhouse growers who need a durable, reusable way to label multiple plant varieties across seasons. |
|---|---|
| Material | PVC plastic |
| Fits 1020 Trays | No |
| Reusable | Yes |
| Weather Resistant | Yes |
| Primary Use | Plant labeling |
| Package Quantity | 100 labels |
| Additional Features |
|
- Sturdy PVC construction resists rust, rot, and breakage, unlike wooden stakes
- Matte finish holds pencil or marker clearly without smudging
- Water-resistant and easy to wipe clean for reuse each season
- Only comes in white, offering no color-coding options
- Fixed 4-inch length may not suit larger pots or deep-buried tags
- Extended UV exposure can make the plastic brittle over time
5. Staedtler Permanent Garden Marker Pen
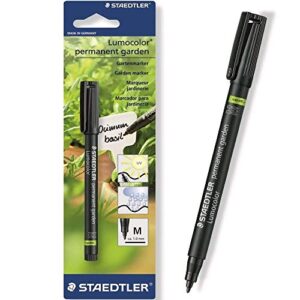
A label’s only as good as the ink on it, and this two-pack from Staedtler earns its keep outdoors. The 1 mm tip dries instantly, so rain, sun, and soil won’t smear your handwriting into mush.
It’s black-only and not refillable, so grab a spare pack — but for marking plastic tags and pots that need to survive a whole season outside, it’s a small, reliable tool that pulls its weight, so you can sow like a pro.
| Best For | Gardeners who need a dependable way to label plant tags, signs, and flowerpots that will stay legible through rain, sun, and regular outdoor handling. |
|---|---|
| Material | Not specified |
| Fits 1020 Trays | No |
| Reusable | No |
| Weather Resistant | Yes |
| Primary Use | Plant labeling |
| Package Quantity | 2 pens |
| Additional Features |
|
- Waterproof, lightfast ink stands up to outdoor conditions all season long
- Instant-dry formula prevents smudging on plastic tags and garden items
- Medium 1 mm tip gives clear, easy-to-read markings
- Only available in black, with no other color options
- Pens aren’t refillable, so they need to be replaced once the ink runs out
- 1 mm tip is a bit wide for very fine or detailed writing
Frequently Asked Questions (FAQs)
Can I start seeds indoors?
Yes — absolutely. Starting seeds indoors gives you a 4 to 8 week head start, protects seedlings from cold snaps, and lets you control germination conditions precisely, so you’re not at the mercy of unpredictable outdoor weather.
When should I plant seeds?
Count backward from your last frost date using each crop’s recommended window — 6 to 8 weeks for tomatoes and peppers, 10 to 12 for celery. Mark it on a calendar, then sow accordingly for sturdy, on-time transplants.
When should I start seedlings indoors?
Timing hinges on your last frost date: 6–8 weeks prior for most vegetables, 8–10 weeks for slow germinators like onions and lettuce, and up to 10–12 weeks for celery, giving roots time to establish before transplanting.
How do I start seedlings indoors?
Think of it like tending a nursery for tiny plants awaiting their debut. Fill trays with sterile seed mix, sow at proper depth, keep warm (70–80°F) and bright, water gently, then harden off before transplanting outdoors.
Which seeds should not be started indoors?
Root crops and taproot-driven vegetables hate the switch. Carrots, beets, parsnips, and turnips develop misshapen roots when transplanted, while peas, radishes, cucumbers, and squash suffer transplant shock — best sown directly once soil warms and frost risk passes.
Why is replanting seeds illegal?
It’s not always illegal, but often restricted: replanting licensed seed without paying required fees breaks license terms, and protected varieties carry plant breeders’ rights limiting reuse—regulations designed to compensate breeders for their development investment.
What are some common mistakes when starting seeds indoors?
Overwatering, using garden soil, and skipping the hardening-off process top the list. Weak light causes legginess; inconsistent watering invites damping-off. Sow seeds too early or too late, and you’ll shortchange your whole season’s harvest.
Which flower seeds can I plant in October?
While the rest of your garden sleeps, autumn quietly plants its own seeds of promise. Sow calendula, nigella, linaria, and cornflower outdoors this month—they tolerate light frost, germinate as soil cools, and reward you with earlier, sturdier spring blooms.
How to plant seeds indoors?
Fill containers with sterile seed-starting mix, sow at the depth your packet suggests, and keep evenly moist. Set trays on a heat mat near 70°F, give 14–16 hours of light, and water from below to protect roots.
What are different ways to start seeds indoors?
Think of it like the Victrola era of gardening: methods have evolved, but choices remain simple. You can use cell trays with domes, recycled cups, soil blocks, or peat pellets — each balancing drainage, humidity, and root space for healthy germination.
Conclusion
Every seed packet is a tiny clock, ticking toward a harvest only you control. Master when to start seeds indoors, and you stop reacting to the calendar and start commanding it.
Count backward from your frost date, respect each crop’s rhythm, and give your seedlings the head start they need. Your garden won’t wait for excuses. Plant with purpose, tend with patience, and watch your tiny miracles become dinner.
- https://www.mofga.org/resources/gardening/seed-planting-calendar
- https://extension.umd.edu/resource/vegetable-planting-calendar
- https://awaytogarden.com/when-to-start-what-vegetable-seed-calculators
- https://www.almanac.com/gardening/planting-calendar
- https://www.johnnyseeds.com/growers-library/seed-planting-schedule-calculator.html