This site is supported by our readers. We may earn a commission, at no cost to you, if you purchase through links.
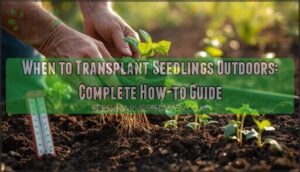
You’ve nurtured those tiny seeds through germination, watched the first leaves unfurl, and kept them thriving under grow lights—but the leap from indoor safety to the unpredictable outdoors separates successful gardeners from those who watch their seedlings wither within days. Transplanting too early invites frost damage and stunted growth, while waiting too long creates root-bound plants that struggle to establish.
The sweet spot depends on reading five critical signals: true leaf development, stem thickness, root density, air temperature trends, and soil warmth. Master these indicators, and you’ll transplant with confidence, giving your seedlings the resilience they need to survive wind, temperature swings, and the shock of their new environment.
Table Of Contents
- Key Takeaways
- Signs Seedlings Are Ready to Transplant
- Choosing The Right Outdoor Timing
- How to Harden Off Seedlings Successfully
- Preparing Soil and Site for Transplanting
- Step-by-Step Outdoor Transplanting Guide
- Frequently Asked Questions (FAQs)
- When should seedlings be transplanted?
- Should I transplant seedlings outside?
- When should you transplant a plant?
- Which plants should be transplanted at the right time?
- Do I need to transplant seedlings?
- How long does it take to transplant a seedling?
- What Should I Do If Seedlings Wilt After Transplanting?
- How Do I Know If My Soil Is Warm Enough?
- Can I Transplant Seedlings During a Heat Wave?
- What Are Signs of Transplant Shock in Seedlings?
- Conclusion
Key Takeaways
- Seedlings are ready to transplant outdoors when they’ve developed 2–4 true leaves, stand 2–4 inches tall with thick stems, show root systems filling 75% of their containers, and outdoor conditions align with your crop’s temperature requirements and local frost dates.
- The hardening off process is non-negotiable—gradually acclimate seedlings over 7–10 days by increasing outdoor exposure from 1–2 hours of filtered sunlight to full 8-hour days while reducing water and fertilizer, which builds transplant resilience and cuts disease susceptibility by more than half.
- Timing varies dramatically by crop type: cool-season vegetables like broccoli and lettuce can handle light frost and transplant 4–6 weeks before your last frost date, while warm-season crops like tomatoes and peppers demand consistent nighttime temperatures above 55°F and soil warmth of 70–75°F, typically 1–2 weeks after frost clears.
- Proper soil preparation and transplant execution—loosening soil 8–12 inches deep, incorporating compost, checking soil temperature with probes, digging holes 2–3 times the root ball width, and immediately watering with 2.6 gallons per bag while adding mulch—separates successful transplants from those that suffer shock and stunted growth.
Signs Seedlings Are Ready to Transplant
You can’t just toss seedlings outside whenever you feel like it—timing this move wrong will set your plants back or kill them entirely. Knowing exactly when your seedlings are mature enough to handle the real world gives you full control over your garden’s success.
Timing your seedling transplant wrong will kill your plants—knowing when they’re ready gives you total control over garden success
Three physical signs will tell you when it’s safe to make the shift.
True Leaves Vs. Cotyledons
Understanding seedling growth starts with spotting the difference between cotyledons and true leaves. Cotyledons—those first rounded, embryonic leaves—emerge right after germination and fuel early seedling growth through stored reserves and photosynthesis.
True leaves follow within 10–14 days in most crops, displaying distinct leaf morphology with species-specific shapes, veins, and edges. Once you see those characteristic true leaves fully expanded beyond the cotyledons, your seedlings are shifting to self-sufficient photosynthesis and nearing transplanting readiness.
Monitoring healthy growth conditions is vital for peak development.
Ideal Seedling Size and Strength
Once your seedlings show true leaves, check their size and strength—they’re your ticket to breaking free from grow lights and launching outdoors. Most vegetable and flower seedlings transplant best at 2 to 3 inches tall, though tomatoes often thrive at 5 inches or taller.
Look for thick, sturdy stems that won’t buckle under their own weight, signaling seedling resilience against transplant shock and outdoor pressures. To ensure a smooth shift, consider the seedling hardening process before moving them outside.
Root System Development
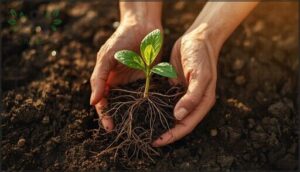
Strong stems tell half the story—below the surface, you’re looking for roots that fill 75% or more of the pot without circling the edges. Gently tip a seedling from its container; a well-formed root ball should hold together and show white, branching growth.
That density means ideal soil contact after transplanting, ensuring efficient water uptake and nutrient absorption while minimizing transplant shock during hardening off.
Choosing The Right Outdoor Timing
You’ve nurtured your seedlings to the perfect size, but rushing them outdoors at the wrong moment can undo all that hard work. The difference between a thriving transplant and a stunted one often comes down to timing—matching your move to what the weather and soil are actually ready for.
Let’s break down the key factors that’ll help you nail that essential transplant window.
Understanding Local Frost Dates
Your local frost date is the primary gatekeeper for transplanting seedlings—it’s the average date when your region sees its last spring freeze. This date shifts dramatically by location, from early February in Houston to mid-May in northern zones, directly determining when it’s safe to move seedlings outdoors.
You can find yours through USDA Climate Zone Mapping tools, regional gardening guides, or frost date calculation resources online.
Cool-Season Vs. Warm-Season Crops
The fundamental split in transplant timing centers on crop temperature tolerance—cool-season varieties thrive in 60–75°F daytime windows and can handle light frost, while warm-season crops demand consistent nighttime temps above 55°F and soil at least 65°F.
Here’s how seasonal planning breaks down:
- Cool-season crops (broccoli, lettuce) transplant 4–6 weeks before last frost date
- Warm-season varieties (tomatoes, peppers) go out 1–2 weeks after frost clears
- Cool-season transplanting targets early spring or late summer windows
- Warm-season crops require late spring timing when soil warms adequately
- Climate considerations override calendar dates—prioritize actual temperature readings
Soil and Nighttime Temperature Guidelines
Beyond forecasts and frost dates, you need hard temperature data—specifically soil warmth at 4-inch depth and overnight air readings.
Cool-season crops tolerate soil as low as 40°F but thrive at 60–65°F, while warm-season transplants demand 70–75°F soil and nights consistently above 55°F.
Measure morning and afternoon soil temperature with a digital probe, then average the readings before committing your seedlings outdoors.
Using Planting Calendars for Specific Crops
Grab a zone-specific planting calendar to translate your frost dates into crop-by-crop transplant windows that account for each vegetable’s heat demands and maturity timeline. These calendars build in seasonal planning intelligence, layering soil temperature thresholds over regional gardening frost-date baselines to deliver precise seed starting and transplanting schedules:
- Tomatoes: transplant 1–2 weeks after last frost, seedlings 6–8 weeks old
- Peppers: schedule 2+ weeks post-frost for sustained warmth
- Brassicas: move outdoors 2–4 weeks before last freeze
- Vine crops: wait until warming trend confirms stable conditions
- Succession intervals: stagger plantings every 2–4 weeks for continuous harvest
This weather forecasting layered with crop rotation logic ensures you’re planting seedlings outdoors at the moment your soil and air align with their biological needs—no guesswork, just gardening tips grounded in local climate data.
How to Harden Off Seedlings Successfully
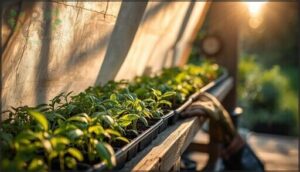
Hardening off is your seedlings’ training ground before they face the real world. It’s a 7 to 10-day process that gradually builds their tolerance to wind, direct sun, and temperature swings.
Let’s break down the exact steps you need to take to toughen them up without throwing them into the deep end.
Gradual Acclimation Steps
Think of hardening off seedlings as boot camp for your plants—a week-long outdoor exposure ritual that builds transplant resilience.
Start with 1–2 hours in filtered sunlight on day one, then gradually increase direct sun exposure by 1–2 hours daily.
By day seven, your seedlings will tolerate full 8-hour days outdoors, complete with environmental adjustments to UV radiation, wind, and temperature swings that prevent transplant shock entirely.
Adjusting Water and Fertilizer During Hardening
Water reduction during hardening off seedlings trains roots to hunt deeper, building transplant survival resilience you can’t fake with coddling. Here’s your hardening protocol:
- Cut watering to 2–3 times weekly—let soil moisture drop to 50–60% field capacity without visible wilting, forcing stronger root development
- Slash fertilizer rates to 50–100 ppm nitrogen, preventing lush, weak tissue vulnerable to outdoor stress
- Water clear (no fertilizer) every third irrigation to avoid salt buildup and wean seedlings off high fertility before transplanting
Preventing Transplant Shock
Transplant shock slams seedlings hard when you skip hardening off—stressed plants show 2.2 times higher disease susceptibility than properly acclimated transplants.
Your shock prevention arsenal: complete the 7–10 day hardening protocol, transplant on cloudy evenings for 10–20% better survival, protect from wind to cut losses by 15–22%, and maintain 75–85% soil moisture the first week to reduce wilting by 31%.
Preparing Soil and Site for Transplanting
You’ve hardened off your seedlings, and now it’s time to get their new home ready. The soil and site you choose will either make or break their shift from cozy containers to the wild outdoors.
Let’s cover the key prep work that’ll give your transplants the strong start they deserve.
Soil Loosening and Amendment
Before you drop a single seedling into the ground, break free from compacted soil that can slash root growth by 30–50%. Loosening the top layer with a spade or fork sets the stage for organic matter integration—your key to soil structure, root depth, and moisture retention.
- Turn soil 8–12 inches deep to reduce bulk density and mechanical resistance
- Work in compost at 3–6 tons per acre (or 2–3 inches across beds) to boost water-holding capacity and soil aeration
- Aim for penetration resistance below 100 psi using a penetrometer to ensure roots won’t hit a brick wall
- Incorporate cover crop residue if available, which can lift organic matter by 7–74% and slash bulk density
- Avoid working wet soil—you’ll destroy aggregates and create cement-like conditions
Quality compost benefits extend beyond soil preparation: municipal solid waste or biosolids compost improves tilth in sandy and calcareous ground, increases cation exchange, and has driven yield gains of 36–92% depending on soil amendment type.
For soil management that fuels vigorous rooting, blend organic matter uniformly through the transplant zone, guaranteeing your seedlings encounter loose, oxygen-rich conditions from day one.
Raising and Monitoring Soil Temperature
Once your soil is loose and amended, don’t gamble on guesswork—use temperature probes to check 2–4 inches deep and wait for a 3-day average above your crop’s minimum.
Black plastic accelerates soil warming by 5–10°F in three weeks, while row covers and thermal mapping pinpoint cold zones that stall root development.
Heat retention through mulch removal and raised beds gives you a 1–2 week head start on transplanting seedlings.
Selecting The Best Planting Location
Now that your soil hits the right temperature, lock in your advantage by choosing a location that sets your seedlings up to thrive. Ideal planting conditions depend on five non-negotiables:
- Sunlight Requirements: 6–8 hours minimum, 10–12 for heat lovers like tomatoes
- Drainage Systems: Avoid low spots where water pools
- Soil Quality: Deep, friable topsoil beats compacted clay every time
- Water Access: Keep your garden close to a reliable source
- Garden Layout: Space beds for airflow and easy access
Your plant variety and climate consideration dictate everything—warm-season crops demand full sun and raised beds in outdoor gardening, while cool-season types tolerate partial shade.
Scout locations away from tree roots and road pollution, then test your garden soil before committing to any spot.
Step-by-Step Outdoor Transplanting Guide
You’ve prepped your soil, hardened off your seedlings, and picked the perfect day—now it’s time to get those plants in the ground. The actual transplanting process doesn’t need to be complicated, but a few deliberate steps will set your seedlings up for strong establishment and long-term success.
Here’s how to handle the move from container to garden bed with confidence.
Digging Proper Planting Holes
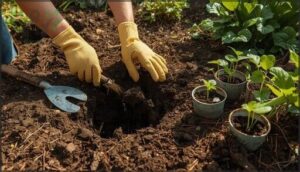
Your planting hole makes or breaks transplant survival—dig it right, and your seedlings thrive. Make the hole width 2 to 3 times your root ball‘s diameter to encourage rapid root growth and avoid soil compaction.
Keep hole depth matching the root ball height, allowing the crown to sit just above grade. This approach boosts survival rates markedly while preventing restricted root expansion.
Gentle Handling and Planting Depth
Your hands hold the difference between thriving plants and transplant shock. Smart handling techniques protect delicate root systems, while establishing proper soil depth sets up long-term success.
- Grasp seedlings by leaves, never stems—stem damage causes up to 3% seedling loss during transplanting.
- Match root ball depth exactly—usually 2–4 inches for most vegetables.
- Minimize root exposure time—keep roots covered to reduce stress.
- Firm soil gently around the base—ensuring seedling support without compaction.
Initial Watering and Mulching
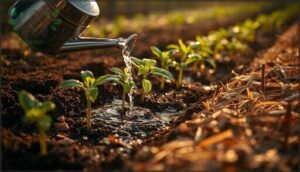
Within minutes of transplanting, your seedlings need water—delaying raises shock risk and mortality by up to 40%. Pour roughly 2.6 gallons per bag of soil, saturating the root zone to kickstart soil-root contact and root development.
Then spread 2–4 inches of mulch for moisture retention and weed prevention, locking in hydration that reduces evaporation by 25–50% while stabilizing soil moisture through those critical first days.
Protecting Seedlings After Transplanting
Resilience in the first weeks decides survival. Shield your transplants from enemies by layering defenses that target frost, pests, heat, and wind:
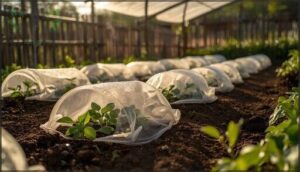
- Frost Prevention: Deploy floating row covers for 2–3°F protection, heavyweight covers for 6–10°F, or cloches to trap warmth and block late freezes.
- Pest Control: Install covers at transplanting to exclude thrips, leafhoppers, and flea beetles while minimizing transplant shock.
- Wind Protection and Shade Management: Use windbreaks to cut wind by 73%, add 30–50% shade cloth above 80°F, and monitor soil moisture daily—container plants drain fastest and demand frequent watering during hardening off and plant care.
Frequently Asked Questions (FAQs)
When should seedlings be transplanted?
Timing is everything—and your seedlings know it. Transplant when they’ve developed 2–4 true leaves, stand 2–4 inches tall, and outdoor conditions align with frost dates and consistent soil temperatures above 55°F.
Should I transplant seedlings outside?
Yes, once seedlings show true leaves and you’ve completed hardening off, transplant seedlings outdoors after garden readiness checks.
Proper outdoor acclimation and transplant timing prevent transplant shock, giving your plants freedom to thrive.
When should you transplant a plant?
You should transplant a plant when it has two to three sets of true leaves, strong roots, and hardened-off resilience.
Timing is crucial—it must align with your soil temperature, frost dates, and the crop’s seasonal needs.
Which plants should be transplanted at the right time?
Some crops demand precise timing strategies—tomatoes, peppers, and squash thrive only after frost risk passes and soil warms.
Cool-season favorites like cabbage, lettuce, and hardy annuals succeed with early transplanting, if you nail soil preparation and transplant techniques.
Do I need to transplant seedlings?
Not always—root crops like carrots or beets suffer when moved, while tomatoes and peppers thrive after transplanting.
Your climate, crop choice, and desired harvest timing determine whether seedling transplantation strengthens or sabotages your garden.
How long does it take to transplant a seedling?
Most gardeners think they’re planting; really, they’re just relocating tiny hostages. The physical act of transplanting seedlings takes 10 to 50 seconds per seedling, but hardening off demands 7 to 10 days before outdoor acclimation prevents transplant shock.
What Should I Do If Seedlings Wilt After Transplanting?
When your seedlings wilt, don’t panic—water management is your first line of defense. Check soil moisture immediately, provide gentle hydration to root depth, and add temporary shade to reduce transplant shock and water loss.
How Do I Know If My Soil Is Warm Enough?
You’ll need a soil thermometer to measure warmth at 2–4 inches deep, targeting 60–65°F for lettuce or 70–75°F for tomatoes. Check morning and afternoon readings for several days to confirm stability.
Can I Transplant Seedlings During a Heat Wave?
You shouldn’t risk it—89% of seedlings died during documented heat waves.
Delay transplanting until temperatures drop, maintain soil moisture retention, and use hardening off strategies to prevent transplant shock from extreme temperature changes.
What Are Signs of Transplant Shock in Seedlings?
Like a flag on a windless day, drooping leaves signal trouble. Wilting despite moist soil means damaged roots can’t absorb water.
Watch for yellowing, curling, or leaf drop after transplanting seedlings, all classic transplant shock symptoms.
Conclusion
Picture your seedlings flexing their roots into sun-warmed soil, leaves tilting toward open sky—that’s the payoff for reading your plants, your weather, and your timing with precision.
Knowing when to transplant seedlings outdoors isn’t guesswork; it’s a skill built on observation, patience, and deliberate hardening. You’ve learned the signals, prepared the ground, and timed the move.
Now your seedlings won’t just survive the shift—they’ll own it, rooting deep and growing bold in their new home.
- https://www.permaculturegardens.org/how-and-when-to-transplant-seedlings
- https://swfrec.ifas.ufl.edu/docs/pdf/veg-hort/transplant/trans_age.pdf
- https://pmc.ncbi.nlm.nih.gov/articles/PMC4395310/
- https://www.canr.msu.edu/news/transplant_production_timing_and_crop_types
- https://www.farmstandapp.com/67484/7-best-practices-for-transplanting-seedlings-outdoors/


