This site is supported by our readers. We may earn a commission, at no cost to you, if you purchase through links.

The difference between gardeners who scramble in March and those who confidently direct-seed their first crops on schedule comes down to decisions you make right now. Soil tests ordered in December reveal deficiencies you can correct before the ground thaws. Seed catalogs studied in January let you lock in heirloom varieties that sell out by February.
Your winter garden planning for spring transforms downtime into strategic advantage, turning cold months into your most productive season for setting up abundance when temperatures rise.
Table Of Contents
- Key Takeaways
- Winter Garden Planning
- Choosing Spring Plants
- Garden Layout Design
- Soil Preparation Tips
- Spring Gardening Timeline
- Frequently Asked Questions (FAQs)
- What is the 3 year rule in gardening?
- When should I start preparing my garden for spring?
- What month do you plant a winter garden?
- How do I protect plants from late frost damage?
- When should I start hardening off seedlings?
- What garden tools need maintenance before spring?
- How do I prevent common spring garden pests?
- Should I mulch before or after planting?
- How do I protect garden tools from winter rust?
- What companion planting strategies work best for spring?
- Conclusion
Key Takeaways
- Winter planning separates successful gardeners from those who scramble in spring—soil tests ordered in December and seed catalogs studied in January give you a five-month strategic advantage to correct deficiencies and secure heirloom varieties before they sell out.
- Smart plant selection balances cool-season crops that germinate in near-freezing temperatures (spinach at 2°C, lettuce at 4–16°C) with disease-resistant hybrids that deliver 25% better yields, while native plants slash water needs by 40% and boost pollinator diversity.
- Your indoor seed-starting timeline is non-negotiable: tomatoes need 6–8 weeks before transplanting, peppers require 8–10 weeks, and success depends on maintaining 70–80°F soil temperature with 14–16 hours of daily grow light positioned 8–12 inches above seedlings.
- Proper soil preparation during winter—adding 2-3 inches of compost, balancing pH between 6.0–7.5, and conducting tests every two to three years—transforms tired earth into a nutrient-rich foundation that gives spring plants an unstoppable head start.
Winter Garden Planning
Winter is your secret weapon for spring garden success. Before the first bulb breaks ground, you’ll want to take stock of what worked last season, define clear goals for the months ahead, and map out a realistic budget.
Here’s how to tackle each step and set yourself up for a thriving garden come March.
Assessing Current Garden
Winter is your secret weapon for spring success—think of it as the gardener’s version of "measure twice, cut once." Grab your notebook and walk your yard with purpose, noting every detail that’ll inform your garden planning and preparation. This garden evaluation isn’t about criticism—it’s about gathering intel for your spring campaign.
- Soil Testing – Test pH levels and nutrient content now while you’ve got time to amend properly
- Plant Inventory – Document which crops dominated and which barely survived in each bed
- Garden Mapping – Sketch your current layout, marking sunlight patterns and drainage trouble spots
- Weed Control Assessment – Identify where invasive species claimed territory for targeted winter gardening interventions
- Infrastructure Check – Examine trellises, irrigation lines, and tool storage—yard assessment reveals what needs repair before soil health work begins
Identifying Spring Goals
Once you’ve sized up your garden’s current state, it’s time to chart your spring course with precision. Effective goal-setting strategies begin with SMART criteria—93% of experienced gardeners report better outcomes when spring gardening objectives are specific and time-bound. You’ll want to establish crop yield targets that match your household’s actual consumption, not wishful thinking. For instance, calculate weekly vegetable needs, then work backward to determine bed counts and harvest scheduling windows. Your garden objectives should balance immediate wins (pest-resistant varieties) with long-term investments (perennial establishment). Understanding soil preparation tips is essential for a successful garden.
Put this in writing—you’re 42% more likely to follow through when goals live on paper.
Your planning hits its stride when winter research translates into concrete spring targets, giving you solid numbers to work with when you map out costs.
Here’s how successful gardeners structure their seasonal planning:
| Goal Type | Example Target |
|---|---|
| Production | 40 lbs tomatoes over 8 weeks |
| Biodiversity | 17+ native plant species |
| Sustainability | Install drip irrigation system |
| Timeline | Seed starting 6 weeks pre-frost |
Creating Budget Plan
Your goals are only as good as the budget that brings them to life—so let’s talk numbers before soil hits the spade. Start with cost estimation for seeds, amendments, and tools—break down expenses by category during your winter gardening prep.
Budget tracking through a spreadsheet keeps expense management tight throughout seasonal planning. Consider funding options like seed swaps or community tool libraries to stretch resources.
Put your money where it counts—quality soil amendments trump pretty planters every time.
This approach keeps your garden thriving without draining your wallet, and you’ll get more mileage from every dollar you spend.
Choosing Spring Plants
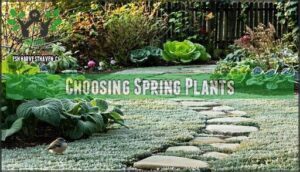
Selecting the right plants now sets you up for a thriving spring garden. Your choices should balance what you love to grow with what actually thrives in your specific conditions.
Let’s break down your options across vegetables, fruits, and flowers, and native plants that’ll make your 2025 garden sing.
Selecting Vegetables
Smart plant selection separates thriving spring gardens from disappointing ones. Cool-season crops like spinach germinate at temperatures as low as 2°C, while lettuce performs best between 4–16°C—perfect for early spring garden success. When planning your crop rotation, balance heirloom varieties’ exceptional flavor against hybrids’ disease resistance and 25% better yields. Disease-resistant selections dramatically improve vegetable yield, especially during wet springs when susceptible varieties struggle. Your seed selection strategy should account for soil health requirements and maturity timing to optimize your spring garden’s productivity. Understanding cold tolerant plants is essential for a successful early spring garden.
Winter gardening prep starts with choosing these spring champions:
- Spinach and lettuce – germinate in near-freezing soil temperatures for early harvests
- Sugar snap peas – tolerate frost while fixing nitrogen for improved soil health
- Radishes – mature in 25–35 days for quick crop rotation opportunities
- Disease-resistant hybrids – reduce losses by up to 25% compared to susceptible varieties
- Brassicas like broccoli – score 6.3 for yield efficiency per square foot
Picking Fruits and Flowers
Pairing the right fruits and flowers transforms your spring garden from purely functional into a landscape that feeds both your table and your soul. Dwarf fruit trees produce harvests within 2-3 years while requiring minimal space—perfect for winter gardening planning sessions.
Plant strawberries alongside borage for 32% higher yields through enhanced pollinator activity. Stagger blooming seasons with early daffodils, mid-season tulips, and late-blooming alliums to maintain vibrant garden colors through spring.
Your seed selection should prioritize pollinator plants that support soil health while creating stunning flower arrangements for your home.
Considering Native Plants
Choosing native plants elevates your garden’s Ecological Restoration potential while slashing maintenance demands. Indigenous species adapted to your region’s rainfall patterns and soil conditions offer Climate Resilience that exotic varieties can’t match.
When you fill 50-70% of your garden with native plants, you’ll see local pollinators and wildlife flourish.
Take oak trees—a single mature oak supports hundreds of caterpillar species that birds depend on to feed their young.
When planning spring beds, consider regional wildflowers like black-eyed Susan or native grasses. Their deep root systems naturally boost soil health.
This approach builds biodiversity corridors that need 40% less water than traditional turf, saving you money while supporting local ecosystems.
Garden Layout Design
A well-thought-out layout transforms your spring garden from a wishful sketch into a thriving reality.
Before you plant a single seed, you’ll need to map your space, design functional pathways and beds, and consider whether water features fit your vision.
Here’s how to nail down each element.
Mapping Garden Space
Think of your garden map as a blueprint for success—without it, you’re basically planting blind and hoping for the best.
Measure your yard’s dimensions precisely, marking existing structures, trees, and utilities. Track sunlight patterns throughout the day to identify full-sun and shaded zones. Note drainage systems and low-lying areas where water pools.
Use graph paper or digital garden design tools to create scaled drawings, incorporating boundary marking and soil preparation zones for effective space planning.
Creating Pathways and Beds
Think of your garden pathways as more than shortcuts between beds—they’re what keeps everything running season after season. The right materials and clean edges make getting around easier while protecting your soil from getting packed down (which chokes off oxygen to plant roots).
When you plan paths with drainage in mind, rainwater moves away from your beds instead of sitting in puddles.
Pathways and beds foundation:
- Select durable pathway materials—gravel, shredded bark, or flagstone—that withstand foot traffic without creating mud zones during soil preparation season.
- Install solid bed edging using cedar boards, stone, or metal to contain amendments and define your garden mapping boundaries clearly.
- Space beds 3-4 feet wide with 24-inch pathways between sections, allowing comfortable access for planting, weeding, and harvest without compacting growing zones.
Incorporating Water Features
A well-placed fountain or pond doesn’t just add visual appeal—it creates a microclimate that can lower surrounding temperatures by 5-10°F while drawing in beneficial insects, amphibians, and birds that naturally control garden pests. Incorporate aquatic plants like water lilies and horsetail to oxygenate the water naturally.
Position your pond installation where it’ll catch runoff, transforming drainage challenges into rainwater harvesting opportunities. Your fountain design should include recirculating pumps that minimize water waste while maximizing the soothing sounds that make your garden layout irresistible during those early spring mornings.
Soil Preparation Tips
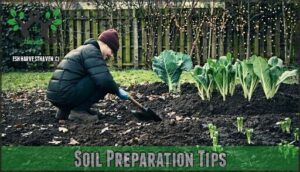
Your soil’s winter health determines your spring harvest success. Right now, while the ground is workable, you can transform tired earth into a nutrient-rich growing medium that’ll give your plants an unstoppable head start.
Here’s how to prep your soil before the first thaw.
Adding Organic Matter
Here’s something most gardeners miss: healthy soil doesn’t happen overnight. You build it layer by layer, and winter’s actually your best window to prep beds before the spring rush hits.
When you enrich soil with organic matter during the cold months, you’re setting up a nutrient-dense base that’ll pay off big when planting season arrives. Your prep strategy:
- Composting Benefits: Layer finished compost or worm castings 2-3 inches deep, providing slow-release nutrients while improving soil structure and microbial activity
- Manure Usage: Apply aged cow or chicken manure in fall, letting winter’s freeze-thaw cycles naturally break down organic matter
- Mulch Types: Spread shredded bark, straw, or leaf mold to retain moisture, suppress weeds, and gradually decompose into humus
This proactive soil health and maintenance approach ensures your spring plants hit the ground running.
Balancing PH Levels
Once you’ve enriched your soil with organic matter, the next step is unlocking nutrient availability through proper soil pH management. Soil testing every two to three years reveals whether your beds fall within the ideal 6.0–7.5 range for most vegetables. Acidic solutions like elemental sulfur correct alkaline conditions, while lime applications neutralize overly acidic soils.
Here’s what different pH levels mean for your spring garden:
| pH Range | Impact on Soil Health and Maintenance |
|---|---|
| Below 5.5 | Nitrogen uptake drops; acid-loving plants thrive |
| 6.0–7.0 | Peak nutrient balance for vegetables; ideal composting conditions |
| 7.0–7.5 | Good for most crops; monitor iron availability |
| Above 7.5 | Iron, zinc deficiency; yellowing and stunted growth |
Proper soil preparation through pH adjustment transforms mediocre harvests into abundant yields—giving you complete control over your garden’s success.
Spring Gardening Timeline
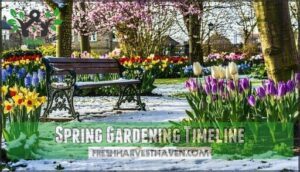
Timing is everything when you’re turning winter plans into spring reality. You’ll need a clear schedule that accounts for your last frost date, indoor seed starting windows, and when to move transplants outside.
Let’s break down the critical milestones that’ll keep your garden on track from February through May.
Creating Scheduling Plan
Six weeks before your last frost date marks the sweet spot for launching your indoor seed-starting operation—miss this window, and you’ll watch neighbors harvest while you’re still transplanting stunted seedlings.
Think of your gardening calendar as the control center that keeps everything running on schedule. Break your winter planning into weekly chunks—this is where you’ll spot which plants actually perform well in your space.
Here’s the truth: good timing makes all the difference. Start tomatoes too late and you’re playing catch-up all season. Plant peppers too early and you’ll be nursing weak, stretched-out seedlings that never quite recover.
Transform your spring gardening strategies into actionable steps:
- Map seasonal gardening tips to frost-sensitive windows, dedicating specific dates for brassicas (8-10 weeks early), tomatoes (6-8 weeks), and peppers (8-10 weeks)
- Integrate garden planning checklists with growth milestones, tracking germination rates and transplant readiness weekly
- Align spring preparation tasks with available daylight hours, ensuring seedlings receive 12-16 hours of artificial light daily before hardening off begins
Starting Seeds Indoors
Once you’ve locked in your scheduling plan, you’re ready to transform those calendar dates into thriving seedlings under your own roof. Starting seeds indoors shifts control into your hands—you’ll manipulate soil temperature, indoor lighting, and moisture levels to coax germination rates that outdoor conditions can’t match. Warm-season crops like tomatoes and peppers demand soil temperatures between 70–80°F, which heat mats deliver consistently, while brassicas tolerate cooler starts at 60–65°F.
The seeds you pick dictate your timeline. Tomatoes need 6–8 weeks indoors before you move them outside; onions take longer at 10–12 weeks.
Set your grow lights 8–12 inches above the trays and leave them on 14–16 hours each day—skimping on light causes those thin, floppy stems that derail most first-time growers (it’s behind more than 70% of failures).
Skip regular garden soil and go with sterile, soilless mix instead—peat and perlite work well. Garden soil brings damping-off disease with it, which can kill half your seedlings in a single night.
Seedling care demands attention without smothering—bottom watering prevents root rot while maintaining consistent moisture. This indoor gardening approach gives spring gardening strategies real teeth, especially for gardening for beginners mastering their first seed starting operation.
Transplanting Outdoors
Moving those hardened seedlings from their protective indoor environment into the garden bed marks the moment your months of planning finally meet the soil. Transplant timing hinges on soil temperature—wait until it holds steady at 60°F for warm-season crops, or you’ll watch your tomatoes stall out completely.
Hardening off over 7–10 days builds resilience through gradual outdoor acclimation, starting with 2-hour exposures and extending daily. Execute your transplanting during overcast afternoons when soil conditioning peaks:
- Measure spacing with precision—crowded seedlings compete ruthlessly for nutrients
- Dig holes twice the root ball width to encourage lateral root expansion
- Water transplant sites an hour before placement for ideal soil moisture
- Shield seedlings with row covers for three days post-transplant
- Monitor daily for wilting or pest damage during the critical first week
This seedling care approach transforms your seed starting efforts into a productive spring garden.
Frequently Asked Questions (FAQs)
What is the 3 year rule in gardening?
Perennials need time to reach their full potential—it’s called the three-year rule. You’ll see modest growth in the first year as plants focus on root development.
Year two brings stronger, more established growth.
By the third year, they hit their stride with full blooms and mature presence.
This gardening principle shapes your winter garden planning approach, guiding crop rotation strategies that prevent soil degradation while building garden resilience and ecosystem balance for thriving spring gardening.
When should I start preparing my garden for spring?
The sweet spot for getting your garden ready hits about 6-8 weeks before your last expected frost—perfectly positioned to match your local growing zone and set up a strong spring.
Start Winter Preparation now: test soil, order seeds during peak selection, and prepare tools while Frost Dates guide your Spring Forecast for smooth planting.
What month do you plant a winter garden?
Timing is everything, as the saying goes. For winter garden planning, you’ll plant cold-hardy crops between August and November, depending on your frost dates and location.
Cool-season vegetables like kale, spinach, and broccoli flourish when started during these months, making your garden calendar essential for successful winter sowing.
How do I protect plants from late frost damage?
Protect tender plants from late frost damage by covering them with frost cloths, row covers, or old sheets before temperatures drop. Water the soil beforehand—moist ground retains heat better.
Remove coverings once morning temperatures rise above freezing.
When should I start hardening off seedlings?
Don’t put all your eggs in one basket—start hardening off seedlings one to two weeks before transplanting outdoors. Gradually increase their outdoor exposure daily, monitoring weather conditions closely.
This outdoor acclimation strengthens seedling transplant success, preventing shock and stunted growth while ensuring vigorous plant health for your spring gardening efforts.
What garden tools need maintenance before spring?
Your pruning shears, garden hoses, and lawn mowers demand attention now. Sharpen cutting tools, oil metal surfaces to prevent rust, inspect hoses for cracks, and service mower engines.
This preventive tool maintenance saves money and ensures your gardening tools perform flawlessly when planting season arrives.
How do I prevent common spring garden pests?
Start with barrier techniques and biological controls to stop pests before they arrive. Row covers shield young transplants, while beneficial nematodes target soil-dwelling larvae.
Companion planting with marigolds deters aphids, and native flowers invite predatory insects.
Practice crop rotation annually to disrupt pest cycles and inspect plants weekly for early intervention.
Should I mulch before or after planting?
Always mulch after planting to protect root systems and guarantee accurate plant placement.
Apply a 2-3 inch layer around established seedlings for weed suppression and moisture retention, but keep mulch away from stems to prevent disease.
How do I protect garden tools from winter rust?
Like a well-oiled machine, your garden tools need proper winter protection to prevent rust.
Clean tools thoroughly, apply a light coat of mineral oil, and store them in a dry location. Tool maintenance now ensures rust prevention and extends equipment lifespan for spring.
What companion planting strategies work best for spring?
Companion planting pairs complementary species—like tomatoes with basil or carrots with onions—to boost garden diversity, deter pests naturally, and support vigorous spring blooms.
Crop rotation prevents nutrient depletion season after season.
Conclusion
Like a general positioning troops before battle, your winter garden planning for spring determines victory before the first warm day arrives. Each soil amendment you spread, every seed packet you organize, and all those layout sketches you perfect now become the infrastructure that turns good intentions into harvested bushels.
You’ve mapped your space, timed your transplants, and built a growing system that runs on preparation rather than panic.
When March winds finally shift and your neighbors scramble for sold-out seedlings, you’ll already be watching your cold-hardy greens emerge on schedule—because champions are made in the off-season.
While neighbors scramble for sold-out seedlings come spring, champions who planned through winter will already be harvesting their greens

