This site is supported by our readers. We may earn a commission, at no cost to you, if you purchase through links.

Most spring bulbs fail because gardeners plant them at the wrong time, and that mistake costs months of waiting for blooms that never appear. The window for successful planting is surprisingly narrow, usually spanning just four to six weeks in fall when soil temperatures drop below 60°F but before the ground freezes solid. Miss that sweet spot, and your tulips won’t develop the root systems they need to survive winter, or worse, they’ll rot in soil that’s still too warm.
Your spring flower bulb planting guide starts with understanding this critical timing, along with soil preparation, depth requirements, and variety selection that determines whether you’ll see vibrant color in March or bare garden beds. The difference between a disappointing spring and a stunning floral display often comes down to decisions you make this fall.
Table Of Contents
- Key Takeaways
- When to Plant Spring Flower Bulbs
- Choosing The Right Spring Bulbs
- Preparing Soil for Bulb Planting
- Where to Plant Spring Bulbs
- How to Plant Spring Bulbs Step by Step
- Designing Beautiful Spring Bulb Displays
- Caring for Spring Bulbs After Planting
- Top 6 Products for Successful Bulb Planting
- Frequently Asked Questions (FAQs)
- When should I plant bulbs for spring flowers?
- Should you soak spring bulbs before planting?
- How many spring bulbs should I plant together?
- What is the general rule for planting bulbs?
- What happens if you plant flower bulbs in the spring?
- When to plant spring bulbs?
- How to plant spring flower bulbs?
- Where should I plant spring bulbs?
- What are spring flower bulbs?
- When should I plant spring flowers?
- Conclusion
Key Takeaways
- Most bulbs fail because gardeners plant outside the narrow 4-6 week fall window when soil temperatures drop below 60°F but before ground freezes, missing the critical period for root establishment before winter.
- Proper planting depth—two to three times the bulb’s height with pointed end up—combined with cluster groupings of 6-12 bulbs creates dramatic visual impact while preventing common mistakes like shallow planting and overcrowding.
- Layering different bulb varieties at staggered depths (lasagna planting) extends your bloom window for 6-10 weeks by combining early crocuses, mid-season tulips, and late alliums in the same bed.
- Your fall soil preparation work—improving drainage, adding organic matter, and testing pH between 6.0-6.5—determines whether you’ll see vibrant March blooms or disappointing bare beds come spring.
When to Plant Spring Flower Bulbs
Timing is everything for planting spring bulbs, and getting it right means the difference between a stunning display and a disappointing spring. You’ll need to factor in your hardiness zone, the specific bulbs you’re planting, and the condition of your soil before you break ground.
For most gardeners, understanding when to plant fall bulbs helps avoid common mistakes that lead to poor root development or frost damage.
Let’s look at the key timing factors that’ll set you up for success.
Ideal Planting Times by USDA Zone
Your bulb planting zones determine best planting times more precisely than any calendar. Zone 3 gardeners should plant between mid-September and mid-October, while those in Zone 5 aim for September 15 to October 15. Zone 6 allows flexibility from September 1 through November 15, and Zone 7 extends the planting window through November 1.
These regional timing windows, paired with proper planting depth, guarantee roots establish before freezing temperatures arrive.
Timing for Different Bulb Varieties
Different varieties require adjusted planting schedules to match their growth stages and bloom windows. Crocus and snowdrops emerge 6 to 8 weeks after planting, while tulips demand 12 to 16 weeks of cold dormancy before flowering. Daffodils set buds in fall and bloom 2 to 3 weeks after ground thaws, and hyacinths deliver color 4 to 6 weeks once soil reaches 45 to 50 degrees Fahrenheit.
Signs The Ground is Ready
You can confirm the ground is ready by testing soil temperature with a thermometer, aiming for 40 to 60 degrees Fahrenheit before fall frost arrives. A quick squeeze test reveals moisture levels—soil should form a loose ball without waterlogging.
Run a drainage test by filling a 12-inch hole with water; if it empties within two hours, you’re set to plant at proper bulb depth.
Avoiding Common Planting Mistakes
Even with solid ground prep, you can still undermine your spring bulbs by rushing key steps. Watch out for these common errors that compromise root protection and moisture control:
- Planting too shallow — bulbs need proper depth (6-8 inches for tulips and daffodils) to anchor roots and survive winter.
- Skipping soil preparation — heavy clay without amendment invites rot and poor drainage.
- Crowding bulbs — tight spacing creates root competition, weakening your entire display. For best results, always review essential plant care planning to avoid the most frequent planting mistakes.
Choosing The Right Spring Bulbs

Selecting the right bulbs is half the battle when you’re planning a spring garden that actually delivers. Your choices will determine both when your flowers bloom and what colors brighten your beds, but also how much effort you’ll need to put in along the way.
Let’s look at what makes certain bulbs better starting points and how to match varieties to your garden’s specific needs.
Best Bulbs for Beginners
You can’t go wrong with tulips for your spring bulb planting guide—they’re among the easiest spring flowers for beginners, delivering bright, reliable blooms in countless color mixes. Daffodils are equally forgiving and naturalize beautifully, while crocuses emerge early to provide cold-tolerant color.
Alliums offer tall architectural interest with minimal bulb care and maintenance, and hyacinths bring vivid fragrance to any garden planning effort.
Selecting for Color and Bloom Time
Your spring flower palette starts with vibrant hues that peak at different points across the season. Purple and blue spring blooming bulbs typically open earliest, while red varieties often follow mid to late spring.
Pair bright white or yellow flower colors in full sun to boost intensity, and layer flower combinations by height to sustain seasonal blooms from late winter through May.
Understanding Bulb Types
True bulbs, corms, and tubers each store energy differently, shaping your approach to depth and dormancy periods. Hardy bulbs tolerate freezing winters and return as naturalizing plants, while tender bulbs need shelter from frost.
Spring-blooming bulbs rely on cold dormancy to trigger flowering, so understanding bulb classification guides you toward the right bulb varieties and bulb storage practices for reliable color.
Sourcing Quality Bulbs
You wouldn’t buy produce from an unmarked bin, so don’t settle for mystery bulbs either. Choosing quality bulbs from certified suppliers with solid reviews protects your investment and ensures spring blooming bulbs perform as promised.
- Look for freshness guarantees and batch testing reports that confirm lumen output and color accuracy
- Verify bulb certification marks like UL or CE for safety compliance
- Check supplier quality control practices, including documented storage conditions and short shelf life
For additional tips on identifying and selecting high-quality bulbs from reputable retailers, explore this university-backed guide.
Preparing Soil for Bulb Planting

Your bulbs won’t thrive in compacted, nutrient-poor soil, no matter how carefully you plant them. Think of soil preparation as building the foundation for a house—you can’t skip this step and expect great results.
Soil preparation is the foundation for spring bulbs—skip it, and no amount of careful planting will save your garden
Let’s walk through the essential tasks that’ll give your spring bulbs the best possible start.
Improving Drainage and Texture
Your bulbs won’t thrive in waterlogged soil, so you’ll need to improve drainage and texture before planting. Mix coarse materials like perlite or sand into heavy clay at a 1:2 ratio to improve porosity improvement and soil aeration.
A raised bed also speeds water management by shortening saturated depth, while gypsum can increase infiltration rates by 20 to 40 percent.
Adding Organic Matter and Compost
Organic matter transforms poor soil into a thriving bulb foundation. You’ll want to work 2 to 4 inches of compost into the top 6 to 12 inches of new beds, which adds 30 to 50 percent more water-holding capacity in sandy soils and improves nutrient cycling over time.
Well-rotted manure provides steady nitrogen release, while annual top-dressing with 1 inch of compost maintains soil enrichment.
Clearing Rocks and Weeds
Rock removal is the next critical step—stones larger than 2 inches block root growth and weaken soil conditions. Use a digging fork or soil sieve to clear debris, then replace it with a 2 to 3 inch layer of garden mulch or compost to improve drainage.
Hand-weed after rainfall when roots lift cleanly, and consider weed barriers beneath your bed to prevent future competition around proper planting depth.
Adjusting Soil PH for Bulbs
Once weeds and rocks are out, test your soil pH—most spring bulbs thrive between 6.0 and 6.5, the sweet spot for nutrient uptake and strong roots.
If your test shows alkaline soil above 7.5, apply elemental sulfur in fall to lower pH gradually. For acidic readings below 6.0, spread agricultural lime and wait 2 to 6 weeks before planting, preventing nutrient lockout that weakens blooms.
Where to Plant Spring Bulbs

Location matters just as much as timing for bulb success. You’ll want to match each variety to the right amount of sun, the best planting spot, and conditions that encourage strong roots and vibrant blooms.
Here’s what to think about regarding where your spring bulbs will grow.
Sunlight and Shade Requirements
Most spring bulbs need full sun—at least six hours of direct light each day—to produce strong stems and vibrant blooms. However, early bloomers like snowdrops tolerate part shade beautifully, while late varieties such as hyacinths demand bright light exposure for peak fragrance.
In hot climates, afternoon shade reduces heat stress, so consider your bulb orientation and local climate considerations when planning your display.
Garden Beds Vs. Containers
Garden beds offer excellent water retention and steady root growth, with soil depth that aids natural drainage systems and needs less frequent care. Containers, however, heat up faster and dry out quickly, demanding closer attention to watering and soil preparation for bulbs.
Both work beautifully for bulb gardening and garden design with bulbs, though container bulb planting gives you flexibility to move displays and adjust planting depth with fresh potting mix each season. Mulch benefits both approaches equally.
Planting Around Trees and Shrubs
To master tree root care, place shade-tolerant bulbs in irregular drifts around trees and shrubs, avoiding straight lines for a natural garden design. Maintain a 6 to 8 inch soil buffer from trunks and plant bulbs at a depth two to three times their height. Finish with 1 inch of mulch to regulate moisture and temperature.
This companion planting approach transforms bare spots into lovely displays while ensuring spring bulbs are planted without harming roots.
Avoiding Problem Spots
Beyond simply picking a sunny spot, you must avoid conditions that sabotage bulb health before they ever bloom. Poor drainage, shallow planting depth, and exposed locations invite waterlogging issues, pest control challenges, and disease that no amount of care can reverse.
- Heavy clay zones cause soil erosion and root protection failures
- Windy corners dry out bulbs faster than sheltered beds
- Full shade spots reduce bloom counts by 50 percent or more
How to Plant Spring Bulbs Step by Step
Once your soil is ready and you’ve chosen the perfect spot, it’s time to get those bulbs in the ground. The actual planting process is straightforward, but a few key steps will make all the difference in your spring display.
Here’s exactly how to plant your bulbs for the best results.
Digging The Right Depth and Spacing

You’ll achieve the best results when you plant bulbs at a depth equal to two to three times their height, a cornerstone of effective planting strategies. Spacing techniques matter just as much, so place bulbs two to three times their width apart to support healthy root development and prevent fungal issues.
| Bulb Type | Planting Depth |
|---|---|
| Tulips | 6 to 8 inches |
| Daffodils | 6 to 8 inches |
| Crocuses | 4 to 6 inches |
| Snowdrops | 2 to 3 inches |
This bulb planting guide ensures strong roots and vibrant blooms.
Planting Bulbs Pointy Side Up

If you want to see strong shoots that emerge straight and early, always position bulbs with the pointy side up. Correct orientation guides the shoot toward sunlight, while the flat base sends roots down into the soil.
You can identify the tip easily on most spring varieties, and following proper planting depth ensures you’re avoiding errors that delay bloom time and reduce vigor.
Watering After Planting

After planting, apply water gently to moisten the soil to a depth of 6 to 8 inches, ensuring bulb hydration without waterlogging the roots. A slow trickle aids root establishment and prevents bulbs from washing away.
- Target soil moisture around 60 to 70 percent of field capacity for ideal growth
- Water deeply every 3 to 7 days based on weather and drainage
- Use soaker hoses or drip irrigation methods to minimize leaf wetness
- Check the top inch of soil with your finger; if dry, water again
- Adjust water frequency during warm spells to prevent stress
Mulching for Protection

Spread 2 inches of garden mulch over your newly planted bulbs to lock in moisture retention and create a natural weed barrier. This protective layer keeps soil temperatures stable, shielding roots from late frosts while preventing rapid evaporation.
Organic mulches like shredded bark improve root health as they decompose, but avoid piling material directly against bulb crowns to prevent rot.
Designing Beautiful Spring Bulb Displays

Planting bulbs in the right spots is only half the battle—arranging them thoughtfully transforms a garden bed into a stunning spring showcase. The difference between scattered blooms and a cohesive display comes down to a few key design strategies that work with how bulbs naturally grow.
Here’s how to create layers of color, extend your bloom season, and make the most of every bulb you plant.
Cluster Planting for Impact
Group three to seven bulbs in tight clusters to create dramatic focal points that read beautifully from any distance. Space bulbs 2 to 3 inches apart within each cluster, planting at a depth equal to three times their height for ideal visual impact.
You’ll get a dense wave of color that transforms borders and containers, especially when you repeat clusters along the bed for rhythm.
Succession Planting for Longer Blooms
Extend your display by strategically combining early, mid, and late spring-blooming bulbs for ongoing color across 6 to 10 weeks. Plant crocuses and snowdrops for the first bloom waves, tulips and hyacinths for mid-season bursts, then alliums to finish strong.
This sequential planting transforms seasonal gardening practices into extended blooms that carry you from late winter through early summer, maximizing every inch of your beds.
Combining Heights and Colors
Beyond bloom sequencing, height variations and color harmony give your spring-blooming bulbs genuine visual balance. Position taller daffodils at 18 to 24 inches behind mid-height tulips at 12 to 18 inches, then finish with low-growing crocuses up front.
Pair complementary colors like purple and yellow for drama, or use analogous pinks and reds for softer cohesion, adjusting spacing and planting depth to showcase each variety’s texture.
Layering Bulbs (Lasagna Planting)
Lasagna planting stacks bulb varieties at different depths to extend your bloom window for weeks. Plant large daffodils 8 to 12 inches deep in the lowest layer, add mid-sized tulips at 4 to 8 inches, then finish with shallow crocuses at 1 to 3 inches.
This vertical gardening approach ensures:
- Early, mid, and late season blooms emerge from the same bed
- Each bulb depth and spacing prevents root competition
- Soil preparation loosens layers without displacing lower bulbs
- Bloom staggering creates continuous color as earlier flowers fade
- Depth control keeps moisture even across all planting levels
Caring for Spring Bulbs After Planting

Your work doesn’t end once the bulbs are tucked into the ground. Proper aftercare determines whether your spring display will be stunning or disappointing, and it’s easier than you might think.
Let’s walk through the essential steps to keep your bulbs healthy from planting through their post-bloom phase.
Watering and Fertilizing Needs
Water your bulbs deeply once a week during active growth to deliver 1 inch per session, allowing the top 2 inches of soil to dry between irrigations.
Apply a balanced 4-6-6 or 9-9-6 fertilizer when shoots emerge in early spring, then side dress again as blooms finish.
Organic matter like compost or bone meal maintains nutrient balance while improving soil moisture retention.
Allowing Foliage Dieback
Patience becomes your greatest ally during leaf senescence, the natural process when spring-blooming bulbs shift toward dormancy and store bulb energy for next year’s show. You’ll support healthy dieback timing and proper foliage management by following these post-bloom care steps for naturalizing plant success:
- Leave foliage intact until all leaves turn completely brown and dry
- Allow 6 to 10 weeks after flowering for dieback timing to complete
- Avoid cutting green leaves to prevent depleting bulb energy reserves
- Monitor leaf color changes from green to yellow to brown
- Remove only diseased foliage once it has fully browned
Protecting From Pests and Critters
After your bulbs settle into their beds, wildlife management becomes essential because squirrels, voles, and deer can damage both flowers and roots before blooms appear. You’ll protect plantings using pest control methods that combine physical garden barriers with natural animal deterrents, such as wire mesh placed during planting or organic repellents sprayed on emerging shoots.
| Pest Control Methods | Garden Barriers | Organic Repellents |
|---|---|---|
| Hardware cloth or mesh | Wire mesh around beds | Garlic-based sprays |
| Plastic plant collars | Row covers for shoots | Pepper compounds |
| Motion-activated sprinklers | Copper mesh perimeter | Diatomaceous earth |
| Deer-resistant bulb varieties | Netting over beds | Companion plantings |
Choose critter protection strategies that match the pests in your area, and layer multiple approaches for better results in protecting bulbs from pests while maintaining pest resistance naturally.
Digging Up and Storing Bulbs
In colder climates, spring bulbs can remain in the ground year after year, but summer varieties need lifting for winter protection.
Start digging up bulbs after foliage dies back naturally, using a garden fork on dry days to prevent decay. Brush off soil, cure in a warm area for one to two weeks, then store dormant bulbs in breathable containers at 40 to 50 degrees Fahrenheit, checking monthly for rot.
Top 6 Products for Successful Bulb Planting
The right products can make all the difference between struggling bulbs and a thriving spring display. From specialized fertilizers that give your bulbs the nutrients they need to stunning varieties that’ll turn your garden into a showstopper, these six essentials set you up for success.
Let’s look at the products that’ll help you grow the spring garden you’re dreaming of.
1. Espoma Organic Bulb Fertilizer
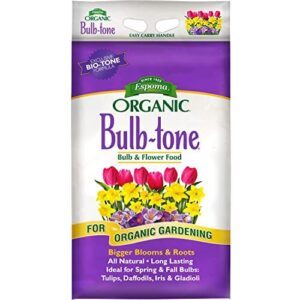
A quality fertilizer sets the foundation for vibrant spring blooms, and Espoma Organic Bulb Tone delivers exactly that with its 3-5-3 nutrient formula. You’ll appreciate the bone meal-based phosphorus that encourages strong root development, while Bio-tone Microbes improve nutrient availability in your soil over time.
Apply these granules at planting or after blooms fade, water them in lightly, and you’re set for steady, slow-release feeding without the risk of fertilizer burn. The all-natural ingredients guarantee your garden stays chemical-free while bulbs flourish.
| Best For | Gardeners who want to grow healthy spring and fall bulbs organically without harsh chemicals or complicated mixing. |
|---|---|
| Primary Use | Bulb fertilizer |
| Blooming Season | Fall/Spring |
| Growing Zones | Not specified |
| Sunlight Needs | Not specified |
| Water Requirements | Not specified |
| Product Type | Fertilizer granules |
| Additional Features |
|
- 3-5-3 formula with extra phosphorus promotes strong root growth and brilliant blooms
- Slow-release granules feed bulbs over time without burning delicate roots
- OMRI-listed organic ingredients keep your garden chemical-free and environmentally safe
- Natural ingredients create a noticeable odor that some gardeners find unpleasant
- Can be hard to track down in local garden centers and retail stores
- No allergen information provided for people with sensitivities to organic materials
2. Caladium Fancy Mix Bulbs
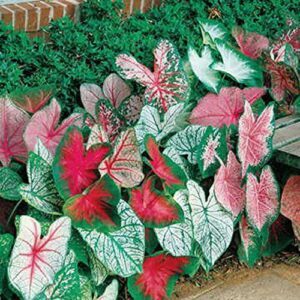
If you’re after show-stopping foliage in shady corners, Caladium Fancy Mix delivers heart-shaped leaves in deep pink, chartreuse, and white that thrive where sun-loving plants struggle.
These tender bulbs require warm soil above 60°F and nighttime temperatures in the high 60s before you plant them 2 to 4 inches deep, spaced 12 to 18 inches apart.
You’ll enjoy 12 to 24 inches of colorful growth throughout summer, though you’ll need to lift the tubers before frost in most regions.
| Best For | Gardeners looking to add vibrant color to shaded areas where most flowering plants won’t grow. |
|---|---|
| Primary Use | Ornamental bulbs |
| Blooming Season | Summer |
| Growing Zones | Indoor/Outdoor |
| Sunlight Needs | Full Shade |
| Water Requirements | Not specified |
| Product Type | Caladium bulbs |
| Additional Features |
|
- Heart-shaped leaves in striking pink, chartreuse, and white combinations create dramatic visual impact in dim spots
- Works well in garden beds, containers, or even as indoor plants in any climate zone
- Large, robust bulbs produce reliable displays year after year when properly stored
- Requires warm conditions (nighttime temps in high 60s°F) before planting, limiting early spring starts
- Must be dug up and stored indoors before frost in most regions, adding seasonal maintenance
- Can take several weeks to sprout after planting, requiring patience before seeing results
3. Tropicana Canna Lily Plant
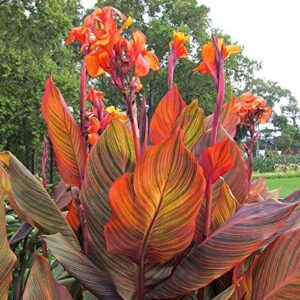
For bold tropical drama in your bulb plantings, Tropicana Canna Lily reaches 4 to 6 feet with vibrant orange blooms and striking multicolored foliage that matures into burgundy striped with red, pink, and yellow.
Plant rhizomes 4 to 6 inches deep in well-draining soil after frost danger passes, spacing them 12 to 18 inches apart in full sun.
These hardy perennials thrive in zones 7-11, though you’ll need to lift and store rhizomes in cooler climates once autumn foliage dies back.
| Best For | Gardeners in zones 7-11 who want a showstopping focal plant with dramatic tropical foliage and bright blooms that can handle both containers and in-ground planting. |
|---|---|
| Primary Use | Ornamental bulbs |
| Blooming Season | Summer |
| Growing Zones | 7-11 |
| Sunlight Needs | Not specified |
| Water Requirements | Regular watering |
| Product Type | Canna bulbs |
| Additional Features |
|
- Eye-catching combo of large orange flowers and multi-colored striped foliage that changes as it matures
- Reaches an impressive 4-6 feet tall, creating serious visual impact in beds or as a backdrop
- Can overwinter in colder zones if you dig up and store the rhizomes after the first frost
- Not ideal for zones outside 7-11 unless you’re willing to do the extra work of lifting and storing rhizomes each fall
- Some buyers have mentioned receiving smaller plants than expected or dealing with quality issues
- Needs consistent watering and care to really thrive—not a “plant it and forget it” option
4. Lucifer Crocosmia Lily Bulbs
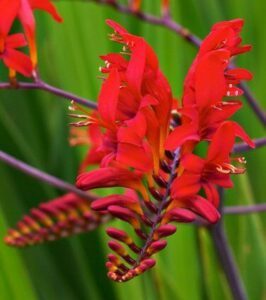
Lucifer Crocosmia offers mid to late summer drama with tall spikes of vivid orange-red blooms reaching 3 to 4 feet. These sword-leaved perennials thrive in full sun across zones 3-8, making them reliably hardy in most temperate regions.
Plant bulbs 2 to 3 inches deep in well-drained soil, spacing them 12 to 18 inches apart to accommodate their expanding clumps. Divide crowded clumps every 3 to 5 years to maintain vigor and encourage vigorous flowering each season.
| Best For | Gardeners looking for low-maintenance perennials that deliver bold color and attract pollinators from mid to late summer. |
|---|---|
| Primary Use | Flower bulbs |
| Blooming Season | Spring |
| Growing Zones | 3-8 |
| Sunlight Needs | Full Sun |
| Water Requirements | Moderate |
| Product Type | Mixed flower bulbs |
| Additional Features |
|
- Reliably hardy across zones 3-8 with vibrant orange-red blooms that reach 3-4 feet tall
- Easy to care for and comes back year after year with minimal maintenance
- Attracts hummingbirds and bees while working well in both garden beds and cut flower arrangements
- Some customers report bulbs arrive dried out or fail to sprout
- Bulbs may be smaller than expected compared to other retailers
- Requires division every 3-5 years to prevent overcrowding and maintain flowering quality
5. Dahlias Flower Bulbs
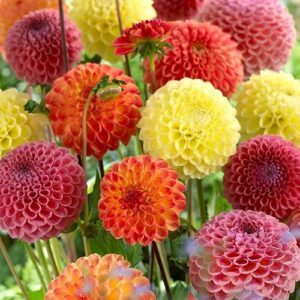
Dahlias bring showy spiral blooms to your garden from summer through fall, with ball-shaped flowers in mixed colors reaching 30 to 36 inches tall.
Plant these tubers 4 to 6 inches deep after frost danger passes and soil warms, spacing large varieties 18 to 24 inches apart. Water deeply once or twice weekly and stake early to support heavy blooms.
In zones 8 and warmer, they return as perennials, while colder regions require lifting tubers after first frost for indoor storage at 40 to 50 degrees.
| Best For | Gardeners looking for dramatic summer blooms with unique spiral petals that work beautifully in both garden beds and cut flower arrangements. |
|---|---|
| Primary Use | Flower bulbs |
| Blooming Season | Summer |
| Growing Zones | 3-10 |
| Sunlight Needs | Full Sun to Partial Shade |
| Water Requirements | Not specified |
| Product Type | Dahlia tubers |
| Additional Features |
|
- Large, showy ball-shaped flowers with distinctive spiral petals in mixed colors
- Versatile planting zones (3-10) with perennial growth in warmer climates
- Substantial tuber size (No. 1) from a recognized bulb supplier
- Multiple reports of damaged or dried-out tubers arriving
- No color identification included, so you won’t know what shades you’re getting
- Return period may end before you discover tubers won’t grow properly
6. Tropical White Pineapple Lily Bulbs
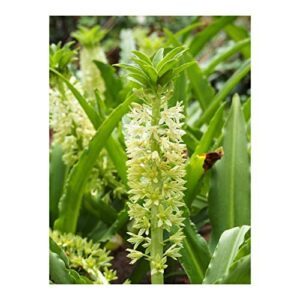
While dahlias dazzle with spiral blooms, the Tropical White Pineapple Lily offers a striking alternative with creamy white petals atop a pineapple-scented stalk.
Plant these fleshy bulbs 6 to 8 inches deep after frost danger passes, spacing them 10 to 12 inches apart in full sun with well-draining soil.
Water moderately, providing about 1 inch of moisture weekly, and watch for butterflies and hummingbirds drawn to the exotic blooms that last throughout summer in Zone 6 and warmer.
| Best For | Gardeners in zone 6+ who want tropical-looking flowers that attract pollinators and work beautifully in both garden beds and vases. |
|---|---|
| Primary Use | Flower bulbs |
| Blooming Season | Summer |
| Growing Zones | 6 |
| Sunlight Needs | Full Sun |
| Water Requirements | Moderate |
| Product Type | Gladiolus bulbs |
| Additional Features |
|
- Long-lasting summer blooms with a unique pineapple-like appearance that draws butterflies and hummingbirds
- Easy to grow in containers or gardens with moderate care requirements
- Works great as a cut flower and adds exotic flair without being high-maintenance
- Needs full sun and well-draining soil, which limits planting locations
- Only hardy to zone 6, so not suitable for colder climates
- Requires careful spacing (10-12 inches) and consistent watering to thrive
Frequently Asked Questions (FAQs)
When should I plant bulbs for spring flowers?
Timing matters more than you think. Plant your bulbs in fall, about 6 to 8 weeks before your area’s first hard freeze, when soil temperatures drop to 50-60°F for ideal root establishment.
Should you soak spring bulbs before planting?
Soaking isn’t necessary for most bulbs, though a brief 4- to 6-hour soak can help rehydrate overly dry ones. Just don’t exceed 12 hours, or you’ll risk rot.
How many spring bulbs should I plant together?
Don’t put all your eggs in one basket—plant bulbs in dense clusters of six to twelve for dramatic impact, or space them two to three times their height apart for a natural, scattered look.
What is the general rule for planting bulbs?
Plant bulbs pointy side up at a depth two to three times their height, spacing them according to variety size, then water thoroughly to settle the soil and encourage root formation.
What happens if you plant flower bulbs in the spring?
You missed autumn’s window, but you’re not doomed—spring-planted bulbs in USDA zones 7 to 9 still establish roots before heat arrives, though blooms appear later and smaller than traditional fall plantings.
When to plant spring bulbs?
You’ll plant spring-flowering bulbs in autumn, ideally six to eight weeks before your ground freezes hard, when soil temperatures hover around 40 to 60 degrees Fahrenheit and drainage is reliable.
How to plant spring flower bulbs?
Want gorgeous blooms come spring? Start by digging a hole two to three times deeper than your bulb’s height, place it pointy side up, cover with soil, and water thoroughly.
Where should I plant spring bulbs?
Choose locations with at least six hours of direct sunlight daily and well-drained soil. Avoid low spots where water pools after rain, as excess moisture causes bulb rot and poor establishment.
What are spring flower bulbs?
These underground storage organs pack nutrients into layered scales or fleshy tunics, powering colorful spring blooms after winter dormancy.
Tulips, daffodils, hyacinths, and crocuses rely on cold temperatures to break dormancy and trigger growth.
When should I plant spring flowers?
Timing is everything in the bulb garden. You’ll want to plant spring-flowering bulbs 6 to 8 weeks before your area’s average last frost date, ideally when soil temperatures cool down.
Conclusion
The irony isn’t lost: spring’s most dazzling blooms depend entirely on work you do when gardens look their bleakest. But that’s exactly what makes this spring flower bulb planting guide so essential—those cold October afternoons spent on your knees, fingers numb, bulbs properly spaced at three times their height, become March mornings filled with color that makes neighbors stop mid-stride.
Your fall effort literally plants the seeds of spring’s best reward.
- https://www.longfield-gardens.com/article/bloom-time-chart-for-spring-and-summer-bulbs
- https://wayne.ces.ncsu.edu/2023/11/plant-bulbs-this-fall-for-spring-flowers/
- https://www.brecks.com/blogs/blog-post/when-to-plant-spring-bulbs
- https://www.shawnee.k-state.edu/lawn-garden/Time%20to%20Plant%20Spring-flowering%20Bulbs.pdf
- https://www.adrbulbs.com/Blog-Post/Flower-Bulb-Planting-and-Storage