This site is supported by our readers. We may earn a commission, at no cost to you, if you purchase through links.
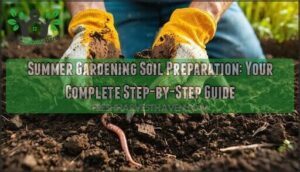
 Preparing garden soil for summer starts with clearing debris and loosening compacted earth—think of it as giving your plants room to breathe.
Remove rocks, weeds, and old plant material, then work the soil 8-12 inches deep using a garden fork or tiller.
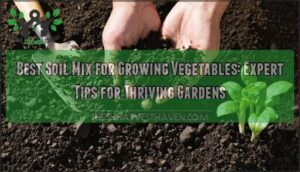
Add 2-4 inches of compost or well-aged manure to boost organic matter and improve drainage.
Test your soil’s pH (most vegetables prefer 6.0-7.0) and adjust with lime or sulfur if needed.
Level your beds and avoid walking on prepared soil to prevent compaction.
The secret lies in understanding your specific soil type and its unique requirements.
Table Of Contents
- Key Takeaways
- Preparing Garden Soil
- Soil Structure Improvement
- Soil Types and Characteristics
- Soil Nutrition and Amendments
- Maintaining Soil Health
- Frequently Asked Questions (FAQs)
- How to prepare soil for summer vegetables?
- How to prepare garden soil after winter?
- What is the most common mistake of first time gardeners?
- Does bagged garden soil go bad?
- How to attract beneficial soil microorganisms naturally?
- What tools are best for small garden spaces?
- How can soil be kept cool in summer?
- Are there natural methods to deter soil pests?
- How to identify contamination in urban soil?
- How often should I water newly prepared soil?
- Conclusion
Key Takeaways
- Clear and prep your soil properly – You’ll need to remove all debris, rocks, and weeds, then loosen the soil 8-12 inches deep to give your plants’ roots room to breathe and establish strong foundations.
- Test and adjust your soil’s pH levels – Most summer vegetables thrive in slightly acidic to neutral soil (6.0-7.0 pH), so you’ll want to test first and add lime to raise the pH or sulfur to lower it as needed.
- Add 2-4 inches of organic matter – You can’t go wrong by mixing in compost, well-aged manure, or leaf mold to boost your soil’s structure, water retention, and nutrient content for healthier plants.
- Prevent compaction with smart planning – You’ll protect your soil investment by creating permanent pathways, avoiding walking on wet beds, and using mulch to maintain the loose, aerated structure your plants need.
Preparing Garden Soil
You’ll create the foundation for healthy summer plants by properly preparing your garden soil before planting season begins.
This essential groundwork involves clearing debris, loosening compacted earth, and creating an even surface that promotes strong root development and ideal water distribution, which is crucial for healthy summer plants.
Clearing Debris and Rocks
Before diving into soil preparation, clear away nature’s clutter to create the perfect foundation for your summer garden. Rock removal and debris clearance are essential first steps that prevent future cultivation headaches and give your plants room to thrive.
Think of this garden cleanup as preparing a stage for your vegetable stars. Here’s your systematic approach to debris clearance:
Your garden deserves a clean stage for its summer performance—clear away the clutter, and let your plants shine.
- Surface sweep: Use a sturdy garden rake to collect leaves, twigs, and surface debris that accumulated over winter
- Deep excavation: Dig out buried rocks and roots with a pointed shovel, creating unobstructed soil for root expansion
- Smart disposal: Compost organic materials while repurposing rocks for attractive garden borders or pathways
This soil preparation step prevents your tools from hitting unexpected obstacles during cultivation. Large rocks can create drainage issues and limit root development, while decomposing debris may harbor plant diseases or pests.
Professional garden soil preparation always begins with thorough soil clearing. Your summer garden tips should emphasize this foundational step—proper garden bed preparation now saves countless hours of frustration later when your plants are establishing their root systems.
Loosening Soil for Root Growth
Once you’ve cleared out rocks and debris, it’s time to give your garden soil a good stretch.
Loosen the soil to a depth of 8–12 inches—think of it as giving roots room to breathe and grow strong.
Use a garden fork, broadfork, or gentle tiller based on your soil texture analysis.
Moist, crumbly soil is best for soil turning and soil aeration methods.
This step improves soil structure, boosts root depth, and sets the stage for healthy plants.
| Tool | Best For | Key Benefit |
|---|---|---|
| Garden Fork | Clay | Reduces compaction |
| Broadfork | Sandy | Maintains structure |
| Tiller | Loam | Improves aeration |
| Spade | Mixed | Versatile loosening |
| Manual Hoe | Surface | Easy soil prep |
The choice of tool depends on the soil type, with options including a garden fork for clay, broadfork for sandy soil, and tiller for loam, each offering unique benefits such as reducing compaction, maintaining structure, and improving aeration.
Leveling Garden Beds
After loosening your soil, proper bed smoothening guarantees even planting depth and prevents water pooling. Using garden rakes and leveling tools, create a uniform surface for ideal soil preparation.
Here’s your soil grading approach:
- Use a steel rake – Pull it across the garden bed in long, overlapping strokes to eliminate high spots and fill depressions
- Check for yard sloping** – Guarantee gentle drainage away from structures while maintaining level planting areas
- Address low spots – Add loose soil where needed, then re-rake for consistent bed smoothening
- Final inspection – Walk the perimeter to spot any remaining uneven areas requiring attention
Proper soil leveling prevents erosion and water runoff while guaranteeing your seeds plant at consistent depths. This soil preparation step sets the foundation for healthy summer growth.
Soil Structure Improvement
You’ll build healthier soil structure by improving drainage and root penetration through three key methods.
These techniques create the foundation for robust plant growth while preventing common summer gardening challenges like waterlogged roots and compacted earth, which can be addressed by improving drainage.
Using Raised Beds

Anyone seeking control over their garden’s success should consider raised beds for superior soil preparation.
These elevated structures offer measurable advantages: raised beds warm 3-5°F earlier than ground soil, reduce waterlogging by 70%, and cut soil compaction by 60-80%.
Your summer crops will thank you for the improved drainage and root aeration. To achieve vital results, it’s essential to understand the importance of soil composition ratios in creating a well-balanced mix for healthy plant growth.
Here’s what makes raised bed construction worthwhile:
- Faster soil warming – Plant summer vegetables 2-4 weeks earlier
- Superior drainage – No more drowning roots during heavy rains
- Reduced pest pressure – Natural barriers against slugs and burrowing insects
- Better accessibility – Less bending means happier backs during bed maintenance
- Customized soil mixing – Perfect garden layout control for different plant needs
Adding Organic Matter
When you add organic matter, you’re giving your soil a much-needed upgrade—think of it as a spa day for your garden beds. Compost application, aged manure, or leaf mold all boost Carbon Content and act as powerful Soil Conditioners.
Aim to mix 2–3 inches of these Natural Amendments into the top 6–8 inches of soil for best results. You improve structure and create nutrient rich soil, and you also encourage beneficial microbes.
Using soil improvement techniques can greatly enhance the overall health of your garden. Here’s a quick guide:
| Organic Matter | Compost Benefits |
|---|---|
| Compost | Increases water retention |
| Manure | Adds organic fertilizers |
| Leaf mold | Enhances microbial life |
| Peat moss | Improves aeration |
| Straw mulch | Reduces compaction |
Avoiding Compaction

Compaction becomes your soil’s silent enemy, crushing the very foundation you’ve built for healthy plant growth.
Compaction crushes your garden’s foundation before plants even get started.
When soil particles press together, root depth suffers dramatically, creating barriers that prevent proper soil aeration and water movement.
Compaction prevention requires strategic thinking about foot traffic patterns.
- Install permanent pathways or stepping stones to direct movement away from planting areas
- Never walk on wet garden beds when soil density increases from moisture weight
- Use broadforks instead of tillers for gentle soil aeration without heavy machinery damage
These simple soil compaction avoidance practices protect your investment in soil preparation.
Soil Types and Characteristics

You’ll encounter four main soil types in your summer garden, each with distinct characteristics that affect plant growth.
Understanding these differences helps you choose the right amendments and watering schedule for ideal results.
Identifying Clay Soil
Recognize clay soil by performing simple Clay Soil Tests that reveal its distinctive characteristics. When moist, clay soil feels sticky and moldable between your fingers—like working with natural Play-Doh. You can easily roll it into a ball or snake shape without cracking, which distinguishes it from other soil types.
The ribbon test provides definitive Clay Identification: roll moist soil between your palms, then squeeze it through your thumb and forefinger. Sticky Soil with high clay content forms ribbons longer than 2 inches before breaking. Sandy or silty soils crumble immediately.
| Test Method | Clay Soil Indicator |
|---|---|
| Touch Test | Smooth, slippery texture when wet |
| Ribbon Test | Forms 2+ inch ribbons without breaking |
| Drainage Test | Water pools on surface after rain |
| Dry State | Hardens like concrete, develops cracks |
Soil Texture analysis using the jar test confirms clay presence—fine particles settle slowly, creating cloudy water that takes 24-48 hours to clear completely. Understanding the soil texture triangle is essential for accurate soil classification.
While identifying clay soil reveals drainage challenges, don’t despair. Clay Amendments like compost and coarse sand transform this soil texture into productive growing medium through proper clay soil management.
Understanding Sandy Soil
Curious why your garden dries out faster than a sidewalk in July? That’s classic sandy soil—gritty to the touch, never holding a shape, and quick to drain.
While this helps with early planting, you’ll face Sandy Soil Issues like rapid Nutrient Loss and constant Water Retention struggles.
For summer soil preparation, mix in 2–4 inches of compost or leaf mold to boost moisture and fertility. Mulch generously to guard against Soil Erosion and keep roots cool.
Regular soil testing guarantees your Drainage Solutions stay effective.
Recognizing Silty Soil
Silty soil feels smooth and flour-like when dry, becoming slippery when wet.
You can identify it through a soil texture test – rub moist soil between your fingers.
If it feels silky and holds together but lacks clay’s stickiness, you’ve found silt.
This soil type excels at water retention but creates drainage problems when compacted.
Silty soil tests reveal excellent nutrient-holding capacity, though silty soil issues include erosion vulnerability.
Proper silty soil handling involves adding coarse sand and compost to improve structure while maintaining its natural fertility benefits.
Ideal Loam Soil
Loamy soil represents the gardening gold standard – a balanced composition of 40% sand, 40% silt, and 20% clay that creates ideal growing conditions.
This ideal loam soil provides excellent soil aeration while maintaining superior water retention capabilities.
You’ll notice its crumbly texture forms a loose ball when squeezed, indicating perfect soil structure improvement.
The balanced loam composition supports healthy microbial activity and maintains ideal soil pH levels between 6.0-7.0.
This nutrient balance allows roots to access oxygen and water simultaneously, making your soil preparation steps worthwhile when you achieve this perfect foundation.
Soil Nutrition and Amendments
Now that you’ve assessed your soil type, it’s time to feed your garden the nutrients it needs to thrive.
Think of soil nutrition as creating a balanced breakfast for your plants—they need the right mix of primary nutrients to grow strong and produce abundant harvests.
Primary Nutrients for Plants

Plants thrive when their nutritional needs are met through proper soil nutrient balance. Understanding these requirements helps you create the foundation for healthy growth.
Your plants depend on three essential nutrients for optimal development:
- Nitrogen – Powers leaf growth and green foliage development
- Phosphorus – Supports strong root systems and flower production
- Potassium – Strengthens disease resistance and overall plant vigor
- Secondary nutrients – Calcium, magnesium, and sulfur support various functions
- Micronutrients – Iron, zinc, and others prevent specific nutrient deficiencies
Fertilizer types display N-P-K ratios showing these percentages. Soil testing reveals which nutrients your garden lacks, preventing guesswork. Proper use of nitrogen fertilizer is vital for plant development and growth.
Adjusting Soil PH Levels

Soil pH adjustment can make or break your summer garden’s success. Your plants need the right pH range to absorb nutrients effectively, so testing comes first.
- pH Testing: Use home test kits or laboratory analysis for accurate readings
- Lime Application: Apply limestone to raise pH in acidic soil conditions
- Sulfur Amendments: Add sulfur to lower pH for alkaline soil correction
- Soil pH Preferences: Match adjustments to specific plant requirements (6.0-7.0 range)
Most vegetables thrive in slightly acidic to neutral soil pH. Remember, soil pH adjustment takes time—plan amendments months ahead for best results.
Using Compost and Manure

Throughout centuries of gardening, compost and manure have remained the gold standard for soil improvement. These organic powerhouses don’t just feed your plants—they transform your garden’s foundation.
Compost Benefits include enhanced water retention, improved drainage, and sustained nutrient release. Manure Types vary in potency, with chicken manure offering higher nitrogen than cow manure.
Your Application Methods depend on timing: work aged materials into soil before planting, or top-dress established beds.
| Material | Nitrogen Content | Best Application Time |
|---|---|---|
| Chicken Manure | High | Fall (aged only) |
| Cow Manure | Moderate | Spring/Fall |
| Finished Compost | Balanced | Anytime |
Sourcing Options range from homemade composting techniques to local farms. Apply 2-3 inches annually, mixing into the top 6-8 inches of soil.
These amendments create the living soil ecosystem your summer vegetables crave, establishing the perfect foundation for growth.
Applying Fertilizers

While compost enriches naturally, fertilizer types offer targeted nutrition your plants crave.
Soil testing reveals which nutrients you’re missing—think of it as a blood test for your garden. Organic options like fish emulsion won’t scorch in summer heat, while synthetic fertilizers provide quick fixes.
Check nutrient balance on labels: nitrogen for leaves, phosphorus for roots, potassium for resilience. Apply during cool morning or evening hours for maximum absorption and optimal soil fertility enhancement.
Understanding soil health basics is vital for making informed decisions about fertilizers and soil amendments.
Maintaining Soil Health

Once you’ve established healthy soil structure and nutrition, maintaining that foundation becomes your ongoing mission through strategic mulching and seasonal care.
Smart maintenance practices protect your investment while creating ideal growing conditions that’ll keep your summer garden thriving all season long, which is crucial for a thriving garden.
Mulching for Weed Control
Applying thick mulch around your plants creates an effective weed suppression barrier that saves hours of summer maintenance.
Organic barriers block sunlight from reaching dormant weed seeds while maintaining ideal soil temperature and moisture retention. Effective weed control methods are essential for a healthy garden ecosystem.
Here are 5 mulching benefits for weed control:
- Prevents germination – Dense mulch application blocks 95% of sunlight needed for weed emergence
- Retains soil moisture – Organic mulches reduce water evaporation by up to 70% during hot days
- Moderates soil temperature – Maintains consistent root zone temperatures between 65-75°F
- Creates physical barriers – Stops wind-blown seeds from reaching soil surface
- Feeds beneficial organisms – Decomposing mulch types support soil microbes that compete with weeds
Choosing The Right Mulch
When selecting mulch types, you’ll want to match your choice to your garden’s specific needs. Organic mulch like shredded bark or compost provides superior moisture retention and gradually improves soil structure as it decomposes.
Consider soil temperature effects—darker mulches absorb heat while lighter options reflect it. For effective weed control, apply organic mulches at 3-inch depth.
The mulching benefits extend beyond aesthetics, creating an environment where your plants thrive while reducing maintenance demands throughout summer’s challenging conditions. Understanding soil health basics is essential for making informed decisions about mulch and soil care.
Seasonal Soil Considerations
With the right mulch in place, timing your soil care makes all the difference. Your garden operates on nature’s schedule, and smart seasonal soil considerations keep your plants thriving year-round.
Summer Soil Prep requires different strategies than spring preparation. Soil temperature monitoring helps you time plantings perfectly, while seasonal amendments boost nutrient availability when plants need it most.
Here’s your seasonal soil care roadmap:
- Test soil annually before summer gardening season begins
- Apply autumn fertilization with cover crops like clover or ryegrass
- Follow winterization tips by avoiding wet soil compaction
- Use soil preparation techniques that match your climate patterns
- Focus on garden soil enrichment through soil health importance practices
Smart timing transforms good seasonal soil considerations into great harvests.
Frequently Asked Questions (FAQs)
How to prepare soil for summer vegetables?
Think of soil prep as laying the foundation for your veggie kingdom.
Clear debris, till 8-12 inches deep, test pH levels, and mix in 2-3 inches of compost for ideal nutrient balance.
This process is essential for creating a healthy environment for your vegetables to grow.
How to prepare garden soil after winter?
Test your soil pH and loosen it 8-12 inches deep.
Remove winter debris, weeds, and rocks.
Mix in 2-3 inches of compost to restore nutrients depleted during dormancy.
Wait until soil crumbles easily before working it.
What is the most common mistake of first time gardeners?
Picture your garden as a cake—if you skip mixing the ingredients well, it flops.
The biggest mistake is neglecting soil preparation: skipping debris removal, texture testing, and nutrient balancing leads to poor root growth and disappointing yields.
Does bagged garden soil go bad?
Bagged garden soil doesn’t technically expire, but it degrades over time.
You’ll notice reduced nutrient levels, potential pest issues, and compacted texture after 1-2 years of storage, especially if exposed to moisture.
How to attract beneficial soil microorganisms naturally?
Soils amended with compost show 20% higher microbial activity.
You’ll naturally boost beneficial microorganisms by adding organic matter like compost, aged manure, and mulch while avoiding chemical fertilizers that disrupt soil biology, which can lead to an increase in microbial activity.
What tools are best for small garden spaces?
You’ll want a hand cultivator for loosening soil, a Japanese hori knife for versatile digging and weeding, and a compact spade for tight spaces.
These three tools handle most small-garden tasks efficiently.
How can soil be kept cool in summer?
Summer’s heat acts like a relentless oven, baking your garden’s foundation.
Apply 3-inch organic mulch layers and water deeply during early morning hours to maintain ideal soil temperature and moisture retention.
Are there natural methods to deter soil pests?
Try adding a layer of compost to encourage beneficial microbes.
Sprinkle crushed eggshells to deter slugs, or plant marigolds as a natural pest repellent.
Nature’s tiny army can do a lot of the heavy lifting, with beneficial microbes being a key part of this process.
How to identify contamination in urban soil?
Test your urban soil by checking for heavy metals like lead and arsenic using professional lab analysis.
Look for unusual discoloration, chemical odors, or poor plant growth patterns that signal contamination.
How often should I water newly prepared soil?
Like watering a thirsty sponge, keep newly prepared soil moist but not soggy.
Water every 2-3 days initially, then adjust based on rainfall and temperature.
Check soil moisture by inserting your finger 2 inches deep.
Conclusion
Think of your garden as a living foundation—just like a house needs solid groundwork, your plants require properly prepared soil to thrive.
Preparing garden soil for summer isn’t just about digging dirt; it’s about creating an ecosystem where roots can establish, nutrients flow freely, and moisture stays balanced.
You’ve learned the essential steps: clearing debris, testing pH, adding organic matter, and maintaining proper structure.
Now you’re equipped with the knowledge to transform any patch of earth into productive growing space that’ll reward your efforts all season long, with a solid understanding of how to prepare the soil to make your plants thrive.