This site is supported by our readers. We may earn a commission, at no cost to you, if you purchase through links.

That brown spot on your tomato leaf isn’t just cosmetic damage—it’s Alternaria solani, a fungal pathogen that overwinters in soil debris and strikes the moment conditions turn warm and wet. Left unchecked, it moves fast, climbing from the oldest lower leaves upward until entire plants defoliate weeks before harvest.
The good news: early blight treatment for tomatoes works best when you catch those first bullseye-ringed lesions early and hit back with a combination of targeted pruning, proper watering habits, and the right fungicide.
Here’s exactly how to identify what you’re dealing with, stop the spread, and keep it from coming back next season.
Table Of Contents
- Key Takeaways
- Identify Early Blight Symptoms
- How Early Blight Spreads
- Top 8 Early Blight Products
- Treat Infected Tomato Plants
- Prevent Early Blight Returns
- Frequently Asked Questions (FAQs)
- How to get rid of early blight on tomato plants?
- Can tomatoes recover from blight?
- What is the best fungicide for early blight?
- Which fungicide is best for early blight of tomatoes?
- What kills early blight on tomatoes?
- Does hydrogen peroxide stop tomato blight?
- When should I spray my tomatoes for blight?
- How do you treat early blight on tomato plants?
- Can tomato blight be cured?
- What is early blight on tomato plants?
- Conclusion
Key Takeaways
- Early blight (Alternaria solani) starts on your lowest, oldest leaves as bullseye-ringed brown spots and climbs fast, so catching it in the first 24–72 hours — before the yellow halo fully forms — is what keeps it from taking the whole plant.
- Copper fungicides, chlorothalonil, and mancozeb work best applied protectively every 7–10 days, but rotating between them matters as much as using them — resistance builds quickly when you lean on a single product all season.
- Wet leaves are the real engine of spread, so switching to drip irrigation and pruning lower foliage to open the canopy removes the moisture conditions Alternaria solani needs to germinate and cycle through new lesions.
- Prevention between seasons — rotating nightshades on a 3–4 year cycle, mulching to block soil splash, and sanitizing tools and containers before storage — cuts the overwintering spore load that restarts the problem each spring.
Identify Early Blight Symptoms
Early blight has a way of sneaking up on you — one day your plants look fine, the next you’re staring at spots you don’t quite recognize. Knowing what to look for makes all the difference between catching it early and watching it spread.
Spotting the difference early is easier with a solid plant disease identification guide — it can save you from losing an entire bed before you’ve even confirmed what you’re dealing with.
Here’s what the disease actually looks like, from leaf to stem to fruit.
Brown Concentric “bullseye” Spots on Lower Leaves

The first sign most gardeners miss is right at the bottom of the plant. Early blight shows up on lower, older leaves first — small brown spots that expand into the classic bullseye pattern through concentric ring formation.
Here’s what to look for during targeted scouting strategies:
- Lesion age progression moves outward, with older center tissue turning necrotic first
- Concentric rings develop sharp, defined boundaries as infection cycles repeat
- Spore margin accumulation appears as dark specks along lesion edges
- Microscopic ring patterns confirm Alternaria solani under magnification
Applying a copper fungicide treatment can help manage early blight and other brown spot issues.
Yellow Halos Around Expanding Leaf Lesions

Just outside those concentric rings, watch for a pale yellow border — that’s the halo, and it’s one of the clearest early blight identification and symptom signals you’ll get.
Halo development timing is fast: visible within 24–72 hours under warm, humid conditions. Moisture influence is real — wet leaves intensify it.
Spotting these diagnostic halo patterns early gives your fungicide timing a fighting chance.
Dark Stem Lesions Near The Soil Line

Shift your eyes from the leaves down to the base of the stem. Dark brown to black lesions hugging the soil line are a telling sign — not just of early blight, but potentially soilborne pathogens triggering crown rot.
Watch for:
- Sunken, rough patches that encircle the stem — classic vascular invasion signs
- Soft or spongy tissue when pressed — decay has set in
- Internal dark streaking visible when you cut the stem
Poor soil drainage improvement and skipping base stem sterilization between seasons let inoculum build fast.
Leathery Spots on Fruit Near The Stem

Fruit infection is less common, but it happens — especially around the stem. Look for dark, leathery raised spots just above the stem scar.
Stem wound entry lets the pathogen in early, and moisture stress disrupts calcium transport, stiffening surrounding tissue.
These patches stay firm as the fruit ripens.
Prioritize skin resilience varieties and sanitation of tools to reduce this risk.
Early Blight Vs. Septoria Leaf Spot

Both diseases hit the lower leaves first, but lesion shape differences give them away fast. Early blight creates large bullseye rings with yellow halos — classic early blight identification and symptoms.
Septoria leaf spot produces dozens of tiny round spots with pale centers. Host tissue preference differs too: Septoria rarely touches fruit. When in doubt, a hand lens reveals diagnostic microscopy features that confirm the culprit.
How Early Blight Spreads

Knowing how early blight moves through your garden is half the battle. Once you understand what’s driving the spread, you can stop it at the source rather than chasing symptoms leaf by leaf.
Here’s what’s actually behind the outbreak.
Alternaria Solani Pathogen Lifecycle
Alternaria solani doesn’t just infect and stop — it keeps cycling. This fungal pathogen reproduces asexually, forming dark conidia on conidiophores directly on infected tissue.
Under warm, humid conditions, those spores germinate in under two hours. That’s polycyclic infection in action: each lesion becomes a new launch point for conidia dispersal mechanisms, driving repeated host tissue penetration throughout a single season.
In warm, humid conditions, each lesion becomes a new launch point, driving repeated infection throughout the season
Soil, Debris, and Overwintering Sources
The soil beneath your tomato bed isn’t neutral ground — it’s a hiding place. Alternaria solani shelters in old stems, leaves, and root tissue, where Soil Microhabitat Protection keeps spores viable through winter. Debris Moisture Retention extends Overwintering Spore Viability for months. Soil Temperature Effects between 50–70°F wake them up in spring.
Debris Removal Timing, crop rotation to reduce soilborne pathogens, and postharvest handling of infected tomato fruit matter so much.
Wind, Rain Splash, and Tool Transmission
Spores don’t wait for an invitation — wind carries them up to 20 meters from a single infected plant. Rain splash scatters them within a 1–2 meter radius. Contaminated tools do the rest quietly, plant by plant.
- Use Windbreak Placement and Canopy Airflow Management to limit spores carried by wind
- Practice Rain Splash Barriers with mulch and Irrigation Timing Strategies using drip systems
- Follow Tool Sanitization Protocols and sanitation and tool disinfection practices between every plant
Warm, Humid Weather and Leaf Wetness
Think of early blight as a disease that runs on a simple formula: warmth plus moisture equals infection. Spore germination requires wet leaf surfaces and temperatures between 75°F and 90°F — conditions that high humidity levels create overnight without any rain.
Warm Night Dew alone can sustain Leaf Wetness Timing long enough for Humidity Driven Infection to begin. A dense Canopy Airflow problem traps that moisture for 6–12 hours.
Mulch Moisture Control and drip irrigation are your most reliable cultural control strategies for early blight under wet or humid conditions.
Why Stressed Plants Get Infected Faster
A struggling plant is an open door for Alternaria. Drought stress triggers Stomatal Opening that won’t fully close, letting spores walk right in.
Phenolic Deficiency follows, stripping the leaf’s chemical armor. Hormonal Imbalance then misdirects immune signals entirely. Canopy Humidity climbs as Root Uptake Limitation reduces transpiration, extending leaf wetness.
Keep your plants well-fed and watered — stressed tomatoes simply can’t fight back.
Top 8 Early Blight Products
Having the right products on hand makes early blight far easier to manage, whether you’re catching it early or fighting an active outbreak.
From fungicides to pruning tools, each item on this list targets a specific part of the problem.
Here’s what’s worth keeping in your garden arsenal.
1. Vitamatic Bacillus Subtilis Probiotic
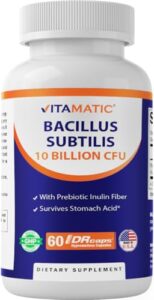
Vitamatic Bacillus Subtilis Probiotic offers a biological approach to early blight suppression that’s worth keeping in your toolkit. Each acid-resistant capsule delivers 10 billion CFU of Bacillus subtilis — a spore-forming bacterium that competes directly with fungal pathogens at the leaf and root surface.
It’s non-GMO, gluten-free, and needs no pre-harvest interval, making it a clean choice for edible gardens. Spray every 7–14 days starting when plants reach 6 inches tall, before symptoms appear.
| Best For | Anyone looking for a simple, single-strain probiotic to support gut health and digestion on a budget. |
|---|---|
| Price | $14.99 |
| Primary Use | Gut health supplement |
| Form Factor | Capsule |
| Material | Bacillus subtilis + inulin |
| Coverage Area | 1 capsule per day |
| Key Limitation | Strain ambiguity reported |
| Additional Features |
|
- 10 billion CFU in an acid-resistant capsule, so the bacteria actually survive the trip through your stomach
- Comes with prebiotic inulin built in, which feeds the probiotic and helps it do its job
- Clean formula — non-GMO, gluten-free, no artificial anything, and made in the USA under GMP standards
- Some users suspect the capsules contain Bacillus coagulans instead of the advertised B. subtilis — a real concern if strain specificity matters to you
- It’s a single-strain product, so it won’t cover all your bases if you’re after broader microbiome support
- A handful of buyers have reported missing caps or broken safety seals, which is a quality control red flag
2. Bonide Captain Jack Copper Fungicide
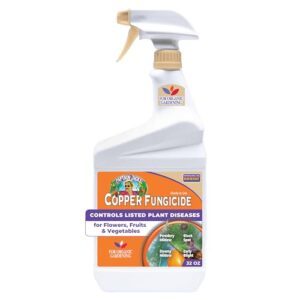
Where biologicals like Bacillus subtilis protect from the inside out, copper works as a surface shield. Bonide Captain Jack Copper Fungicide uses Copper Octanoate — copper soap — to form a protective barrier that stops Alternaria solani spores before they germinate.
It’s OMRI-listed for organic gardens and safe to use right up to harvest day.
The ready-to-use trigger sprayer means no measuring, no mixing. Apply every 7–10 days, coat both leaf surfaces thoroughly, and reapply after rain.
| Best For | Home gardeners and small-scale growers who want an easy, organic-approved way to protect fruits, vegetables, and ornamentals from fungal disease without any mixing or measuring. |
|---|---|
| Price | $12.99 |
| Primary Use | Fungal disease control |
| Form Factor | Ready-to-use spray |
| Material | Copper-based solution |
| Coverage Area | Up to day of harvest |
| Key Limitation | Risk of phytotoxicity |
| Additional Features |
|
- Ready-to-use trigger sprayer makes application quick and hassle-free — just grab and go.
- OMRI-listed for organic use and safe to apply all the way up to harvest day.
- Works across a wide range of plants and diseases, from powdery mildew on roses to blight on tomatoes.
- Can burn leaves if you apply too much, use it in hot weather, or spray it on young or sensitive plants.
- Won’t clear up a bad infection overnight — you’ll need consistent applications over several weeks.
- Repeated use builds up copper in the soil over time, which can mess with soil health if you’re not careful.
3. Southern Ag Liquid Copper Fungicide
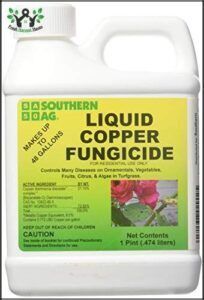
Southern Ag Liquid Copper Fungicide takes that same copper-shield approach, but gives you far more flexibility.
Its active ingredient — copper diammonia diacetate complex — works as a broad-spectrum contact fungicide, covering leaf spots, early blight, and bacterial diseases across vegetables, fruit trees, and ornamentals.
One 16 oz bottle concentrates down to treat a large area, so it stretches well into the season. Mix a few teaspoons per gallon, spray both leaf surfaces thoroughly, and give it at least six dry hours to bond before rain hits.
| Best For | Home gardeners dealing with fungal issues on vegetables, fruit trees, or ornamentals who want a flexible, concentrate-based solution that covers a lot of ground without breaking the bank. |
|---|---|
| Price | $17.99 |
| Primary Use | Fungal disease control |
| Form Factor | Liquid concentrate |
| Material | Copper sulfate |
| Coverage Area | Large area per oz |
| Key Limitation | Surface fungi only |
| Additional Features |
|
- Works across a wide range of plants and diseases — leaf spots, early blight, powdery mildew, and even bacterial issues
- A 16 oz bottle goes a long way since it’s a concentrate, making it solid value at $17.99
- Low toxicity on edible crops when used at label rates, so you’re not stressing about harvest safety
- Only hits surface fungi — if the infection has spread to stems or roots, it won’t help
- Rain within six hours basically wipes out the application, so timing your spray matters
- Repeated use can build up copper in your soil over time, which can cause problems for your plants down the road
4. Fiskars Bypass Pruning Shears
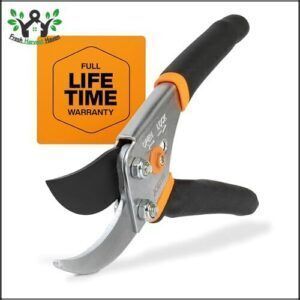
Fungicides protect what’s still healthy, but removing infected material is just as important — and that’s where a reliable pruner earns its place. Fiskars Bypass Pruning Shears ($9.92) make clean, precise cuts without crushing stems, which matters when you’re trimming diseased foliage.
Crushed tissue invites secondary infection. The bypass blade passes the counter blade like scissors, leaving a smooth wound that heals faster.
At 0.65 lb with an ergonomic grip, you won’t fatigue mid-session, even when working through a badly infected plant.
| Best For | Home gardeners and plant enthusiasts who do regular pruning on roses, shrubs, and small branches and want a clean, reliable cut without breaking the bank. |
|---|---|
| Price | $9.92 |
| Primary Use | Plant pruning |
| Form Factor | Hand tool |
| Material | Precision-ground steel |
| Coverage Area | Up to 5/8 in stems |
| Key Limitation | 5/8 in capacity max |
| Additional Features |
|
- Bypass blade design makes smooth, clean cuts that help plants heal faster and stay healthier
- Super lightweight at 0.65 lb with an ergonomic grip, so your hand won’t give out mid-session
- Backed by a lifetime warranty from Fiskars, which is hard to beat at a $9.92 price point
- Maxes out at 5/8 in diameter, so thicker branches are a no-go
- Steel blades still need regular cleaning, especially if you’re working in wet or humid conditions
- Strictly manual — not a replacement for loppers or a saw when the job gets heavy
5. Certis Kocide 3000 O Fungicide
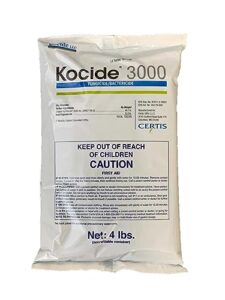
Kocide 3000 O is one of the more trusted copper fungicides in professional disease management — and for good reason. Its 46.1% copper hydroxide concentration delivers broad-spectrum protection against Alternaria solani, the fungus behind early blight, plus dozens of other fungal and bacterial pathogens.
What sets it apart is BioActive technology, which increases biologically active copper ions while reducing total metallic copper load. That’s a practical win for your soil long‑term.
Apply protectively every 7–14 days under wet conditions, before symptoms appear.
| Best For | Growers managing disease pressure across citrus, grapes, vegetables, and other crops who want reliable copper protection with a lower environmental footprint. |
|---|---|
| Price | $43.80 |
| Primary Use | Fungal disease control |
| Form Factor | Liquid concentrate |
| Material | Copper hydroxide 46.1% |
| Coverage Area | Wide crop range |
| Key Limitation | Risk of phytotoxicity |
| Additional Features |
|
- BioActive technology means you get more active copper ions with less total metallic copper — better for your soil over time.
- Broad-spectrum coverage hits a long list of fungal and bacterial problems, from downy mildew to anthracnose, so it pulls weight across different crops.
- Flexible application — works aerial, ground-dilute, or ground-concentrate, so it fits into most spray programs without hassle.
- Copper can burn sensitive crop varieties if rates or conditions aren’t dialed in — high humidity and extreme temps make phytotoxicity more likely.
- Requires careful mixing and rate adherence; cut corners and you risk either crop damage or ineffective disease control.
- Copper residue regulations vary by region, so you’ll want to check local rules before building it into a regular rotation.
6. Hudson Flo Master Handheld Sprayer
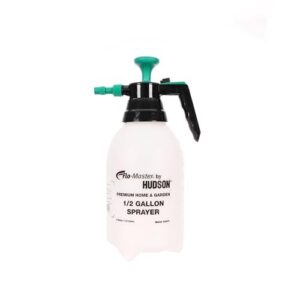
Even the best fungicide fails without even coverage — that’s where the Hudson Flo Master Handheld Sprayer earns its place.
Its half-gallon translucent tank lets you monitor your mix at a glance, and the adjustable nozzle shifts from fine mist to a focused stream depending on what you need.
The manual pump builds steady pressure, and the lock-on trigger keeps your hand from fatiguing mid-row.
Chemical-resistant Viton seals mean copper and mancozeb solutions won’t degrade it over time.
| Best For | Home gardeners and small-plot growers who need reliable, chemical-safe coverage for fungicides, fertilizers, or pest control without the bulk of a backpack sprayer. |
|---|---|
| Price | $11.99 |
| Primary Use | Liquid application |
| Form Factor | Handheld sprayer |
| Material | Polyethylene + Viton |
| Coverage Area | 0.5 gallon tank |
| Key Limitation | Pump pressure drops |
| Additional Features |
|
- The translucent tank makes it easy to see how much solution you have left, so you’re not guessing mid-job.
- Viton seals hold up against harsh chemicals like copper fungicides and mancozeb without breaking down over time.
- The lock-on trigger lets you spray continuously without gripping the whole time — a small thing that makes a real difference on longer sessions.
- Pressure drops as the tank empties, so you’ll need to re-pump more often toward the end of a fill.
- A few users have reported the pump giving out after several months of regular use, which isn’t great for something you rely on seasonally.
- The lock-on trigger can accidentally engage if your thumb drifts, so it takes a little getting used to.
7. Inspire Black Heavy Duty Nitrile Gloves
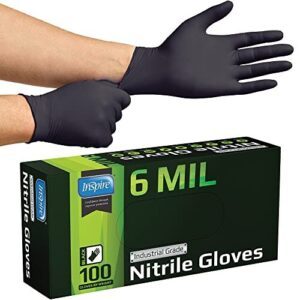
Handling infected leaves and copper-soaked tools without proper protection is asking for trouble. The Inspire Black Heavy Duty Nitrile Gloves are 6 mil thick — sturdy enough to resist punctures and tears when you’re pruning diseased stems or scraping debris.
They’re latex-free, powder-free, and the textured fingertips keep a firm grip on slippery tools. Chemical resistance means fungicide splashes won’t seep through.
They’re also touchscreen-compatible, so you don’t have to strip them off mid-task.
| Best For | Gardeners, lab workers, and anyone dealing with chemicals, grease, or biohazards who needs reliable hand protection without sacrificing dexterity. |
|---|---|
| Price | $18.99 |
| Primary Use | Chemical protection |
| Form Factor | Disposable gloves |
| Material | 6 mil nitrile rubber |
| Coverage Area | 100 gloves per box |
| Key Limitation | Moderate cuff length |
| Additional Features |
|
- At 6 mil thick, these gloves hold up against punctures, tears, and chemical splashes — including fungicide and cleaning agents
- Textured fingertips give you a solid grip on wet or slippery tools, and they work with touchscreens so you stay hands-on without interruption
- Latex-free and powder-free, making them a safe pick for people with sensitivities
- Some boxes have arrived with pre-torn or defective gloves, so quality control can be hit or miss
- The cuff sits fairly short, which might leave your wrists exposed during deeper or messier tasks
- Not cut-resistant, so they won’t protect against sharp blades or extreme heat beyond everyday use
8. Tuzoc Stainless Steel Garden Hose

Switching to drip irrigation is one of the best moves you can make against early blight — and having the right hose matters.
The Tuzoc Stainless Steel Garden Hose runs 100 feet, so it reaches your full garden without extensions.
Its stainless outer braid resists rust, and the 10-pattern nozzle lets you water gently near seedlings or rinse tools between rows.
At 10.6 lbs, it’s light enough to move without fatigue during those long spray sessions.
| Best For | Home gardeners and outdoor enthusiasts who want a lightweight, rust-resistant hose that’s easy to maneuver and versatile enough for everything from delicate seedlings to car washing. |
|---|---|
| Price | $47.45 |
| Primary Use | Garden watering |
| Form Factor | Garden hose |
| Material | Stainless steel + PVC |
| Coverage Area | 100 ft length |
| Key Limitation | Reduced flow rate |
| Additional Features |
|
- Stainless steel outer braid keeps it tough against rust, UV, and temperature swings without adding a ton of weight
- The 10-pattern nozzle covers everything from a soft mist to a focused jet, so you’re not switching tools mid-task
- Flexible, kink-proof design means no wrestling with it mid-watering session
- Narrower inner diameter than standard rubber hoses, so don’t expect strong flow if you’re filling a pool or running a pressure washer
- A few users noticed the inner lining starting to break down after a few years of seasonal use
- Comes with a bit of a chemical smell out of the box — it fades, but it’s worth running water through it a few times first
Treat Infected Tomato Plants

Once early blight takes hold, acting fast is the difference between saving your plants and losing the season. You’ll need to combine physical removal, smarter watering habits, and targeted fungicide applications to stop the spread.
Here’s exactly what to do.
Remove Diseased Leaves, Stems, and Fruit
Think of diseased leaves as live spore factories — the longer they stay, the more they spread.
Remove infected leaves, stems, and fruit immediately, using proper stem cutting technique to cut just beyond the diseased zone.
Seal everything in disposal bags for leaf bagging and trash disposal.
Disinfect tools between cuts, log what you remove for record keeping, and never compost infected material.
Prune Lower Foliage to Improve Airflow
Pruning lower leaves is one of the most effective cultural control strategies you can apply right now. Strip foliage below the first fruit cluster to open the canopy — better canopy ventilation speeds moisture evaporation and improves light distribution across inner branches.
Drier leaves mean fewer spore landing zones, reduced pest habitat, and stronger stem resilience as the plant redirects energy upward.
Early blight slows down fast.
Stop Overhead Watering and Switch to Drip
Overhead sprinklers keep leaves wet for hours — exactly what Alternaria solani needs to germinate. Drip irrigation solves that by delivering water straight to the root zone, so humidity reduction techniques happen naturally.
- Water Use Efficiency: Drip cuts water use by up to 60%.
- Reduced Leaf Wetness: Foliage stays dry, cutting spore germination.
- Soil Moisture Management: Roots get steady moisture without splash inoculum.
Apply Copper, Chlorothalonil, or Mancozeb Protectively
Once your foliage is dry, it’s time to build a chemical defense. Copper fungicide, chlorothalonil, and mancozeb each create a protective barrier on leaf surfaces that stops spores before they penetrate.
Spray timing matters — apply early morning before heat sets in.
Coverage uniformity, hit both leaf sides.
Rotate products for resistance rotation, and follow label safety protocols every time.
Use Bacillus Subtilis for Organic Suppression
If you’d rather skip synthetic chemicals, Bacillus subtilis is your go-to for organic disease control.
It works three ways — lipopeptide production breaks down Alternaria cell walls, biofilm formation keeps colonies anchored to roots, season after season, and induced systemic resistance readies your plant to fight back faster.
Spray every 7–14 days for reliable biological control options that also support soil microbiome enhancement.
Prevent Early Blight Returns

Treating an active outbreak buys you time, but prevention is what keeps early blight from showing up again next season. The good news is that a few consistent habits go a long way.
Here’s what to put in place before and after the growing season.
Rotate Tomatoes and Other Nightshades
Think of crop rotation as starving the enemy. Alternaria solani survives in soil for years — but only if it keeps finding nightshade roots nearby.
Rotate your crops on a three-to-four-year cycle, moving tomatoes, peppers, and eggplant to a fresh bed each season.
Follow nightshades with legumes for smart soil nutrient management, and purge nightshades and volunteer tomato plants from old beds completely.
Mulch to Block Soil Splash
Mulch is one of the simplest cultural methods to stop early blight before it starts — because the pathogen travels from soil to leaf, not the other way around. Material selection matters: straw and wood chips outperform fine bark at absorbing raindrop impact.
- Depth guidelines: Apply 2.5–7.5 cm around each plant
- Uniform coverage: No gaps near the stem crown
- Maintenance schedule: Replenish after heavy rain or storms
- Drip integration: Pair mulch with drip irrigation to keep foliage dry
Together, these sanitation practices in gardening substantially cut soil splash and early blight risk.
Space Plants and Stake Them for Airflow
Stake your plants and space them right — this is one of the most effective cultural methods for keeping early blight at bay. Canopy airflow drops sharply when leaves overlap, trapping moisture in which Alternaria solani thrives.
| Practice | Specification | Why It Matters |
|---|---|---|
| Row orientation | Align with prevailing wind | Speeds canopy drying |
| Aisle width | 12–18 inches between rows | Allows pass-through airflow |
| Plant spacing | 18–24 inches apart | Reduces humidity pockets |
| Vertical spacing | Adjustable stakes, 4–6 ft tall | Lifts foliage above soil |
| Pruning | Remove lower leaves weekly | Opens airflow under canopy |
Good plant sanitation means tying stems at multiple points, pruning suckers consistently, and raising adjustable stakes as plants grow.
Choose Partially Resistant Tomato Varieties
Not all tomatoes fight early blight equally. When browsing seed catalog labels, look for resistance gene markers and terms like "EB tolerant" or "partial resistance to Alternaria."
Match your maturity group to your local growing season — climate adapted hybrids bred for warm, humid conditions outperform generic picks. There’s a slight flavor resistance tradeoff with some hybrids, but integrated pest management gets far easier when your plant starts ahead.
Sanitize Tools, Containers, and End-of-season Debris
Your tools and containers carry last season’s Alternaria spores straight into a fresh planting — sanitation breaks that chain for good. Follow this seasonal checklist:
- Bleach Solution Ratios: Mix a 50–150 ppm chlorine solution; soak containers for 10 minutes using the Tool Drying Protocol — scrub, rinse, air dry fully.
- Disinfect containers and pruning shears between plant varieties to block mechanical spread.
- Remove infected plants entirely after harvest; bag or burn diseased material — sanitation and disposal methods for infected plant material prevent overwintering spores.
- Debris Composting Guidelines: Only compost disease-free residues in hot piles reaching 140°F minimum.
- Container Storage Hygiene: Store sanitized gear off the ground in dry, labeled areas to prevent recontamination.
Apply this Seasonal Sanitation Checklist — including garden sanitation of drip lines and postharvest handling of infected tomato fruit — before closing out each growing season.
Frequently Asked Questions (FAQs)
How to get rid of early blight on tomato plants?
Getting rid of early blight means acting on multiple fronts — pruning infected leaves, switching to drip irrigation, applying copper fungicides, and using biological control products like Bacillus subtilis to slow the spread fast.
Can tomatoes recover from blight?
Yes, but don’t expect a full miracle.
With leaf regrowth supported by smart pruning for improved airflow and consistent post‑treatment monitoring, most plants stage a real yield rebound — if you act before infection overwhelms them.
What is the best fungicide for early blight?
Copper fungicides, chlorothalonil, and mancozeb are your strongest options. For organic suppression, Bacillus subtilis works well. Rotate between them — resistance management strategies matter — and time applications before symptoms appear.
Which fungicide is best for early blight of tomatoes?
For early blight, copper fungicides work well as a first line of defense — but rotating with chlorothalonil or mancozeb helps slow fungicide resistance. Bacillus subtilis is your best organic option.
What kills early blight on tomatoes?
Want to stop early blight in its tracks? Copper fungicides, chlorothalonil, Mancozeb, potassium bicarbonate, and Bacillus subtilis all kill or suppress it — especially on a consistent fungicide rotation schedule.
Does hydrogen peroxide stop tomato blight?
Hydrogen peroxide can knock back surface spores, but it won’t stop early blight for long.
It breaks down fast in sunlight, offers no soil efficacy, and can’t replace copper fungicides or Bacillus subtilis.
When should I spray my tomatoes for blight?
Start preventive spraying when plants reach 6–8 inches tall and nights stay above 50°F. Spray every 7–10 days, tightening to every 5–7 days after rain or high humidity.
How do you treat early blight on tomato plants?
Catching it early is half the battle.
Remove infected leaves, switch to drip irrigation, and apply copper fungicides protectively.
Pruning for airflow and mulching for soil management stop the spread quickly.
Can tomato blight be cured?
Early blight can’t be fully cured once it takes hold, but integrated management — combining biocontrol efficacy, cultural control methods, and timely fungicide application — limits damage and keeps plants productive through harvest.
What is early blight on tomato plants?
Tomato early blight is a fungal disease caused by Alternaria solani, showing up as brown spots with concentric rings on lower, older leaves — a classic pattern that makes leaf spot identification straightforward once you know what to look for.
Conclusion
Early blight is a slow thief—it doesn’t take your harvest overnight, but patiently, leaf by leaf, until there’s nothing left to save. That’s why early blight treatment for tomatoes isn’t a one-time fix; it’s a discipline built on observation, timing, and the right tools applied before the damage compounds.
Catch those first bullseye lesions, cut them out, and hold your ground with copper or Bacillus subtilis. Stay consistent, and thief never gets a foothold.