This site is supported by our readers. We may earn a commission, at no cost to you, if you purchase through links.

A single packet of tomato seeds costs less than a dollar and holds enough plants to fill your entire garden—plus your neighbor’s. That ratio alone explains why experienced gardeners rarely buy transplants. But the real advantage isn’t the money. It’s control. When you start from seed, you choose exactly what goes in the ground: the variety, the timing, the root health.
Store-bought transplants arrive stressed, rootbound, and hardened off on someone else’s schedule. Your seed starting tips for vegetables determine whether you harvest in July or September. The difference between those outcomes starts under grow lights, weeks before the soil thaws.
Table Of Contents
- Key Takeaways
- Key Benefits of Starting Vegetables From Seed
- Choosing Vegetable Seeds and Supplies
- Best Practices for Seed Starting Indoors
- When and How to Start Different Vegetable Seeds
- Seed Sowing and Seedling Care Tips
- Transplanting and Hardening Off Seedlings
- Top 9 Tools for Successful Seed Starting
- 1. LVWIT LED Shop Light Fixture
- 2. Barrina Led Shop Light Fixture
- 3. Seedling Heat Mat For Plants
- 4. Portable Garden Pressure Sprayer Tool
- 5. Dramm Lemonhead Hose End Sprayer
- 6. High Performance Grow Light Fixture
- 7. Full Spectrum Led Grow Light
- 8. Flexible Garden Tub Trug
- 9. Surge Protector Timer Outlet Strip
- Frequently Asked Questions (FAQs)
- What are common seed starting mistakes?
- Is it too late to plant seeds in October?
- Can you use toilet paper rolls to start seeds?
- What is the best way to start vegetables from seeds?
- Does soaking seeds in hydrogen peroxide help germination?
- How to successfully germinate vegetable seeds?
- Which vegetables should not be planted next to each other?
- Is it better to germinate seeds in soil or paper towel?
- What is the best method for starting seeds?
- Can I reuse seeds from store-bought vegetables?
- Conclusion
Key Takeaways
- Starting vegetables from seed gives you full control over variety, timing, and root health—advantages no nursery transplant can match.
- Soil temperature, light duration (14–16 hours daily), and sterile seed mix are the three variables that make or break germination.
- Hardening off is non-negotiable: move seedlings outside gradually over six days, starting with just 1–2 hours in shade, or transplant shock will undo weeks of indoor work.
- Succession sowing every 10–14 days eliminates feast-or-famine harvests and keeps your beds producing all season long.
Key Benefits of Starting Vegetables From Seed
Starting from seed puts you in control from day one. You get more choices, better plants, and often a longer growing season — all for less money than buying transplants.
If you’re just getting started, seasonal gardening tips for beginners can help you figure out exactly when to sow seeds versus when to grab transplants.
Here’s what you actually gain when you start vegetables from seed.
Greater Variety and Plant Choice
Nursery shelves give you maybe a dozen tomato options. Start from seed, and that number explodes. Heirloom options like Brandywine, Cherokee Purple, and Black Krim aren’t found at most garden centers.
Seed diversity opens the door to rare varieties — Turkish Orange eggplant, Watermelon Radish, Medusa Pepper. Your plant selection becomes intentional, not accidental.
Seed variety selection is how you grow exactly what you want. By choosing seeds from a reliable popular seed source, you can guarantee a successful harvest.
Cost Savings Compared to Transplants
Variety is one win. Cost is another.
A seed packet runs about $3 and holds 25 seeds — roughly $0.12 per plant. A nursery transplant costs $0.85 or more. That gap adds up fast.
Here’s what seed starting saves you per season:
- Seed cost: ~$0.17 per seedling versus $0.85+ at retail
- Equipment savings: gear pays off after ~190 plants across seasons
- Transplant costs: starting 60–70 seedlings yearly breaks even by year three
Understanding the cost benefit analysis is essential for smart budget planning.
Smart budget planning starts here.
Earlier Harvests and Season Extension
That cost savings pays off even faster when your plants hit the ground weeks ahead of schedule. Indoor seed starting can push your first ripe tomatoes to July instead of late August.
Add cold frame gardening or low tunnel systems, and season extension stretches both ends of the calendar. Earlier harvests, longer production — that’s what smart transplanting around frost dates actually delivers.
Healthier, More Resilient Seedlings
You control every variable when you grow from seed — soil sterilization, light intensity, seedling nutrition, and water management. That control builds plants nurseries simply can’t match.
- Bottom-watering encourages deep root development from day one
- Sterile seed mix blocks damping-off before germination starts
- 14–16 hours of light produces sturdy stems before transplanting
Proper hardening off locks in that strength for good.
Choosing Vegetable Seeds and Supplies

Everything starts with the seed in your hand. Before you fill a single tray, you need to know what to look for — and where to find it.
Here’s what to keep in mind when choosing your seeds and supplies.
Selecting The Right Seed Varieties
The seed variety you choose sets the ceiling on your harvest. Hybrid seeds push 20–30% higher yields and ripen faster — Early Girl tomatoes at 50 days, for example. Heirloom traits like Brandywine’s flavor or Nantes 2’s sweet core trade uniformity for character. Match climate tolerance to your zone before anything else.
| Seed Type | Best For | Example Variety |
|---|---|---|
| Hybrid Seeds | High yield, uniformity | Belstar Broccoli |
| Heirloom Traits | Flavor, seed saving | Brandywine Tomato |
| Space-Saving | Containers, small beds | Patio Baby Eggplant |
Always read the seed packet. It tells you everything.
Assessing Seed Quality and Viability
Not every seed in that packet is worth your time. A quick germination test tells the truth: lay 10 seeds on a damp paper towel, keep them warm, and check in 3–7 days. Below 70%? Sow thicker or replace the lot.
- Test seed viability before committing to full trays
- Check germination rates using the paper towel method
- Inspect seed quality — plump seeds outperform shriveled ones
- Store seeds cool, dry, and dark to preserve viability
- Look for seed certification labels to confirm purity standards
Sourcing Seeds Locally and Online
Where you buy matters as much as what you buy. Local nurseries stock regionally proven varieties — staff there can point you toward what actually thrives in your zone. Online catalogs like Johnny’s or Baker Creek offer thousands of choices, detailed days-to-maturity data, and small packet sizes for trialing.
| Source | Best For |
|---|---|
| Local Nurseries | Zone-tested vegetable seeds |
| Seed Exchanges | Free heirloom swaps |
| Regional Suppliers | Climate-adapted varieties |
| National Catalogs | Rare and specialty picks |
| Niche Online Shops | Open-pollinated, organic seed |
Don’t skip community seed exchanges either — locally adapted seed is hard to beat.
Best Practices for Seed Starting Indoors

Getting your setup right from the start makes everything easier down the line. A few key decisions — your mix, containers, lights, and temperature — will set the foundation for strong, healthy seedlings.
Here’s what to get right before you sow a single seed.
Choosing The Right Seed Starting Mix
Your seed starting mix is the foundation everything else builds on. Skip garden soil — it compacts, harbors fungi, and brings weed seeds into your trays.
A sterile medium with 60% peat or coco coir, plus 30–40% perlite and vermiculite, gives seedlings the right soil structure. It holds moisture without waterlogging roots.
Check pH levels — aim for 6.0–6.5 for reliable germination.
Selecting Containers and Trays
Your container choice shapes root health from day one. Match cell size to the crop.
- Tomatoes and peppers — use 72-cell trays; 1.5–2 inch depth accommodates early root systems.
- Lettuce and herbs — 128-cell plug trays work well; shallow roots don’t need more.
- Squash and melons — go with 24-cell flats; cells up to 4 inches wide prevent binding.
- Drainage systems matter — every seed tray needs holes; bottom-watering trays allow capillary uptake without saturating your seedstarting mix.
Plastic trays last 10-plus seasons. Biodegradable pots decompose in 45–90 days — no removal needed at transplant.
Using Grow Lights for Healthy Seedlings
Most windows don’t cut it for indoor seed starting. Seedlings need 14–16 hours of light daily — more than winter sun provides. That’s where grow lights earn their place.
Full spectrum LED options between 5000–6500K mimic natural daylight best. For seedling care, keep fluorescent fixtures 3–6 inches above trays. LEDs hang 12–24 inches higher.
Photoperiod control via a timer locks in consistent germination and transplanting success.
Managing Temperature and Humidity
Light sorted. Now temperature does the heavy lifting.
Most seeds germinate best when soil temperature stays between 65–75°F. A heat mat paired with a thermostat keeps warm-season crops like tomatoes on track. For climate monitoring, check trays daily — conditions shift fast.
- Keep humidity dome on until sprouts appear
- Remove dome for air circulation right after emergence
- Use consistent moisture, not saturation
When and How to Start Different Vegetable Seeds

Timing is everything in seed starting. Get it wrong and you’re either scrambling to catch up or watching leggy seedlings outgrow their trays.
Here’s what you need to know about when and how to start each type of vegetable.
Calculating Seeding Dates by Frost Zone
Every seed starting decision begins with one number: your last frost date. That’s your anchor for seasonal planning and frost zone mapping.
Use a seed date calculator — NOAA or frostdates.com work well. Enter your zip code. Get your date.
Then count back from it.
| Crop | Start Indoors | Transplant |
|---|---|---|
| Tomatoes | 6–8 weeks before last frost | After last frost |
| Peppers | 6–8 weeks before last frost | 1–2 weeks after last frost |
| Broccoli | 10 weeks before last frost | 2 weeks before last frost |
| Celery | 10–12 weeks before last frost | After last frost |
| Eggplant | 8–10 weeks before last frost | After last frost |
Climate considerations matter too. Microclimates can shift your frost date by two full weeks. Weather forecasting helps you confirm before transplanting. Germination and seedling care depend on getting this timing right.
Vegetables Best Started Indoors
Now that you know when to sow, here’s what to start indoors. Some crops just need that head start. Indoor sowing tips apply most to plants that struggle in cold soil or need long seasons.
These four categories cover most gardens:
- Warm Season Crops — tomatoes, peppers, eggplant (6–10 weeks before last frost)
- Cool Season Starts — broccoli, cabbage, cauliflower (8–10 weeks out)
- Slow Developers — celery, leeks, onions (10–12 weeks)
- Tender Greens — lettuce, bok choy, Swiss chard (3–4 weeks)
Seedling care and transplanting seedlings successfully starts with getting these indoors on time.
Vegetables Best Direct Sown Outdoors
Not every seed wants to start life in a tray. Root vegetables — carrots, beets, turnips — resent being moved. Sow them direct. Same goes for peas, beans, corn, and squash.
Soil preparation matters here: fine, weed-free beds give seeds the contact they need. Match seed depth to your seed packet.
Cool-weather crops go in early; warm-weather crops wait until soil hits 65–70°F.
Succession Planting for Continuous Harvest
Stagger your sowings every 10–14 days instead of planting everything at once. That’s the core of succession planting — and it eliminates feast-or-famine harvests. Lettuce, radishes, and spinach are ideal for this.
Pair smart harvest scheduling with simple garden mapping and crop rotation to keep beds working all season. Good soil management between rounds keeps yields strong. Vegetable cultivation done this way pays off every week.
Seed Sowing and Seedling Care Tips
Getting seeds into the ground right is half the battle. From sowing depth to airflow, the small details shape everything that follows.
Here’s what to focus on once your seeds are in the tray.
Sowing Depth and Spacing Guidelines

Depth controls everything. Tomatoes and peppers go 1/4 to 1/2 inch deep — no deeper. Lettuce needs just 1/8 to 1/4 inch; it requires light for germination. Soil density matters too: loose seed starting mix lets roots push through easily.
For tray layout, space tomatoes and peppers 1–2 inches apart. Proper plant spacing improves airflow and boosts germination rates. Always check seed packet instructions.
Labeling and Organizing Seed Trays

Lost seedlings start with lost labels. For seed starting, plastic labels or repurposed vinyl mini blind strips work well — both resist moisture and hold pencil marks all season. Write the crop, variety, and sowing date on each one.
For tray organization, try an alphanumeric grid and a companion notebook for seed tracking, plant identification, and record keeping before transplanting begins.
Watering and Moisture Control

Too much water kills seedlings faster than drought. For ideal conditions for seed germination, consistent moisture matters more than volume.
Use bottom watering — set trays in shallow water for 30 minutes. This pulls moisture up through capillary action, keeps the surface dry, and encourages deeper roots.
Check soil moisture daily. Aim for a reading of 4–7 on a moisture meter before watering again.
Preventing Damping Off and Seedling Diseases

Damping off strikes fast — one day your seedlings stand tall, the next they’ve collapsed at the soil line. Sterile soil is your first line of defense; avoid reusing old mix that harbors Pythium and Fusarium. Sterilize trays in a 10% bleach solution.
Damping off collapses seedlings overnight — sterile soil and sanitized trays are your only reliable defense
For added fungal control, mix Trichoderma into your seed starting media. Humidity management matters too — lift humidity domes the moment germination completes.
Ensuring Proper Airflow

Still air is a silent killer for seedlings. Poor air circulation invites damping off disease and produces leggy seedlings that struggle after transplanting.
Set up seedling ventilation with these three steps:
- Place a small fan several feet away, aimed across — not into — the trays.
- Run it 12–14 hours daily, matching your grow light schedule.
- Keep humidity around 45–55 percent for healthy seedling development stages.
This wind training builds stems roughly 36 percent thicker, making hardening off seedlings far easier.
Transplanting and Hardening Off Seedlings

Your seedlings have done the hard work indoors — now comes the shift that makes or breaks them. Moving plants outside too fast is one of the most common mistakes new gardeners make.
Here’s what to watch for and how to get it right.
Signs Seedlings Are Ready to Transplant
Readiness isn’t guesswork — your seedlings tell you clearly. Watch for three to four true leaves, stems as thick as a pencil, and roots peeking through drainage holes. Those signals confirm solid Root Development and Stem Strength.
| Sign | What to Look For | Why It Matters |
|---|---|---|
| Leaf Expansion | 3–4 true leaves present | Aids photosynthesis after transplant |
| Stem Strength | Pencil-thick, upright stem | Withstands outdoor wind and stress |
| Root Development | Roots at drainage holes | Plug holds shape when removed |
When all three align, transplant timing is right.
How to Harden Off for Outdoor Success
Once your seedlings show those three signals, hardening off begins. Gradual Exposure is the method — start with 1 to 2 hours in a shaded, sheltered spot above 50°F. Add time daily, reaching full sun by day six.
Wind Protection matters early; porches and walls buffer gusts. Temperature Acclimation through this steady Outdoor Placement process prevents shock before transplanting seedlings to outdoor gardens.
Minimizing Transplant Shock
Hardening off gets them ready — but the move itself still matters. Gentle Root Handling is everything: hold the plug, not the stem. Slide roots out with moist soil intact. Transplant Timing keeps exposure under a minute.
Soak roots with a phosphorus-rich starter for Nutrient Boosting. Water Management means moistening 3–4 inches deep after planting. Good Soil Acclimation starts right there.
Timing Outdoor Planting
Timing matters as much as technique. In Saxony, the last frost averages around May 13 — your anchor point for all plant schedules.
Tender crops like tomatoes go out after that date, once soil temperature hits 60°F. Check weather forecasting a week ahead before committing.
Hardy crops tolerate earlier exposure based on their hardiness zones. Frost date is your non-negotiable line.
Top 9 Tools for Successful Seed Starting
The right tools make seed starting less guesswork and more reliable. Having the proper gear — from lighting to watering — keeps your seedlings on track from day one.
Here are the 9 tools worth having in your setup.
1. LVWIT LED Shop Light Fixture
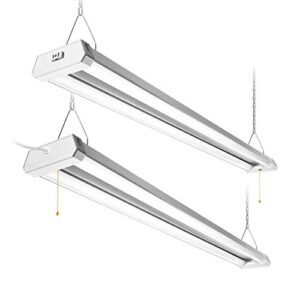
The LVWIT LED Shop Light punches well above its size. At 22 watts, it delivers 2,200 lumens at 6,500K — daylight-bright, perfect for vegetable starts.
Hang it 24–36 inches above your trays and run it 14–16 hours daily. It covers a standard 2×4-foot area, fits 1020 trays cleanly, and the adjustable chains make height changes easy.
Rated for 50,000 hours, it won’t quit mid-season. The linkable design means you can daisy-chain units as your setup grows.
| Best For | Anyone setting up a workshop, garage, or grow space who needs bright, reliable light without a complicated install. |
|---|---|
| Primary Use | Seed starting lighting |
| Indoor Use | Yes |
| Ease of Setup | Plug-and-hang |
| Expandable/Scalable | Yes, daisy-chain |
| Safety Rating | 50,000-hr rated |
| Price Tier | Mid-range |
| Additional Features |
|
- Pumps out 4,200 lumens of crisp 5000K daylight — plenty of light for detailed work or seedling trays
- Easy to hang and daisy-chain, so you can start with one and expand as your space grows
- Works in cold temps and can be hardwired if you want a cleaner, permanent setup
- The mounting hardware feels a bit flimsy, and the gold pull chain looks out of place
- No dimming option, so what you see is what you get
- LEDs aren’t replaceable, so if they burn out early, the whole fixture is done
2. Barrina Led Shop Light Fixture
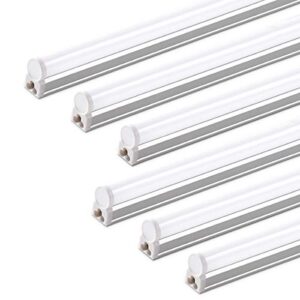
Barrina’s 4ft T5 shop light is a workhorse for seed-starting shelves. At 20 watts, it pushes 2,200 lumens at 6,500K — cool, bright, and exactly what vegetable starts need. Hang it 2–4 inches above your trays. Run it 14–16 hours daily.
The linkable design lets you chain up to 8 units from one outlet, so scaling your setup is straightforward. LEDs run cool, so no heat stress on young leaves — pair it with a heat mat for peppers and tomatoes.
| Best For | Home growers, gardeners, and hobbyists who want reliable, energy-efficient lighting for seed starting, plant shelves, garages, or workbenches. |
|---|---|
| Primary Use | Seed starting lighting |
| Indoor Use | Yes |
| Ease of Setup | Plug-and-play |
| Expandable/Scalable | Yes, up to 8 units |
| Safety Rating | Standard LED safety |
| Price Tier | Budget-friendly |
| Additional Features |
|
- Bright 2,200-lumen output at just 20 watts — great light without a big power bill
- Chain up to 8 lights from a single outlet, so expanding your setup is dead simple
- Plug-and-play installation with snap joints means you’re up and running fast
- Not compatible with motion sensors, which can cut the lifespan short
- Mounting hardware feels a bit flimsy and may need an upgrade
- The adapter wire runs short on some installs, so keep an extension cord handy
3. Seedling Heat Mat For Plants
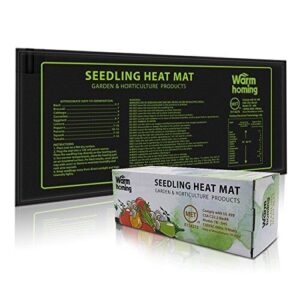
Cold soil stalls germination. That’s where a heat mat earns its place. This 18.5" x 8.5" mat runs at 15 watts and raises the root zone 10–20°F above room temperature — enough to wake up peppers and tomatoes that would otherwise sit and sulk.
It’s UL-listed and waterproof, so moisture isn’t a worry. Pair it with a humidity dome until sprouts emerge, then pull the dome. Use it with your Barrina lights and you’ve got a complete germination station.
| Best For | Home gardeners who start seeds indoors — especially during colder months when soil temps make germination a struggle. |
|---|---|
| Primary Use | Seed germination |
| Indoor Use | Yes |
| Ease of Setup | Plug-in |
| Expandable/Scalable | Pair with dome/lights |
| Safety Rating | UL-listed, waterproof |
| Price Tier | Budget-friendly |
| Additional Features |
|
- Raises root zone temps 10–20°F above room temp, giving seeds like peppers and tomatoes the warmth they need to actually sprout
- UL-listed and waterproof, so you’re not stressing about water from trays or humidity domes causing issues
- Works great paired with a humidity dome and grow lights for a full indoor germination setup
- At 18.5" x 8.5", it’s a bit small if you’re trying to start a large batch of seeds all at once
- Some people find it stiffer than expected, which makes it a little awkward to store when not in use
- Can’t be stacked with other heat sources or placed on rough surfaces, so you’ve got to be thoughtful about where you set it up
4. Portable Garden Pressure Sprayer Tool
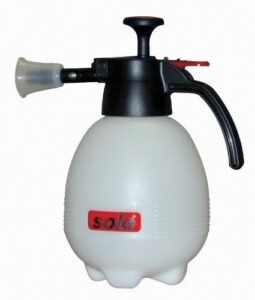
Seedlings don’t need a flood — they need a mist. The SOLO 418-2L pressure sprayer delivers exactly that. Its adjustable nozzle shifts from fine mist to a gentle fan spray, so you control every drop.
At just 1 lb empty, it won’t wear out your wrist during long watering sessions. The lock-on trigger reduces hand fatigue. Drift guards keep spray on target, not on your floor. Fill it, pump 20 seconds, and you’re ready.
| Best For | Home gardeners and hobbyists who want precise, low-volume watering for seedlings, houseplants, or spot-treating weeds without lugging around a bulky sprayer. |
|---|---|
| Primary Use | Seedling watering |
| Indoor Use | Yes |
| Ease of Setup | Fill and pump |
| Expandable/Scalable | Multiple fills |
| Safety Rating | Non-chemical safe |
| Price Tier | Mid-range |
| Additional Features |
|
- Adjustable nozzle lets you switch between a fine mist and a fan spray depending on what you’re watering
- Lock-on trigger and lightweight build (1 lb empty) make it easy on your hands during longer sessions
- Drift guards keep the spray where you actually want it — no wasted product or overspray mess
- Takes about 20–25 seconds of pumping to pressurize, which adds up if you’re refilling often
- Not safe for use with acids, caustic chemicals, or flammable liquids, so it’s limited to standard garden and cleaning products
- The heavy-duty plastic reservoir can feel a bit bulkier than expected for a 2-liter sprayer
5. Dramm Lemonhead Hose End Sprayer
The Dramm Lemonhead 750PL is built for benches, not buckets. Its 750 micro holes break water into a soft, wide shower — gentle enough for newly sown cells where seeds sit just under the surface.
At 40 psi, it pushes about 8 gallons per minute without blasting soil out of trays. The standard 3/4-inch threads fit most hoses directly.
Pair it with a wand to reach back rows. No adapter needed. No crushed seedlings. Just even, consistent coverage across a full 10×20 flat.
| Best For | Gardeners and growers who need gentle, even watering for seedlings and newly sown trays without disturbing soil or seeds. |
|---|---|
| Primary Use | Seedling watering |
| Indoor Use | Yes |
| Ease of Setup | Thread-on hose |
| Expandable/Scalable | Use with wand |
| Safety Rating | Standard garden use |
| Price Tier | Budget-friendly |
| Additional Features |
|
- 750 micro holes create a soft, wide shower that’s safe for delicate seedlings
- Fits standard 3/4-inch hose threads — no adapter needed
- Delivers solid coverage across a full 10×20 flat at 8 gallons per minute
- Plastic build may not hold up to heavy daily use over time
- Limited to hose-end use, so you’ll need a wand to reach back rows
- Spray distance and control are fairly basic compared to metal alternatives
6. High Performance Grow Light Fixture
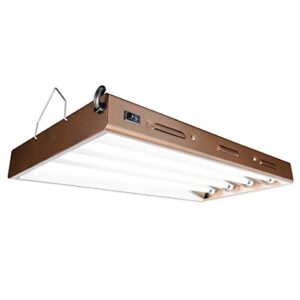
Four T5 tubes at 6400K push up to 8,000 lumens — that’s serious output for a fixture this compact. Mount it 2–4 inches above your trays and seedlings stay tight, not leggy.
The faceted aluminum reflector spreads light evenly, so edge cells don’t get shorted.
Hang it overhead or flip it vertical depending on your setup. Daisy-chain multiple units from one outlet. The 10-foot cord gives you real flexibility on cramped shelving.
| Best For | Indoor gardeners and seed-starters who need serious light output in a compact, flexible fixture. |
|---|---|
| Primary Use | Seed starting lighting |
| Indoor Use | Yes |
| Ease of Setup | Plug-and-hang |
| Expandable/Scalable | Yes, daisy-chain |
| Safety Rating | Standard electrical |
| Price Tier | Mid-range |
| Additional Features |
|
- Puts out up to 8,000 lumens with four 6400K T5 tubes — plenty of power for healthy seedling growth
- Hangs overhead or vertical and daisy-chains easily, so it adapts to almost any grow setup
- The faceted aluminum reflector spreads light evenly across the whole tray, not just the middle
- Generates noticeable heat, so you’ll want to watch placement with sensitive plants
- Some users have run into problems with the switch and ballasts over time
- Warranty coverage is limited, and getting support can be a hassle
7. Full Spectrum Led Grow Light
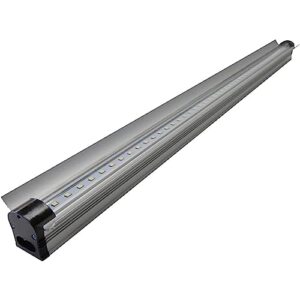
If you need wider coverage, this strip light changes the math. Ninety-six high-performance LEDs at 6400K deliver full spectrum output — blue through far-red — across a 48-inch span.
Run it 20–30 inches above your trays for even intensity without heat stress. The patented self-cooling design keeps temperatures safe for tender seedlings.
Link up to 8 units from one power cord, so scaling a larger setup stays simple. At 48 watts, it won’t spike your energy bill either.
| Best For | Gardeners and indoor growers who want to scale up seedling or plant setups without a mess of cords or a spike in the energy bill. |
|---|---|
| Primary Use | Seed starting lighting |
| Indoor Use | Yes |
| Ease of Setup | Plug-and-link |
| Expandable/Scalable | Yes, up to 8 units |
| Safety Rating | 50,000-hr lifespan |
| Price Tier | Mid-range |
| Additional Features |
|
- Links up to 8 units from one power cord, making it easy to expand coverage as your setup grows
- Self-cooling design protects delicate seedlings from heat stress
- 50,000-hour lifespan means you’re not replacing bulbs every season
- May not cut it for larger plants or high-light-intensity crops without adding extra units
- Some users have reported burnout issues sooner than expected
- Coverage per unit is limited to 48 inches, so bigger spaces add up fast
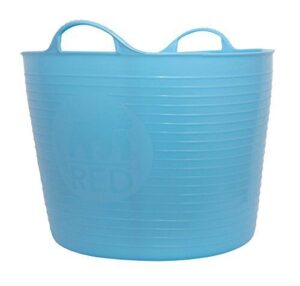
8. Flexible Garden Tub Trug
Lights managed. Now think about what holds everything together — literally.
A flexible tub trug earns its place in any seed-starting setup. Mix your potting soil in it. Rinse freshly harvested greens. Collect pulled seedlings when you’re thinning trays. One tub, a dozen uses.
This one’s made from food-grade, phthalate-free plastic — safe for edibles. The reinforced ribbing keeps it sturdy under load. Squeeze the grips to form a pour spout. At $40.46, it pulls serious weight.
| Best For | Gardeners, builders, and hobbyists who need a durable, multi-use tub that can handle everything from mixing soil to rinsing produce. |
|---|---|
| Primary Use | Soil mixing/garden tasks |
| Indoor Use | Yes |
| Ease of Setup | Ready to use |
| Expandable/Scalable | Multiple sizes available |
| Safety Rating | Food-grade, phthalate-free |
| Price Tier | Premium |
| Additional Features |
|
- Made from food-grade, phthalate-free plastic — totally safe around edibles and kids
- Super flexible yet sturdy, with reinforced ribbing that holds its shape under a heavy load
- Comfort grip handles make it easy to carry, pour, and maneuver even when it’s full
- At $40.46, it’s pricier than a lot of basic tubs you’d find at a hardware store
- Shipping can be hit or miss — some buyers have reported oversized packaging for a simple product
- Limited design and color options may not appeal to everyone
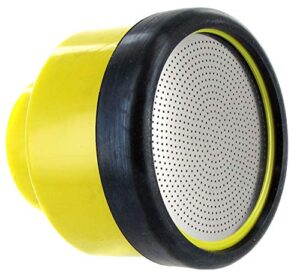
9. Surge Protector Timer Outlet Strip
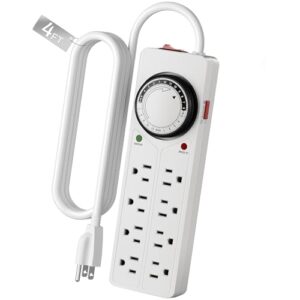
One tub manages the mess. Now something needs to manage the timing.
Plug your grow lights into the 4 timed outlets. Set a 14–16 hour day in 15-minute increments. Done. The 4 always-on outlets keep your fans and heat mats running without interruption. Surge protection guards everything from voltage spikes. The manual override is handy when you need lights on outside the schedule. Rated at 1,875W, it manages multiple devices at once — lights, fans, heat mat, no problem.
| Best For | Indoor plant growers and hobbyists who need automated lighting schedules for grow tents, aquariums, or terrariums. |
|---|---|
| Primary Use | Grow light automation |
| Indoor Use | Yes |
| Ease of Setup | Plug-in timer |
| Expandable/Scalable | Yes, 8 outlets |
| Safety Rating | ETL listed, UL standard |
| Price Tier | Budget-friendly |
| Additional Features |
|
- Timer outlets let you set a precise light schedule in 15-minute increments — no guessing, no forgetting
- Always-on outlets keep fans and heat mats running without interruption
- Built-in surge protection keeps your gear safe from unexpected voltage spikes
- The 3-foot cord is pretty short, so placement near an outlet is a must
- Some buyers have received a product that looks different from the listing photos
- Return shipping is on you if something goes wrong
Frequently Asked Questions (FAQs)
What are common seed starting mistakes?
Drown them, starve them of light, then skip hardening off — most seedlings never had a chance. Overwatering, weak light, wrong sowing depth, and skipping the hardening step kill more starts than anything else.
Is it too late to plant seeds in October?
It depends on your climate. In cold zones, October is too late for most crops. In mild zones 9–10, cool-season vegetables like lettuce, carrots, and spinach thrive when sown now.
Can you use toilet paper rolls to start seeds?
Yes — and they work surprisingly well. Toilet paper rolls are free, biodegradable, and deep enough for lettuce, herbs, and small-rooted vegetables. Plant the whole tube directly into soil. Roots push right through.
What is the best way to start vegetables from seeds?
Fill clean containers with moist seed-starting mix, sow at the right depth, and give seedlings 14–16 hours of light daily. Keep soil consistently damp — not soggy. That’s the foundation.
Does soaking seeds in hydrogen peroxide help germination?
Soaking seeds in dilute hydrogen peroxide can speed germination and lower disease risk. Mix 1 ounce of 3% solution into 1 pint of water. Soak 30–60 minutes, rinse, then sow immediately.
How to successfully germinate vegetable seeds?
Germination comes down to four things: moisture, warmth, darkness, and depth. Most vegetables sprout reliably when soil stays consistently moist and temperatures hit their sweet spot — usually 70–85°F.
Which vegetables should not be planted next to each other?
Like bad neighbors, some vegetables make each other miserable. Keep tomatoes away from potatoes — they share blight and beetles.
Don’t plant onions near beans.
Broccoli and cabbage compete heavily, cutting yields sharply.
Is it better to germinate seeds in soil or paper towel?
Both methods work. Soil is simpler — seeds sprout and grow without moving. Paper towel shows you viability faster. For most vegetables, start directly in soil and skip the extra step.
What is the best method for starting seeds?
Start seeds in a sterile mix, at the right soil temperature, with strong light overhead. Consistent moisture and good airflow do the rest. Simple setup, reliable results.
Can I reuse seeds from store-bought vegetables?
Yes, but it depends on the seed type. Heirloom varieties like Brandywine tomatoes grow true to parent. Hybrid store seeds sprout unpredictably.
Always test viability first — place seeds on a damp towel for seven days.
Conclusion
Every seed you place in that tray is a decision you’re making months ahead. The gardener who controls germination controls the harvest.
Your seed starting tips for vegetables don’t stop at transplant day—they echo in every fruit you pick in July instead of September. You chose the variety. You set the timing. You built the root.
What grows from here isn’t luck. It’s everything you did right, weeks before the ground was ready.
- https://www.susansinthegarden.com/guides/seed-starting-when-to-plant-vegetables-for-all-zones/
- https://edis.ifas.ufl.edu/publication/VH026
- https://www.epicgardening.com/indoor-seed-depth/
- https://harvesttotable.com/troubleshooting-seed-starting-problems-leggy-seedlings-damping-off-weak-growth-and-more/
- https://gardenbetty.com/the-no-brainer-guide-to-starting-seeds-indoors/