This site is supported by our readers. We may earn a commission, at no cost to you, if you purchase through links.

Most first-time gardeners kill their vegetables before summer even peaks—not from neglect, but from skipping the groundwork. The wrong spot, the wrong soil, the wrong timing, and even the toughest tomato won’t deliver.
The good news? A productive vegetable garden isn’t about luck or a green thumb. It comes down to a handful of decisions made before you ever put a seed in the ground.
Get those right, and you’ll move from guessing to harvesting with real confidence. This guide walks you through vegetable planting and care from site selection to your first harvest—step by step, nothing skipped.
Table Of Contents
- Key Takeaways
- Plan Your Vegetable Garden
- Prepare Soil Before Planting
- Plant and Care Step-By-Step
- Top 5 Planting Care Tools
- Frequently Asked Questions (FAQs)
- In what order should I plant my vegetable garden?
- How often should I rotate crops?
- When should I start composting?
- What tools do I need for gardening?
- How do I preserve seeds for planting?
- Can I grow vegetables in containers?
- When is the best time to harvest vegetables?
- How do you store harvested vegetables properly?
- What are signs of overwatering or underwatering?
- How often should you prune vegetable plants?
- Conclusion
Key Takeaways
- Before you plant a single seed, walk your yard at noon and pick a spot that gets 6–8 hours of direct sun—everything else depends on getting this right.
- Test your soil pH and aim for 6.0–7.0, because even the richest soil can’t feed your plants if the numbers are off.
- Knowing your last frost date is the anchor for your whole season—start frost‑sensitive crops like tomatoes indoors 5–8 weeks before it arrives.
- Stagger your plantings every 7–14 days and match each crop to the right method (direct sow vs. transplant), and your garden will keep producing instead of peaking all at once.
Plan Your Vegetable Garden

A great vegetable garden starts with a few smart decisions made before you ever touch a seed. Getting these basics right sets you up for a smoother, more rewarding growing season. Here’s what to think through first.
From soil prep to picking the right heat-tolerant crops, these summer vegetable gardening ideas give you a solid starting point before planting day arrives.
Choose Sunny Planting Locations
Before you plant a single seed, walk your yard at noon and notice where the sun actually falls. Most vegetables need at least six hours of full sun daily — tomatoes and peppers push that to eight. South-facing spots give you the longest exposure. Aim for the optimal 6–8 hour sunlight range to promote healthy growth. Watch out for:
- Shadows from fences or tall trees
- Low spots where cold air settles
- Reflected heat near driveways or walls
- Wind tunnels that dry out soil fast
Pick Beginner-friendly Vegetables
Once you’ve nailed your sunny spot, it’s time to choose what to grow. Start with fast-growing greens like radishes (ready in 25–30 days), lettuce (45–60 days from seed), and spinach (37–45 days). These low maintenance varieties forgive small mistakes and reward you quickly.
Cherry tomatoes and zucchini are smart beginner crop list additions too — productive, easy, and hard to mess up.
Compare Containers and Beds
Now that you’ve picked your crops, you need to decide where they’ll actually live.
Containers win on flexibility — move them to chase the sun or dodge frost. Beds give roots more room and hold nutrients longer.
For deep-rooted crops like carrots, beds are the better fit. Short on space? A few well-drained pots go a long way.
Plan Around Frost Dates
Knowing your last frost date changes everything. It’s the anchor for your whole planting schedule.
Check a frost date calculator or your local extension service to find yours, then count backward.
Start frost-sensitive crops like tomatoes indoors 5–8 weeks before that date.
Row covers and south-facing walls can buy you extra days when a late cold snap threatens.
Schedule Staggered Harvests
Once you’ve nailed your frost dates, it’s time to think about staggered harvests — so your garden keeps giving all season long.
- Sow leafy greens every 7–14 days for a steady supply.
- Use a Crop Calendar to track planting and harvest dates.
- Create Harvest Zones grouped by maturity for easy picking.
Succession planting turns one garden into a continuous production machine.
Prepare Soil Before Planting

Good soil is the foundation everything else builds on. Before you drop a single seed in the ground, a little prep work makes the difference between a struggling garden and one that actually thrives. Here’s what you need to do to get your soil ready.
Test Soil PH First
Before you drop a single seed into the ground, your soil has something to say — and a soil test is how you listen. Soil pH controls which nutrients your vegetables can actually use. Even rich soil can starve your plants if the pH is off.
Once you know your soil is ready, you can start turning that harvest into something delicious with these easy garden-to-table meal ideas built around beginner crops like tomatoes and herbs.
Even rich soil can starve your plants if the pH is off
Aim for a soil pH balance between 6.0 and 7.0. Tomatoes, for instance, do best around 6.0 to 6.5. Outside that range, nutrients lock up and plants struggle — no matter how much you’ve fed them.
| pH Level | What It Means |
|---|---|
| Below 6.0 | Too acidic; limits nutrient uptake |
| 6.0 – 7.0 | Ideal range for most vegetables |
| Above 7.0 | Too alkaline; causes deficiencies |
| Above 8.0 | Severely limits root health |
A basic soil test kit gives you a reliable starting point. For real-time readings, a soil pH probe works directly in the ground with almost no prep. Test before planting, again after adding lime or sulfur, and annually in active beds. That’s how you stay in control.
Add Compost and Amendments
Think of compost as your soil’s best investment. Work 2–4 inches of compost into the top 8–12 inches before planting. Commercial compost boosts moisture retention by 20–30% in sandy soils, while vermicompost delivers nutrients faster thanks to higher microbial activity. Apply in early spring for the best results.
For a quick seasonal boost, try compost tea — water it in or spray it on foliage to fuel early growth.
Improve Drainage and Texture
Poor drainage is the silent killer of most vegetable gardens. If water sits too long, roots suffocate fast.
Here’s how to fix it:
- Aeration core installation opens channels that improve water flow by 15–25%
- Subsurface drainage pipes at 12–24 inches deep cut waterlogging time by up to 60%
- Surface grading techniques at a 1–2% slope move excess water out within 24 hours
- Coarse material layering at the bottom of beds increases pore space by 20–30%
Top with mulch topdressing to keep soil loose and prevent crusting. Good soil texture starts here.
Choose Pre-plant Fertilizer
The right pre-plant fertilizer can make or break your first harvest. Before you grab anything off the shelf, get a soil test done. It tells you exactly what’s missing — no guesswork.
| Soil Type | Best Fertilizer | Recommended Rate |
|---|---|---|
| Sandy | 5-10-10 (phosphorus-heavy) | 2 lb per 100 ft² |
| Clay | 10-20-10 | 1 lb per 100 ft² |
| Loamy | Balanced NPK | 1–2 lb per 100 ft² |
| High organic matter | Compost + low inorganic | Soil test guided |
| Cold/early season | Phosphorus starter | Band near seed row |
For organic vs synthetic, compost and feather meal build long-term soil health. Synthetic options like urea deliver nutrients fast. Slow-release fertilizers work steadily over weeks, so you’re not constantly reapplying. Work your chosen amendment into the top 8–12 inches before planting — that’s when roots need nutrients most.
Build Healthy Raised Beds
A raised bed is one of the best investments you can make for your garden. Use cedar or redwood for the frame — both resist rot and last up to 12 years.
Fill it with a mix of 50% topsoil, 30% compost, and 20% perlite for drainage. Add a coarse material layer at the bottom, then mulch the surface.
Replenish compost every one to two years.
Plant and Care Step-By-Step
Good soil gets you started, but how you plant and care for your crops determines what you actually harvest. Every step matters — from knowing whether to direct sow or transplant, to watering the right way and keeping pests in check. Here’s exactly what to do.
Direct Sow Versus Transplant

Every seed has a choice: go straight into the ground or start life indoors first. Knowing which path to take can make or break your crop yield.
- Direct sow suits beans, carrots, and corn — crops that hate transplant shock
- Transplanting seedlings gives tomatoes and peppers a critical head start on seedling timing
- Seed packets usually tell you which method works best
Germination speed depends on soil temperature, so direct sown seeds stall in cold ground. Transplants sidestep that wait entirely, though they demand hardening off and extra labor requirements upfront. Match the method to the crop, and you’ll rarely go wrong.
Space Vegetables Correctly

Once your seedlings are in the ground, give them room to breathe. Crowded plants compete for light, water, and nutrients — and everyone loses.
Thin seedlings after they emerge, following the spacing on your seed packet. Tomatoes need at least 24 inches apart; lettuce works fine at 6–8 inches.
That breathing room makes harvests bigger and healthier.
Water Deeply and Consistently

Good spacing sets your plants up to thrive — but spacing alone won’t carry them through summer. Water does that.
Aim for 1 inch per week, applied deeply. Deep watering encourages roots to push 12–18 inches down, so plants stay strong during dry spells. Drip irrigation is your best tool here — it delivers water straight to the root zone with almost no waste.
Water in the early morning.
Mulch, Weed, and Prune

Once your watering routine is set, mulch is your next move. Spread 2–4 inches of straw or shredded leaves around your plants. This cuts evaporation by up to 70% on hot days and blocks weed light.
Pull any weeds you spot early — small weeds are easy; big ones aren’t.
For tomatoes, prune dead or yellowing stems during cool mornings to improve airflow and reduce disease.
Manage Pests Organically

Pests are part of the game — but they don’t have to win. Companion planting is your first line of defense: tuck basil near tomatoes and scatter marigolds around the bed to deter whiteflies and nematodes.
- Attract beneficial insects like lady beetles and parasitic wasps by keeping your garden diverse
- Apply neem oil or soap spray directly on soft-bodied pests when scouting reveals rising numbers
- Use floating row covers to block beetles and moths from young transplants
Scout weekly and act only when damage justifies it.
Top 5 Planting Care Tools
The right tools make every gardening task faster, easier, and more satisfying. You don’t need a shed full of gear — just a few well-chosen picks that cover the essentials. Here are the five tools worth having from day one.
1. Rapitest Garden Soil Test Kit
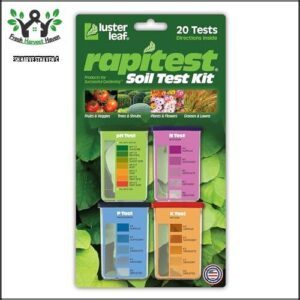
Before you plant a single seed, you need to know what you’re working with. The Rapitest Garden Soil Test Kit gives you exactly that — a quick read on your soil’s pH, nitrogen, phosphorus, and potassium levels.
At just $15.79, it includes 40 total tests (10 per parameter), so you can retest through the season.
It’s straightforward enough for beginners, with instructions and a pH guide covering 450+ plants.
| Best For | Home gardeners — beginners and seasoned growers alike — who want a fast, affordable way to check soil health before planting or during the season. |
|---|---|
| Primary Use | Soil testing |
| Material | Plastic/reagent |
| Weight | 0.25 lb |
| Organic/Natural | No |
| Skill Level | Beginner-friendly |
| Origin | Not specified |
| Additional Features |
|
- Tests four key soil factors (pH, N, P, K) in one kit for under $16 — way cheaper than a lab
- Simple enough for beginners, with step-by-step instructions and a pH guide for 450 plants
- Capsule-based system with a color comparator makes reading results quick and easy
- Color-matching can be tricky depending on your lighting, so readings aren’t always precise
- Only 10 tests per parameter — frequent testers will burn through a kit fast
- Doesn’t cover micronutrients or soil texture, so it won’t catch every deficiency
2. Corona ComfortGEL Hand Pruner
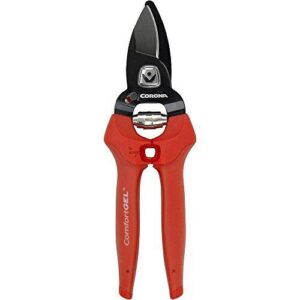
Good pruners make a real difference — and the Corona ComfortGEL Hand Pruner delivers where it counts.
The soft ergonomic grips reduce hand fatigue, even during long sessions, making it a great pick if your hands tire quickly.
Its high-carbon, non-stick blade cuts cleanly through stems up to ½ inch, handling most shrubs and garden growth with ease.
The built-in thorn stripper is a small but handy bonus for rose pruning.
Lightweight at just 0.3 lb, it won’t wear you out.
| Best For | Gardeners with hand sensitivity or conditions like peripheral neuropathy who need a lightweight, comfortable pruner for everyday garden maintenance. |
|---|---|
| Primary Use | Pruning |
| Material | Alloy steel |
| Weight | 0.3 lb |
| Organic/Natural | No |
| Skill Level | Beginner-friendly |
| Origin | Not specified |
| Additional Features |
|
- Soft ergonomic grips cut down on hand fatigue during longer pruning sessions
- Non-stick, high-carbon blade makes clean cuts through stems up to ½ inch
- Built-in thorn stripper is a handy touch for anyone working with roses
- Blade can dull or bend sooner than expected with regular use
- Half-inch cutting capacity means it’s not up for thicker branches or heavy-duty jobs
- Alloy steel construction may not hold up as well as premium full-steel tools over time
3. Dr Earth Natural Choice Compost
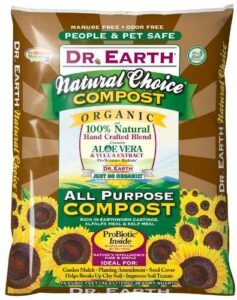
Healthy soil is the foundation of everything, and Dr. Earth Natural Choice Compost gives you a strong start.
This 100% organic blend combines earthworm castings, alfalfa meal, and kelp meal to feed your soil naturally.
It improves clay texture, boosts moisture retention, and adds beneficial microbes that keep roots thriving.
Use it when prepping beds, filling containers, or mulching around vegetables.
One 1.5 cu ft bag goes a long way.
| Best For | Home gardeners who want a clean, organic way to improve their soil—especially if they’re working with heavy clay or building raised beds from scratch. |
|---|---|
| Primary Use | Soil amendment |
| Material | Organic matter |
| Weight | Not specified |
| Organic/Natural | Yes, certified |
| Skill Level | All levels |
| Origin | USA |
| Additional Features |
|
- The earthworm castings kelp alfalfa combo is a genuinely solid mix that feeds soil biology, not just plants
- Works across the board—vegetables, trees, containers, lawn overseeding, you name it
- Certified organic and made in the US, so you know what you’re getting
- A few buyers have found rocks, twigs, or dusty filler in the bag, so quality can vary batch to batch
- It’s pricier than bulk compost from a big-box store, which adds up if you’re covering a large area
- No NPK breakdown or pH info, so it won’t replace a proper soil test if you’re chasing specific numbers
4. Dave Thompson Organic Vegetable Herb Fertilizer
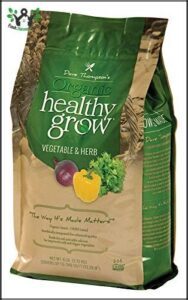
Once your soil is prepped, it needs a reliable nutrient source — and Dave Thompson Organic Healthy Grow delivers exactly that. Made from aerobically composted chicken litter, it feeds your soil steadily rather than hitting plants with a quick synthetic jolt. It’s OMRI listed, so it meets organic standards without question.
Mix the granules in before planting, water well to activate, and expect visible results within 5 days. It works in beds, raised beds, and containers — tomatoes, herbs, you name it.
| Best For | Home gardeners who want a trustworthy organic fertilizer for vegetables, herbs, and flowers without worrying about synthetic chemicals. |
|---|---|
| Primary Use | Fertilizing |
| Material | Granulated organic |
| Weight | 6 lb |
| Organic/Natural | Yes, OMRI listed |
| Skill Level | All levels |
| Origin | Not specified |
| Additional Features |
|
- OMRI listed and fully organic — no guesswork on whether it meets organic standards
- Feeds soil steadily with calcium and microbial support, leading to stronger, higher-yielding plants
- Works fast — many users see visible improvement within about 5 days of application
- Some users report gnat problems after applying, which can be a real nuisance
- Needs a good soaking after application to activate properly and tone down the smell
- Nutrient release is slower than synthetic options, so you’ll need a little patience
5. Nisaku Stainless Steel Hori Hori Knife
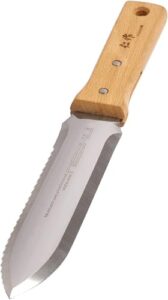
One tool does the work of five.
The Nisaku Hori Hori Knife features a 7.25-inch Japanese stainless steel blade with both a straight edge and serrated edge, so you can slice roots, dig planting holes, and saw through tough stems without switching tools.
Depth markings on the blade take the guesswork out of planting bulbs or transplanting seedlings.
It comes with a sheath and weighs just 10 oz — tough enough for compacted soil, compact enough for your back pocket.
| Best For | Gardeners, foragers, and field researchers who want one reliable tool for digging, cutting, and planting without hauling a whole kit around. |
|---|---|
| Primary Use | Digging & weeding |
| Material | Stainless steel |
| Weight | 10 oz |
| Organic/Natural | No |
| Skill Level | Intermediate |
| Origin | Japan |
| Additional Features |
|
- Dual-edge blade handles both clean slicing and sawing through tough roots — no tool-switching mid-task
- Depth markings on the blade make planting bulbs and seeds quick and accurate
- Compact and light at 10 oz, so it’s easy to carry on long days in the field or garden
- The sheath is low-grade vinyl and may feel flimsy or leave sticky residue over time
- The wooden handle isn’t contoured, so it can feel a bit awkward during extended use
- Extremely sharp blade means you’ll want gloves — accidental contact can cause a serious cut
Frequently Asked Questions (FAQs)
In what order should I plant my vegetable garden?
Start with cool-season crops like lettuce and radishes, then follow with warm-season ones like tomatoes and zucchini once frost risk has passed. Timing it right means less loss, more harvest.
How often should I rotate crops?
Rotate crops every year, moving each plant family to a new bed. Aim for a three-to-four year cycle before returning any crop to its original spot.
When should I start composting?
The best time to start is spring or fall. Spring’s warmth speeds up decomposition fast. Fall gives you plenty of leaves to balance the pile. Either way, you’ll be ready to feed your garden soon.
What tools do I need for gardening?
You don’t need a garage full of gadgets. A trowel, hand pruner, hori hori knife, drip hose, and gloves handle most tasks. Start lean, add tools as your garden grows.
How do I preserve seeds for planting?
Keep seeds cool and dry — aim for under 50°F and humidity below 20%. Store them in airtight glass jars, label with variety and year, and test germination before planting.
Can I grow vegetables in containers?
Absolutely — containers work beautifully for vegetables. Use pots at least 45 cm deep, place them where they get 6 to 8 hours of sun, and water more often than you would in-ground beds.
When is the best time to harvest vegetables?
Pick vegetables in the morning, when they’re fully hydrated and flavor is at its peak. Most crops are ready when they reach full size and color — firm, bright, and just before overripening sets in.
How do you store harvested vegetables properly?
Cool your harvest within two hours of picking. Leafy greens last 5–7 days at 32–40°F with high humidity. Root vegetables hold up to 12 weeks in similar conditions. Don’t wash until you’re ready to eat.
What are signs of overwatering or underwatering?
Yellow, soft leaves mean too much water. Crispy, drooping leaves mean too little. Check the soil: soggy roots rot, dry soil cracks. Both stress plants fast.
How often should you prune vegetable plants?
Prune too little, and your plants get crowded. Prune too much, and you rob them of energy. Most vegetables need pruning every one to two weeks during active growth.
Conclusion
Like a well-tended seed, success with vegetable planting and care starts long before anything breaks through the soil. Choose your site, fix your soil, and plant with purpose—those early decisions carry the whole season.
You now have the tools, the timing, and the know-how to move from patch to plate with real confidence.
Your first harvest won’t just feed you. It’ll prove that a productive garden was never about luck—it was always about preparation.
- https://ccetompkins.org/resources/getting-the-most-out-of-your-vegetable-garden-soil-test-report
- https://alluvialsoillab.com/blogs/soil-analysis/soil-testing-guide-2025
- https://www.almanac.com/when-water-your-vegetable-garden-watering-chart
- https://www.mastergardenersd.org/how-often-and-how-long-should-i-drip-irrigate-my-raised-bed-vegetable-garden
- https://gardeningsolutions.ifas.ufl.edu/plants/edibles/vegetables/watering-the-vegetable-garden