This site is supported by our readers. We may earn a commission, at no cost to you, if you purchase through links.

A pane of old glass and a few scrap boards can push your last frost date back by weeks. That’s the quiet power of a cold frame: a bottomless box with a clear lid that traps solar heat and shrugs off frost while your open beds sit bare.
Soil under glass runs 3 to 8°C warmer than the air outside, which means faster germination and roots that don’t stall out in cold, wet ground. Growers who build one right can extend growing season with cold frames by 2 to 6 weeks on both ends of the calendar.
Get the angle, the location, and the venting habits right, and that box becomes one of the highest-return tools in your garden.
Table Of Contents
- Key Takeaways
- How Cold Frames Extend Growing Seasons
- Choose The Best Cold Frame Location
- Build a Durable DIY Cold Frame
- Manage Temperature, Moisture, and Pests
- Plan Cold Frame Crops by Season
- Top 5 Cold Frame Building Items
- Frequently Asked Questions (FAQs)
- Can a cold frame extend your gardening season?
- How can I extend my harvest season?
- How do I protect my greenhouse from cold weather?
- Can you extend your gardening season?
- How do I Keep my Garden warm in the winter?
- How long does a greenhouse last?
- When should you plant in a cold frame?
- What are the disadvantages of a cold frame greenhouse?
- How to use a cold frame in summer?
- How can I extend my growing season?
- Conclusion
Key Takeaways
- A cold frame traps solar heat to warm soil 3 to 8°C above outside air, letting you plant 2 to 6 weeks earlier in spring and keep harvesting weeks longer into fall.
- Placement drives performance, so face your frame south or southeast, secure 6 to 8 hours of direct sun, block prevailing winds, and set it against a masonry wall for extra stored heat.
- Build with rot-resistant wood like cedar or oak, slope the lid 15 to 20 degrees toward the sun, and seal every gap with caulk and weatherstripping to lock in warmth.
- Daily management makes or breaks results, so vent before temps climb past 60-75°F, close the lid before sunset, water only when the top inch of soil dries out, and check weekly for pests.
How Cold Frames Extend Growing Seasons

A cold frame does more than block wind, it actually adds weeks of usable growing time on both ends of your season. That extra time comes down to a handful of factors working together, from heat capture to frost protection. Here’s exactly how each one pulls its weight.
In fact, gardeners who master these techniques can stretch their harvest window by as much as 60 days, as this guide to winter garden protection using cold frames explains in detail.
Passive Solar Heat Capture
Every sunny day is free fuel your cold frame can capture. Passive solar heating works through transparent glazing that admits light while trapping heat, converting rays into warmth right at the surface.
Three keys drive solar gain optimization:
- Angled lid design maximizing sun angle alignment
- South-facing glazing material selection
- Consistent heat retention through enclosed space
This approach mirrors the principles of passive solar heating used in sustainable building design.
Warmer Air and Soil
That trapped sunlight doesn’t just warm the air, it heats the soil beneath it. Surface soil can run 3 to 8°C above ambient air temperature on sunny days, speeding up germination and root growth.
Air inside the frame runs 10-20°F warmer too. The soil’s thermal mass stores this heat, buffering plants against cool overnight swings.
Frost and Wind Protection
Warm soil means little if a hard freeze rolls in and wind strips away every degree of protection. Wind protection slows heat loss around your plants, so place windbreaks upwind to cut turbulence.
On brutal nights, layer frost cloth over the glazing and vent briefly at dawn before heat builds, protecting tissue while stretching your season further.
Stable Growing Microclimates
Think of your cold frame as a buffer zone, smoothing out the swings that stress young plants.
A cold frame is a buffer zone, smoothing out the swings that stress young plants
Surrounding walls and soil act as thermal mass, storing daytime heat and releasing it after dark. Sealed lids trap moisture, cutting humidity loss while keeping soil temperature steady within 2 to 4°F. That stability is what lets roots and leaves grow without interruption.
Expected Seasonal Extension
So how many extra weeks can you actually expect? A simple cold frame usually buys 2 to 6 extra weeks in both spring and fall, depending on your climate.
- Sow spring crops 4-6 weeks early
- Extend fall harvests past first frost
- Track daily temperature fluctuations closely
- Layer in succession planting for continuous yields
- Adjust venting and shading as seasons shift
That’s real season extension, not guesswork.
Choose The Best Cold Frame Location

Where you put your cold frame matters just as much as how you build it. The right spot can mean the difference between thriving winter greens and a frozen, soggy mess. Here’s what to check off before you settle on a location.
Face South or Southeast
Orientation makes or breaks your cold frame’s performance. Due south captures the longest daily sun and speeds spring soil warming, while southeast delivers strong morning light for seedlings and gentler afternoon heat.
| Orientation | Key Benefit | Best For |
|---|---|---|
| South | Longer winter exposure | Soil warming |
| Southeast | Morning light, less afternoon heat | Seed starting |
| North/East | Poor exposure | Avoid entirely |
Capture Six to Eight Hours
Six hours is your baseline; eight is your target. Peak sun hours drive solar gain, soil warmth, and how fast your cold frame shakes off frost each morning.
Even with strong light levels, keep an eye on humidity buildup inside the frame, since our tips for growing healthy tomatoes explain how stagnant air invites the very pests you’re checking for each week.
Track sunlight duration across the seasons, since low winter angles shrink exposure fast. Fewer than six hours stalls growth and weakens your season extension gains entirely.
Shelter From Strong Winds
A gust-battered cold frame loses heat fast, no matter how many sun hours it gets. Pick a spot shielded from prevailing winds, ideally behind a hedge, fence, or building.
Wind sneaks under lids and steals warmth, so tight weather stripping and sealed edges matter as much as placement. Sloped, low-profile designs shed gusts better than boxy ones ever will.
Use Walls for Thermal Mass
A brick or concrete wall behind your frame acts like a battery, soaking up sun and releasing heat after dark. Position the frame against south-facing masonry for free wall heat storage and steadier soil temperature regulation.
This thermal mass benefit stretches your microclimate’s warm hours, cutting fuel for season extension without costing you a dime.
Ensure Fast Soil Drainage
Water pooling under your frame invites root rot fast. Choose sites with fast-draining soil, or build a raised bed with a gravel base layer and sand beneath to speed percolation.
Mix in organic matter to improve structure and porosity. For stubborn clay, install subsurface drainage pipes.
Good drainage keeps soil temperature stable and roots healthy through winter.
Build a Durable DIY Cold Frame
Once you’ve picked the perfect spot, it’s time to put your tools to work. A well-built cold frame comes down to five key decisions, from the wood you choose to how you seal it up. Here’s exactly what goes into building one that lasts.
Choose Rot-Resistant Frame Materials

Wood choice decides whether your frame lasts five winters or twenty. Cedar durability comes from natural oils resisting decay. Teak’s dense grain repels moisture without any coating. Kiln-dried oak stays stable, warping less over time. Accoya wood uses acetylation to nearly eliminate rot for decades. Whatever lumber you pick, add weatherproof sealant before assembly to lock in that protection.
Size Frames for Easy Reach

Once your lumber frame construction is picked, size it for your body, not just your beds. Keep interior width between 18 and 28 inches, with a 10-14 inch front opening height for kneeling access. Adjust shelf heights in 2 inch increments, and position hinges so the transparent glazing lid never blocks your reach.
Slope Lids Toward Sunlight

With reach sorted, angle the lid itself toward the sun. Cut your front piece 8-12 inches and back piece 12-18 inches, giving a 15-20 degree slope that maximizes sunlight capture and drives passive solar heating deep into the bed.
This tilt boosts heat retention, sheds rainwater off the edges, and keeps thermal mass working through cold nights.
Install Glazing, Hinges, Supports

With the slope cut, fit the glazing next. Old windows, polycarbonate, or acrylic all work, sized to the opening with a small gap for expansion.
Use 3D adjustable hinges so the lid aligns tight against the frame front. Mount support brackets at even spacing so the glazing doesn’t bow, and use stainless screws so hinges resist rust.
Seal Gaps and Insulate

Gaps around the glazing leak more heat than most growers expect. Run a bead of silicone caulk along every glazing edge, then weatherstrip the lid with foam tape for tight closure. Fill larger gaps near hinges with expanding foam to stop thermal bridging.
This simple seal gaps and insulate routine locks in your cold frame’s microclimate and preserves thermal mass overnight.
Manage Temperature, Moisture, and Pests

Building the frame is only half the job. Once it’s in the ground, daily upkeep determines whether your plants thrive or struggle. Here’s what you need to watch and do to keep conditions right.
Monitor Daily Highs and Lows
Numbers don’t lie, and your thermometer is the best tool in the frame. Temperature logging hourly reveals trend analysis, sunrise heat buildup, and soil temperature lag behind air readings.
Watch for:
- Highs above 75°F signaling overheating risk
- Lows near 32°F threatening frost damage
- Sudden swings hinting at microclimate instability
This data drives smarter ventilation timing and genuine season extension.
Vent Before Heat Builds
Wait for the sun, not the thermostat. Crack the lid 2-4 inches before temperatures climb past 60-75°F, cutting the rise by 5-10°F and easing pressure on hinges and glazing seals.
Early venting drains excess humidity too, keeping leaves dry and lowering fungal risk, while steady airflow curbs pests and delivers fresh CO2 to your cool-season crops.
Close Lids Before Sunset
Think of the lid as your nightly lock on the day’s stored warmth. Close it before sunset for evening heat retention, cutting frost risk and locking in moisture. Closing early also curbs dusk pests and wind exposure.
- Nighttime frost shield: gains 5-15°F
- Moisture conservation overnight: less evaporation
- Pest activity reduction: fewer intruders
Water When Soil Dries
A closed lid traps heat, but it also traps moisture, so check soil before you assume it’s dry.
Water only when the top inch feels dry, using drip irrigation or a gentle hand-water early in the day.
Overwatering invites rot in cold frames, since trapped humidity already slows evaporation compared to open beds.
Prevent Pests and Diseases
A closed, humid frame is a bug magnet, so weekly pest monitoring matters. Check leaf undersides for aphids and whiteflies.
Pull diseased leaves fast and wipe tools with alcohol between plants. Space seedlings for airflow, avoid overhead watering, and rotate crops each season.
Add fine mesh covers, choose disease-resistant varieties, and welcome ladybugs to keep populations in check naturally.
Plan Cold Frame Crops by Season

A cold frame only pays off if you’re planting the right crops at the right time. Timing your seeds, transplants, and harvests around the seasons keeps that frame working for you year-round instead of sitting empty half the year. Here’s how to map out what goes in and when.
Start Spring Seeds Earlier
A few extra weeks can make or break your spring harvest. Cold frames let you push seed starting timing well ahead of the outdoor calendar, starting warm-season crops indoors 6-8 weeks before last frost.
- 6500K grow lights, 2-4 inches above trays
- 65-75°F soil via heat mats
- 14-16 hours daily light
- Sterile, lightweight seed-starting mix
This indoor sowing schedule builds sturdy, transplant-ready seedlings fast.
Harden Off Indoor Seedlings
Those sturdy seedlings still need gradual sun exposure before transplanting. Move trays outside for 2-6 hours daily in partial shade, then build up over 7-14 days. Keep daytime temps at 60-70°F and nights above 50°F. Since damp, crowded trays can still invite trouble even outdoors, it’s worth brushing up on how to prevent damping off disease in seedlings as you ease your plants into their new routine.
Use your cold frame’s lid for wind protection and easy temperature monitoring. Check soil moisture daily and watch for pests as plants adjust.
Plant Fall Crops Early
Once seedlings harden off, shift your cold frame’s job to fall crops. Direct sow radishes, beets, and carrots 8-12 weeks before first frost using a simple fall planting schedule. Prep soil with compost and nitrogen for greens.
Sow lettuce and spinach 6-8 weeks out, then succession plant every 2-3 weeks for continuous cool season vegetables.
Harvest Winter Greens and Roots
Once frost hits, your cold frame becomes a harvest tool, not just a shelter. Cut kale and collards 2-3 inches above the crown for regrowth. Dig beets and parsnips after hard frosts for peak sweetness. Keep carrots mulched in-ground all winter.
- Harvest outer leaves first
- Cut with sharp pruners
- Dig roots gradually
- Store greens 5-10 days
- Mulch roots against freezing
Use Succession Planting Year-Round
Never let your cold frame sit empty. A tight succession planting schedule keeps beds working: sow new greens every 10-14 days, pairing quick 30-day gap fillers with staggered maturity crops.
Rotate cool and heat-tolerant varieties for real crop rotation planning, and you’ll get a continuous harvest strategy running on a real planting calendar, stretching your growing season well past what one frame should manage.
Top 5 Cold Frame Building Items
You don’t need a lumberyard full of supplies to build a cold frame that actually works. A handful of the right parts make the difference between a frame that leaks heat and one that holds it. Here are five items worth adding to your shopping list before you start building.
1. National Hardware Galvanized Removable Pin Hinge
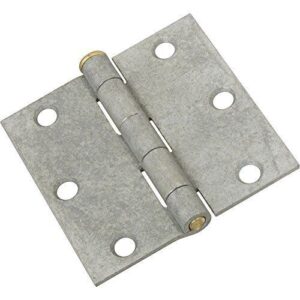
Every cold frame lid needs to swing open for venting and shut tight for frost nights, and that’s where a solid hinge earns its keep. National Hardware’s galvanized removable pin hinge uses cold rolled steel construction with a five-knuckle full mortise design, rated for salt air and outdoor exposure.
The removable loose pin lets you lift the lid clean off for repairs without touching the frame mount. At 6.7 by 0.8 inches, two hinges per pack cover a standard lid.
| Best For | Gardeners and homesteaders who need a durable, corrosion-resistant hinge for cold frames, sheds, or other outdoor structures exposed to salt air or harsh weather. |
|---|---|
| Material | Alloy steel, galvanized |
| Dimensions | 6.7 in x 0.8 in |
| Installation Type | Mortise mounting |
| Primary Use | Door hinge hardware |
| Weather Resistance | Corrosion resistant galvanized finish |
| Ease Of Use | Removable pin for door removal |
| Additional Features |
|
- Galvanized finish resists corrosion in outdoor and salt-air environments
- Removable loose pin allows the lid or door to be lifted off easily for repairs without unmounting the frame
- Full mortise design offers a strong, flush fit for residential, farm, or commercial use
- Requires mortising, which adds extra installation work
- Only sold in a 2-hinge package, which may not suit larger projects
- Galvanized coating thickness can vary and affect fit in tight tolerances
2. Skil 15 Amp Circular Saw With Laser
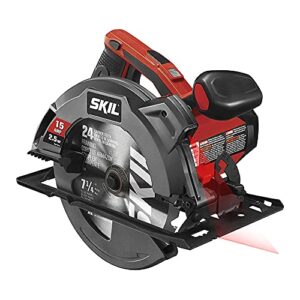
Cutting cedar or cypress boards to size demands a saw that won’t wander off your line, and the Skil 15 Amp Circular Saw delivers that precision. Its 5,300 RPM motor and 7-1/4 inch carbide blade rip through 2×6 lumber fast, while the single-beam laser guide keeps bevel cuts true up to 51 degrees.
At 8.7 pounds, it won’t wear out your arms mid-build. The spindle lock makes blade swaps quick, and the dust blower keeps your cut line visible from start to finish.
| Best For | DIYers and experienced builders who need a lightweight, reliable corded saw for framing, decking, and general lumber cutting. |
|---|---|
| Material | Steel with carbide-tipped blade |
| Dimensions | 8.75 in L x 10.75 in W |
| Installation Type | Corded, handheld operation |
| Primary Use | Cutting lumber and sheet goods |
| Weather Resistance | Not weatherproofed for outdoor use |
| Ease Of Use | Spindle lock for fast blade changes |
| Additional Features |
|
- Powerful 15-amp motor hits 5,300 RPM for fast, efficient cuts through lumber and sheet goods
- Laser guide and dust blower work together to keep your cut line visible and accurate
- Lightweight 8.7-pound design with tool-free spindle lock reduces fatigue and speeds up blade changes
- No electronic brake means the blade keeps spinning after you release the trigger, so extra caution is needed
- Laser guide is harder to see in bright sunlight, which can affect cutting accuracy outdoors
- Corded design limits mobility compared to cordless saw options
3. Trisiki Strong Adhesive Door Weather Stripping
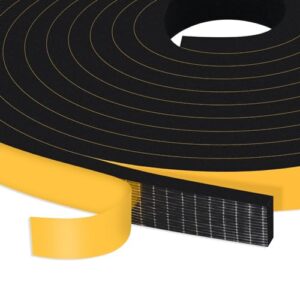
A well-built frame still leaks heat at every seam, and that’s where Trisiki weather stripping earns its spot on your list. The CR foam grid adhesive spreads glue evenly and cuts down on air bubbles, giving you a tighter bond around lid edges and joints.
Rated from -50°C to 150°C, it holds up through summer sun and hard freezes alike. Each roll set gives you 26 feet, plenty for sealing gaps around your lid and frame.
| Best For | Homeowners and DIYers sealing gaps around doors, windows, coolers, or cabinets who want a durable, self-adhesive weather seal that holds up in extreme temperatures. |
|---|---|
| Material | CR foam (neoprene) |
| Dimensions | 312 in x 0.5 in |
| Installation Type | Peel-and-stick self-adhesive |
| Primary Use | Sealing gaps and reducing noise |
| Weather Resistance | Operates -50C to 150C |
| Ease Of Use | No tools needed for install |
| Additional Features |
|
- Grid adhesive backing creates a stronger, more even bond with fewer air bubbles
- High-density CR foam resists deformation and performs from -50°C to 150°C
- Easy peel-and-stick installation with no tools required
- Strong adhesive can pull paint or finish if installed under tension instead of compression
- May leave a noticeable chemical odor that needs several days of ventilation to clear
- Adhesive residue can remain after removal, especially in heat or humidity
4. Solar Automatic Greenhouse Window Opener
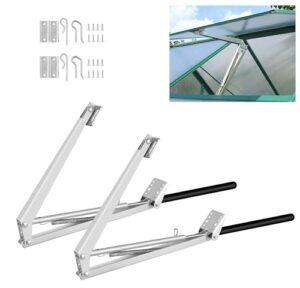
Manual venting works fine until the one afternoon you forget, and your seedlings cook. A solar opener fixes that: it opens at 77°F and closes at 59°F automatically, using a thermal wax cylinder rather than batteries or wiring.
The dual-spring system lifts lids up to 18 inches and controls windows weighing 33 lbs, so it fits most cold frame lids without strain. Rust-proof aluminum and stainless steel hardware survives seasons outdoors, making this the closest thing to hands-free climate control your frame will get.
| Best For | Greenhouse owners, hobby gardeners, and small commercial growers who want automatic temperature regulation without running electricity or checking vents every day. |
|---|---|
| Material | Aluminum alloy and stainless steel |
| Dimensions | 1 in x 1 in x 1 in |
| Installation Type | Screw and bracket mounting |
| Primary Use | Automatic greenhouse ventilation |
| Weather Resistance | Rust-proof aluminum and steel build |
| Ease Of Use | Hands-free solar powered operation |
| Additional Features |
|
- Opens and closes automatically between 77°F and 59°F with no batteries or wiring needed
- Dual-spring system handles windows up to 33 lbs and opens as wide as 18 inches
- Rust-proof aluminum and stainless steel construction holds up well outdoors season after season
- Some users find installation tricky on non-standard vent setups, and instructions aren’t always clear
- Relies on a thermal wax cylinder rather than an actual solar panel, so "solar powered" is a bit of a misnomer
- A few reviewers reported piston failure, so quality can be inconsistent between units
5. GoDear Adjustable Vertical Panel Blinds
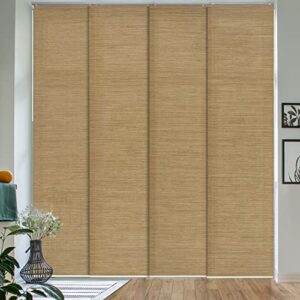
A cold frame near a window doesn’t need blinds, but the window feeding light into your seed-starting area does.
GoDear’s cordless track adjusts from 45.8" to 86" wide, using four 23"x96" woven panels you trim to fit. They soften harsh afternoon sun on seedling trays without blocking growth light entirely. Cordless and pet-safe, they mount in minimal depth, making them a smart add for anyone hardening off transplants indoors before moving them out to the frame.
| Best For | Indoor gardeners and plant parents who want to soften strong sunlight over seed-starting or transplant-hardening areas without fully blocking the light plants need. |
|---|---|
| Material | Natural woven paper-poly blend |
| Dimensions | 45.8-86 in track, 23×96 in panels |
| Installation Type | Wall or ceiling mount track |
| Primary Use | Window and door light filtering |
| Weather Resistance | Not recommended for high moisture |
| Ease Of Use | Cordless wand for smooth sliding |
| Additional Features |
|
- Cordless, pet-safe design keeps curious animals and small hands away from hazards near your plant setup
- Adjustable 45.8"–86" track and trimmable panels let you customize the fit for awkward or oversized windows
- Woven fabric diffuses harsh sun while still letting enough light through for healthy growth
- No valance included, so you’ll need to source or create your own hardware cover
- Panel overlap shrinks to just 2" at the widest track setting, which may let more light through than expected
- Not suited for humid spaces, limiting use in greenhouses or high-moisture growing areas
Frequently Asked Questions (FAQs)
Can a cold frame extend your gardening season?
Yes, a small unheated box can outwork a heated greenhouse. A cold frame traps solar heat, raising soil temps 5-10°F higher than open air, protecting crops from frost while stretching your harvest weeks earlier and later each season.
How can I extend my harvest season?
Combine a cold frame with row covers or succession planting for the biggest payoff. You’ll gain 4 to 8 extra weeks of harvest, letting you plant earlier in spring and pull crops later into fall.
How do I protect my greenhouse from cold weather?
The coldest nights demand the warmest defenses. Seal every gap with weather stripping, add bubble wrap insulation inside glazing, and lay frost blankets over the structure. Lift pots off the floor and use water-filled containers as thermal mass overnight.
Can you extend your gardening season?
Absolutely, with the right setup. A well-built cold frame adds 2 to 8 extra weeks of growing time by trapping solar heat, protecting crops from frost, and keeping soil warm enough for planting well before or after your normal season ends.
How do I Keep my Garden warm in the winter?
Interior air inside a sealed frame can run 10 to 20°F warmer than outside. Face the frame south, seal all gaps tight, and close the lid before sunset to lock in daytime warmth overnight.
How long does a greenhouse last?
Lifespan depends on materials: glass structures run 20 to 30 years, steel frames reach 40 to 60 years, and polycarbonate panels last 10 to 20 years with proper maintenance, sealing, and glazing replacement extending durability well beyond base estimates.
When should you plant in a cold frame?
Soil hits 40°F and cool crops go in. That’s your green light. Six to eight weeks before last frost, start spring seeds; four to six weeks before first frost, sow fall greens like kale and spinach.
What are the disadvantages of a cold frame greenhouse?
Cold frames can’t hold heat during hard freezes, so tender crops still suffer. They also cramp growing space, invite pest and fungal issues from trapped humidity, and demand constant venting, sealing, and glazing repairs to stay effective.
How to use a cold frame in summer?
Prop the lid open daily once temps climb past 75°F, add shade cloth to cut afternoon sun, and water early morning. Keep vents clear for cross airflow so plants don’t cook by noon.
How can I extend my growing season?
Want to squeeze six extra months of harvests out of a calendar that only gives you three? A cold frame does exactly that, adding 2 to 8 weeks on each end through trapped solar heat and frost protection.
Conclusion
A cold frame is a small bet against winter, and it pays off every time you check the vents. Four boards, one sloped lid, and steady daily habits are all it takes to extend growing season with cold frames by weeks on both ends of the calendar.
Master the angle, the airflow, and the timing, and that humble box becomes your garden’s most reliable tool. Build it once. Harvest for years.
- https://extension.illinois.edu/blogs/ilriverhort/2017-01-27-cold-frames-extend-garden-season
- https://extension.umn.edu/gardening-minnesota/extending-growing-season
- https://extension.missouri.edu/publications/g6965
- https://underwoodgardens.com/garden-season-extension-simple-techniques-for-longer-harvests
- https://www.almanac.com/how-build-cold-frame