This site is supported by our readers. We may earn a commission, at no cost to you, if you purchase through links.

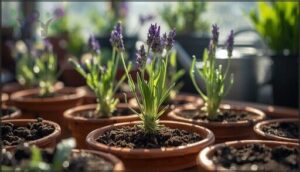
Most gardeners don’t know that the secret to multiplying lavender lies in catching it at just the right moment of growth. When you propagate lavender from softwood cuttings, you’re working with the plant’s youngest, most flexible stems—the ones that bend without snapping and root faster than you’d expect. This method gives you exact genetic copies of your best plants while sidestepping the unpredictability of seeds.
The process hinges on three simple elements: selecting healthy new growth, creating the right moisture balance, and timing your cuts with the seasons. Once you understand how softwood differs from hardwood cuttings, you’ll discover why spring and early summer offer your best window for success.
Table Of Contents
Key Takeaways
- Softwood cuttings from young, flexible lavender stems root faster and produce exact genetic copies of the parent plant.
- The best time to take softwood cuttings is late spring through early summer, before buds form, when rooting hormones peak.
- Healthy parent stems, clean cutting tools, and proper moisture management are essential for successful propagation and disease prevention.
- Using a well-draining potting mix, rooting hormone, and maintaining high humidity gives cuttings the best chance to develop strong roots.
What Are Softwood Lavender Cuttings?
Softwood lavender cuttings are taken from the newest, most flexible growth on your plant. Understanding how these differ from hardwood cuttings helps you choose the best method for your garden.
Let’s look at what sets softwood cuttings apart and why they’re a smart choice.
Softwood Vs. Hardwood Cuttings
When you compare cutting types, softwood cuttings come from young, flexible stems, while hardwood cuttings use mature, woody growth. Cutting maturity affects rooting speed—softwood cutting propagation roots in two to four weeks, hardwood cuttings take longer.
Seasonal impact matters too: softwood cuttings thrive in spring and early summer. It’s best to take them before the buds begin to form.
Moisture needs differ, with softwood cuttings requiring careful management for propagation success.
Benefits of Softwood Cuttings
When you want faster rooting and uniform plants, softwood cuttings are the way to go. They root quicker than hardwood options and guarantee genetic consistency with every new plant. Expect increased yield, less watering, and even stronger disease resistance.
Fall is considered the best time due to the plant’s focus on root development during dormancy. Softwood cuttings make lavender propagation reliable, resource-efficient, and ideal for anyone looking to master plant propagation from sturdy, healthy new growth.
Choosing Suitable Lavender Varieties
Picking the right lavender makes all the difference when propagating from softwood cuttings. Cultivar selection and regional adaptability play major roles in your success. For instance, compact types like ‘Munstead’ do well for home growers, while disease resistance and unique fragrance profiles matter most for larger projects. Commercial viability also guides your choice. Think:
- Angustifolia for cold climates
- Hardy disease-resistant hybrids
- Distinct fragrance-focused varieties
- Locally adapted cultivars for strong growth
Best Time to Propagate Lavender
Timing is important for propagating lavender from cuttings. The season you choose affects how quickly your cuttings will root and how well they’ll establish themselves.
Let’s look at the best windows of opportunity and what influences your success rate.
Optimal Seasons for Taking Cuttings
You’ll get the best results with softwood lavender cuttings in late spring through early summer when plants are actively growing. This period aligns with peak rooting hormones and favorable Climate Considerations.
Seasonal Variations matter—autumn planting works for semi-hardwood types, but softwood Cutting Viability drops as dormancy approaches.
Growth Stages shift after flowering in late summer, so spring remains ideal for fast-rooting success across most growing season climates.
Timing for Maximum Rooting Success
During the growing season, you can improve rooting success by targeting late spring through mid-summer when softwood cuttings root fastest—often within two to four weeks. Best Season temperatures between 70–75°F and at least 14 hours of indirect Light Impact daily boost success rates above 80%.
Cutting Age matters: choose semi-mature new growth just before stems harden. Temperature Effects and Rooting Time drop sharply outside this window, especially in late summer.
Factors Affecting Propagation Timing
Seasonal Temperature and Light Exposure directly control how fast your softwood cuttings develop roots. Parent Health determines whether stems contain enough energy reserves to propagate lavender successfully. Humidity Control prevents moisture loss during rooting, while Rooting Hormones accelerate root formation.
When taking lavender cuttings in spring or late summer, these factors work together—optimizing each one greatly increases your success rate.
How to Select and Prepare Cuttings
The success of lavender propagation starts with choosing the right stems from your parent plant. You want healthy growth that’s free from damage and disease.
Let’s walk through how to select quality cuttings and prepare them for rooting.
Identifying Healthy Parent Stems
You want to start with a healthy mother plant that shows vigor and vitality. Strong nutritional balance in the parent plant translates directly to successful rooting and vigorous new growth.
Look for selecting lavender cuttings with flexible stems and silvery-green foliage color. Choose blossom-free stems from softwood cuttings that display a compact growth habit and pest absence. Avoid any choosing lavender stems with yellowing leaves or signs of disease.
Making a Clean Cut Below a Node
Cutting tool sterilization matters before you take cuttings from your lavender. Use sharp pruning shears to make a clean cut at a 45-degree angle just below a node. This angle’s importance lies in moisture absorption and preventing stem rot.
Nodes contain high hormone concentration that triggers root formation. Best cutting length runs 3 to 6 inches for softwood cuttings. Sharp tools reduce infection risk greatly.
Removing Lower Leaves Properly
Strip the lower leaves from the bottom 2 inches of your softwood cuttings to expose the stem’s rooting zone. Leaf Removal Benefits include better Node Rooting at former leaf points and improved Cutting Viability.
Use sanitized fingers or shears for proper Sterilization Techniques. This step prevents Fungal Prevention issues when preparing lavender cuttings.
Your exposed stem should contact the soil directly to propagate lavender successfully.
Preparing Pots and Propagation Medium
Once your cuttings are ready, the next step is setting up the right environment for roots to develop. The soil mix and containers you choose directly affect rooting success and plant health.
Let’s look at what you need to create the ideal conditions for your lavender cuttings.
Choosing The Right Potting Mix
Your potting mix makes or breaks rooting success. A proper rooting medium balances drainage materials and water retention while maintaining sterility. Mix one part multipurpose potting soil with one part perlite, coarse sand, or grit by volume. This combination offers excellent soil drainage and prevents rot. Choose a slightly alkaline soil pH between 6.5 and 7.5. For sustainability, consider peat-free mixes using coir instead. Avoid nitrogen-rich garden soil, which promotes disease and reduces soil moisture control.
- Use 50% drainage materials like perlite or sand for best air circulation
- Select sterile potting mix to prevent soilborne fungi and root disease
- Aim for 25–35% water retention capacity to support healthy root development
Preparing Containers for Rooting
Once you have your potting mix ready, preparing the pot correctly determines rooting success. Start by selecting containers with proper drainage specifications—minimum 5 mm holes prevent waterlogging that kills 50% of cuttings in the first month. Material selection matters: porous terracotta improves aeration and reduces root rot by 60% compared to plastic. Follow sterilization protocols by rinsing containers in running water for 30 minutes, then applying 70% alcohol for 30 seconds. Choose container dimensions of at least 4 inches in diameter to accommodate multiple cuttings spaced 3–4 inches apart. Fill each pot with rooting medium to 1 inch below the rim, following the preparation sequence that ensures the best contact between stem and soil.
| Container Type | Drainage Benefit | Best Use |
|---|---|---|
| Terracotta | Reduces rot by 60% | Outdoor propagation |
| Plastic | Retains moisture longer | Indoor controlled environments |
| Wood | Insulates roots effectively | Cold-climate rooting |
| Glazed ceramic | Requires enhanced drainage | Decorative indoor use |
Moistening and Aerating The Soil
After filling your containers, proper moisture levels and soil aeration set the foundation for rooting success. Lightly moisten the potting soil until it reaches ideal water retention without waterlogging—aim for substrate moisture between 0.20 and 0.40 m³/m³.
Good soil drainage and ventilation prevent root rot while supporting oxygen flow. Mist the surface twice daily at low volumes to maintain consistent moistening frequency without oversaturating the medium.
Rooting Lavender Cuttings Successfully
Once your cuttings are prepared and planted, the real work begins. Getting them to develop strong roots depends on a few key factors that work together.
Let’s walk through the essentials that will give your lavender cuttings the best chance at success.
Using Rooting Hormone or Alternatives
When using rooting hormone powder, dip your cutting’s base about half an inch deep and tap off excess to avoid overdose. Hormone success rates jump from 50% to 80% by stimulating auxin-driven root growth.
Dip cuttings half an inch deep in rooting hormone powder to boost success rates from 50% to 80%
Natural alternatives like willow water or aloe vera gel offer organic rooting solutions with comparable results.
Environmental factors—humidity around 85% and temperatures near 72°F—boost plant hormone effectiveness regardless of your chosen method.
Planting Cuttings at The Correct Depth
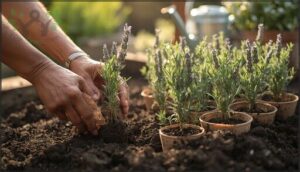
After applying rooting hormone, plant cuttings in soil at 2–3 cm deep for best rooting success rates. This depth balances desiccation risk reduction with oxygen availability around developing roots.
Planting softwood cuttings deeper than 3.5 cm increases fungal pathogen susceptibility and stem rot prevention becomes compromised. Insert the bare stem portion fully below the surface but never exceed one-third of your cutting’s total length for healthy root development.
Creating a Humid Environment
After planting, cover your cuttings with a humidity dome or bell jar to maintain 80–90% relative humidity around the stems. This greenhouse-like setup slows transpiration while roots develop.
Misting systems can deliver moisture every 20–30 minutes in controlled setups. Ensure air circulation by venting covers daily for rot prevention and use humidity monitoring tools to avoid fungal issues above 95%.
Watering and Moisture Management
For the first two weeks, water your lavender cuttings every 2–4 days to keep soil moist but never soggy. Avoiding overwatering prevents root rot—lavender’s biggest enemy. Check moisture by feeling the top inch of soil.
Use bottom watering to encourage deep rooting while maintaining humidity control. Proper drainage solutions and monitoring moisture levels guarantee ongoing care for cuttings without waterlogging that damages transpiration.
Caring for and Transplanting Rooted Cuttings
Once your cuttings develop roots, the real work begins. You’ll need to watch for signs of healthy growth and prepare your young plants for life beyond their starter pots.
Here’s how to guide them from fragile cuttings to thriving lavender plants.
Monitoring Root Development
You can tell when your lavender cuttings develop plant roots by performing the Tug Test around week three. Gently pull the stem—resistance means rooting lavender cuttings have anchored.
Visual Observation through clear containers or Digital Imaging helps track the rooting process without disturbing growth.
Monitoring lavender cuttings this way, combined with proper Rooting Hormones, boosts Survival Rates to around 80% and ensures healthy root growth.
Gradually Acclimating Young Plants
Your rooted lavender cuttings need about one week of gradual outdoor exposure before transplanting. Start with morning light exposure for a few hours and increase daily. Use shade cloth or ventilated covers for wind protection during this adjustment.
Monitor humidity management by reducing watering frequency as plants adjust. Maintain temperature control between 60°F and 75°F while increasing sunlight to strengthen plant health and promote steady root growth.
Transplanting to Pots or Garden Beds
You’re ready to move your cuttings when they resist a gentle tug.
Choose containers at least 5 inches wide with excellent drainage, or prepare garden beds with loosened soil 10 inches deep. Transplanting requires well-draining potting soil with a neutral to slightly alkaline soil pH between 6.5 and 7.5.
Select locations offering full sunlight exposure and establish a careful watering schedule for best lavender plant care.
Ongoing Care for Healthy Growth
Your transplanted lavender needs consistent care to thrive and avoid common pitfalls. Light management means providing 6-8 hours of direct sunlight daily. Establish a watering schedule, checking soil dryness several inches down before watering lavender cuttings. Monitor plant health through:
- Regular pest control inspections for aphids and root rot signs
- Minimal fertilization until established to prevent nutrient stress
- Pruning techniques removing spent blooms to encourage bushy growth
- Well-draining soil maintaining ideal moisture without waterlogging
Frequently Asked Questions (FAQs)
Can I propagate lavender indoors without sunlight?
You can propagate lavender indoors without sunlight by using artificial lighting like full-spectrum LED grow lights. Keep them six to twelve inches above softwood cuttings for sixteen to eighteen hours daily to guarantee successful rooting.
How do I prevent mold on cuttings?
To keep mold off your softwood cuttings, focus on air circulation, sanitation practices, and medium aeration.
Use a humidity dome with ventilation, control temperature, avoid soggy soil, and consider fungicide usage to prevent root rot and protect plant health.
What if my cuttings turn brown or black?
When cuttings turn brown or black, it’s often root rot or fungal infections at play. Moisture levels matter—too wet, and trouble brews.
Viral infections or lack of roots can also signal poor plant health; adjust your plant care promptly.
Can I propagate lavender in winter successfully?
Winter propagation of lavender cuttings is possible indoors, especially in cold climates, if you control humidity and light exposure.
Rooting success improves with warm temperatures, careful watering, and winter protection.
Start extra softwood cuttings to offset seasonal losses.
Do different lavender varieties root at different rates?
Yes, different lavender varieties root at different rates. Hybrid Rooting Success is higher, with lavandin types rooting faster than French lavender.
Variety Rooting Speed, Cutting Maturity Impact, and Propagation Medium Effects all shape Seasonal Rooting Variance in lavender cuttings.
Conclusion
Just as seeds promise surprises, propagating lavender from softwood cuttings offers certainty—each new plant mirrors its parent, preserving fragrance and form. Timing and preparation work together like gears in a well-oiled machine, each step reinforcing the next. Where patience meets precision, roots develop quietly beneath the surface.
This method transforms fleeting spring growth into lasting beauty. By mastering these techniques, you shape your garden’s future, one cutting at a time—a living legacy, rooted in your care.
- https://lovelygreens.com/plants-for-free-propagating-lavender/
- https://celebratednest.com/propagating-lavender/
- https://dergipark.org.tr/en/download/article-file/3934926
- https://meridian.allenpress.com/jeh/article/40/3/109/487299/Stock-Plant-Management-of-Lavandula-angustifolia
- https://www.agriculturejournal.org/volume7number2/clonal-propagation-of-medicinal-and-aromatic-plants-through-stem-cuttings-for-promoting-their-cultivation-and-conservation/


