This site is supported by our readers. We may earn a commission, at no cost to you, if you purchase through links.
Most herb gardeners learn the hard way—cutting too much, too often, and wondering why their once‑thriving basil looks like a bare stick by August. The plant doesn’t die overnight; it slowly exhausts itself trying to recover from cuts that took more than it could give.
Timing, placement, and quantity all play a role in whether your herb bounces back stronger or quietly gives up.
Harvest herbs without killing the plant changes everything, turning a single pot of mint into months of steady cuttings. The steps are straightforward once you understand what the plant actually needs.
Table Of Contents
Key Takeaways
- Harvest herbs in the early morning, right after the dew dries, so you get the strongest flavor and avoid stressing the plant with heat or moisture.
- Always cut just above a leaf node and leave at least two sets of leaves below each cut — this tells the plant to branch out instead of stalling.
- Never take more than one-third of the plant at once, and wait for new shoots to appear before harvesting the same stem again.
- Different herbs need different approaches: pinch basil at the top, cut mint stems back, take parsley from the outside in, and stick to soft green tips on rosemary and thyme.
Harvest Herbs at The Right Time
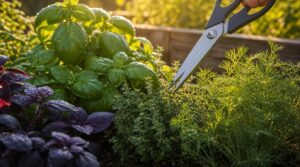
Timing your harvest makes a bigger difference than most people expect. A few simple habits — mostly around when you head outside with your scissors — can mean the difference between flavorful, thriving herbs and stressed plants that struggle to bounce back. Here’s what to pay attention to before you make your first cut.
Following a seasonal herb harvesting calendar takes the guesswork out of knowing exactly when your herbs are ready for that first morning cut.
Early Morning Flavor Peak
The best time to harvest is early morning, right after the dew dries. That’s when essential oils sit closest to the leaf surface, giving you the strongest aroma and flavor.
- Dawn aroma intensity peaks before the sun heats the plant
- Volatile compounds stay stable before UV exposure begins
- Leaves hold more moisture, keeping herbs crisp
- Flavor concentration is highest in the cool morning air
- Morning cuts support sustainable harvesting without stressing the plant
After Dew Dries
Timing matters more than most gardeners realize. Once the dew has dried — usually between sunrise and 10 a.m. — dew-free leaf aroma is noticeably sharper and truer.
Wet leaves dilute the volatile oils that give herbs their flavor. Dry surfaces also mean your clean sharp shears grip stems properly, reducing slipping and keeping your cuts precise.
Before Herbs Flower
Dry leaves are just the start. Before herbs flower is when their flavor truly peaks — leaves are sugar-rich and oil-dense, and stems stay firm enough for clean cuts above a leaf node.
Once flowering starts, that balance shifts fast. Pinch off any buds you spot, leave enough foliage behind, and you’ll keep that pre-bloom flavor working in your favor.
During the flowering stage, you may notice an essential oil boost during flowering, which can alter the herb’s taste.
Avoid Midday Heat
Once you’ve locked in your pre-bloom window, heat becomes the next thing to manage. Midday sun intensifies quickly, and harvesting between 10 a.m. and 4 p.m. speeds up moisture loss — directly hurting both leaf mass and plant vigor. Your best move is simple: harvest in the morning, before the heat climbs.
Here’s how to protect yourself and your herbs:
- Wear heat protection gear — a wide-brim hat, light clothing, and UV sunglasses cut your sun exposure considerably.
- Use shade cloth over beds on hot days to keep ambient temperatures lower around your plants.
- Build a cool harvest schedule by targeting days below 90°F and mornings when soil feels cool to the touch.
- Take hydration breaks every 20–30 minutes and keep a water bottle within reach throughout.
Skip Wet Harvests
Rain doesn’t just rinse your herbs — it leaves them vulnerable. Wet leaves harbor fungi and bacteria that spread quickly once you make a cut.
Always wait until morning after the dew has dried before harvesting.
A simple dew check routine takes seconds: run a finger across the leaves. If moisture clings, wait another hour.
Use Clean, Sharp Cutting Tools
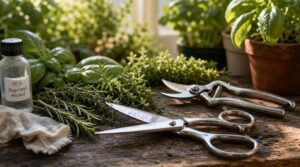
The tool you use matters more than most people think. A dull blade or dirty pair of scissors can stress the plant, invite disease, and slow regrowth. Here’s what to keep in mind when choosing and using your cutting tools.
Scissors or Garden Shears
The right tool makes a real difference. Sharp scissors work well for soft herbs, handling stems up to about ¼ inch thick with clean, precise cuts.
For thicker or woodier stems, garden shears or pruning shears give you more cutting force without crushing the tissue.
Choose tools with ergonomic, non-slip grips to reduce hand fatigue during longer harvesting sessions.
Sterilize Between Plants
Moving from one plant to the next without cleaning your tools is how disease spreads fast.
Wipe blades with 70% isopropyl alcohol between plants, then rinse with clean water to prevent corrosion. Let them air dry before your next cut.
For a deeper clean, soak tools in a 1:9 bleach-to-water solution for 10 minutes.
Make Clean Angled Cuts
The angle of your cut matters more than most gardeners realize. A clean angled cut — made at roughly 45 degrees — helps water run off the exposed stem rather than pooling and inviting rot.
- Position the blade at a 45-degree angle above the leaf node
- Use precision cut technique with steady, even pressure
- Align your stem angle position away from the main stem
- Apply blade angle control — no twisting mid-cut
- Finish with a post-cut inspection for smooth, clean edges
Avoid Crushing Stems
A dull or tight-grip tool can crush herb stems before you even finish the cut.
Always use sharp bypass scissors and apply steady, even pressure — no squeezing or sawing. Support the stem near its base with your free hand using the Stem Support Technique, then follow through with one Smooth Cutting Motion.
Immediately place cut stems in water to prevent wilting.
Remove Diseased Growth
Diseased growth is a silent threat — it spreads fast if you ignore it.
Spot disease symptoms early: look for soft tissue, mold, unusual discoloration, or cankers. Once identified, isolate diseased sections immediately and remove unhealthy growth by cutting at the base of the infected area where healthy tissue begins.
- Sterilize tools after every diseased cut
- Dispose of infected material in the trash, never the compost
- Apply wound sealant if recommended for your herb species
- Monitor post-pruning health closely for new symptoms
Good garden hygiene practices keep problems from cycling back.
Cut Herbs Above Leaf Nodes
Where you make each cut matters more than most people realize. Snipping in the right spot tells the plant to branch out instead of giving up. Here’s what to focus on when you’re cutting above leaf nodes.
Find Healthy Leaf Nodes
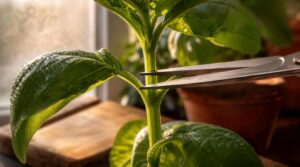
Every cut you make should land just above a leaf node — the small junction where a leaf meets the stem. Run your fingers along the stem and feel for a slight bump or ridge; that’s your target.
A healthy leaf node shows firm, green tissue with no dark spots or mushy areas. Avoid any node that looks stressed or damaged.
Leave Two Leaf Sets
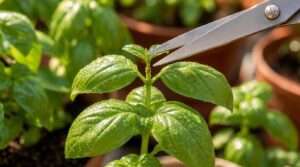
Once you’ve found your leaf node, the rule is simple: leave two leaf sets below every cut. That means when you cut above a leaf node, at least two sets of leaves must remain on the stem beneath it.
Here’s why that matters:
- Two leaf sets keep photosynthesis running after you harvest
- Retained leaves supply carbohydrates that speed up stem healing
- Enough foliage means the plant won’t stall between harvests
- Leaf set benefits include protection from sunscald and moisture loss
- Leaving adequate growth nourishes the leaf node growth point for faster regrowth
Think of those two leaf sets as the plant’s engine — remove them, and regrowth stalls completely.
Encourage Bushier Regrowth
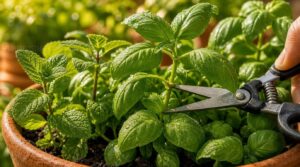
Cutting above a leaf node does more than just tidy up a stem — it triggers a growth hormone boost that signals the plant to branch outward. Instead of growing one long shoot, your herb pushes out two or more lateral stems.
Cutting above a leaf node triggers a growth hormone boost that turns one shoot into many
That’s pruning for bushier growth in action, and it works every time you follow the technique correctly.
Spread Cuts Evenly
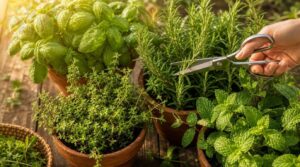
Think of your herb as a living system — if you keep pulling from the same spot, that branch weakens while the rest of the plant sits untouched.
Instead, spread cuts evenly across multiple stems. Rotate where you harvest each time, taking no more than one-third of the total leaf mass, so every part of the plant shares the workload equally.
Avoid Bare Stems
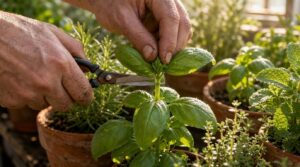
Bare stems are a red flag. When you cut above a leaf node and leave at least two sets of leaves below, you protect the plant’s ability to photosynthesize and keep moving water through its vascular system.
Pinch off the top leaves or prune back a portion, but never strip a stem bare — exposed stems stall regrowth and invite stress.
Harvest The Right Amount
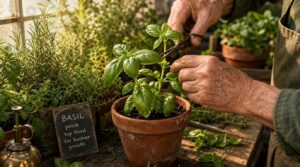
Knowing how much to take is just as important as knowing when and how to cut. Too much at once can stress the plant and slow down regrowth considerably. Here’s what you need to know to get the balance right.
Follow The One-third Rule
One simple rule protects your herbs from serious setbacks: never remove more than one-third of the plant’s total leaf mass in a single session. This keeps enough foliage in place for continued photosynthesis and root support.
Here’s why the One-Third Limit matters:
- It preserves growth retention, so the plant doesn’t lose the energy it needs to bounce back.
- It strengthens plant health by preventing stress that leads to yellowing or weak stems.
- It improves yield management, giving you a steady supply rather than one large cut that stalls regrowth.
When you prune back a portion of the plant this way, you’re actually encouraging stronger plant regrowth over time.
Take Small Regular Harvests
Small, frequent cuts are your best strategy for leaf yield optimization. Rather than waiting and harvesting a lot at once, regular harvesting every one to two weeks keeps the plant in an active growing phase.
Each small cut signals the plant to push out new stems, making regrowth stimulation a natural side effect of your routine.
Wait for New Shoots
After each cut, don’t rush back in too soon. Wait for new shoots to appear at the leaf node before harvesting that stem again.
These small, bright-tipped sprouts are your clearest growth restart signal — they tell you the plant has recovered and is ready. Harvesting before they emerge stresses the plant and slows regrowth noticeably.
Avoid Overharvesting Young Plants
Young plants need extra grace. Their growth reserve minimum is much smaller than a mature herb’s, so even a modest over-cut can trigger a regrowth delay period that sets your whole season back.
Stick to taking only a third — or less — until the plant fills out and shows strong, consistent new growth before each session.
Keep Enough Foliage
Think of foliage like a solar panel array — remove too many panels, and the whole system loses power. Always leave enough foliage so your herb can keep photosynthesizing and rebuilding energy reserves.
A healthy leaf retention ratio means keeping at least two‑thirds of the plant’s total leaf mass intact after every cut, giving it the fuel it needs to bounce back strong.
Harvest Different Herbs Correctly
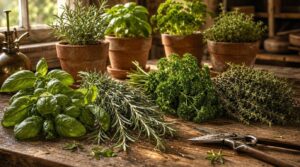
Not every herb plays by the same rules, and that’s where a lot of people go wrong. What works for basil won’t work for rosemary, and ignoring those differences can set your plants back. Here’s how to handle each one correctly.
Basil: Pinch Top Growth
Basil rewards you most when you pinch just above a leaf node — specifically above the second set of leaves from the top.
That single cut signals the plant to push out two or more lateral shoots below it, doubling your harvest surface over time.
Aim for a pinch every one to two weeks to keep growth compact and delay flowering, which protects both flavor and aroma intensity.
Mint: Cut Stems Back
Mint grows fast and gets leggy quickly if you don’t keep up with it.
Cut stems back by one-third, just above a healthy leaf node, using sharp scissors held at a slight angle for cleaner healing. Aim to prune every two to three weeks during peak season. That rhythm keeps growth compact and pushes new side shoots consistently.
Parsley: Outer Stems First
Parsley works a little differently than mint. Instead of cutting stems back, focus on outer stem selection — those are the oldest, fully grown stems sitting at the base, usually 6 to 8 inches long. Harvest those first and leave the inner crown completely untouched.
Here’s why that matters:
- Outer stems reach full size first and are ready before inner shoots
- Removing them triggers growth stimulation from the central crown
- Inner shoot preservation keeps photosynthesis running at full capacity
- This approach promotes steady plant regeneration after cutting without stress
Pull outer stems near the soil line, cutting cleanly rather than yanking. That simple cutting technique protects the central meristem — the engine behind new growth — and maximizes your long-term yield.
Rosemary: Green Tips Only
Rosemary is different from parsley — you’re not reaching for the base. Instead, focus on the soft green tips at the end of each branch. These young shoots hold the highest oil retention and deliver the sharpest aroma. Skip anything woody or hardened at the base entirely.
Cut just above a leaf node, removing no more than one-third of the plant’s total leaf mass per session. This triggers regrowth stimulation along the sides, keeping your plant full and productive all season.
Thyme: Avoid Woody Stems
Thyme is one of those woody perennial herbs that punishes careless cutting. Before you harvest herbs, run your fingers along each stem — woody stem detection is simple: brown, stiff, and fibrous means hands off. Your target is always the soft growth harvesting zone, the flexible green tips near the top.
Here’s how to approach cutting them correctly:
- Snip stems one-third above the nearest leaf node
- Target only tender leaf selection — young, pliable growth
- Skip any stems that snap instead of bend
- Repeat every one to two weeks following a pruning frequency guideline
This steady rhythm of pruning back keeps new shoots coming and prevents stems from thickening into wood over time.
Help Herbs Recover After Cutting
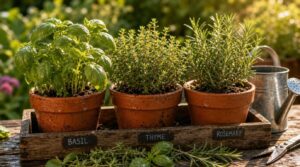
Cutting your herbs is only half the job — what you do right after matters just as much. A little care in the hours and days following a harvest helps your plants bounce back stronger and ready to grow again. Here’s what to focus on after each cut.
Water After Harvesting
Right after you cut, your herbs are thirsty. Give them a deep, thorough watering to reduce stress and support fast regrowth.
If any leaves look wilted, place them briefly in cool water between 10–20°C for 5 to 15 minutes — no longer, or you’ll lose flavor. Always use clean, pathogen-free water to prevent contamination at the root level.
Feed Lightly When Needed
Once your herbs have had a good drink, a light feed goes a long way.
Mix a diluted fertilizer solution at quarter strength — nothing stronger. Apply it every one to two weeks during active growth to keep nutrient levels steady without stressing the roots.
A balanced fertilizer with equal NPK numbers works best here.
Deadhead Flower Buds
Leaving flower buds to develop is one of the fastest ways to weaken your herbs. Spent bud removal redirects the plant’s energy from seed formation back to producing the leaves you actually want. Deadhead regularly — especially early flower buds — to prolong bloom season and keep flavors strong.
Here’s how to do it right:
- Pinch or snip spent and fading buds just above a leaf node.
- Use a clean, angled cut — your bud cut angle matters for faster healing.
- Never remove unopened buds; leave those for future growth.
- Target clusters of spent blooms rather than hunting every single bud.
- Discard removed buds rather than leaving them on the soil.
The benefits of pruning back early flower buds go beyond looks — it’s one of the simplest forms of pruning for herb plants that pays off all season.
Improve Airflow Naturally
Good airflow is one of the easiest things to overlook after a harvest — but it matters more than most people realize.
Vertical air flow starts with placement. Set pots on shelves or stands 15–30 cm above floor level to keep stagnant air from settling around the base.
Follow plant spacing guidelines by keeping at least 12–18 cm between herbs. This gives each plant room to breathe and lowers disease risk. Position larger herbs 45 cm from walls for even circulation.
A pebble tray underneath the pot encourages gentle evaporative cooling around the foliage. It’s a small step with a real payoff.
Rotate pots weekly so every side gets fresh air and equal light. Combined with regular harvesting and pruning back dense growth, this keeps air circulation strong and your herb’s leaf mass healthy all season.
| Airflow Method | What to Do | Why It Helps |
|---|---|---|
| Vertical placement | Raise pots 15–30 cm | Prevents air stagnation at base |
| Pot spacing | Keep 12–18 cm gaps | Reduces moisture and disease risk |
| Wall distance | Stay 45 cm from walls | Ensures even airflow around plant |
| Weekly rotation | Turn pots once a week | Balances light and fresh air exposure |
Watch for Pests
Pests rarely announce themselves — they creep in quietly while you’re focused on everything else.
After each harvest, flip leaves and check stems for aphids or spider mites. Look for ant trails near the base, since ants often farm aphids on basil. Inspect window screens for tiny gaps that let whiteflies in. Keep compost away from pots to discourage gnats from targeting your herbs.
Top 3 Helpful Herb Books
If you want to go deeper into herb growing and harvesting, a good book can make a real difference. These three are worth keeping on your shelf, whether you’re just starting out or looking to sharpen your skills.
Each one covers something slightly different, so there’s something useful here for every kind of herb grower.
1. Rosemary Gladstar Medicinal Herbs Guide
If you’re just starting out with medicinal herbs, Rosemary Gladstar’s guide is worth keeping on your shelf. It covers 33 common healing plants — each with growing, harvesting, and preparation tips.
You’ll find step-by-step instructions for making teas, tinctures, salves, and syrups using basic kitchen tools. At 224 pages and $11.49, it’s affordable and beginner-friendly.
It won’t cover every herb out there, but it gives you a solid, practical foundation to start growing and using your own remedies with confidence.
| Best For | Beginners who want a simple, affordable intro to growing and using medicinal herbs at home. |
|---|---|
| Price | $11.49 |
| Page Count | 224 pages |
| Herbs Covered | 33 herbs |
| Skill Level | Beginner-friendly |
| Preparations Included | Tinctures, oils, salves, teas |
| Harvesting Guidance | Yes |
| Additional Features |
|
- Covers 33 herbs with clear instructions for teas, tinctures, salves, and more — all using basic kitchen tools.
- Full-color photos and indexed entries make it easy to find what you need fast.
- At $11.49, it’s a low-risk way to start building real herbal knowledge.
- Only 33 herbs, so it’s not the resource you’d reach for once you’re past the basics.
- Dosage and safety info is pretty light — you’ll want a second source for anything clinical.
- Some plants may be hard to find or grow depending on where you live.
2. Herbal Apothecary Medicinal Herb Handbook
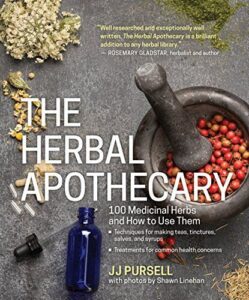
If Gladstar’s guide sparked your interest, the Herbal Apothecary Medicinal Herb Handbook takes things a step further. It profiles 100 medicinal herbs with full-color photos, identification tips, and cultivation advice — all in one place.
At $15.05 and 292 pages, it covers teas, tinctures, salves, and compresses with clear preparation steps. You’ll also find sections adapted to men, women, and children for common issues like insomnia and anxiety.
It’s a solid enhanced reference once you’re ready to expand your herb knowledge.
| Best For | Anyone ready to move beyond the basics and build a solid home herb reference — especially beginners who want clear photos, prep guides, and practical growing tips all in one affordable book. |
|---|---|
| Price | $15.05 |
| Page Count | 292 pages |
| Herbs Covered | 100 herbs |
| Skill Level | Beginner-friendly |
| Preparations Included | Teas, tinctures, salves, compresses |
| Harvesting Guidance | Yes |
| Additional Features |
|
- Covers 100 herbs with full-color photos, making identification and learning way less intimidating
- Step-by-step prep guides for teas, tinctures, and salves mean you can actually start making things right away
- At $15.05, it’s a steal compared to spending hundreds on a weekend herbal workshop
- The index can be frustrating — you might search "nausea" and come up empty because it’s filed under something broader
- Published in 2015, so some of the science or safety guidance may not reflect current research
- A few known errors (like the Red Root entry) slipped through, so it’s worth double-checking anything critical
3. Best Little Culinary Herb Book

If you’re more focused on cooking than remedies, Best Little Culinary Herb Book is the one to keep on your kitchen shelf. At just $8.24 for 140 pages, it covers harvesting, storage, and herb-specific recipes tested in a real home kitchen — nothing overcomplicated.
It’s built for beginners, so the guidance stays clear and practical. You’ll find tips on basil, mint, thyme, and more, plus advice on saving seeds for next season.
| Best For | Home cooks and beginner gardeners who want to grow and use fresh culinary herbs without a steep learning curve. |
|---|---|
| Price | $8.24 |
| Page Count | 140 pages |
| Herbs Covered | Select culinary herbs |
| Skill Level | Beginner-friendly |
| Preparations Included | Culinary recipes |
| Harvesting Guidance | Yes |
| Additional Features |
|
- Recipes were actually tested in a home kitchen, so they’re practical and realistic to follow.
- At $8.24 for 140 pages, it’s an easy, low-risk buy for anyone just getting started.
- Covers seed saving, so you’re set up for long-term gardening, not just a one-season experiment.
- Only covers a limited selection of herbs, so you may outgrow it quickly.
- Not much depth on troubleshooting or advanced care techniques.
- Too basic for experienced gardeners looking for more than the fundamentals.
Frequently Asked Questions (FAQs)
Do all herbs grow back after cutting?
Like a plant bouncing back after a good trim, most herbs regrow reliably after cutting. Perennials like mint, rosemary, and thyme reshoot from existing crowns, while annuals like basil regrow with regular pinching.
Can container herbs be harvested the same way?
Yes — the same rules apply. Harvest in the morning, use sharp scissors, follow the one-third rule, and cut above leaf nodes. Container herbs just dry out faster, so water them right after.
How do you harvest herbs growing indoors?
Indoor herbs follow the same core rules as outdoor ones. Harvest in the morning, use sharp scissors, cut above a leaf node, and never take more than a third at once.
Does harvesting frequency change in winter months?
Yes, winter changes everything. Most herbs slow down or nearly stop growing in cold months, so harvest less often — every 3–4 weeks instead of weekly — to give plants time to recover.
Should you harvest herbs differently during a drought?
Yes — during a drought, your herbs are already under stress, so harvest less and less often. Stick to early morning, take no more than one-third, and skip harvesting altogether if plants look wilted.
Can you harvest herbs right before the first frost?
Absolutely — harvest herbs right before the first frost hits. Tender herbs like basil and cilantro lose flavor fast after frost exposure, so pick them early. Hardy herbs like thyme and rosemary can wait a little longer.
Conclusion
The right cut, at the right time, in the right place—that’s what separates a struggling herb from one that keeps giving all season long.
Once you know how to harvest herbs without killing the plant, every snip becomes intentional.
Your basil stays full. Your mint doesn’t collapse. Your rosemary holds its shape.
Treat each harvest as a conversation with the plant, not a demand, and it’ll keep answering all summer.
- https://heybigsplendor.com/how-to-harvest-herbs-without-killing-the-plant
- https://melissaknorris.com/how-to-prune-herbs-and-perennials
- https://content.ces.ncsu.edu/harvesting-and-preserving-herbs-for-the-home-gardener
- https://www.allrecipes.com/article/how-to-trim-herbs
- https://gardenbetty.com/prune-perennial-herbs