This site is supported by our readers. We may earn a commission, at no cost to you, if you purchase through links.
I still remember my first batch of jam turning into a science experiment gone wrong—jars cracked, lids didn’t seal, and I had no idea why. Turns out, canning failures rarely come from bad luck. They come from missing gear.
Every jar, lid, and tool in this hobby has a real purpose, not just tradition. Skip the canning rack or use table salt instead of pickling salt, and you’re rolling dice with food safety.
So what supplies do you need for canning to get it right the first time? Grab a cup of coffee, and let’s build your toolkit piece by piece, starting with the jars themselves.
Table Of Contents
Key Takeaways
- Match your canning method to your food’s acidity: water bath canning works only for high-acid foods (pH 4.6 or below), while low-acid foods like meats and vegetables require a pressure canner reaching 240-250°F to destroy botulism spores.
- Use purpose-made ingredients rather than substitutes—canning salt, 5% acetic acid vinegar, and bottled lemon juice all have standardized properties that ensure safe, consistent results.
- Inspect and replace key components regularly: check jars for chips or cracks before each use, always use new flat lids for a proper seal, and get pressure canner gauges calibrated yearly.
- Core tools like a jar lifter, canning funnel, bubble remover, and headspace measuring tool aren’t optional extras—they directly prevent burns, contamination, and seal failures during the canning process.
Essential Canning Jars and Lids
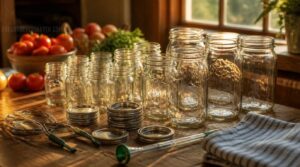
Every canning project starts in the same place: your jars and lids. Get these basics right, and you’re already halfway to a safe, solid seal. Let’s walk through exactly what you need to have on hand before you start.
Mason Jar Size Options
Ever wonder why your pantry shelf holds four different jar shapes? Size matters here.
Choosing the right jar for each recipe gets easier once you browse this guide to garden canning supplies for small-batch preserving, which breaks down sizes and lids by use.
Mason jars run from tiny 4 oz jars for gifts to 1 gallon jars for bulk goods. For everyday canning, 8 oz half pints, 16 oz pints, and 32 oz quarts cover most recipes. Smaller jars suit jams and samples; quarts handle big batches. Check labels for capacity and mouth type before you buy. It is essential to select a safe canning jar designed to withstand high heat and pressure.
Wide-mouth Versus Regular-mouth
Mouth size comes down to what you’re filling. Wide-mouth jars open around 3.4 inches, perfect for scooping whole fruits, chunky salsas, or pickles without slicing everything first. They’re also easier to clean.
Regular-mouth jars, closer to 2.5 inches, give you better control for pouring jams or syrups. Both use the same lids and rings, so pick based on your recipe, not convenience.
New Flat Lids
Grab a fresh box of flat lids every single canning season — this isn’t the place to cut corners. The sealing compound only works once; reusing it risks a broken vacuum seal.
After processing, lids should dip inward, your sign of success. Store unused lids somewhere cool and dry, and never let moisture near that sealing edge.
Reusable Screw Bands
Lids are single-use, but the metal screw bands holding them down are a different story: rinse, dry, and reuse them season after season.
Metal bands can rust over time, so check for corrosion before each batch.
If you’d rather skip that hassle, food-safe plastic bands resist rust entirely and are often dishwasher safe for easy cleanup.
Inspecting Jars for Chips
Why risk a ruined seal over a jar you already own? Run your finger along the rim to check for chips, then hold it to the light for micro cracks. Check threads for nicks, and set the jar down firmly to test for bottom stability.
Any flaw means retire it—canning safety starts before you ever fill the jar.
Water Bath Canning Supplies
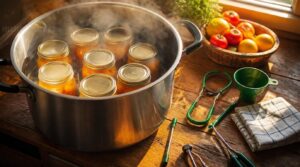
Once your jars and lids are sorted, it’s time to think about how you’ll actually process them. Water bath canning is the go-to method for high-acid foods, and it comes with its own short list of must-haves. Let’s walk through exactly what you need to get boiling.
Large Water Bath Canner
Think of your water bath canner as a large stockpot built for one job: fully submerging jars. Look for a flat bottom design, since it works on gas, electric, and even induction stoves. Stainless steel is best for heat processing.
Choose a size that fits your kitchen — most hold seven quarts or nine pints. Boiling depth matters: water should cover jars by several inches for safe processing.
Canning Rack
A rack sits at the bottom of your canner for one reason: preventing jar scorching. Without it, jars touch direct heat and can crack.
Look for stainless steel — rust-resistant and sturdy for repeated use.
- Wire grid designs for even heat circulation
- Stacking racks for larger batches
- Contoured edges for safe jar removal
Wash and dry thoroughly after each canning session to prevent corrosion.
High-acid Foods Only
Water bath canners only work safely for high-acid foods, meaning anything with a pH of 4.6 or lower.
That acidity comes naturally from citrus, or from fermentation’s lactic acid, or from vinegar’s acetic acid. Below that threshold, boiling water alone stops botulism spores from growing.
Low-acid foods need a pressure canner instead — no exceptions, no shortcuts.
Fruits, Jams, and Pickles
Jams, jellies, and pickles are where water bath canning really shines.
For jams, pick fruit that’s ripe but not overripe — this gives clean pectin setting and bright flavor. Sugar usually equals fruit weight for proper gel. Jellies use strained juice for clarity; jams keep fruit pieces.
For pickles, a 4 to 6 percent vinegar solution paired with mustard seed or dill delivers safe, flavorful results while preserving color.
Proper Boiling Coverage
Boiling coverage isn’t optional — it’s the difference between safely sealed jars and a wasted batch.
Keep 1 to 2 inches of water above your jars at all times. Add hot water to prevent temperature shock, and check levels every 10-15 minutes.
If bubbles threaten overflow, reduce heat and skim foam. Your water bath canner should sustain a steady boil — this is essential canning supplies knowledge every beginner needs.
Pressure Canning Supplies
Once you move past high-acid foods, water bath canning won’t cut it anymore. Low-acid foods like meat, vegetables, and soups need higher heat, and that means a whole different setup. Here’s what you’ll want on hand before you start.
Pressure Canner Requirements
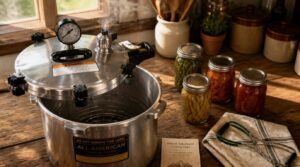
Ready to graduate from a water bath to a pressure canner? Your canner must hold at least 4 quart jars upright, with a secure locking lid and rack. Look for a weighted or dial gauge, calibrated yearly.
Always vent 10 minutes before pressurizing, and adjust pressure for altitude above 1,000 feet—it’s non-negotiable for food safety.
Low-acid Food Safety
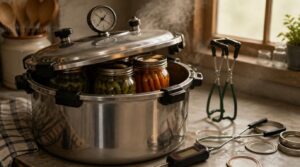
Here’s why that altitude math actually matters: low-acid foods have a finished pH above 4.6, giving botulinum spores room to survive. Only a pressure canner reaching 240-250°F destroys them reliably.
That’s the real line between acidic and low-acid foods—water activity and pH monitoring decide which path keeps your jars safe from botulism risk.
Vegetables, Meats, and Soups
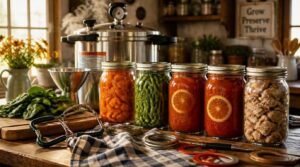
Once your pressure canner’s ready, it’s time to load it right.
Preserving leafy greens like spinach needs careful headspace and venting to dodge seal failures.
Carrots and green beans? Blanch first—2 to 5 minutes. If you’re growing your own carrots for canning, using cloches to extend your carrot-growing season can help you get a longer, more reliable harvest before blanching and canning.
For meats, trim fat and cook pork thoroughly.
Tomato soups need acidifying with lemon juice to stay safe.
Dial Gauge Testing
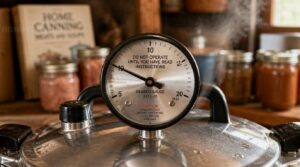
Once your meats and soups are packed, your gauge deserves attention too. A dial gauge measures spindle movement through gears, showing pressure in fine increments.
Get it checked yearly for calibration accuracy at your extension office. Proper zeroing procedures and avoiding parallax error keep readings honest—essential for canning safety protocols.
- Check calibration annually
- Zero the dial correctly
- Read straight-on, avoiding parallax
Safety Valves and Fuses
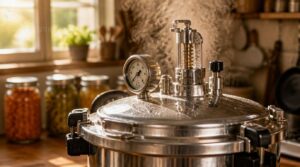
Why trust a lid alone when your canner has built-in backup? Safety valves rely on thermal melting points to trigger emergency flow isolation, no electricity needed—pure passive safety.
| Component | Function |
|---|---|
| Fusible link | Melts at set temp |
| Spring loaded actuator | Snaps shut fast |
| Secondary seal | Backs up primary seal |
Inspect yearly for valve corrosion. It’s cheap insurance for safe pressure canning and reliable food preservation.
Handy Canning Tools
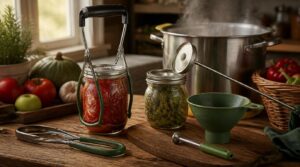
Beyond your jars and canner, a few small tools make the whole process go smoother. They save your fingers from hot jars and your jars from air bubbles ruining the seal. Here are five handy helpers worth keeping in your kitchen.
Jar Lifter
Ever tried grabbing a boiling-hot jar with regular tongs? Don’t. A jar lifter is non-negotiable for safe home canning equipment.
Look for cushioned, ergonomic grips and heat resistant, coated jaws that grip glass without slipping. The spring mechanism should open smoothly—check it often to prevent jar breakage. On every canning supplies checklist, this tool earns top billing for good reason.
Canning Funnel
Ever tried pouring hot jam into a jar without a funnel? Sticky mess, guaranteed. A canning funnel keeps rims clean, which matters for a good seal.
Choose stainless steel for durability, or plastic for lightweight ease. Pick regular or wide neck widths based on your jar size. Rinse and dry thoroughly after each use, and store with the lid off to prevent mold.
Bubble Remover
Trapped air pockets can wreck a jar’s headspace and mess with your seal. That’s why a bubble remover—often just a wooden chopstick or plastic tool—matters for home canning.
Slide it along the jar’s inside edge to release bubbles. Unlike ultrasonic or vacuum methods used in resin crafts, canning relies on simple manual bubble popping—quick, safe, and perfectly effective for beginners.
Magnetic Lid Lifter
Fishing lids from simmering water with your fingers is a burn waiting to happen. A magnetic lid lifter uses a neodymium magnet to grab lids cleanly, no scalding required.
I recommend one with an ergonomic handle for comfortable, steady lifting. Good magnet strength prevents lid drops, and telescopic models keep your hands safely away from steam entirely.
Headspace Measuring Tool
That gap between your food and the lid isn’t just empty space—it’s a safety zone. Too little headspace causes overflow and messy seals; too much invites spoilage.
Options include:
- Manual gauges with sliding indicators
- Rim-mounted rulers
- Digital sensors for millimeter precision
I recommend a simple headspace measurer for beginners—accurate, foolproof, and essential among your canning supplies for beginners.
Ingredients for Safe Preserving
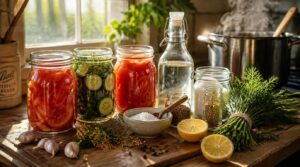
Good jars and gear only get you halfway there. What goes inside the jar matters just as much for safety and taste. Here are the key ingredients you’ll want on hand before you start.
Canning or Pickling Salt
Salt matters more than most beginners expect.
Canning or pickling salt is 99–100% pure sodium chloride, with no iodine or anti-caking additives that cloud brines. That purity keeps your brine clear and your salinity measurements accurate. Fine grain size means faster dissolution too.
No pickling salt on hand? Use additive-free fine sea salt, but avoid coarse or flaky kosher varieties—they measure unevenly.
Five Percent Vinegar
Once your salt is sorted, vinegar is the next non-negotiable on your canning supplies list.
Grab white distilled vinegar at 5% acetic acid—the standard for safe pickling brine acidification. Check the label every time; acidity levels vary by brand. Store bottles in a cool, dark spot to protect potency.
Want more flavor? Apple cider vinegar swaps in nicely, though its color and taste run stronger.
Pectin for Jams
Vinegar works for pickles, but jams and jellies need pectin to set properly. Pectin comes in high methoxyl (HM) and low methoxyl (LM) varieties—HM needs sugar and acid for gelling; LM uses calcium, great for low-sugar recipes. Whether you’re making a strawberry jelly recipe or dandelion jelly, pre-dissolve powdered pectin in sugar first to avoid clumps and get a firm, spreadable texture every time.
Bottled Lemon Juice
Here’s a tip that trips up plenty of beginners: not all lemon juice is created equal for canning. Bottled lemon juice works better than fresh because manufacturers standardize its acidity, guaranteeing that consistent acetic acid level every recipe depends on for safe acidification. Fresh lemons vary in tartness.
Once opened, refrigerate your bottle and use it within a few weeks—check for that bright yellow color and skip anything smelling off.
Ascorbic Acid
Vitamin C does double duty in your canning kitchen: it’s your body’s antioxidant powerhouse, supporting collagen synthesis, iron absorption, and warding off scurvy, plus it preserves color and boosts acidity in low-acid foods like pears.
It’s heat-sensitive though—light and metal degrade it fast. Skip acidification shortcuts; ascorbic acid supplements acidity but never replaces proper recipes for high-acid versus low-acid foods.
Top 5 Beginner Canning Supplies
Standing in the store aisle, it’s easy to feel overwhelmed by all the options. You don’t need everything on the shelf—just a handful of trusted picks that work every time. Here are the five products I recommend to any beginner starting out.
1. Ball wide mouth glass mason jars
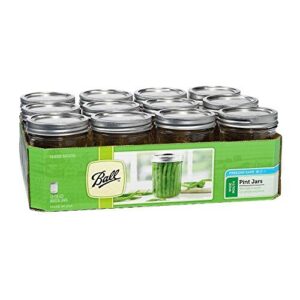
Ball’s wide mouth jars are where I tell every beginner to start. They come in 16 and 32 ounce sizes, made from tempered soda lime glass that experiences thermal shock during processing without cracking.
The wide mouth design makes filling salsa or chunky jam so much easier — no funnel fights, no wasted food down the sides. They’re BPA-free, resist staining from beets and turmeric, and work great for fridge, freezer, or pantry storage too.
| Best For | Home cooks and beginner canners who want a reliable, made-in-the-USA jar for preserving, meal prepping, or gifting. |
|---|---|
| Material | Glass |
| Canning Use | Food storage |
| Jar Compatibility | Regular/wide mouth |
| Weight | 5.6 lbs |
| Reusability | Reusable jars |
| Ease Of Use | Dishwasher safe |
| Additional Features |
|
- BPA-free, food-grade glass that’s dishwasher safe for easy cleanup
- Wide mouth opening makes filling with salsa, jam, or layered meal prep simple and mess-free
- Versatile enough for canning, fridge/freezer storage, or decorative and DIY projects
- Glass construction is fragile and can break if dropped or mishandled
- Requires separate lids and bands to achieve an airtight seal
- Listed dimensions are placeholder values, so exact jar size isn’t clearly specified
2. Mason Regular Mouth Canning Lids
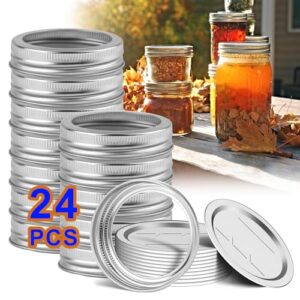
Twenty-four lids fit standard 2.375 inch regular mouth jars, made from tin plated steel with a sealed inner gasket for a proper vacuum.
That heat-activated sealing compound is what creates your seal, and remember: lids are single-use only. Once you’ve processed a batch, that lid’s done its job for good.
Check for dents or bent edges before filling. A damaged lid won’t seal, no matter how careful you are with everything else.
| Best For | Home canners and food preservers looking for a reliable, airtight seal on regular mouth Mason jars for projects like jams, pickles, and other shelf-stable goods. |
|---|---|
| Material | Stainless Steel |
| Canning Use | Sealing jars |
| Jar Compatibility | Regular mouth |
| Weight | 0.2 kg |
| Reusability | Rings reusable |
| Ease Of Use | Airtight sealing |
| Additional Features |
|
- Food-grade silicone ring and rust-proof stainless steel construction ensure an airtight, contamination-free seal
- Set of 24 (12 lids and rings) offers great value for frequent canning or food storage needs
- Versatile for preserving jams, spices, cookies, teas, and candies, plus handy for date labeling
- Lids are single-use for canning, so they need to be replaced after each batch
- May fit Kerr jars more snugly than Ball jars, causing inconsistent compatibility
- Freezer safety isn’t guaranteed, and cold storage could risk warping
3. Granite Ware Enamelware Water Bath Canning Kit
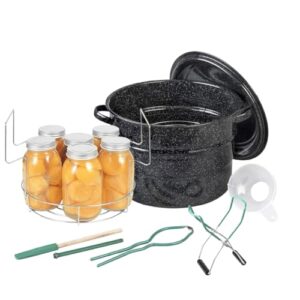
Want everything in one box? This 21.5-quart enamelware kit packs a canner, rack, and five tools together, so you’re not hunting down pieces separately.
It holds seven quarts, nine pints, or twelve half-pint jars, with a rust-proof chromed rack keeping everything elevated. You get a bubble remover, ruler, jar lifter, magnetic lid lifter, and funnel included.
Just wash it by hand and dry it fast — enamel rusts if you let it sit wet, and it won’t work on glass or induction stovetops.
| Best For | home cooks and beginner canners who want a complete, all-in-one water bath canning setup without buying tools separately. |
|---|---|
| Material | Enameled Steel |
| Canning Use | Water bath canning |
| Jar Compatibility | 7qt/9pt/12 half-pint |
| Weight | 4 lbs |
| Reusability | Reusable toolset |
| Ease Of Use | All-in-one kit |
| Additional Features |
|
- Comes with everything you need — canner, rack, and five tools — in a single kit
- Rack holds a solid batch at once (7 quarts, 9 pints, or 12 half-pints)
- Tools nest inside the pot for easy, compact storage
- Won’t work on glass or induction stovetops
- Enamel and steel need hand washing and quick drying to avoid rust
- Built for water bath canning only, not pressure canning heavier vegetables
4. Ball Secure Grip Jar Lifter
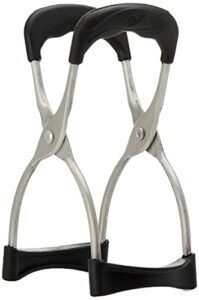
Your fingers will thank you after a full canning day, and this lifter is why. The spring hinge pops open automatically once you lift a jar, so you’re not fighting the grip with wet hands.
That molded surface grabs hold even when jars are slick from syrup or steam. It fits both wide-mouth and regular jars, from half-pints to quarts, so one tool covers your whole shelf.
I recommend it for anyone tired of dropped jars near boiling water.
| Best For | This jar lifter is best for home canners and preservers who want a secure, comfortable grip on regular sized jars during hot canning sessions. |
|---|---|
| Material | Stainless Steel |
| Canning Use | Jar lifting |
| Jar Compatibility | Regular jars |
| Weight | Not specified |
| Reusability | Reusable lifter |
| Ease Of Use | Spring mechanism |
| Additional Features |
|
- Ergonomic handle design makes handling jars comfortable, even during long canning sessions
- Molded grip increases surface contact for a more secure hold than standard lifters
- Spring hinge mechanism opens automatically, simplifying the process of picking up jars
- Still requires manual effort to grip jars properly
- Designed only for regular sized jars, so it may not accommodate other jar sizes
- Made of stainless steel, which can conduct heat if not handled carefully
5. PrepWorks Canning Funnel for Jars
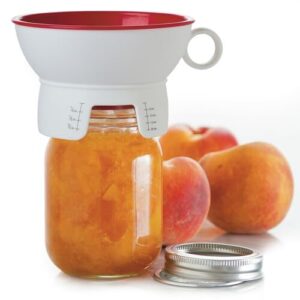
Ever poured hot jam and watched half of it run down the jar’s outside? This funnel fixes that.
Its double-wall design keeps drips off rims and countertops, with a raised collar lifting it off your workspace entirely. Built-in headspace markings mean no more guessing or extra tools.
It works with both wide and regular mouth jars. Made from high-heat plastic, it’s dishwasher safe and stain resistant.
I recommend keeping one on hand for every batch you can.
| Best For | Home canners and food preservers who want a simple, mess-free way to fill jars accurately, whether they’re doing a small batch of jam or a full day of large-scale canning. |
|---|---|
| Material | Plastic |
| Canning Use | Filling jars |
| Jar Compatibility | Wide and regular mouth |
| Weight | 0.29 lbs |
| Reusability | Reusable funnel |
| Ease Of Use | Spill prevention |
| Additional Features |
|
- Printed headspace measurements take the guesswork out of filling jars correctly
- Raised collar and outer edge design keep the funnel off countertops and prevent spills on jar rims
- Fits both wide and regular mouth jars, so one funnel covers most canning needs
- Made of plastic, so it has limits on heat exposure compared to metal alternatives
- Only one funnel comes per package, which may be limiting for larger canning operations with multiple stations
- Plastic construction may feel less durable over time than stainless steel options
Canning Safety Supplies
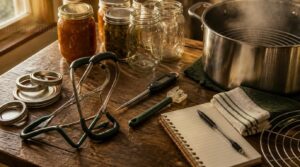
Good jars and gear only get you so far—safety habits seal the deal. A few simple supplies help you avoid contamination, track your food, and process everything correctly. Here’s what belongs in your canning safety kit.
Lint-free Cleaning Cloths
A clean rim makes or breaks your seal, so grab a good lint-free cloth before you start. Microfiber blends—usually polyester and polyamide—wipe away residue without leaving fibers behind, preventing surface contamination that ruins a vacuum seal. They’re also highly absorbent, wicking up moisture fast.
Rinse yours after each canning session and skip fabric softener. Sealed edges resist fraying, so your cloth stays reliable batch after batch—one of those essential canning supplies you’ll reach for constantly.
Vinegar for Jar Rims
That same cloth works even better with a splash of vinegar for oily foods like fish or fatty sauces. Its acetic acid cuts through grease that plain wiping misses. Use it for:
- Removing surface oils before sealing
- Preventing mineral deposits in hard water areas
- Cleaning sticky rim residue
Rinse afterward, dry completely, then move on to timing your batch.
Reliable Kitchen Timer
Once your rims are spotless, set a reliable kitchen timer running — guessing at minutes is where good jars go bad.
Look for audible alarms around 60-90 decibels so you’ll hear it over running water. I like models with dual countdown features, magnetic backs for the fridge, and heat resistant shells that won’t melt near the stove.
Permanent Labeling Marker
Grab a permanent marker with water resistance built in — you don’t want your labels smearing during a water bath session.
Test surface compatibility on glass before labeling a full batch. I recommend:
- Fine tips for small jars
- Medium tips for larger batches
- Chisel tips for bold headlines
Good ink durability matters for beginner canning kits stored long-term. Choose solvent-safe, low-odor formulas.
Research-tested Recipes
Here’s the one supply that costs nothing but saves everything: a tested recipe. Skip the improvised jar of grandma’s "eyeball it" salsa — recipe standardization means every measurement, boil time, and yield went through real kitchen trials, not guesswork.
A tested recipe costs nothing but saves everything, turning guesswork into guaranteed safety
That consistency, backed by feedback validation and sensory testing notes, is what separates safe home canning equipment use from risky experiments. For beginner canning kits, trust the process on paper first.
Frequently Asked Questions (FAQs)
What are the essential canning supplies?
Picture a kitchen counter buried in mismatched jars, rusty lids, and a suspicious gauge from 1987—recipe for disaster, not dinner.
Real home canning equipment means proper canning jars, a water bath canner or pressure canner, and quality tools matched to your recipe’s acidity level.
What equipment is needed for canning?
Your home canning equipment list starts with jars, lids, and bands, then a water bath canner or pressure canner depending on food type. Add a jar lifter, funnel, and rack — the essential toolkit for safe, confident preserving.
What is the best canning for beginners?
Think of canning like learning to swim before diving into deep water: water bath canning with jars, jams, and pickles builds confidence safely, while pressure canning for low-acid foods comes later, once basics feel natural.
Is canning easy for beginners?
Yes, especially with starter recipe selection like jams or pickles. Water bath canning for beginners keeps the learning curve gentle. A small batch practice weekend project, following tested recipes, builds confidence and success through testing.
Why must dairy, eggs, or pasta never be canned?
These low-acid foods block even heat penetration: dense starches and fatty proteins shield botulism-causing bacteria from lethal temperatures. Freeze dairy instead, refrigerate eggs, and add cooked pasta after opening jars, not before processing.
Should vintage or antique glass jars ever be reused?
Grandma’s jars carry memories, but not always safety. Vintage glass risks include invisible microfractures and lead glaze hazards, plus antique thread compatibility issues with new lids and bands.
I recommend decorative repurposing instead—sterilize canning jars only when structurally sound and thoroughly inspected.
Why is canning salt different from iodized table salt?
Iodine and anti-caking agents cause cloudy brines and off colors. Canning salt is pure sodium chloride with consistent grain size, so it dissolves evenly—keeping brines clear and safe, unlike iodized table salt, which wasn’t made for preserving.
Conclusion
A well-stocked canning shelf is like a good recipe: leave out one ingredient, and the whole thing falls apart. Now you know exactly what supplies do you need for canning, from jars and lids down to lemon juice and labels.
Don’t rush out and buy everything at once. Start with the essentials, master water bath canning, then grow into pressure canning when you’re ready. Your pantry—and your family’s dinner table—will thank you for the care you put in today.