This site is supported by our readers. We may earn a commission, at no cost to you, if you purchase through links.
That basil you grew all summer? It won’t survive winter unless you handle it right. Most gardeners hang a bundle, forget about it, and end up with brown, flavorless dust instead of fragrant, potent herbs.
The difference between mediocre and excellent dried herbs comes down to timing, temperature, and technique. Harvest at the wrong hour, dry at the wrong heat, or store in the wrong container, and you’ll lose the essential oils that make homegrown herbs worth growing in the first place.
Mastering homegrown herb drying techniques means understanding what each method, from air drying to dehydrators, actually does to your harvest. Get it right, and you’ll stock your pantry with herbs that outshine anything from a store shelf.
Table Of Contents
- Best Homegrown Herb Drying Techniques
- When to Harvest Herbs
- How to Prepare Fresh Herbs
- How to Air Dry Herbs
- How to Use Heat Drying
- Top 6 Herb Drying Tools
- How to Store Dried Herbs
- Cooking With Dried Herbs
- Frequently Asked Questions (FAQs)
- What is the best way to dry homegrown herbs?
- What herbs should you not dry?
- Why hang herbs upside down to dry?
- Can you dehydrate herbs too long?
- Which herbs dry best for long-term storage?
- Can you dry herbs with woody, thick stems?
- How do I know if dried herbs went bad?
- Is it safe to dry herbs indoors year-round?
- Whats the difference between drying and dehydrating herbs?
- Conclusion
Best Homegrown Herb Drying Techniques
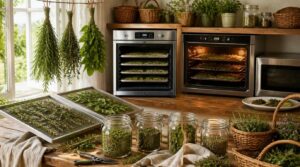
Once you’ve grown a thriving herb garden, the next challenge is locking in that fresh flavor before it fades.
Whether you’re drying, freezing, or infusing oils, these garden-to-table summer recipe ideas show simple ways to savor that just-picked taste all season long.
Every drying method, from simple air circulation to modern kitchen appliances, offers its own balance of speed, convenience, and quality.
Here are five tried-and-true techniques you can start using today.
Air Drying Herbs
Hanging bundles upside down is the oldest trick in the book, and for good reason. Tie 4–7 stems with loose bundle ties, hang in a low-humidity environment (40–60%), away from sunlight to prevent color fade. Good airflow management matters—give bundles breathing room. Expect 5–10 days; herbs are ready when brittle and crumbly to the touch.
For high-moisture varieties, you can use paper bags with holes to assist the process.
Dehydrating Herbs
Not everyone has space to hang bundles for a week, and that’s where a food dehydrator earns its keep. Set temperatures between 95°F and 115°F, nudging up to 125°F in humid climates.
- Arrange leaves in single layers
- Rotate trays for even drying
- Watch for brittle texture
- Cool completely before storing
This dehydrator method delivers consistent food preservation fast.
Oven Drying Herbs
Oven drying works great in a pinch—no dehydrator needed. Keep the temperature between 95°F and 115°F, propping the door open with a wooden spoon for airflow and essential oil preservation.
Spread leaves in single, uniform layers on parchment-lined trays. Convection settings speed things up nicely.
Check often; ovens run hotter than dials suggest, and overheating browns herbs fast.
Microwave Drying Herbs
Short on time? The microwave gets herbs dry in 2-5 minutes flat, using rapid moisture loss to your advantage.
- Set wattage to 300-700W depending on herb type
- Use 15-30 second bursts, checking often to prevent edge scorching
- Dry small batches for even results and better essential oil retention
Rosemary and thyme handle this beautifully; delicate leaves need a gentler touch.
Freeze-drying Herbs
Freeze-drying delivers the best possible results in botanical preservation, pulling roughly 95% of moisture out through sublimation—ice converting straight to vapor under vacuum, no heat damage involved.
| Method | Temp Range | Best For |
|---|---|---|
| Freeze-drying | -40°F to -50°F | Delicate leaves, flowers |
| Oven | 150-180°F | Sturdy herbs |
| Dehydrator | 95-125°F | Bulk batches |
Nutrient retention stays high, and rehydration happens in minutes—flavor practically fresh again.
When to Harvest Herbs
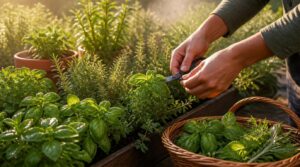
Timing matters just as much as technique for drying herbs, since harvesting at the wrong moment can leave you with a weak, flavorless batch. Your plants hold the most flavor and aroma at very specific points in their growth, and catching that window makes all the difference. Here’s what you need to know before you head out to the garden with your scissors.
Early Morning Harvesting
Ever wonder why your grandmother swore by picking herbs before breakfast? Here’s the secret: morning harvesting catches herbs at peak turgidity, when overnight hydration fills their cells and essential oils haven’t yet volatilized in the day’s heat.
Pick herbs before breakfast, when overnight hydration and unreleased oils give them peak flavor
Cooler temps mean less plant stress, cleaner cuts, and faster recovery. Snip once dew evaporates but before the sun climbs—that narrow window respects your plants’ diurnal rhythm and rewards you with maximum flavor and aroma.
Bud-stage Flowering Herbs
Catch flowering herbs right at bud stage, when tiny buds appear at leaf axils but flowers haven’t opened yet. This shift signals peak flavor potential, as the plant redirects energy from leaves into blooms.
- Watch for pale, swollen buds forming along stems
- Handle gently to avoid bruising delicate bud tissue
- Harvest promptly, since brightness fades once buds open
Peak Essential Oils
Timing is everything for essential oil content, since those tiny glandular structures inside each leaf are most active just before full bloom.
Terpene profile shifts happen fast here, with monoterpenes like cineole peaking for that bright, citrusy punch. Wait too long, and aroma intensity can drop by 20 to 60 percent, robbing you of flavor retention and those prized volatile oils entirely.
Avoid Wet Foliage
Wet leaves are trouble, plain and simple—fungal infections thrive when moisture lingers, turning your harvest into moldy disappointment.
By harvesting when foliage is bone dry, you protect essential oils and stop disease spread.
Keep plants spaced for good airflow, water at the base, and pat leaves dry if needed.
Clean, crisp herbs dry faster, preserve flavor, and store safely.
How to Prepare Fresh Herbs
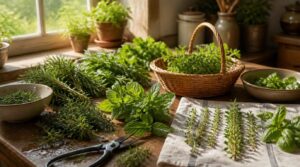
Before you dry your herbs, a few key steps will help you preserve their best flavor and aroma. With the right preparation, you’ll set the stage for successful drying and storage. Here’s what you need to do first.
Snipping Above Leaf Nodes
If you want your herbs to bounce back lush and strong, always snip just above a leaf node—that’s where new shoots are waiting to burst out. Use a clean, sharp blade, angling your cut to steer growth outward.
This simple move prevents disease entry, encourages bushy regrowth, and keeps your botanical harvesting both tidy and productive.
Washing Garden Herbs
Once you’ve snipped your herbs, rinse garden herbs in cold water for 20–60 seconds, swirling gently to loosen soil and debris. For gritty stems, hold them under running water and rub lightly. Always avoid dish soap—just fresh water works best.
Handle delicate leaves like basil and mint with care, rinsing bunches or sprigs individually to prevent bruising and tearing.
Removing Excess Moisture
Once your herbs are clean, removing excess moisture is what keeps drying safe and efficient. Use a salad spinner for leafy bunches or gently pat them dry with towels, making sure you don’t crush the leaves. For best results:
- Spin in small batches.
- Lay herbs on towels, flipping once.
- Check for dryness by touch—aim for damp, not wet.
Sorting Damaged Leaves
After you’ve dried off your garden haul, start sorting damaged leaves by looking for chewing holes, fungal spots, or insect marks. Remove anything with over 25% tissue loss—these leaves won’t dry well and can spread problems.
For minor blemishes under 5% damage, keep them; they still contribute to flavor and photosynthesis.
Always toss compromised leaves far from your healthy stash.
Separating Leaves and Stems
Once your leaves are sorted, separating leaves and stems is the next step for preserving flavor. Keep the temperature between 15–25°C—this helps prevent wilting and loss of aroma.
Use sharp herb scissors to snip above leaf nodes, ensuring leaf integrity. For larger batches, mechanical separators like perforated drum or roller systems boost efficiency. Always inspect for stem fragments and bruising.
How to Air Dry Herbs
Air drying herbs is a time-honored method that lets you preserve their color, aroma, and potency with minimal equipment. There are a few practical ways you can set up your drying space to suit the herbs you’re working with. Let’s look at the most effective options for getting consistent results at home.
Hanging Herb Bundles
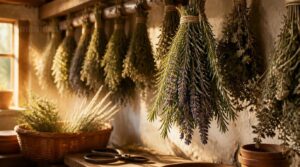
When you want full flavor and lasting color, hanging herb bundles is your tried-and-true method. Tie 5–10 stems together at the stem end with natural twine, keeping each bundle loose for good air circulation.
Hang them upside down in a warm, dry, dark space, allowing several inches between bundles. Herbs are ready when the leaves feel brittle and stems snap easily.
Paper Bag Drying
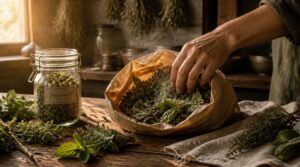
Slip your harvest into a brown uncoated paper bag—this absorbs moisture and protects flavor. Aim for humidity near 60–65%. Partial drying first keeps condensation away. Each day, burp the bag: open it, turn leaves, and release trapped moisture. Inspect for mold or sour smells, and remove any damaged parts. When leaves feel brittle, transfer to airtight glass jars for lasting potency.
- Use loose batches per bag
- Burp bags daily
- Store dried leaves airtight
Mesh Screen Drying
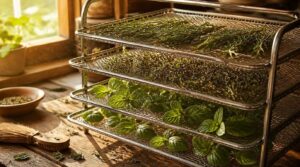
Laying your herbs on a mesh drying rack brings even air circulation to every leaf, helping moisture escape quickly and thoroughly. Choose stainless steel mesh for strength and easy cleaning, or opt for food-safe plastic in lighter setups.
Keep the mesh taut to avoid sagging, check for tears, and brush off debris regularly to maintain efficient drying performance.
Ideal Airflow Conditions

Picture a gentle breeze, not a wild gust—ideal airflow is the secret to even, mold-free drying. Keep your fans steady, aiming for 0.35 to 1.0 meters per second, and make sure air sweeps across your herbs, not directly at them. Proper spacing prevents stagnant zones.
- Use cross-flow fans near racks
- Monitor with a hygrometer
- Rotate bundles for uniform drying
Preventing Mold Growth
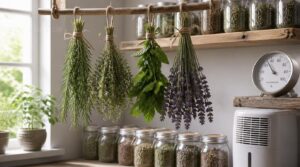
If you’re aiming for herbs that last, keeping humidity below 60 percent is your first defense against mold. Use a hygrometer to track moisture, run dehumidifiers in damp rooms, and fix leaks right away.
For stubborn spills, dry surfaces within 24 hours, disinfect with unscented cleaners, and rotate bundles often.
With steady air and vigilant moisture control, your herbs stay crisp and safe.
How to Use Heat Drying
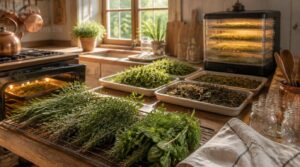
If you’re ready to speed up the drying process, heat-based methods can be a reliable option. Each technique has its own requirements for temperature, placement, and timing. Here’s what you need to know before you get started.
Food Dehydrator Temperatures
If you want to preserve the essential oils and vibrant color in your herbs, start your food dehydrator at 95°F to 105°F for slow, gentle drying. Higher temperatures—like those used for fruits (135–145°F) or meats (155–165°F)—will strip aroma and flavor.
In humid climates, bump up to 125°F to avoid mold but watch for leaf browning.
Oven Drying Steps
By keeping your oven at a steady low temperature—between 130°F and 160°F—you’ll dry herbs without cooking them.
Place leaves in a single layer on trays or wire racks, and prop the door open with a wooden spoon for moisture escape.
Rotate trays every 30–60 minutes, removing herbs as they turn brittle and letting them cool completely before storing.
Microwave Drying Method
By switching from the oven to the microwave, you take advantage of rapid moisture removal and volumetric heating—waves penetrate every cell, drying herbs quickly while preserving color and aroma. Lay leaves between plain white paper towels, zap in 30–60 second bursts at medium power, and check for crispness.
To master microwave drying, focus on:
- Controlled power settings
- Even layer placement
- Preserving nutrients
Single-layer Tray Placement
Once your herbs are crisp from the microwave, you’ll see why single-layer tray placement matters.
Spread leaves evenly—no overlap—on a clean, food grade stainless steel or BPA-free plastic tray. Maintain a uniform thickness (under 5 millimeters), with trays spaced 1–2 centimeters apart. This setup maximizes airflow and prevents moisture trapping, ensuring every leaf dries evenly.
Avoiding Overheated Herbs
If you push drying temperatures above 140°F, you risk losing those fragrant essential oils and ending up with bitter, browned leaves.
Always monitor with a thermometer and aim for low and slow—think 95–115°F in dehydrators, or the oven’s lowest setting with the door cracked.
Test small batches first, watch for crispness not brittleness, and avoid heat-induced flavor loss.
Top 6 Herb Drying Tools
When you’re ready to dry your herbs, having the right tools makes the process smoother and more reliable. Each option brings something different to your setup, whether you’re working with leafy bundles or delicate flowers. Here are six essential tools to help you get started.
1. OXO Good Grips Salad Spinner
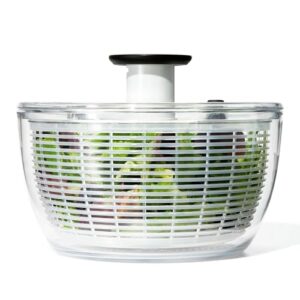
If you’re chasing crisp, clean herbs for drying, the OXO Good Grips Salad Spinner is your best ally. With its one-touch pump system, you can spin out moisture using just one hand, which means you won’t bruise delicate leaves. The patented brake button lets you halt instantly—no waiting for the basket to slow down. The non-skid base keeps everything steady, even on damp counters. All parts are dishwasher safe, making cleanup easy and prepping herbs for drying a breeze.
| Best For | Home cooks and salad lovers who want quick, easy drying of greens, herbs, and veggies without bruising. |
|---|---|
| Primary Material | BPA-free plastic |
| Dries Herbs | Yes |
| Weight | 2.5 lbs |
| Assembly Required | Minimal |
| Cleaning Method | Top rack dishwasher |
| Storage Footprint | Compact, stackable |
| Additional Features |
|
- One-touch pump makes spinning effortless and one-handed.
- Brake button stops the basket instantly for convenience and safety.
- Large bowl doubles as a colander, food prep bowl, or lettuce keeper.
- Lid requires manual disassembly for thorough cleaning.
- Only top rack dishwasher safe, limiting cleaning options.
- Takes up significant storage space due to its large size.
2. Four Layer Mesh Herb Drying Rack
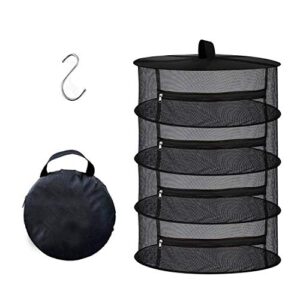
When you’re drying a big harvest, the Four Layer Mesh Herb Drying Rack is your ace. Its vertical stack lets you spread herbs across four breathable trays, each holding up to 2.2 pounds without sagging.
The zippered enclosures protect your plants from birds and dust, while the collapsible frame folds flat for easy storage. With steel wire rings built in, you won’t see warping, even in humid conditions.
Hang it on a balcony or in a grow tent—setup takes just minutes.
| Best For | Home growers or gardeners who need a space-saving, efficient way to dry herbs, flowers, or small batches of produce. |
|---|---|
| Primary Material | Nylon mesh/polyester |
| Dries Herbs | Yes |
| Weight | 8 lbs |
| Assembly Required | Yes, unpack carefully |
| Cleaning Method | Hand wash |
| Storage Footprint | Collapsible, folds flat |
| Additional Features |
|
- Four spacious layers with zippered closures keep plants protected from birds and dust.
- Breathable mesh design ensures even air circulation for faster, cleaner drying.
- Collapsible frame and included storage bag make setup, takedown, and storage quick and easy.
- Each layer can only hold up to 2.2 lbs, limiting capacity for larger harvests.
- Spring-loaded mesh may pop open suddenly, requiring careful unpacking.
- Package and rack must be handled gently to avoid accidental damage.
3. Cosori stainless steel food dehydrator
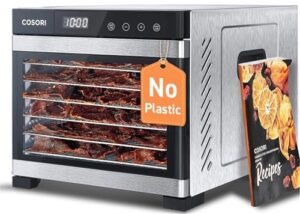
If you’re after precision and power, the Cosori stainless steel food dehydrator is your workhorse. With six spacious trays and a 600W brushless motor, you’ll dry bulk herbs efficiently and quietly.
The digital touch control panel lets you fine-tune temperatures from 95°F to 165°F—ideal for delicate leaves or tough roots. Cleanup’s easy, since the trays are dishwasher-safe. Automatic shutoff and overheat protection mean you won’t babysit batches. It’s a reliable choice for serious herb preservation.
| Best For | Home cooks and gardeners who want a quiet, high-capacity dehydrator for bulk drying and precise control. |
|---|---|
| Primary Material | Stainless steel |
| Dries Herbs | Yes |
| Weight | Not specified |
| Assembly Required | Manual tray assembly |
| Cleaning Method | Dishwasher safe |
| Storage Footprint | Significant counter space |
| Additional Features |
|
- Large drying area and six trays handle big batches of food, herbs, or treats.
- Quiet operation and timer make it easy to run overnight without disturbance.
- Easy cleaning with dishwasher-safe stainless steel trays.
- Requires manual assembly of trays before each use.
- Takes up significant counter space due to its size.
- Accessories like mesh screens or fruit roll sheets must be purchased separately.
4. OSTBA electric food dehydrator machine
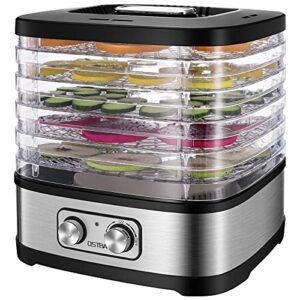
If you want hands-on control over herb drying, the OSTBA electric food dehydrator stands out.
Its adjustable knob lets you set temperatures from 95 to 158℉, perfect for preserving delicate leaves or drying tougher stems. With five stackable BPA-free trays and 360° airflow, you’ll get even drying—just remember to rotate trays for consistent results. The transparent window makes it easy to check progress.
Cleanup’s a breeze since trays are dishwasher-safe, and its compact build fits right into your kitchen routine.
| Best For | Home cooks and DIY enthusiasts looking for a simple, hands-on dehydrator to preserve herbs, make snacks, and try new recipes in small batches. |
|---|---|
| Primary Material | Plastic/stainless steel |
| Dries Herbs | Yes |
| Weight | 4.09 lbs |
| Assembly Required | Minimal |
| Cleaning Method | Dishwasher safe |
| Storage Footprint | Compact cupboard size |
| Additional Features |
|
- Adjustable temperature control for versatile drying of different foods
- Dishwasher-safe, BPA-free trays make cleanup easy
- Compact design fits easily in most kitchens and storage spaces
- Manual knob lacks digital timer or precise settings
- Small capacity limits the amount you can dry at once
- Requires manual tray rotation for even drying
5. Bohemian Hanging Herb Drying Racks
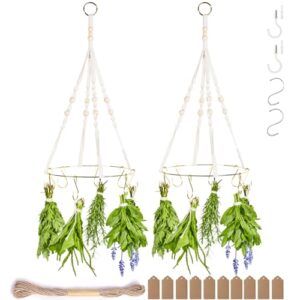
If you’re after a mix of utility and artistry, bohemian hanging herb drying racks are your answer. These racks use hand-woven cotton cords, wood beads, and gold rings, offering space for up to 20 herb bundles with removable hooks.
The adjustable tiers make the most of airflow and prevent overlapping, so herbs dry evenly. You’ll appreciate how easily they install—just hang, attach your bundles, and let nature do the work.
When not in use, they add a rustic charm to your kitchen or sunroom.
| Best For | People who want a decorative and functional way to dry herbs, flowers, or sage at home, especially those who love bohemian style. |
|---|---|
| Primary Material | Cotton/wood/metal |
| Dries Herbs | Yes |
| Weight | 0.59 kg |
| Assembly Required | Manual hook assembly |
| Cleaning Method | Not applicable |
| Storage Footprint | Hanging, decorative |
| Additional Features |
|
- Hand-woven design adds artistic, boho flair to any room.
- Holds up to 20 herb bundles with adjustable hooks for easy customization.
- Simple assembly and installation, making it user-friendly.
- Needs a suitable spot for hanging, which may limit placement options.
- Manual setup required for attaching hooks and arranging plants.
- Best for lightweight botanicals; not suitable for heavier items.
6. Natural Granite Mortar and Pestle
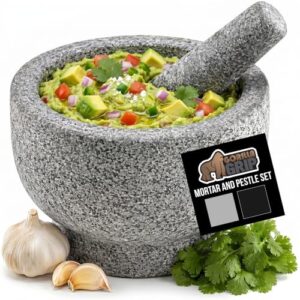
If you crave control over texture and flavor, a natural granite mortar and pestle is your go-to tool. The rough-finished interior releases essential oils from dried herbs, while the heavy base keeps things steady. Crushing spices or grinding dried leaves feels natural, and you’ll appreciate the contoured pestle that makes smooth, consistent pastes.
With a 2-cup capacity and unpolished gray finish, this set’s durability and non-porous surface make easy cleaning and minimal odor retention a breeze—ideal for frequent, varied herb grinding.
| Best For | Home cooks and food enthusiasts who want to unlock fresh flavors and customize the texture of their dishes with hands-on grinding. |
|---|---|
| Primary Material | Natural granite |
| Dries Herbs | Yes |
| Weight | 6.6 lbs |
| Assembly Required | None |
| Cleaning Method | Hand wash |
| Storage Footprint | Compact, heavy |
| Additional Features |
|
- Handcrafted from durable, natural granite for long-lasting use
- Heavy base and pestle make grinding easy and stable
- Releases natural flavors better than electric mixers
- Its weight can make handling and storage more challenging
- Unpolished surface may require extra effort when cleaning
- Needs a foam bottom to protect delicate countertops
How to Store Dried Herbs
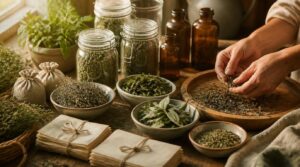
Once your herbs are fully dried and crisp, storing them properly makes all the difference in preserving their flavor and aroma. You have several reliable options to keep your harvest fresh and potent. Here’s how you can choose the best storage method for your dried herbs.
Airtight Glass Jars
Reach for airtight glass jars when you want your dried herbs to last. With clamp, screw top, or twist lid options—all using durable silicone or rubber gaskets—you’ll block out moisture and preserve flavors. Inspect for cracks, hand wash gently, and keep jars dry. Use clear glass for easy inspection, and store in a cool, dark spot for best results.
- Clamp seal jars
- Screw top jars
- Silicone/rubber gaskets
- Cool, dark storage
- Regular inspection
Vacuum-sealed Bags
If you’re serious about preserving herbs for months, vacuum-sealed bags offer unbeatable protection. These bags use multi-layer plastic films—usually 3 to 5 mils thick—to lock out air and moisture.
With a tight heat seal and sometimes a one-way valve, you’ll prevent spoilage and extend shelf life. Choose BPA-free, food-grade bags for safety and maximum freshness.
Cool Dark Storage
Once your herbs are vacuum-sealed, tuck them away in a cool dark storage spot—think 45–60°F and shielded from light. Use airtight glass jars or opaque containers to protect aroma and color.
Moisture is your biggest enemy, so add desiccant packets if humidity creeps up. Label jars by harvest date, and keep them organized in your pantry for easy rotation.
Whole-leaf Storage
Keeping your leaves whole, instead of crushing them, helps preserve aroma compounds and essential oils for longer.
To prevent mold, you’ll want to keep humidity between 60–70 percent and use airtight, moisture-resistant containers—think glass jars or vacuum-sealed bags.
Stable temperatures around 15–20°C keep flavors intact, and regular checks for mold or off odors protect your harvest.
One-year Potency Timeline
From the moment you dry your herbs, their potency stays strong for about one year—assuming you store them in cool, dark conditions and keep humidity low. Light, heat, and moisture speed up potency loss, so airtight jars or vacuum-sealed bags are best.
If stored well, your herbs will hold at least 90% potency until the next harvest cycle.
Cooking With Dried Herbs
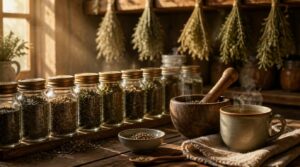
Now that your herbs are dried and stored, it’s time to make the most of their flavors in your kitchen. Using dried herbs opens up all kinds of creative possibilities, from seasoning blends to homemade teas. Here’s how you can put your harvest to good use.
Fresh-to-dried Herb Ratio
When you dry your own herbs, the standard 3:1 fresh-to-dried herb ratio is your anchor—use 1 teaspoon dried for every tablespoon fresh. If you’re working with ground herbs, drop that to 1/2 teaspoon. For delicate herbs, start with a 2:1 swap. Always taste as you go, since drying methods and storage can nudge flavor strength up or down.
Homemade Seasoning Blends
Craft your own seasoning blends by mixing dried herbs like oregano, thyme, or basil with spices for targeted flavor profiles—think taco, Italian, or Cajun.
Control salt levels for health, batch blends for efficiency, and adjust chili for heat.
Store in airtight jars for freshness, grinding only as needed.
Homemade blends last three to six months and make everything from roasted meats to vegetables taste better.
Herbal Teas and Infusions
Your dried garden herbs make a cup of tea that beats store-bought bags any day. Since herbal infusions skip Camellia sinensis entirely, you’re getting caffeine-free comfort.
Match flavor profiles to your mood: chamomile for winding down, peppermint for digestion. Steep delicate lemon balm just 5 minutes; strong peppermint needs 7-10.
Add honey or citrus zest as infusion enhancers, but never boil after steeping.
Infused Salts and Oils
Turn those crumbly, dehydrated herbs into something you’ll reach for daily: herb-infused salts and oils.
- Coarse sea salt or kosher salt absorbs flavor best
- Wet infusion (oil-based) cures 2-4 days
- Dry mixing skips moisture entirely, preventing clumping
Pair rosemary or thyme for savory depth, then store in airtight jars for shelf life extension up to six months as a finishing salt.
Garden-to-table Recipe Ideas
Your dried herbs deserve real meals, not just a shelf spot.
Stir oregano into tomato basil pasta, toss thyme with roasted zucchini and peppers, or sprinkle chives into stovetop snap peas.
Try dried basil in harvest salads, or dill in one-pot chickpea stews.
Round it out with herb-infused oils drizzled over roasted veggies and a warm herbal tea to finish the meal.
Frequently Asked Questions (FAQs)
What is the best way to dry homegrown herbs?
Air drying and dehydrator methods both work well, but for best essential oil preservation, hang bundles in a dark, 70-75°F space for 5-14 days, or dehydrate at 95-115°F for faster, uniform moisture removal.
What herbs should you not dry?
Some herbs fight the process rather than cooperate with it. Basil, cilantro, parsley, chives, and mint hold too much moisture, losing flavor, browning, or molding fast — freeze them or dehydrate quickly instead of slow air-drying if you want real potency later.
Why hang herbs upside down to dry?
Gravity pulls moisture down and away from leaves, so airflow drying stays uniform while flavor and aroma preserve better in a low-humidity environment. This upside-down setup also saves counter space and helps prevent mold throughout the air drying method.
Can you dehydrate herbs too long?
If you dehydrate herbs too long, you risk essential oil evaporation, volatile compound loss, and texture brittleness. Over drying leads to dull color and reduced aroma intensity, making your dried herbs less potent and flavorful.
Which herbs dry best for long-term storage?
For long-term storage, you’ll get the best results from woody herbs like rosemary, thyme, sage, oregano, and lavender. These retain their essential oils and flavor potency for up to 24 months when properly dried and stored.
Can you dry herbs with woody, thick stems?
You can dry herbs with woody, thick stems, though they need extra time and care. Cut stems into short pieces, use gentle heat in a dehydrator or oven, and watch closely for even drying and mold.
How do I know if dried herbs went bad?
If your dried herbs smell musty, taste flat or bitter, look dull or faded, feel soft or sticky, or show clumping, mold, or insect activity, they’re no longer potent—it’s best to discard and replace them.
Is it safe to dry herbs indoors year-round?
You might think it’s always safe, but year-round indoor drying depends on low humidity and steady airflow. Without those, mold can sneak in, especially during damp seasons. Use fans or dehumidifiers to keep moisture content low.
Whats the difference between drying and dehydrating herbs?
Drying relies on natural evaporation with cool airflow, preserving color and volatile oils but taking days. Dehydrating uses controlled heat and airflow, speeding moisture removal for consistent texture, though high heat risks aroma loss and duller color.
Conclusion
Drying herbs is a bit like sending a telegram—each step carries a message, and if you rush or skip, the meaning gets lost. By mastering homegrown herb drying techniques, you’re preserving not just flavor, but the story your garden tells.
Handle your harvest with intention, choose the right tools, and store your herbs where they’ll thrive. When winter sets in, your kitchen will whisper summer’s secrets with every pinch, keeping your meals vibrant long after the frost.