This site is supported by our readers. We may earn a commission, at no cost to you, if you purchase through links.

You can spot the start of spring by the sudden rush of green—lettuce leaves unfurling in window boxes, radish seedlings pushing through chilly soil, and asparagus spears breaking ground after months of dormancy.
For gardeners, these moments aren’t just pretty, they signal the best spring vegetables to plant for a harvest that’s both abundant and early.
Timing matters: a handful of crops thrive when cool nights and days grow longer, setting roots before summer’s heat arrives.
Choosing the right varieties means you’ll enjoy crisp salads, sweet roots, and vibrant greens well before most folks even dust off their trowels.
Table Of Contents
- Top 9 Spring Vegetable Plants to Grow
- 1. Hydroponic Lettuce Seedling Mix
- 2. Mixed Color Onion Sets Bundle
- 3. Organic Green Onion Garden Seeds
- 4. Organic Red Cherry Radish Seeds
- 5. Live Asparagus Bare Root Plants
- 6. Live Organic Artichoke Vegetable Plant
- 7. Sweet Green Bell Pepper Plants
- 8. Big Boy Tomato Plants
- 9. Fresh Chard Plants Ready Garden
- Best Leafy Greens for Spring Gardens
- Top Root Vegetables for Early Spring
- Cool-Weather Crops That Thrive in Spring
- Perennial Spring Vegetables to Consider
- Green Onions and Alliums for Spring
- Raised Bed and Container Spring Gardening
- Planting and Care Tips for Spring Vegetables
- Succession and Companion Planting Strategies
- Common Spring Vegetable Growing Mistakes
- Frequently Asked Questions (FAQs)
- What vegetables to plant first in spring?
- What is the 70 30 rule for gardening?
- What vegetables do I plant in October?
- What vegetables should I plant in spring?
- What is the easiest plant to grow in spring?
- What are the fastest growing spring vegetables?
- What are the best beginner vegetables to grow?
- What is the best order to plant vegetables in a garden?
- What vegetables are good in spring?
- What vegetables can and cannot be planted next to each other?
- Conclusion
Top 9 Spring Vegetable Plants to Grow
Spring is one of the best times to get your hands in the dirt, and starting with the right plants makes all the difference. Whether you’re working with a raised bed, containers, or open ground, the options below are reliable, rewarding, and well-suited to cooler temperatures.
For tips on prepping your beds and choosing spring-friendly crops, check out this guide to building raised garden beds for spring planting.
Here are nine spring vegetables worth growing this season.
1. Hydroponic Lettuce Seedling Mix

Four seedlings are all it takes to get your indoor lettuce garden going with this hydroponic mix. Each pack includes two Amanda Green Leaf and two Red Leaf varieties, pre-grown in compact peat‑based plugs that measure just 3.5 cm wide and 4.5 cm tall. The substrate is pH‑adjusted between 5.8 and 6.5, which keeps nutrient uptake on point from day one.
These plugs drop directly into the Miracle‑Gro Twelve system or any compatible hydroponic setup — no soil, no mess, no guesswork. Wait 10 to 14 days until white roots peek through the plug base, then transplant. After that, switch to a half‑strength nutrient solution to avoid stressing the young roots.
You’re not starting from scratch here. You’re starting close to the finish line, which means fresh, crunchy lettuce arrives on your table much faster.
| Best For | Anyone who wants to grow fresh lettuce indoors year-round without the hassle of starting from seed. |
|---|---|
| Plant Type | Seedlings |
| Growing Method | Hydroponic |
| Harvest Time | 10–14 days to transplant |
| Sunlight | Indoor/Artificial |
| Skill Level | Beginner |
| Edible Part | Leaves |
| Additional Features |
|
- Comes with four pre-grown seedlings, so you’re already ahead of the game compared to starting from scratch
- Drops right into the Miracle-Gro Twelve system or any compatible hydroponic setup — no soil, no mess
- Two variety mix (Green Leaf and Red Leaf) gives you color and flavor in one pack
- You’ll need a hydroponic system or soilless setup — these won’t work in a regular garden or pot of dirt
- Growth can slow down without the right nutrients, so you’ll need to stay on top of feeding
- Indoor use only, which limits where and how you can grow
2. Mixed Color Onion Sets Bundle
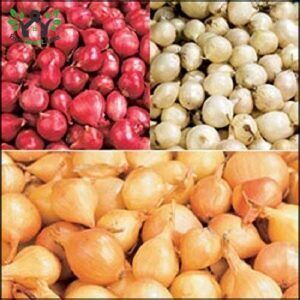
If you’re ready to take your growing outdoors, onion sets are one of the easiest places to start. This CaribbeanGarden bundle includes 40 mixed bulbs — red, yellow, and white — for $12.99, giving your raised beds real visual variety without much work on your end.
Plant each set 1 to 2 inches deep, pointed end up, spacing them 4 to 6 inches apart in rows about 12 to 18 inches wide. Within two to three weeks, you’ll see green shoots pushing up. From there, you can snip the tops early to use as fresh greens, or wait the full 90 to 120 days for mature bulbs. For best results, use nitrate-based fertilizer and keep the soil consistently moist through bulb development.
| Best For | Home gardeners who want an easy, colorful start to their veggie garden and plan to grow onions for both cooking and fresh greens. |
|---|---|
| Plant Type | Bulbs |
| Growing Method | Soil |
| Harvest Time | 90–120 days |
| Sunlight | Full Sun |
| Skill Level | Beginner |
| Edible Part | Bulb/Greens |
| Additional Features |
|
- You get three varieties in one bundle — red, white, and yellow — so there’s plenty of flexibility in the kitchen.
- The tops can be snipped early and used as fresh greens, so you’re getting value before the bulbs even mature.
- At $12.99 for 40 sets, it’s a pretty affordable way to fill out a raised bed.
- These are short-day onions, so they won’t perform well in every climate — worth checking your zone before you buy.
- A few customers have run into shipping issues, with bulbs arriving poorly packed or already rotting.
- Germination rates can be inconsistent, so don’t count on every single bulb making it.
3. Organic Green Onion Garden Seeds

Prefer starting from seed? Seedz Organic bunching onion seeds get you about 550 starts for $3.99 — a hard deal to beat if you’re planning multiple rounds of succession planting.
These are USDA Certified Organic, non‑GMO, and heirloom, so you’re working with seeds that have a real track record.
Sow them ¼ inch deep, spacing seeds 1 to 2 inches apart, once your soil hits around 60°F.
Germination usually takes 7 to 14 days, and you can expect harvestable stalks somewhere between 60 and 65 days.
One grower reported around 80% germination, which is solid for organic seed. Plant a fresh row every two weeks through April, and you’ll have steady scallions well into summer.
| Best For | Home gardeners who want to grow scallions from scratch, especially those planning succession planting or looking for a cold-hardy variety that can overwinter. |
|---|---|
| Plant Type | Seeds |
| Growing Method | Soil |
| Harvest Time | 60–65 days |
| Sunlight | Full Sun |
| Skill Level | Beginner |
| Edible Part | Stalks |
| Additional Features |
|
- USDA Certified Organic, non-GMO, and heirloom — solid credentials if you care about what goes in your garden
- Around 550 seeds for under four bucks is genuinely great value, especially for succession planting
- Extremely cold-hardy, so growers in northern climates can overwinter them without much fuss
- Seed counts have been inconsistent — at least one buyer got 279 instead of the advertised 550
- Germination rates can vary, so don’t expect every seed to pop
- Needs full sun, well-drained soil, and regular weeding — not the most low-maintenance option
4. Organic Red Cherry Radish Seeds
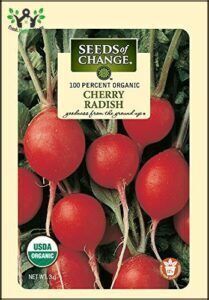
If speed is what you’re after, radishes belong at the top of your spring list. Seeds of Change Organic Red Cherry radish seeds give you 250 starts for $3.99 — plenty for five rounds of succession sowing through April.
Direct-seed them ½ inch deep, 1 inch apart, once your soil reaches 40°F. You’ll pull bright red, 1-inch roots in just 22 to 28 days — well before most other crops even think about sprouting.
The crisp white flesh has a mild peppery bite that works beautifully raw in salads or thinly sliced for quick pickles. Sow a fresh row every 10 days, and harvest promptly. Left too long, radishes turn pithy fast.
| Best For | Beginner and experienced gardeners who want a fast, low-fuss crop they can harvest in under a month. |
|---|---|
| Plant Type | Seeds |
| Growing Method | Soil |
| Harvest Time | 22–28 days |
| Sunlight | Full Sun |
| Skill Level | Beginner |
| Edible Part | Roots |
| Additional Features |
|
- Ready to pull in just 22–28 days, making them one of the quickest crops you can grow
- Certified organic and non-GMO, so you know exactly what’s going into your soil and your food
- Works in containers or garden beds, even in poor or dry soil conditions
- Growth can be inconsistent — some users saw slower development or smaller roots than expected
- Needs prompt harvesting or the roots turn pithy and lose that crisp texture fast
- Pests like slugs can be an issue, and richer soil may be needed for the best results
5. Live Asparagus Bare Root Plants
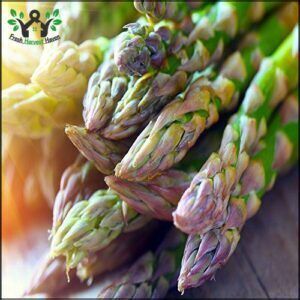
Asparagus is one of those rare investments that pays you back for decades. Hand Picked Nursery’s 2-year bare root crowns give you a meaningful head start — plant them 6 to 8 inches deep in well-drained soil once temperatures sit between 45°F and 70°F, spacing each crown 12 to 18 inches apart.
Year one is all about root establishment, so don’t expect a harvest yet. By year three, though, you’ll be cutting tender spears for up to 15 to 20 weeks every single season — no replanting required.
Amend your bed with compost, keep the soil pH between 6.5 and 7.5, and mulch well to hold moisture. It asks for patience upfront, but a mature asparagus bed can produce for 20 years or longer with basic care.
| Best For | Home gardeners who want a long-term perennial harvest and don’t mind waiting a season or two before picking their first spears. |
|---|---|
| Plant Type | Bare Root Crowns |
| Growing Method | Soil |
| Harvest Time | Year 3+ |
| Sunlight | Full Sun |
| Skill Level | Intermediate |
| Edible Part | Spears |
| Additional Features |
|
- Two-year-old roots give you a solid head start — you’re not starting from seed, so you’ll see results faster.
- A well-established bed can keep producing for 20 years, making it a one-time investment that keeps giving.
- Some customers reported harvesting within the first year, which is a nice bonus if conditions are right.
- Germination rates can be hit or miss — some buyers saw less than 50% of their plants take hold.
- There are questions about where the plants actually ship from, which may concern buyers expecting a domestic product.
- No planting instructions included for all orders, so first-timers might need to do a bit of extra research before getting started.
6. Live Organic Artichoke Vegetable Plant
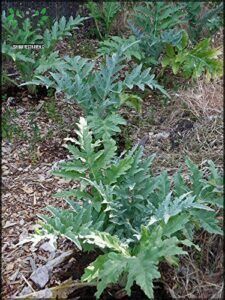
Artichokes are a slow-burn investment — give them the right conditions and they’ll reward you for 6 to 7 years.
Dhed Garden’s organic live plant arrives ready to go into well-draining soil with a pH between 6.0 and 7.5. Space each plant 3 to 4 feet apart in full sun, and mulch around the crown to hold moisture.
Harvest buds before the bracts open wide. If your plant arrives limp, rehydrate it quickly and get it into the ground.
| Best For | Home gardeners and food lovers who want a long-term, low-maintenance crop they can grow in a garden bed or a large pot on the deck. |
|---|---|
| Plant Type | Live Plant |
| Growing Method | Soil |
| Harvest Time | First year possible |
| Sunlight | Full Sun |
| Skill Level | Beginner |
| Edible Part | Buds |
| Additional Features |
|
- Can double in size within two months and produce for up to 6–7 years, making it a solid long-term investment
- Grows well in containers or in-ground, so it works for a range of setups
- Arrives as a live organic plant, ready to go straight into soil
- Plant health on arrival can be hit or miss — some customers have received limp or barely viable plants
- Actual plant size and quantity may not always match expectations
- Needs consistent care upfront (right soil pH, full sun, proper spacing) to really take off
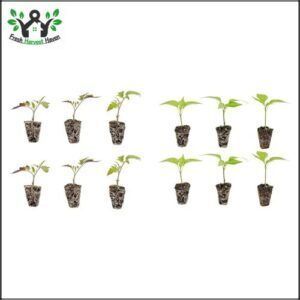
7. Sweet Green Bell Pepper Plants
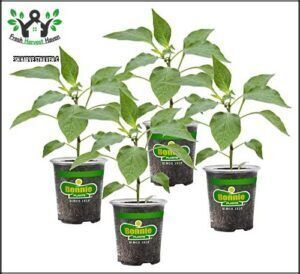
Bell peppers reward patience — but Bonnie’s GMO-free four-pack makes the waiting easier. These transplants arrive ready to go once your soil hits at least 64°F and frost risk is behind you. Space them 18 to 24 inches apart in full sun, and plan to stake them as fruit sets. A mature plant can yield 8 to 10 peppers per season, so those branches need support.
For even healthier, more productive bell peppers, try pairing drip irrigation with mulch—see how this combo boosts water efficiency and plant growth.
Water consistently — about 1 to 1.5 inches per week — and feed with a potassium-rich fertilizer at fruit set to keep peppers firm and full-sized. Uneven watering invites blossom-end rot, so don’t let the soil dry out between sessions. Scout early for aphids. Green bells are mild, sweet, and adaptable: slice them fresh, stuff them whole, or freeze them for later.
| Best For | Home gardeners wanting a reliable, high-yielding pepper for beds or containers |
| Plant Type | Transplants |
| Growing Season | Spring/Summer |
| Harvest Time | 70–80 days |
| Spacing | 18–24 inches |
| Sunlight | Full sun |
| Skill Level | Beginner |
| Additional Features | GMO-free, four-pack, container-friendly |
Best For: Home gardeners who want a reliable, high-yielding sweet bell pepper they can grow in a bed or container without much fuss.
| Plant Type | Transplants |
|---|---|
| Growing Method | Soil |
| Harvest Time | 70–80 days |
| Sunlight | Full Sun |
| Skill Level | Beginner |
| Edible Part | Fruit |
| Additional Features |
|
- GMO-free four-pack that’s ready to plant — no starting from seed required
- Versatile harvest you can slice fresh, stuff, or toss in the freezer
- Container-friendly, so you don’t need a big yard to grow a solid crop
- Frost-sensitive, so you have to time planting carefully around your last frost date
- Branches need staking as the fruit load builds up
- Plants can arrive dry or stressed from shipping, so check them right away
8. Big Boy Tomato Plants
Big Boy tomatoes aren’t for the faint of heart — indeterminate vines push past six feet tall and keep producing right up until frost hits.
That’s a long, rewarding season if you give them what they need.
Wait until your soil warms to at least 59°F and nighttime temperatures stay reliably above 50°F before transplanting.
Space plants 18 to 36 inches apart in full sun, and get your stakes or tall cages in place early — mature fruit can reach 32 ounces, and those branches won’t hold themselves up.
Water consistently to prevent cracking, mulch to hold moisture, and feed every few weeks once fruiting begins.
Expect harvest around 78 days after transplant, with yields that can hit 100 tomatoes per plant across a full season.
| Best For | Gardeners wanting massive, continuous slicing tomatoes with space to support tall vines |
| Plant Type | Transplants |
| Growing Season | Spring/Summer |
| Harvest Time | 78+ days |
| Spacing | 18–36 inches |
| Sunlight | Full sun |
| Skill Level | Intermediate |
| Additional Features | Indeterminate, up to 32 oz fruit, 100 tomatoes/plant |
Best For: Home gardeners with plenty of space who want big, meaty slicing tomatoes and don’t mind putting in the work to support tall, heavy vines all season long.
| Plant Type | Transplants |
|---|---|
| Growing Method | Soil |
| Harvest Time | 78+ days |
| Sunlight | Full Sun |
| Skill Level | Intermediate |
| Edible Part | Fruit |
| Additional Features |
|
- Fruit can grow up to 32 oz — seriously impressive for a backyard garden
- Keeps producing right up until frost, so you get tomatoes for months
- Resistant to cracking, which means less waste and frustration at harvest time
- Vines get tall fast and need solid staking or caging from the start
- Takes a full 78 days to first harvest, so patience is a must
- Some buyers have had plants arrive in rough shape, so check them carefully when they show up
9. Fresh Chard Plants Ready Garden
Chard might just be the most underrated plant you can put in a spring garden. Bold stems in white, yellow, pink, and red rise from deep green leaves, and the whole plant actually enjoys cool weather — no coddling required.
This pack ships 10 garden-ready seedlings within 2 to 8 days, so you skip the seed‑starting wait entirely.
Space them 12 to 18 inches apart in well‑drained soil with a pH between 6.0 and 7.0, and wait until temperatures hold consistently above 50°F before transplanting.
Water about an inch per week, mulch around the base to lock in moisture, and always harvest outer leaves first — that’s what keeps new growth coming. Within 6 to 8 weeks, you’ll have tender greens ready for soups, sautés, and fresh salads.
| Best For | Home gardeners who want to skip seed‑starting and jump straight into spring harvests |
| Plant Type | Live transplants |
| Growing Season | Spring/Summer |
| Harvest Time | 6–8 weeks from transplant |
| Spacing | 12–18 inches |
| Sunlight | Full sun to light shade |
| Skill Level | Beginner |
| Additional Features | 10 plants included, ships in 2–8 days, multiple stem colors |
Best For: Home gardeners who want to skip the seed-starting hassle and get straight to growing colorful, fresh greens.
| Plant Type | Live Plants |
|---|---|
| Growing Method | Soil |
| Harvest Time | Immediate to weeks |
| Sunlight | Full Sun |
| Skill Level | Beginner |
| Edible Part | Leaves |
| Additional Features |
|
- Pre-propagated transplants mean you’re weeks ahead — no seeds, no waiting, just plant and go.
- Chard is naturally hardy in cool weather, making it one of the easier greens for beginners to grow.
- Multiple vibrant stem colors make it as pretty in the garden as it is tasty on the plate.
- Each pack only includes 6 plants, so larger gardens may need multiple orders.
- Shipping takes up to 8 days, which requires a bit of planning around your planting window.
- Like any live plant, chard needs consistent watering and some basic gardening know-how to really thrive.
Best Leafy Greens for Spring Gardens
Leafy greens are some of the easiest and most rewarding crops you can grow in spring, since cool temperatures actually bring out their best flavor.
Most of them don’t need much space, and a few can go in the ground weeks before your last frost date. Here are the top leafy greens worth planting this season.
Growing Spinach in Cool Weather

Spinach is one of those cool season crops that rewards you for getting outside early. Sow seeds as soon as the soil reaches 40°F — roughly 4 to 6 weeks before your last frost — and you’ll have iron‑rich leaves in about 40 to 50 days. Smart cool season crop management makes all the difference:
- Maintain soil pH between 6.0 and 7.5 for strong iron uptake
- Use straw mulch types to hold moisture and regulate temperature
- Apply drip irrigation to reduce aphid prevention issues and leaf disease
- Time seedling transplants carefully if late frosts threaten your region
- Control daylength exposure by using row covers during unexpected warm spells
Spring gardening with spinach is straightforward once you respect the cold.
Planting Lettuce Varieties

Lettuce is one of the most forgiving cool season crops you can grow, but a little garden planning goes a long way. Soil temperature between 40 and 70°F gives you reliable seed starting results.
Sow seeds ⅛ to ¼ inch deep, practice succession sowing every 10 to 14 days, and choose leaf color selection that fits your kitchen.
Bolting prevention starts early — shade cloth helps once temperatures climb.
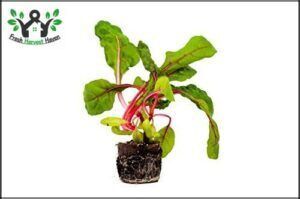
Swiss Chard for Colorful Harvests

Swiss chard outlasts most leafy greens in a spring vegetable garden, bridging cool mornings and warmer afternoons without skipping a beat. Its betalain pigments — responsible for those vivid red, yellow, and orange stems — don’t fade when cooked, which makes colorful harvests worth planning for.
Sow seeds ½ inch deep once soil reaches 50°F, spacing plants 6 to 12 inches apart. Succession planting every two weeks keeps production steady. Shade cloth benefits kick in once temperatures climb. Five varieties worth growing:
- Bright Lights – Electric stems, striking contrast
- Rhubarb Chard – Deep ruby petioles, bold garden presence
- Fordhook Giant – White-ribbed, reliably productive
- Rainbow Mix – Multicolor organic gardening at its best
- Perpetual Spinach – Mild flavor, extended yields
Harvest outer stems vs leaves separately — stems need slightly longer cooking — and you’ll appreciate the nutrient density on every plate.
Asian Greens Like Bok Choy and Tatsoi

Those rainbow chard stems lead naturally into another cool-season duo worth knowing: heat‑tolerant bok choy and tatsoi.
Both are nutrient‑dense Asian greens that handle light frost without complaint.
Sow them once the soil hits 50°F, spacing plants 6 to 8 inches apart in well‑draining beds with a pH of 6.0 to 7.0.
Tatsoi’s frost resistance lets it outlast most quick‑harvest greens, and bok choy heads are ready in roughly 45 to 55 days.
Arugula and Mâche for Early Greens

After bok choy and tatsoi, arugula and mâche round out your early spring vegetables beautifully. Both germinate in soils as cold as 40°F, so you can sow them weeks before most crops even start.
Here’s what makes this pairing work in your spring vegetable garden:
- Harvest Timing — Arugula yields baby greens in just 25 to 30 days; mâche follows close behind.
- Flavor Pairing — Arugula’s peppery bite balances mâche’s buttery, hazelnut-like softness perfectly.
- Pest Barriers — Simple row covers protect young seedlings from flea beetles and slugs.
- Succession Planting — Sow every two weeks to keep harvests coming all spring.
Watch soil moisture carefully; both greens prefer consistently moist but well‑drained beds. These spring gardening tips keep your garden productive from the first thaw forward.
Top Root Vegetables for Early Spring

Root vegetables are some of the most rewarding things you can grow in early spring — they work quietly underground while the rest of your garden is just waking up.
The cool soil actually works in your favor here, coaxing out sweeter, crisper flavors than you’d ever get in summer heat.
Here are four root crops worth making room for this season.
Planting Carrots for Sweet Flavor
Few vegetables reward careful soil preparation quite like carrots in a spring vegetable garden. Cool temperatures between 60–70°F trigger real sugar buildup in the roots, so timing your planting matters. Here’s how to grow sweeter carrots:
- Soil preparation: Work loose, sandy loam to 12 inches deep, targeting pH 6.0–6.8, with low nitrogen to encourage root growth over leafy tops.
- Seed spacing and variety selection: Thin to 2–3 inches apart; longer‑maturing varieties develop richer sweetness.
- Mulch type and harvesting techniques: Apply straw mulch to stabilize moisture and temperature, then harvest after cool nights for peak flavor.
Radishes for Fast Spring Crops
Radishes are the sprinters of spring vegetable gardening — sow them, and you’re harvesting in as little as 22 days.
For cool season gardening success, focus on soil pH optimization between 6.0 and 7.0, and apply seed spacing techniques of about 1 inch apart.
Use row cover timing to protect early sowings, then follow basic harvest storage tips: refrigerate trimmed roots for up to two weeks.
Companion plant benefits increase when you tuck radishes beside lettuce or spinach.
Growing Beets for Dual Harvest
most efficient spring vegetables you can grow — one planting gives you two harvests. Pull tender greens as early as 30 to 40 days after sowing, then wait for baby roots at 1.5 to 3 inches.
soil pH management (6.0 to 7.0), early thinning techniques, and consistent moisture are what separate shapely roots from forked ones. Beet greens nutrition rivals the roots themselves, offering solid vitamin K and A.
Japanese Turnips for Crisp Texture
Japanese turnips are one of those spring vegetables that reward patience with a satisfying crunch — part apple, part carrot, entirely worth it.
For harvest timing, aim for the 40 to 60 day window, pulling roots at 2 to 3 inches across for peak crispness. Soil moisture consistency matters here; drought stress turns that snap into pith fast. Thin to 4 inches apart, choose a crisp white‑flesh variety for best results, and don’t skip the greens — they’re edible, too.
Cool-Weather Crops That Thrive in Spring

Cool-weather crops are where spring gardening really shines, and a handful of vegetables genuinely love the unpredictable temperatures of early spring.
From hearty brassicas to climbing peas and tangy herbs, these plants don’t just survive the chill — they thrive in it.
Here’s a closer look at the cool-season crops worth making room for in your spring garden.
Broccoli and Cauliflower Planting Tips
Start broccoli and cauliflower seedlings 6 to 8 weeks before your last frost — seedling timing is everything with these cool-season headers.
For spring vegetable planting success, follow these gardening tips:
- Prep soil to a pH of 6.0 to 7.0 and work in 2 to 4 inches of compost
- Space transplants 18 to 24 inches apart under full sun, following a consistent fertilizer schedule at planting and again when heads begin forming
- Apply row cover usage early for pest monitoring against cabbage worms, and practice crop rotation every 2 to 3 years
Cabbage for Dense Spring Heads
cabbage rewards careful garden planning with heads so firm they practically spring back under your fingertips — that’s head density testing right there.
For spring vegetable planting, work 2 to 3 inches of compost into soil at pH 6.0 to 6.8, then focus on seedling spacing of 18 to 24 inches.
Fertilizer timing matters: shift from nitrogen to phosphorus once heads begin forming. Maintain 1 to 1.5 inches of water weekly, keep mulch thickness around 2 to 3 inches, and choose heat‑tolerant varieties if your spring warms quickly.
Sustainable gardening starts with these small, consistent decisions.
Sugar Snap Peas and Supports
Once your cabbage heads are locked in, it’s time to think vertical. Sugar snap peas are one of spring’s most rewarding climbers — sweet, crisp, and surprisingly productive when your garden planning includes proper support from the start.
Trellis installation timing matters more than most gardeners realize. Get structures in place before vines start reaching, ideally at sowing time. Structure height guidelines suggest 4 to 6 feet for most varieties, using wire mesh or bamboo with 6 to 8 inch spacing for good airflow optimization strategies.
Here’s what sets a solid pea setup apart:
- Direct seed 1 inch deep at 40°F or warmer, spacing seeds 2 inches apart
- Space rows 18 to 24 inches apart to improve airflow and simplify picking
- Apply straw mulch around the base — moisture retention techniques like this protect roots during pod formation
- Water 1 inch weekly at soil level; overhead watering encourages disease
- Follow a consistent pod harvest scheduling routine, picking every 1 to 3 days once pods reach bright green and fill out
Sustainable gardening with snap peas also means companion planting — pairing them with carrots or radishes keeps your spring vegetable garden productive from the ground up.
Sorrel and Cress for Unique Flavors
After the climbers, think low and leafy.
Sorrel and cress are spring garden standouts — understated but full of personality.
Sorrel’s sharp, citrusy acidity balance pairs brilliantly with eggs and creamy sauces, while cress delivers a peppery aroma that wakes up salads instantly.
Both offer a solid nutritional boost.
Nail your harvest timing — sorrel at 6 to 8 weeks, cress in just 2 to 4 — for peak seasonal produce flavor.
Perennial Spring Vegetables to Consider

Not every vegetable needs replanting each spring — some come back stronger year after year with almost no effort on your part. Perennials are a quiet investment that pays off in fresh harvests for decades.
Here are a few worth carving out space for in your garden.
Asparagus for Long-Term Yields
Plant asparagus once, and it pays you back for 20 years or more. That kind of return demands solid groundwork: aim for a soil pH between 6.5 and 7.5, and work in 4 to 6 inches of compost before planting.
Plant asparagus once, and it pays you back for 20 years or more
- Crown Spacing: Set crowns 12 to 18 inches apart for healthy perennial growth.
- Irrigation Scheduling: Water every 2 to 3 days during establishment.
- Mulch Types: Use straw or wood chips to conserve moisture and suppress weeds.
- Disease Monitoring: Watch for rust and manage it with proper spacing and sanitation.
Artichokes as Nutritious Perennials
Asparagus earns its place in the long game, and so do artichokes. Unlike most spring vegetables, artichokes return year after year — thriving as perennials in well‑draining soil with a pH of 6.0 to 7.0 and at least six hours of daily sun.
Perennial Care is straightforward: divide clumps every three to four years, mulch consistently, and harvest buds before they open.
Artichoke Nutrition delivers real Nutrient Benefits — fiber, folate, magnesium, and antioxidants — making them standout Nutrient‑Dense Foods in any Sustainable and Organic Gardening approach.
Italian Dandelion for Easy Greens
Italian Dandelion is one of those spring vegetables that rewards you without much fuss. Unlike wild types, this bred variety stays put — no invasive spreading — and its mildly bitter leaves are ready in 30 to 50 days. It thrives in a soil pH of 6.0 to 6.8 and fits beautifully into container growing or raised beds.
- Harvest Timing: Pick outer leaves first to keep new growth coming
- Culinary Pairings: Shines with lemon, olive oil, garlic, or parmesan
- Pest Barriers: Use iron phosphate bait to deter slugs on young plants
- Companion Planting: Grows well alongside lettuce and arugula for diverse spring harvests
- Easy to Grow: Tolerates light frost, making it ideal for early vegetable gardening
Green Onions and Alliums for Spring

Alliums are some of the most rewarding plants you can grow in spring — they’re forgiving, flavorful, and surprisingly adaptable.
Whether you’re tucking onion sets into the ground or letting chives spread along a border, there’s an option here for every kind of gardener.
Here’s a closer look at the best alliums to plant this spring.
Planting Onion Sets for Green Onions
spring’s most reliable shortcuts to fresh flavor.
plant sets 1 to 2 inches deep with 1‑inch set spacing, pointed end up, once soil reaches 40°F.
Maintain a soil pH between 6.0 and 6.8, add a 1‑inch mulch depth for moisture retention, and expect harvest timing around 50 to 75 days.
row covers for frost protection in your spring vegetable garden.
Growing Shallots and Scallions
Shallots and scallions bring real versatility to your spring vegetable garden beyond standard onion sets. For shallot soil prep, plant bulbs 4 to 6 inches apart in loose, well‑drained soil with a pH of 6.0 to 7.0, about two to four weeks before your last frost.
- Scallion watering: keep soil evenly moist for harvest in 40 to 60 days
- Shallots: expect 90 to 120 days to maturity
- Bulb curing techniques: cure harvested shallots in a warm, airy spot for 2 to 3 weeks
- Shallot pest control: rotate crops every three years to reduce thrips and mildew
Chives and Garlic for Spring Flavor
Chives and garlic are two of the most rewarding alliums you can add to a spring vegetable garden. Chives tolerate cool temps early on and deliver continuous harvests once established. Garlic, planted in fall, rewards your spring gardening preparation with plump bulbs by summer.
Keep soil pH between 6.0 and 7.0, and use mulch benefits to your advantage — moisture retention and weed suppression in one step.
- Snip chives 60 to 90 days after sowing for fresh flavor pairings with eggs or potatoes
- Practice scape management by removing garlic scapes to redirect energy toward bulb development
- Use companion planting and crop rotation to reduce allium pests naturally
- Time your spring harvest when garlic tops turn yellow and fall over
Raised Bed and Container Spring Gardening

Not everyone has a sprawling backyard, and honestly, you don’t need one.
Raised beds and containers let you grow a serious spring harvest in surprisingly small spaces, with better soil control and earlier planting windows than ground beds usually allow. Here are some smart setups worth considering.
Benefits of Raised Beds for Early Crops
Raised beds give your spring vegetable garden a genuine head start.
Soil warms up 5 to 10 days earlier than in‑ground plots, supporting enhanced soil warmth and early germination for crops like lettuce and radishes.
Improved drainage keeps roots healthy, while reduced pest pressure comes naturally from elevated height.
You’ll benefit from faster harvest cycles, making spring gardening preparation, companion planting, and crop rotation easier to manage all season.
Growing Vegetables in Containers
Containers open up your spring vegetable garden to any corner of your home — balcony, patio, or windowsill.
Here’s what gives container gardening real results:
- Use 1–3 gallon containers for lettuce and spinach
- Choose high-quality soil mixes with perlite for drainage solutions
- Water when the top inch dries out — watering techniques matter
- Apply liquid fertilizer every 1–2 weeks for fertilizer scheduling
- Place pots where they receive 6–8 hours of sun for light management
Soil Preparation for Small Spaces
Even in a tight corner or balcony bed, compact composting and a vertical soil mix give your spring vegetable garden a real edge.
Start with pH balancing tips—test and amend for healthy roots. Layer 2–4 inches of compost and a space‑saving mulch. Microbial soil boost means faster warming and stronger starts.
Here’s a quick guide:
Consider the no‑till gardening method to keep soil structure intact.
| Garden Preparation | Organic Gardening Methods |
|---|---|
| pH balancing tips | Microbial soil boost |
| Compact composting | Space‑saving mulch |
| Vertical soil mix | Companion Planting |
| Crop Rotation | Spring Vegetable Garden |
| Soil Science/Management |
Planting and Care Tips for Spring Vegetables

Getting your spring vegetables off to a strong start takes a little know-how and attention to timing.
There are a few key steps that make all the difference, from soil prep to keeping young plants protected.
Here’s what you need to focus on as you plant and care for your spring crops.
Soil Temperature and Seed Sowing
While you’re planning your spring vegetable garden, don’t overlook soil thermometer use—it’s your ticket to precision. Spring planting hinges on hitting those ideal soil temperatures, so lean on soil science and management for stronger seedlings. Mulch heating effects and row cover timing can nudge the soil into the sweet spot, while soil moisture insulation protects seeds from cold snaps. Try seed bed warmers for stubborn soils. Master these thresholds:
- Spinach/Lettuce: 45–65°F
- Radishes: 50–65°F
- Carrots: 50–70°F
- Beets/Chard: 50–75°F
- Warm-season: Above 65°F
Refer to soil temperature guidelines for best planting decisions.
Watering and Fertilizing Best Practices
Once your soil temps are dialed in, water and feeding become your next focus.
Most spring vegetables do best with 1 to 1.5 inches of water weekly — drip line scheduling and deep root irrigation keep moisture where roots actually need it.
For fertilizer dilution ratios, a balanced nutrient timing approach works well: leafy greens appreciate light nitrogen every two to three weeks, while root crops need less once established.
Using Row Covers and Mulch
Once you’ve dialed in watering and nutrients, it’s time to shape your spring garden’s microclimate. Lightweight row covers lift soil temperature by 2 to 4 degrees, offering pest exclusion for tender seedlings.
Mulch—applied at 2 to 3 inches locks in moisture, regulates temperature, and aids garden maintenance. Keep covers ventilated to manage humidity, and check weekly for pests or debris.
Smart garden planning and maintenance pays off all season.
Succession and Companion Planting Strategies

Spring gardening isn’t just about what you plant—it’s about when and how you plant it.
With a few smart strategies, you can stretch your harvest and keep your garden thriving.
Here’s how to make the most of succession and companion planting this season.
Staggered Planting for Extended Harvest
Think of your spring vegetable garden like a relay race — staggered planting keeps the baton moving all season long.
By sowing seeds at 7 to 14 day maturity intervals, you avoid the feast-or-famine cycle that catches so many gardeners off guard.
Succession scheduling, bed rotation, and smart variety staggering align harvest timing with what you actually need, turning a single bed into weeks of steady, satisfying yields.
Mixing Fast and Slow-Growing Crops
When you coordinate Interplant Timing and Succession Scheduling, your garden becomes a living mosaic. Pairing Sugar Snap Pea with Radish or Kale lets you harvest quick crops while Asparagus matures slowly. Try these strategies:
- Growth Habit Pairing for bed efficiency
- Nutrient Balancing to prevent depletion
- Microclimate Zoning for healthy roots
- Crop Rotation with Companion Planting for resilience
Companion Plants for Pest Prevention
Even as your spring vegetable garden comes alive, companion planting strategies offer reliable pest control.
Marigold Nematode Control works wonders around peppers, while Trap Crop Radishes draw flea beetles away from brassicas. Aromatic Herb Borders—think thyme or mint—confuse pests, and Beneficial Flower Strips attract lady beetles and hoverflies. Allium Aphid Barrier protects leafy greens.
With careful crop rotation, these vegetable gardening tips keep your spring beds thriving.
Common Spring Vegetable Growing Mistakes

Even experienced gardeners make the same spring mistakes year after year, and most of them are easy to avoid once you know what to look for.
A few missteps early in the season can set your whole harvest back by weeks. Here are the most common pitfalls to watch out for this spring.
Avoiding Overwatering and Waterlogged Soil
Too much water in your spring vegetable garden suffocates roots—fast. Want healthy growth? Focus on Soil Moisture Monitoring and Drainage Solutions.
Raise beds, use mulch management wisely, and stick to a Watering Schedule that keeps the root zone aerated.
For practical Vegetable Care and Garden Planning and Maintenance, picture:
- Gravel trenches for drainage
- Raised beds for root zone aeration
- Mulch after soaking soil
- Morning watering for seasonal gardening
Preventing Bolting in Cool-Season Crops
Bolting is one of spring’s sneakiest problems—once a plant decides to flower, your harvest window slams shut. Cool night temps below 60°F are your best defense, slowing that stress response naturally.
soil moisture consistency through drip irrigation helps plants stay focused on leafy growth. Choose slow-bolt varieties for your spring vegetable garden plants, apply mulch temperature control, and keep a succession sowing schedule rolling.
Recognizing and Managing Early Pests
Check your spring vegetable garden plants weekly — early catches save entire rows. Look for gnaw mark identification on stems, yellowing leaves, or the telltale honeydew trail aphids leave behind.
Sticky trap placement near entry points helps you monitor pressure before it escalates. Physical barrier installation like row covers block egg‑laying moths entirely.
Combine companion planting and crop rotation with consistent soil moisture monitoring, and keep a pest log, keeping the system simple enough to actually use.
Frequently Asked Questions (FAQs)
What vegetables to plant first in spring?
Picture crisp morning air and dew on soil—early spring vegetables like lettuce, spinach, radishes, and peas thrive now.
Use a soil thermometer, follow seed pack timing, and set up cold frames for frost protection and early harvest herbs.
What is the 70 30 rule for gardening?
70 30 rule guides garden planning and design: 70% reliable, structural plants or natives for stability and maintenance allocation, 30% filler, non-natives, or experimental crops.
It aids risk management, crop diversity, and companion planting in spring vegetable gardens.
What vegetables do I plant in October?
October’s chill signals a turning point—time for spinach, lettuce, radishes, carrots, and garlic planting.
Mulch strategies and soil warming support winter harvest planning, while cover crop selection, companion planting, and crop rotation shape your spring garden’s design and storage.
What vegetables should I plant in spring?
Spring is your window for cool-season vegetables like spinach, lettuce, peas, and radishes.
Start seeds indoors, monitor soil pH management, use frost protection techniques, and practice succession planting timing for steady harvests.
Companion pest repellents boost your vegetable gardening success.
What is the easiest plant to grow in spring?
Lettuce is the easiest vegetable to grow in spring.
With quick germination in 7 to 10 days, low maintenance needs, and tolerance for light frost, you can harvest tender leaves in under 30 days.
What are the fastest growing spring vegetables?
Arugula, radishes, and spinach win the speed race. You’ll cut baby arugula in 20 to 25 days, pull cherry radishes in under 30, and harvest tender spinach greens within 30 days of sowing.
What are the best beginner vegetables to grow?
Think of your garden as a canvas—paint it with easy-to-grow vegetables like radishes, green onions, and leafy greens.
With solid soil preparation, a steady watering schedule, and basic pest prevention, you’ll harvest fresh flavors in weeks.
What is the best order to plant vegetables in a garden?
Start with cool-season crops like peas, spinach, and lettuce, spacing for sunlight.
Sow fast radishes between slower growers. Wait for soil temperature above 60°F before planting warm-season crops.
Use succession planting intervals and crop rotation sequencing for steady harvests.
What vegetables are good in spring?
Like a blank canvas waiting for color, your spring garden rewards those who plant early. Spinach, peas, radishes, and lettuce are cool-weather champions that thrive before summer heat arrives.
What vegetables can and cannot be planted next to each other?
Pairing the right plants together can make or break your harvest. Some spring vegetable garden plants thrive side by side, while others quietly sabotage each other underground.
Conclusion
conversation with the season—spring is the season that rewards those who show up early. The best spring vegetables to plant aren’t just chosen; they’re timed, tended, and trusted to grow.
crisp lettuce to patient asparagus, each crop you put in the ground builds your confidence alongside your harvest. Start with one bed, stay consistent with your care, and spring will deliver more than you planted for.