This site is supported by our readers. We may earn a commission, at no cost to you, if you purchase through links.
 Most gardeners assume seed germination is a simple "plant and pray" affair—toss seeds in dirt, add water, and hope for the best. But here’s the truth: fresh seeds can hit 95% germination rates under the right conditions, while those same seeds might struggle to reach 30% when you skip a few natural preparation steps.
The difference between a thriving seedling tray and a disappointing handful of sprouts often comes down to mimicking what nature’s been perfecting for millions of years. Whether you’re scarifying tough seed coats, adjusting soil temperature, or timing your planting with seasonal rhythms, these natural techniques don’t just boost germination rates—they set your plants up for vigorous growth from day one.
Table Of Contents
- Key Takeaways
- What is Seed Germination?
- Essential Conditions for Germination Success
- Choosing and Preparing The Right Soil
- Natural Seed Preparation Techniques
- Best Methods for Sowing Seeds
- Creating Ideal Germination Environments
- Troubleshooting Common Germination Problems
- Optimizing Seedling Growth After Germination
- Frequently Asked Questions (FAQs)
- Conclusion
Key Takeaways
- Fresh seeds hit 95% germination rates when you mimic nature’s prep work—scarification breaks tough seed coats, stratification simulates winter’s chill, and both can boost rates from 30% to 80% compared to untreated seeds.
- Your soil mix matters more than you think: sterile seed-starting mix prevents damping-off disease, while adding perlite and coconut coir creates the airy, moisture-balanced environment that separates 100% germination consistency from rotting failures.
- Pre-soaking seeds in diluted fertilizer (like Neptune’s Harvest) doesn’t just soften seed coats—it loads embryos with nutrients for explosive early growth, giving seedlings a head start that translates to vigorous plants from day one.
- Most germination failures trace back to three controllable factors: wrong temperature (most seeds need 65-75°F), inconsistent moisture (damp but not waterlogged), and improper planting depth (2-3 times the seed’s diameter)—nail these basics and you’ll avoid 90% of common problems.
What is Seed Germination?
Seed germination is the process where a dormant seed breaks through its protective coat and begins to grow into a seedling. Understanding what triggers this process—and what can stop it in its tracks—gives you real control over your garden’s success.
Let’s break down germination rates and the key factors that determine whether your seeds thrive or fail.
Germination Rate Explained
Germination rate is simply the percentage of seeds that sprout when given the right conditions—and knowing this number can save you from planting duds and wasting your time. You’re basically measuring seed viability, which tells you how many seeds will actually do their job. Here’s what germination rates reveal:
- Seed quality – Fresh seeds usually have 85-95% germination rates, while older stock drops sharply
- Water absorption efficiency – Viable seeds swell and activate embryo development within 24-48 hours
- Soil microbe interactions – Healthy germination speed depends on beneficial microorganisms supporting early growth
Maximizing germination rates means you’ll plant with confidence instead of crossing your fingers.
Factors Affecting Seed Germination
Knowing your germination rate is one thing—actually getting seeds to sprout reliably means understanding what they need to break dormancy. The seed coat, embryo development, and water absorption work together like a lock-and-key system, and soil quality, moisture levels, and temperature control determine whether you release that potential or just stare at empty trays.
Each factor shifts your germination rates dramatically, so you’ll want to dial in the basics before troubleshooting failures. Understanding the ideal environmental factors is vital for achieving high germination success.
Essential Conditions for Germination Success
You can’t beat Mother Nature in terms of germination—but you can work with her. Seeds need three basic things to wake up and grow: the right amount of light, consistent moisture, and proper temperature.
Let’s break down exactly what your seeds are asking for so you can give them the best shot at success.
Light, Water, and Temperature Needs
Without the right balance of light, water, and temperature, even the healthiest seeds won’t crack open and sprout—so let’s break down exactly what your seeds need to wake up and thrive.
Most seeds germinate best between 65–75°F, with consistent moisture levels that keep the soil damp but not waterlogged. Ideal lighting varies—some seeds need darkness initially, while proper temperature control and humidity management directly influence germination timing and seedling growth success.
Seeds That Need Sunlight to Germinate
Here’s the thing—not all seeds play by the same rules. Tiny seeds like lettuce, petunia, and snapdragon have special light-dependent germination triggers and actually need exposure to sunlight to sprout. Their seed photoreceptors sense light intensity effects and tell them it’s safe to grow.
If you bury these guys too deep in your seed starting mix, they’ll just sit there dormant, wondering where the sun went—which is why surface-sowing is key for meeting their sunlight requirements and getting your seedlings off to a strong start. Understanding the light requirements is essential for successful seed germination.
Choosing and Preparing The Right Soil
You can’t grow strong seeds in weak soil—it’s that simple. The right mix drains well, holds moisture where it counts, and keeps diseases at bay from day one.
Let’s break down how to build a soil foundation that actually works.
Benefits of Seed-Starting Mix
You want your seeds to actually sprout, not rot in the dirt—that’s where a dedicated seed starting mix makes all the difference. This specialized soil preparation offers enhanced moisture retention without the waterlogging risks that plague garden compost.
The sterile composition prevents damping-off disease, while its fine texture allows delicate seed coat penetration and consistent germination across everything from tomatoes to peppers.
Professional growers see up to 100% germination consistency with quality seed mix compared to standard soils.
Improving Soil With Perlite and Coconut Coir
If your seed-starting mix drains like a brick or stays soggy for days, blending in perlite and coconut coir can transform it into the airy, moisture-balanced medium seeds crave.
Mix one part perlite with one part coconut coir into your seed-starting mix—this combination boosts soil aeration while creating drainage systems that prevent damping-off.
The volcanic glass structure of perlite mixtures increases airflow, while coconut benefits include outstanding water retention without suffocation, giving you complete control over your germination environment.
Using Vermicompost and Organic Amendments
Vermicompost isn’t just worm poop—it’s a powerhouse of nutrients and beneficial microbes that can boost your seeds from the moment they crack open. Add it to your seed starting mix in small amounts—think one part vermicompost to five parts mix—to release serious benefits without overwhelming delicate roots.
Game-changing organic fertilizers to blend in:
- Dr. Earth Organic fertilizer – Feeds microbial activity while releasing slow, steady nutrients your seedlings actually use
- Neptune’s Harvest Crab Shell and Kelp Meal – Delivers that nitrogen kick plus trace minerals for explosive early growth
- Compost tea – Drench your mix before planting to inoculate it with living organisms that protect against disease
Natural Seed Preparation Techniques
Before you plant, give your seeds a little prep work—it can make all the difference between stubborn duds and vibrant sprouts. Some seeds have built-in barriers that slow things down, so a few simple tricks help break through those defenses.
Let’s look at two powerful techniques that’ll stack the odds in your favor.
Soaking Seeds in Water or Fertilizer
Think of pre-soaking as giving your seeds a head start in the race to germination—a simple overnight bath can mean the difference between sluggish sprouting and explosive growth. Lukewarm water works perfectly for seed rehydration, but here’s where you can level up: soaking seeds in diluted fertilizer like Neptune’s Harvest Fish & Seaweed gives them a nutrient-packed boost that improves germination and strengthens early growth.
This seed priming technique isn’t just about softening tough seed coats—it’s about loading your seeds with everything they need to hit the ground running.
Scarification and Stratification Methods
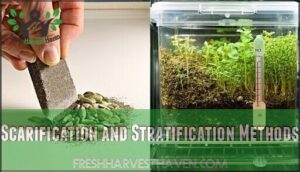
Scarification and Stratification aren’t just fancy gardening terms—they’re your secret weapons for cracking open stubborn seeds that refuse to germinate without a little tough love. Mechanical Scarification (physically abrading the seed coat with sandpaper or nicking it with a knife) can skyrocket germination rates from 22% to 80% in hard-seeded species, while Cold Conditioning mimics winter’s chill to break seed dormancy in plants like native wildflowers and perennials.
Scarification and stratification are secret weapons that crack open stubborn seeds, boosting germination rates from 22% to 80% in hard-seeded species
- Seed Abrasion: Gently rub seeds on fine-grit sandpaper for 10-15 seconds to weaken tough coats
- Thermal Stratification: Expose seeds to 95°C water for 35 seconds (boosting rates to 80% in some species)
- Cold Stratification: Refrigerate seeds in moist medium for 1-5 months at 35-40°F
- Chemical Treatment: Use diluted acid cautiously—sulfuric acid hits 76.4% germination in lupines but damages thin-coated seeds
- Combined approaches: Pair scarification with stratification for peak performance (74% vs. 30% in untreated controls)
These seed germination techniques target specific dormancy mechanisms, so match your method to your seed type for best results.
Best Methods for Sowing Seeds
Once you’ve prepped your seeds, it’s time to get them in the ground—and how you sow matters just as much as what you sow. Whether you’re planting directly in your garden beds or starting seeds indoors, the method you choose sets the stage for germination success.
Let’s break down the best approaches so you can pick the right strategy for your setup.
Direct Sowing Outdoors
There’s something liberating about skipping the seed trays and letting your seeds find their home right where they’ll grow—straight into the garden soil. Direct sowing outdoors works best when your soil temperature hits the ideal range for your chosen seeds—you’re working with nature’s timeline, not against it.
Check weather resistance for your seed selection, plant at the proper depth (usually 2-3 times the seed’s width), and you’ve mastered one of gardening’s most straightforward techniques.
| Direct Planting Methods | Soil Temperature Range | Seed Depth Control |
|---|---|---|
| Cool-season crops (peas, lettuce) | 40-65°F | ¼ to ½ inch deep |
| Warm-season crops (beans, squash) | 65-85°F | ½ to 1 inch deep |
| Root vegetables (carrots, radishes) | 45-75°F | ¼ to ½ inch deep |
Indoor Sowing Techniques
When you need more control over timing or your outdoor climate throws curveballs, starting seeds indoors puts you back in the driver’s seat. Indoor greenhouses give you command over every variable affecting seedling care. You’ll master seed germination by creating a mini-ecosystem with these essentials:
- Seed trays filled with fresh seed starting mix for disease-free indoor seedling development
- Indoor lighting and soil warming mats to replicate nature’s perfect conditions
- Humidity control through covered seed sowing methods that prevent drying without drowning
Planting Depth and Spacing Tips
Once you’ve set up your indoor growing station, getting the depth and spacing right can make or break your germination success—plant too deep and seeds exhaust themselves before breaking the surface, too shallow and they dry out before they even get started. Follow this simple rule: your seed planting depth should match two to three times the seed’s diameter, with proper row spacing preventing overcrowding that stunts seedling growth.
| Seed Type | Germination Depth | Plant Density | Soil Compaction | Spacing Between Seeds |
|---|---|---|---|---|
| Large (beans, peas) | 1-2 inches | 3-4 per sq ft | Firm press | 2-4 inches |
| Medium (tomatoes, peppers) | ½ inch | 1-2 per sq ft | Light tamp | 1-2 inches |
| Small (lettuce, carrots) | ¼ inch | 8-12 per sq ft | Barely cover | ½-1 inch |
| Tiny (petunias, snapdragons) | Surface | 16+ per sq ft | No press | Sprinkle lightly |
| Extra-large (squash, corn) | 2-3 inches | 1 per sq ft | Moderate firm | 6-12 inches |
Your seed starting mix shouldn’t be packed down like concrete—gentle seed placement with minimal soil compaction allows oxygen to reach germinating seeds while your sowing technique keeps everything at the perfect germination depth for sturdy roots.
Creating Ideal Germination Environments
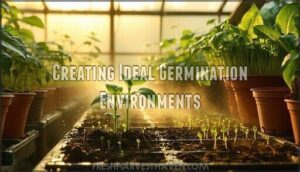
You’ve got your seeds ready and your soil dialed in—now it’s time to nail the environment. Temperature and humidity can make or break germination, and a few smart tweaks will keep those seedlings healthy and disease-free.
Let’s look at how to control these conditions and avoid the most common pitfalls.
Managing Humidity and Temperature
Getting the right balance of humidity and temperature can feel like unlocking a secret code, but once you nail it, your seeds will germinate faster and more consistently than you ever thought possible. Here’s how to master climate management for ideal seed germination:
- Temperature Control: Most seeds germinate best between 65-75°F; use soil warming mats or germination chambers to maintain steady warmth.
- Humidity Levels: Keep moisture around 70-80% by covering trays with clear domes or plastic wrap—don’t let things get soggy.
- Monitor Daily: Check your setup morning and evening; condensation buildup means you need ventilation.
- Adjust By Seed Type: Cool-season crops prefer cooler temps (60-65°F), while warm-season varieties need 70-80°F for seedling health and growth.
Preventing Damping Off and Root Rot
Proper sanitation methods and drainage work together to stop damping off and root rot before they devastate your seedlings. Start by sanitizing trays with a 10% bleach solution—this simple step cuts pathogen presence by up to 95%.
Fresh seed-starting mix is non-negotiable; old soil harbors fungi that thrive in waterlogged conditions. Mix in perlite to boost drainage by over 50%, and water only when the top feels dry to the touch, reducing root rot risk by 65%.
For organic remedies, Trichoderma and Bacillus strains provide fungal control while supporting seedling health and growth naturally.
Troubleshooting Common Germination Problems
Sometimes your seeds just won’t cooperate, no matter how carefully you’ve followed the steps. When germination stalls or fails completely, you need to figure out what’s blocking the process before you can fix it.
Let’s break down the most common culprits and how to get those stubborn seeds moving.
Diagnosing Poor Germination
If your seeds aren’t popping up, poor germination rates often point to a few key culprits you can spot with some detective work. Start by checking seed health and age, since germination percentages dropping below 80–85% usually mean quality problems—fungal infections above 10–25% or poor storage can slash viability fast.
Look at these environmental factors and substrate issues:
- Soil moisture swings or compaction blocking 10–25% of seeds from breaking through
- Wrong temperatures delaying or killing up to half your seed lot
- Pathogens like Fusarium dragging germination below 80% when infections exceed 25%
- Compacted or waterlogged growing mix cutting emergence by 15% due to poor aeration
Run simple germination tests at home or get a soil analysis to pinpoint what’s holding your seeds back.
Solutions for Low-Quality Seeds
Low-quality seeds don’t have to spell disaster for your garden—a few rescue tactics can breathe life back into stubborn batches and salvage your planting season. Try seed priming in diluted fertilizer to trigger embryo activation, or use scarification to crack tough seed coats that block water uptake. Stratification breaks dormancy, while fresher storage boosts seed viability—giving your germination rates the revitalization they desperately need.
| Rescue Method | How It Restores Seed Germination |
|---|---|
| Seed Priming | Soaking triggers embryo activation and speeds germination boost |
| Scarification | Filing or nicking the seed coat allows water penetration |
| Stratification | Cold treatment provides dormancy break for stubborn seeds |
| Fertilizer Soak | Nutrient infusion strengthens weak embryos for seed revitalization |
| Quality Testing | Identifies viable seeds worth saving from your batch |
Addressing Dormancy Mechanisms
Some seeds won’t wake up without a nudge—nature programmed them with built-in delay tactics that protect embryos from sprouting at the wrong time. Breaking dormancy isn’t complicated, but you’ve got to match your method to the seed’s biology—scarification cracks tough coats, cold stratification mimics winter, and hormone regulation jumpstarts embryo activation when soaking alone won’t cut it.
5 Dormancy Breaking Techniques That Command Results:
- Cold Treatment (Stratification) – Refrigerate seeds in moist medium for 30-90 days to simulate winter’s trigger
- Seed Scarification – File or nick hard seed coats so water penetration ignites germination
- Warm Stratification – Store seeds at 68-86°F in damp conditions to break chemical inhibitors
- Hormone Soaking – Use gibberellic acid solutions for stubborn hormone regulation issues
- Combination Methods – Layer cold treatment with scarification for double-dormant seeds that refuse to cooperate
Optimizing Seedling Growth After Germination
Germination is just the beginning—what happens next determines whether your seedlings become strong, healthy plants or weak, spindly disappointments. Once those first leaves appear, you’ll need to master three critical skills to turn fragile sprouts into garden-ready transplants.
Here’s how to keep your seedlings thriving from emergence to transplant.
Thinning and Transplanting Seedlings
Here’s the thing about seedlings: they’re basically competing roommates in a tiny apartment, and if you don’t step in to sort things out, they’ll all end up stunted and struggling for resources. Thinning means snipping weaker seedlings at soil level—never pull them, or you’ll damage neighboring roots.
Proper seedling spacing prevents transplant shock later and promotes healthy seedling development, giving your plants room to breathe before transplanting seedlings into their permanent homes.
Providing Adequate Light
Without enough light, your seedlings will stretch themselves into pale, spindly disasters—basically plant versions of someone who hasn’t seen the sun in months.
Here’s how you nail seedling light requirements:
- Light Intensity matters: Natural lighting through south-facing windows works, but grow lights deliver consistent photosynthesis rates without the guesswork.
- LED benefits rule: LED grow light options consume less energy while promoting excellent seedling development and seed germination success.
- Duration counts: Your seedlings need 12-16 hours of strong light daily—no shortcuts here.
Watering and Fertilizing Young Plants
Your seedlings survived the germination gauntlet, but now comes the trickier part—watering and feeding them just enough without drowning their delicate roots or starving their growth potential.
Check soil moisture daily—you want it damp like a wrung-out sponge, not soaked.
Start fertilization with diluted liquid fertilizers at half-strength once true leaves appear, supporting steady plant growth without overwhelming tender roots.
Frequently Asked Questions (FAQs)
Can seeds germinate without soil or growing medium?
Yes—and it’s actually liberating. Seeds can germinate without soil through water culture or hydroponic growth methods. The seed coat only needs moisture levels and oxygen to trigger germination, allowing air roots to develop in medium-free systems, though seed-starting mix usually provides stronger support for healthy germination rates.
How long do different seeds remain viable?
Most vegetable seeds stay viable for one to five years when stored properly, though longevity varies widely. Lettuce and onions decline faster, while tomatoes and brassicas hold strong for three to four years.
Proper seed storage is critical for maintaining germination rates.
What natural hormones stimulate faster seed germination?
Gibberellin function naturally breaks seed coat dormancy and triggers germination by activating enzymes that mobilize stored nutrients.
Auxin effects and cytokinin role support root and shoot development, while ethylene impact can speed things up or slow them down depending on moisture levels.
Which companion plants help seeds germinate better?
Companion Planting enriches soil with beneficial microbes that act as natural germination boosters. Legumes like clover, beans, and peas fix nitrogen through rhizobia bacteria, creating nutrient-rich conditions that improve seedlings’ growth and overall seed germination success.
Do moon phases affect seed germination success?
Traditional lunar farming practices claim the lunar cycle affects germination rates, but solid scientific evidence remains scarce. While cosmic influence theories persist, most research confirms that seed starting success depends far more on proven germination techniques—proper moisture, temperature, and seedling care—than moon phase synchrony or germination rhythm.
Conclusion
Why settle for coin-flip odds when nature’s already cracked the code? These natural ways to improve seed germination aren’t just gardening hacks—they’re your blueprint for transforming mediocre results into consistent success.
Scarification breaks stubborn barriers, stratification mimics winter’s wake-up call, and proper soil prep creates the perfect launchpad. Master these techniques, and you’re not just planting seeds—you’re engineering vigorous, resilient plants from the ground up.
The difference between frustration and triumph starts right here, in those critical first days.

