This site is supported by our readers. We may earn a commission, at no cost to you, if you purchase through links.

Most new gardeners kill their first tomato plant before it ever flowers. Not from bad luck, but from skipping the boring stuff: sunlight checks, soil tests, spacing rules. Green thumbs aren’t born, they’re built one right decision at a time.
Here’s the good news. A solid planting guide for beginners garden setup doesn’t need fancy tools or a farming degree. You just need the right order of steps, from picking your spot to choosing crops that forgive rookie mistakes.
Grab your gloves. Let’s turn that empty patch of dirt into something that actually grows.
Table Of Contents
- Key Takeaways
- Choose Your Garden Location
- Start With Manageable Garden Size
- Test and Prepare Soil
- Top 10 Garden Starter Picks
- 1. AmazStove Galvanized Raised Garden Bed
- 2. SnugNiture Galvanized Round Garden Bed
- 3. Keter Wood Look Raised Garden Bed
- 4. Miracle Gro Organic Outdoor Potting Mix
- 5. Miracle Gro Potting Mix
- 6. Burpee Organic Potting Soil for Containers
- 7. Patio Tomato Seeds for Containers
- 8. Sun Gold Cherry Tomato Seeds
- 9. Sunsugar Early Sweet Cherry Tomato Seeds
- 10. Container Herb Gardening Guide
- Pick Easy Beginner Vegetables
- Plan Planting Dates Carefully
- Plant Seeds and Seedlings Correctly
- Water, Mulch, and Feed Plants
- Prevent Problems and Harvest Often
- Frequently Asked Questions (FAQs)
- What is the 70 30 rule for gardening?
- What should I plant in my garden as a beginner?
- Is October too late to plant?
- How to plant a garden for beginners step by step?
- How do I start gardening as a beginner?
- How to get started with gardening?
- Should you ask for gardening advice for beginners?
- How do I start a vegetable garden?
- How do you plant a garden?
- How do I start my gardening journey?
- Conclusion
Key Takeaways
- Choose a garden spot with 6-8 hours of daily sun, good drainage, wind protection, and easy water access before planting anything.
- Start small with a manageable size like a 4×8 raised bed or 10×10 plot, since oversized gardens overwhelm beginners.
- Test and prep your soil by checking pH, adding compost, loosening it 12 inches deep, and clearing weeds before seeds go in.
- Pick forgiving beginner crops like lettuce, radishes, peas, and tomatoes, and time your planting around your area’s last frost date for the best results.
Choose Your Garden Location

Your garden’s success starts before you plant a single seed. The spot you pick will shape how well everything grows, so it’s worth getting right. Here are five things to check off before you break ground.
If you’re new to all this, our guide to essential vegetable gardening tips for beginners walks you through sunlight, soil, and drainage basics before you commit to a spot.
6–8 Hours Sunlight
Sunlight often makes or breaks a beginner garden. Most vegetables need 6 to 8 hours of direct sun daily for strong growth and good fruit set.
- Boost photosynthetic flux with open, unblocked sky
- Compare morning vs afternoon sun for heat-sensitive crops
- Use reflective mulch to boost light reach
- Watch for leaf scorch in intense afternoon rays
- Track seasonal light shifts as days lengthen
Consider garden orientation basics to make sure your beds receive consistent full sun.
Good Soil Drainage
Good soil drainage matters just as much as sun. Puddling water after rain, or soggy roots, signals trouble ahead.
Run a simple test: dig a 12×12 inch hole, fill it with water, and time the drain.
| Drain Time | Soil Quality | Fix |
|---|---|---|
| 1-2 hrs | Good | None needed |
| 3+ hrs | Poor, clay-heavy | Add compost |
| Instant | Sandy | Add organic matter |
Wind-protected Planting Area
Once drainage’s sorted, think about wind. A windbreak barrier—hedge, fence, or lattice—cuts wind speed 60-80% at bed level, protecting pollinators and tender stems.
Place it on the windward side. This creates a warmer microclimate, holds soil moisture, and lets you tuck delicate herbs and lettuce into the sheltered center.
Close to Water Source
Water access matters just as much as sun and shelter. Keep beds within a short hose reach to cut watering time by up to 40%.
Under 30 meters allows gravity-fed irrigation, easing pump costs by 25%. Install a backflow preventer, consider a rain barrel, and test water quality yearly to protect soil health and irrigation schedules.
Easy Harvesting Access
Once your beds are watered, think about how you’ll actually reach the crops. Keep pathways 3 feet wide with firm, non-slip surfaces, and place key plants within 24 inches of your access point.
- Less bending
- Fewer spills
- Faster picking
Choose accessible bed heights and ergonomic tools to make every harvest feel easy, not exhausting.
Start With Manageable Garden Size

Bigger isn’t better when you’re just getting started. A small, well-planned space keeps weeds, watering, and harvesting easy to manage. Here’s what to think about as you map out your first garden.
Small 4×8 Raised Bed
A 4×8 raised bed is the sweet spot for beginners: big enough to grow plenty, small enough to manage.
Pick cedar or redwood boards for rot resistance, with galvanized screws to fight corrosion. Build walls 12 to 24 inches tall for root depth and comfortable access. This size holds roughly 0.9 to 1.4 cubic yards of soil, and you’ll want 18 inches of clearance on all sides for easy weeding.
Simple 10×10 Plot
If ground-level growing suits you better than raised beds, a 10×10 plot delivers 100 square feet of workable space.
Use square foot methods for intensive vegetable spacing and maximizing growing space. Mound beds slightly for compact plot drainage.
Quick garden planning tips:
- Test soil before digging
- Sketch your garden layout first
- Plan efficient path design
- Prep beds before planting seeds
Room for Garden Paths
Skip the trampled-mud look — plan for real walkways. Space paths every 4 feet so you can weed and harvest without stepping on planting soil.
Aim for 36 to 48 inches wide on main routes, narrowing secondary paths to 24-30 inches. Gravel drains well and stays low-maintenance, while stepping stones add a rustic touch. Either way, leave room for a wheelbarrow.
North-side Tall Crops
Think of tall crops as your garden’s sunshade—placed wisely, not blindly.
Plant corn, sunflowers, or pole beans along the north side of your bed. As the sun arcs overhead, their shadows fall behind them, not across your shorter veggies.
- Use stakes or trellises for vertical growth support
- Improves airflow, reducing disease risk
- Cools soil, aiding moisture control
- Watch seasonal shadow patterns
- Keep proper plant spacing
Beginner-friendly Layout Sketch
A quick sketch saves you from costly redos later.
Grab graph paper and map a 4×6 grid, marking beds, paths, and sun direction. Note 18-inch path widths for wheelbarrow access, orient beds south for sun exposure, and label zones by letter or number.
Leave room in your notes to shift crops next season—good garden design always expects change.
Test and Prepare Soil

Great plants start with great soil, not luck. Before you put a single seed in the ground, your dirt needs a little attention. Here’s exactly how to get it ready.
Check Soil PH
Before you plant a single seed, grab a soil pH test kit or digital meter. Sample several spots for accuracy.
Aim for pH 6.0–7.0—outside that range, nutrient availability drops fast.
- Buy a test kit
- Sample multiple spots
- Check moisture levels
- Read results carefully
- Retest after adjustments
Adjust naturally with lime or sulfur, then recheck seasonally.
Add Aged Compost
Once your pH is balanced, feed the soil with aged compost. Spread 1–3 inches across your bed and work it in.
Compost boosts fertility, holds moisture in sandy soil, and loosens clay for better root growth. It also adds beneficial microbes that release nutrients naturally, giving your vegetables a steady, balanced start.
Loosen Soil Deeply
Compost feeds the soil, but roots still need room to spread. Grab a garden fork or broadfork and work the bed to about 12 inches deep. Deep loosening breaks up compaction, boosts root porosity, and improves aeration.
Why it matters:
- Roots grow deeper and stronger
- Water reaches thirsty roots below
- Microbes thrive in aerated soil
Improve Drainage Naturally
Soggy soil suffocates roots, even after all that forking. Organic mulch benefits go beyond weed control, giving you a real soil porosity boost as materials break down into humus.
If your beds sit low, try natural grading techniques: a gentle 1–2% slope steers water toward paths instead of puddles. Raised beds and permeable pathway materials like gravel help excess water soak away naturally.
Remove Weeds Before Planting
Before your seedlings ever touch soil, clear out the competition. Pull weeds with roots intact, since leftover fragments regrow fast.
Rake the bed to expose hidden tubers. For stubborn patches, try solarization: clear plastic over 4-6 weeks during hot spells kills seeds effectively. A hand fork makes root removal easier, keeping your garden bed prep truly weed-free before planting begins.
Top 10 Garden Starter Picks
Once your soil’s ready, having the right gear makes everything easier. You don’t need a fancy setup, just a few reliable picks that fit your space and budget. Here are ten beginner-friendly options to help you get growing.
1. AmazStove Galvanized Raised Garden Bed
Rust is the enemy of any metal bed, and this one fights back with double-layer galvanized steel, 0.80mm to 0.98mm thick. Assembly takes about 10 minutes thanks to pre-drilled holes and rounded edges that won’t nick your hands.
The open-base design lets excess water drain away, protecting roots from rot. Each 4x2ft unit comes two to a kit, backed by a three-year warranty against defects.
| Best For | Novice gardeners who want a durable, quick-to-assemble raised bed for growing vegetables, fruits, or flowers in a compact space. |
|---|---|
| Product Type | Raised Bed |
| Beginner Friendly | Yes |
| Outdoor Use | Yes |
| Container Suitable | No |
| Assembly Required | Yes |
| Price Range | Mid |
| Additional Features |
|
- Rust-resistant double-layer galvanized steel built to last for years
- Quick, tool-light assembly with pre-drilled holes and rounded, safe edges
- Open-base drainage helps prevent waterlogged roots and root rot
- Fixed 4x2ft size may be too small for larger or high-yield crops
- Metal walls can heat up in direct sun, potentially stressing roots
- Only 1ft deep, so it’s not suitable for deep-rooted perennials
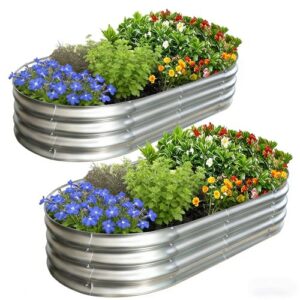
2. SnugNiture Galvanized Round Garden Bed
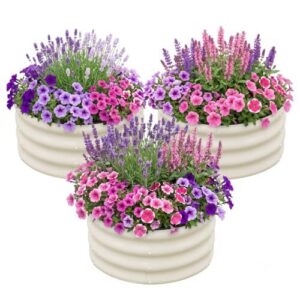
If curves fit your space better than corners, this bed delivers. The round footprint uses thick galvanized steel with wave-reinforced panels, giving it a wood-grain texture that looks nice on any patio.
At 23.6 in wide and 11.8 in tall, it holds about 4 cubic feet of soil — plenty for lettuce, herbs, or strawberries. The open-bottom design lets roots stretch into the ground below, and everything you need for assembly (bolts, wrench, gloves) comes in the kit.
| Best For | This round garden bed is best for balcony, patio, or small-space gardeners growing shallow-rooted plants like lettuce, herbs, and strawberries. |
|---|---|
| Product Type | Raised Bed |
| Beginner Friendly | Yes |
| Outdoor Use | Yes |
| Container Suitable | Yes |
| Assembly Required | Yes |
| Price Range | Mid |
| Additional Features |
|
- Durable galvanized steel with wave-reinforced panels resists rust and holds up outdoors
- Open-bottom design promotes natural drainage and lets roots grow into the soil below
- Comes as a complete DIY kit with bolts, wrench, gloves, and illustrated instructions for easy setup
- Open bottom means you’ll need a drip tray or waterproof mat if placing it on a deck or wooden balcony
- Limited 11.8-inch depth isn’t suitable for deep-rooted vegetables like carrots or potatoes
- Filling all three beds requires about 12 cubic feet of soil, adding extra cost to the project
3. Keter Wood Look Raised Garden Bed
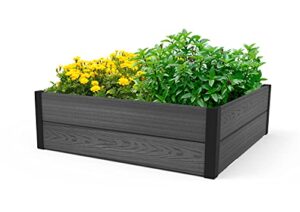
Want the classic wood look without any of the upkeep? This bed gives you that trade-off. Made from Keter’s Evotech composite, the embossed panels mimic real wood grain but never need staining or sealing.
At 48 in. W x 48 in. D x 12.6 in. H, it holds plenty of soil for veggies, herbs, or flowers. Tool-free assembly takes about five minutes. Just know it’s heavy once filled, so pick your spot before adding soil.
| Best For | Gardeners who want the look of natural wood without the maintenance, and need a sturdy raised bed that sets up in minutes. |
|---|---|
| Product Type | Raised Bed |
| Beginner Friendly | Yes |
| Outdoor Use | Yes |
| Container Suitable | Yes |
| Assembly Required | Yes |
| Price Range | Mid |
| Additional Features |
|
- Assembles in about five minutes with no tools required
- Embossed composite panels mimic real wood grain without staining or sealing
- Resists weather, rot, and UV damage for long-term outdoor use
- Doesn’t offer the same visual depth as genuine timber
- Limited planting depth isn’t ideal for deep-rooted crops
- Heavy and difficult to move once assembled and filled with soil
4. Miracle Gro Organic Outdoor Potting Mix
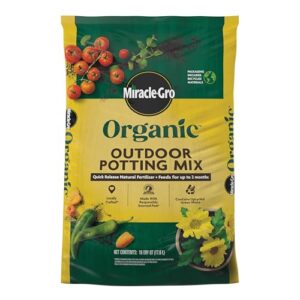
Feeding your containers shouldn’t mean juggling extra bottles of fertilizer. This mix solves that with a quick-release organic formula that feeds plants for up to two months.
It’s OMRI listed, made with responsibly sourced peat, and blended with upcycled green waste. One 16-quart bag fills a single 12-inch container, perfect for patio tomatoes or herbs.
Keep in mind: it’s built for outdoor containers only, not in-ground beds. If you’re growing in several pots, grab more than one bag.
| Best For | Gardeners who grow vegetables, herbs, or flowers in outdoor containers and want an easy, organic way to feed plants without extra fertilizer applications. |
|---|---|
| Product Type | Fertilizer |
| Beginner Friendly | Yes |
| Outdoor Use | Yes |
| Container Suitable | Yes |
| Assembly Required | No |
| Price Range | Low |
| Additional Features |
|
- Feeds plants for up to two months with a quick-release organic formula
- OMRI listed and made with responsibly sourced peat plus upcycled green waste
- Locally manufactured, keeping transportation impact low
- Only suitable for outdoor containers, not in-ground planting
- Peat-based mix may not appeal to growers with sustainability concerns
- One bag covers just a single 12-inch container, so multiple pots need extra bags
5. Miracle Gro Potting Mix
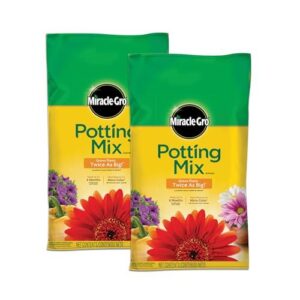
Six months of feeding in one bag? That’s the trade-off here, versus the two-month organic version above.
This classic mix suits flowers, veggies, herbs, shrubs, and perennials alike. It claims to double plant size compared to unfed plants, thanks to that slow-release fertilizer working the whole season.
Each 16-quart bag fills a 12-inch pot, and the set includes two bags (32 quarts total). Application’s simple: fill a third, add your plant, top off, water. Outdoor containers only, though.
| Best For | Gardeners who grow flowers, vegetables, herbs, shrubs, or perennials in outdoor pots and want a low-maintenance feeding routine that lasts the whole season. |
|---|---|
| Product Type | Fertilizer |
| Beginner Friendly | Yes |
| Outdoor Use | Yes |
| Container Suitable | Yes |
| Assembly Required | No |
| Price Range | Low |
| Additional Features |
|
- Feeds container plants for up to six months, cutting way down on repeat fertilizing
- Claims to double plant size versus unfed plants
- Works with a wide variety of plants, from veggies to ornamentals
- Outdoor container use only—won’t work for in-ground beds or hydroponics
- One bag may not be enough for larger or deeper pots
- Feeding stops after six months, so you’ll need to reapply or refresh the mix
6. Burpee Organic Potting Soil for Containers
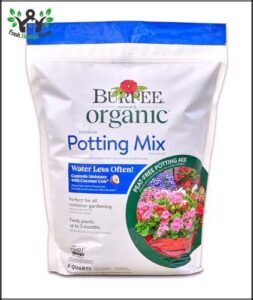
Prefer coconut coir over standard peat? This mix pairs it with plant food for instant nutrition plus better moisture retention.
It’s OMRI listed, covers vegetables, flowers, and herbs, and works indoors or out. Feeding lasts about three months, so plan a follow-up fertilizer after that window closes.
Watch your watering habits, though. Coir can compact if you overdo it, so let the top inch dry before rewatering, and store leftover soil somewhere dry.
| Best For | Container gardeners growing vegetables, flowers, or herbs indoors or outdoors who want an easy, all-natural soil that cuts down on watering chores. |
|---|---|
| Product Type | Fertilizer |
| Beginner Friendly | Yes |
| Outdoor Use | Both |
| Container Suitable | Yes |
| Assembly Required | No |
| Price Range | Low |
| Additional Features |
|
- OMRI listed and made with all-natural ingredients, including coconut coir and plant food
- Slow-release nutrients feed plants for up to 3 months with no extra work
- Coconut coir boosts moisture retention, so containers need less frequent watering
- Nutrient supply runs out after about 3 months, so you’ll need to add fertilizer afterward
- Coir can compact if overwatered, which may affect drainage
- Requires dry storage to avoid mold or degradation before use
7. Patio Tomato Seeds for Containers
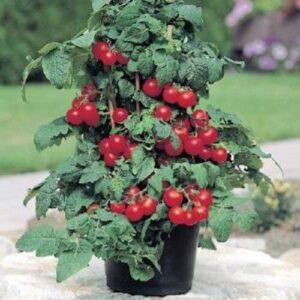
Got a balcony or small patio? This pack gives you 20 seeds bred for compact container growth, with bright red fruit perfect for salads.
Give plants 6+ hours of full sun daily, and expect to add stakes or cages as fruit sets in. One pack suits a pot or two, so grab extras for bigger harvests.
It’s an easy, space-saving way to grow real tomatoes without needing a full garden bed.
| Best For | Anyone with a balcony, patio, or small outdoor space who wants to grow fresh tomatoes without a full garden bed. |
|---|---|
| Product Type | Seeds |
| Beginner Friendly | Yes |
| Outdoor Use | Yes |
| Container Suitable | Yes |
| Assembly Required | No |
| Price Range | Low |
| Additional Features |
|
- Compact habit makes it ideal for container gardening
- Produces bright red fruit great for fresh eating and salads
- Easy to start, saving space compared to traditional garden plots
- Needs 6 hours of full sun daily to produce well
- Will likely require staking or cages as the plant grows
- Single pack may not yield enough for larger harvests
8. Sun Gold Cherry Tomato Seeds

Ready for something sweeter than your average cherry tomato? Sun Gold delivers tangerine-orange fruit with honeyed flavor and low acidity, making it a favorite among small-space growers.
This indeterminate variety keeps producing from midsummer to frost, so you’ll get a steady harvest. It grows well in containers or raised beds, but give it a sturdy cage since vines get heavy with fruit.
Sun Gold resists Fusarium wilt and Tobacco Spot Virus, too. Just give it 8+ hours of sun and consistent watering for best results.
| Best For | Sun Gold Cherry Tomato Seeds are best for small-space and container gardeners who want a steady supply of sweet, low-acid tomatoes all season long. |
|---|---|
| Product Type | Seeds |
| Beginner Friendly | Yes |
| Outdoor Use | Yes |
| Container Suitable | Yes |
| Assembly Required | No |
| Price Range | Low |
| Additional Features |
|
- Produces exceptionally sweet, tangerine-orange fruit with low acidity
- Indeterminate growth means continuous harvest from midsummer to frost
- Thrives in containers, grow bags, raised beds, and patios
- Needs sturdy staking or caging to support heavy fruit clusters
- Requires at least 8 hours of direct sunlight daily for best flavor and yield
- Must be started indoors 6–8 weeks before last frost and transplanted only after nights stay above 50°F
9. Sunsugar Early Sweet Cherry Tomato Seeds

Sun Gold’s cousin deserves a spot too, especially if you’re short on patience. Sunsugar ripens in just 50-55 days, among the fastest cherry tomatoes around.
These heirloom organic seeds produce crack-resistant fruit even after heavy rain, with tiny 1-gram tomatoes packed with sugar. Each packet holds 15 seeds, enough for a small trial row.
They handle unheated greenhouses and cold climates well, though windy spots call for staking. Perfect for snacking, less so for sauces.
| Best For | market growers and home gardeners who want an extremely early, super-sweet cherry tomato for fresh snacking rather than cooking. |
|---|---|
| Product Type | Seeds |
| Beginner Friendly | Yes |
| Outdoor Use | Yes |
| Container Suitable | Yes |
| Assembly Required | No |
| Price Range | Low |
| Additional Features |
|
- Ready to harvest in just 50-55 days, one of the fastest cherry tomatoes available
- Crack-resistant skin holds up well even after heavy rain
- Grows well in unheated greenhouses, cold climates, or outdoors
- Tiny 1-gram fruits aren’t well suited for cooking or sauces
- Only 15 seeds per packet, so larger plots may need extra purchases
- May require pollinator support or staking in windy conditions
10. Container Herb Gardening Guide
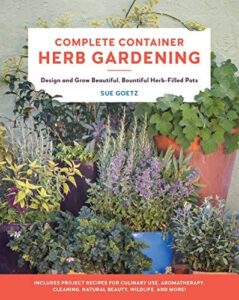
If your yard’s too small (or too shady) for a full veggie bed, herbs in containers are the perfect workaround. Cool Springs Press’s guide covers over a dozen illustrated combos, from basil and oregano to trickier picks like turmeric and saffron.
You’ll learn container sizing (10 inches per herb), soil choices, and light needs for windowsills or patios. At $17.90 for 192 pages, it’s a handy shelf reference for growing your own kitchen staples.
| Best For | Beginners with limited outdoor space who want to grow their own culinary herbs on a patio, balcony, or windowsill. |
|---|---|
| Product Type | Book |
| Beginner Friendly | Yes |
| Outdoor Use | Both |
| Container Suitable | Yes |
| Assembly Required | No |
| Price Range | Mid |
| Additional Features |
|
- Includes over a dozen illustrated container combinations, making it easy to follow along
- Covers both common kitchen herbs and specialty options like turmeric, saffron, and ginger
- Offers clear guidance on containers, soil, and light needs for indoor or outdoor setups
- Focuses only on container gardening, so it won’t help with in-ground methods
- Some herbs featured, like saffron and turmeric, need more specialized care than typical kitchen herbs
- Comes in print only, with no digital or interactive resources included
Pick Easy Beginner Vegetables

Now comes the fun part: choosing what to grow. Some vegetables forgive mistakes and reward you fast, making them perfect for your first season. Here are five easy picks that’ll build your confidence in the garden.
Lettuce and Spinach
Cool-season champs, lettuce and spinach both thrive when soil temps sit around 40-50°F, making them perfect early spring picks.
Spinach packs more iron, calcium, and folate than lettuce, though lettuce hydrates better in salads. Spinach also tolerates cold better before bolting.
Plant seeds shallow, about ½ inch deep, in loose soil. Store spinach 3-5 days refrigerated; lettuce keeps longer, up to a week.
Radishes and Carrots
If you want quick wins, radishes deliver roots in just 25-30 days, while carrots take 70-80 days but reward patience with nutrient-rich harvests.
- Sow radishes 1 inch apart, carrots 2-3 inches, both shallow
- Thin seedlings once true leaves appear
- Keep soil consistently moist for crisp texture
- Try purple, yellow, or red carrot varieties
- Eat young radish greens in salads
Successive sowing every 10-14 days keeps harvests coming.
Peas and Green Beans
Peas and beans might share the legume family, but they play by different rules. Peas love cool weather and even shrug off light frost, while beans need warm soil above 60°F to germinate.
Peas pack more protein and fiber per cup too. Space peas 2-3 inches apart, beans 3-4 inches, both about 1 inch deep. Pair peas with carrots, beans with corn, for natural pest control.
Tomatoes and Peppers
Tomatoes and peppers are the flavor stars of any garden. Both are warm-season crops needing 6-8 hours of sun and soil above 60°F.
- Stake tomatoes early
- Choose bell or hot peppers
- Water deeply, avoid soggy roots
- Mulch to retain moisture
- Harvest when fully colored
Tomatoes bring lycopene; peppers deliver vitamin C, even more than citrus. Store both at room temperature, never refrigerated.
Zucchini and Kale
Zucchini and kale make a great odd couple in your vegetable garden. Zucchini loves heat and space, while kale shrugs off cold and even sweetens after frost.
Plant zucchini near beans for better soil nitrogen. Watch for squash bugs—hand-pick them early. Harvest zucchini at 6-8 inches.
| Crop | Ideal Companion | Harvest Sign |
|---|---|---|
| Zucchini | Beans | 6-8 inches long |
| Kale | Carrots | Leaves 8-10 inches |
Plan Planting Dates Carefully

Timing is just as important as soil and sunlight for a thriving garden. Plant too early or too late, and even the toughest vegetables can struggle. Here’s how to map out your planting calendar with confidence.
Find Last Frost Date
Find your last frost date before you plant a single seed. Check your regional climate zone or hardiness zone using a Frost Date Calculator, since local meteorological data beats guessing.
Saxony often sees later frosts than western Germany. Add a week or two as buffer, and watch your microclimate closely, since a sheltered spot may warm sooner than open ground.
Cool-season Crop Timing
Cool-season crops go in early, 4 to 6 weeks before your last frost date. Lettuce, spinach, and peas handle cold soil fine, germinating once temperatures hit 40°F. Kale and broccoli shrug off light frosts too.
Watch soil temperature with a simple thermometer. For fall succession, sow again in late summer so plants mature before hard freezes hit.
Warm-season Crop Timing
Peppers, cucumbers, and their heat-loving cousins need patience. Wait until soil hits 60–65°F before transplanting or direct sowing—cold soil stalls germination and stresses roots.
Once daytime temps average above 70°F, fruit set improves fast. Try succession planting every couple weeks for steady harvests, and keep an eye out for late frost risks before committing tender seedlings outdoors.
Indoor Seed Starting
Getting a jump on the season means starting seeds indoors, weeks before outdoor soil warms up.
Use a sterile, soilless mix, moistened first, filled two-thirds up trays. Provide 14-16 hours of light with full-spectrum bulbs, positioned close above seedlings.
- Keep humidity around 60-70%
- Maintain soil temps 70-85°F for warm crops
- Add a small fan to prevent damping off
Good airflow keeps stems sturdy and roots healthy.
Succession Planting Schedule
Once seedlings go in, keep the harvest coming with staggered sowing intervals. Replant lettuce and radishes every 10-14 days; beans every 7-14 days.
Stagger tomato transplants every 3-4 weeks for continuous fruiting. Check seed packets for days to maturity to plan each growth cycle.
This rhythm smooths cool-season turnover into warm-season succession, keeping your seasonal planting calendar full and baskets never empty.
Plant Seeds and Seedlings Correctly
You’ve got your dates picked and your seeds ready to go. Now comes the part that decides whether your plants thrive or struggle: getting them in the ground the right way. Here are five simple steps to plant with confidence.
Follow Packet Spacing

Ever notice how crowded rows choke each other out? Seed packets tell you exact spacing for a reason.
- Crowded roots
- Weak stems
- Poor airflow
Follow that spacing and your garden layout design breathes properly, letting nutrients and sunlight reach every plant. Good spacing and layout now means stronger harvests later.
Plant at Proper Depth

Depth matters more than most beginners think. Small seeds need just 1/4 to 1/2 inch of soil, while beans and corn go 1 to 2 inches deep for warmth and moisture.
For transplants, match the depth of the pot. Sandy soil? Plant slightly deeper. Clay soil? Keep it shallow to avoid root rot. Too deep or shallow, just replant at the right depth.
Harden Off Seedlings

Skip this step and tender seedlings can wilt fast in full sun. Harden off over 7-14 days, adding an hour or two of outdoor light daily.
- Start with morning sun in a sheltered spot
- Watch for leaf curling or sunburn
- Bring plants in at night for the first week
Keep temps above 50°F, water lightly, and check your seed packets for transplant timing.
Water After Planting

That first drink matters as much as the planting itself. Water immediately to settle soil and remove air pockets around roots.
Use slow, deep soaking rather than a quick splash. Check moisture an inch down daily for two weeks, and adjust for weather—more on hot, windy days, less after rain. A soaker hose or watering wand works better than overhead sprinklers here.
Label Rows Clearly

Two months from now, "the row by the fence" won’t mean much to you. Grab weatherproof plant tags and note crop, variety, and planting date on each.
- Prevents mix-ups during harvest
- Saves your succession-planting schedule
- Builds confidence for next season
Keep label formatting consistent—same abbreviations, same date style—so your garden design stays easy to read at a glance.
Water, Mulch, and Feed Plants

Your seedlings are in the ground, and now it’s time to keep them happy. Water, mulch, and food work together to build strong, healthy plants. Here’s what you need to know to get this part right.
Water Deeply Weekly
Water deeply once a week, soaking the soil until it reaches 6 to 8 inches down into the root zone. A slow soak beats a quick sprinkle every time.
Try drip irrigation or a soaker hose for efficient, even coverage. Water in early morning to cut evaporation and disease risk.
Check soil moisture with a probe—aim for that "squeezed sponge" feel six inches down before your next watering schedule.
Avoid Overwatering Roots
Too much love can drown your plants. Waterlogged soil pushes out oxygen roots need to breathe, inviting rot.
Watch for these warning signs:
- Mushy, brown roots instead of firm white ones
- Soggy soil days after watering
- Yellowing, droopy leaves
- Foul smell from the soil
Run a quick soil drainage test, then adjust your watering schedule before roots suffer.
Mulch Around Plants
Once your watering rhythm feels right, add a 2 to 3 inch layer of organic mulch like straw, wood chips, or shredded leaves.
| Benefit | Effect |
|---|---|
| Moisture retention | Cuts evaporation 25-60% |
| Weed control | Blocks up to 70% germination |
| Soil temperature | Stays within 5-10°F |
| Stem health | Prevents rot |
Keep mulch pulled back a couple inches from stems.
Fertilize After Growth
Once seedlings show new growth, feed them. Use a balanced fertilizer (NPK 10-10-10) at about 1 cup per 4 square feet, watered in well.
Granular feeds release slowly over weeks; liquid feeds work faster for containers. Watch leaves for micronutrient deficiencies—yellowing between veins often signals trouble. Always water before and after feeding to prevent fertilizer burn.
Keep Stems Mulch-free
Give each stem a little breathing room. Pull organic mulch back 1 to 3 inches from the base to prevent stem rot and reduce slug habitat.
This clearance boosts airflow, keeps the root flare visible, and helps stems dry faster after watering. Check regularly for compacted mulch pressing against stems, and adjust during routine garden maintenance.
Prevent Problems and Harvest Often

Your garden’s growing strong, but a little trouble can still creep in. Staying ahead of pests, disease, and weeds keeps your plants healthy and your harvest coming. Here’s what to watch for, and how to make the most of every ripe vegetable.
Watch Common Garden Pests
Bugs happen to every gardener, so don’t panic when you spot them. Check leaves often for curling, stippling, or holes—these clues point to aphids, spider mites, or beetles.
Try insecticidal soap or handpicking first. Encourage beneficial insect allies like lady beetles for natural pest control. For nighttime feeders like slugs, try copper barriers or traps as a reliable pest deterrent.
Remove Diseased Leaves
Spotting a discolored or spotted leaf? Snip it right away. Early symptom detection stops spore spread before it reaches healthy tissue.
Use clean, sharp shears, cutting just above a healthy node. Sterilize tools with rubbing alcohol between cuts. Bag diseased leaves for disposal—never compost them. Your plant will redirect energy to new growth, supporting recovery within a few weeks.
Weed Before Roots Spread
One weed left standing today means hundreds of seeds tomorrow. Weeds spread fast through wind, water, and even your own boots.
One weed today means hundreds of seeds tomorrow, spread fast by wind, water, and your own boots
Pull them young, while roots stay shallow and easy to remove. For rhizome-spreading perennials, dig out every fragment—leftover pieces regrow.
5-Minute Weed Routine:
- Scan beds weekly
- Pull seedlings by hand
- Bag, don’t compost
- Cultivate top 2 inches
- Mulch bare soil
Harvest at Peak Maturity
Timing is everything when harvesting your produce—pick too early and flavor suffers, too late and quality drops fast.
Watch for color change, gentle firmness, and rising Brix sweetness. Tomatoes soften slightly at color break; strawberries turn fully red.
Ethylene signals ripeness too. Harvest at the right time, cool crops quickly after picking, and harvest remaining vegetables regularly to keep plants productive all season.
Track Dates in Journal
Your garden journal is basically a memory bank—and next year’s you will be grateful for it.
Pick one date format and stick with it (like 2026-04-21) for easy searching later. Mark milestones—final expected spring frost, planting depth used, harvest timing—with clear tags. Note weather patterns alongside plant performance. This weekly gardening habit, just minutes a day, builds a searchable history and shapes your smarter 2026 planting calendar.
Frequently Asked Questions (FAQs)
What is the 70 30 rule for gardening?
Picture your beds split into two jobs: 70% perennial backbone for structure, 30% rotating annuals for color. This balance reduces maintenance load while keeping your garden design flexible enough for seasonal experimentation and visual rhythm all year long.
What should I plant in my garden as a beginner?
Imagine rows of crisp lettuce, bright radishes, and climbing peas thriving your first season. Stick to easy crops like these plus beans, tomatoes, and kale.
Mix cool-season and warm-season picks, try compact varieties and vertical trellises, and grow herbs like basil for quick wins.
Is October too late to plant?
Not always. In zones 5-6, wrap up by late October; zones 7+ can keep going with frost protection. Pick fast maturing varieties, cool-season crops like spinach, and plant overwintering garlic for a spring harvest.
How to plant a garden for beginners step by step?
Every farmer starts with one seed and a plan. Success follows six steps: planning your garden, testing soil quality, garden bed preparation, planting seeds at proper depth, transplanting seedlings carefully, then watering, mulching, and watching for pests as seasons shift.
How do I start gardening as a beginner?
Start small with a 4×8 raised bed, pick a sunny spot, and prepare your soil first. Budget for basic garden tools, seeds, and compost. Learn as you go—mistakes teach you more than perfect planning ever will.
How to get started with gardening?
Pick a sunny spot with good soil quality, gather basic garden tools, and test pH before planning your garden. Choose easy vegetables, budget for supplies, and consider seed starting indoors to build confidence early on.
Should you ask for gardening advice for beginners?
Absolutely, yes. Expert mentorship and local gardening communities help you dodge common beginner mistakes early. Online forums offer quick troubleshooting, while professional help suits tricky soil or pest issues. Learning from others speeds up your garden’s success.
How do I start a vegetable garden?
Choosing the right location matters most: aim for 6–8 hours of sun, good drainage, and easy water access.
Then focus on soil quality and simple garden design before planting seeds—small steps that build a thriving vegetable garden.
How do you plant a garden?
Rome wasn’t built in a day, and neither is a good garden. Test your soil, pick a sunny spot, prep the bed, then sow seeds or transplant seedlings at proper depth, water well, and mulch generously.
How do I start my gardening journey?
Start small: set a realistic budget, gather basic tools, and research your local climate.
Set simple goals, pick a sunny vegetable garden spot, and sketch a design—beginner mistakes usually come from starting too big, too fast.
Conclusion
Test this theory yourself: gardeners who follow a planting guide for beginners garden setup rarely lose their first crop. Soil prep, smart spacing, and picking forgiving plants aren’t glamorous, but they work.
Your tomatoes won’t care about Instagram-worthy raised beds; they care about sunlight, water, and patience. Start small, track what happens, and adjust next season.
That messy patch of dirt? It’s just waiting for you to show up. Grab those gloves again tomorrow.
- https://www.almanac.com/vegetable-gardening-for-beginners
- https://content.ces.ncsu.edu/home-vegetable-gardening-a-quick-reference-guide
- https://hort.extension.wisc.edu/articles/beginning-vegetable-garden-basics-site-selection-and-soil-preparation
- https://extension.umn.edu/planting-and-growing-guides/planting-vegetable-garden
- https://www.theeasygarden.com/threads/beginners-guide-to-creating-a-vegetable-garden-tips-tricks-and-benefits.25080