This site is supported by our readers. We may earn a commission, at no cost to you, if you purchase through links.

The day you harvest that last tomato or pull up your final bean plant, the real gardening work begins—and what you do in these next few weeks will determine whether you’re fighting an uphill battle come spring or coasting into next season with rich, balanced soil that practically grows vegetables on its own.
Most gardeners treat post-harvest as downtime, but I’ve watched thirty years of neglected fall gardens turn into pest sanctuaries, disease incubators, and nutrient-depleted wastelands. The difference between a thriving garden and a struggling one often comes down to those critical autumn tasks—clearing debris, testing and amending soil, planting cover crops, and preparing equipment for storage.
Each step you skip now becomes a problem you’ll inherit later, while each task you complete is an investment that compounds season after season. Here’s exactly how to close out this year’s garden in a way that sets you up for remarkable success when planting time rolls around again.
Table Of Contents
- Key Takeaways
- Clear Spent Plants and Garden Debris
- Test and Amend Your Soil
- Plant Cover Crops for Soil Health
- Apply Mulch to Protect Garden Beds
- Top 3 Products for Post-Harvest Garden Care
- Clean and Store Garden Tools
- Inspect and Winterize Irrigation Systems
- Plan Crop Rotation for Next Season
- Create Habitat for Beneficial Insects
- Develop Your Next Season Garden Plan
- Frequently Asked Questions (FAQs)
- Conclusion
Key Takeaways
- Post-harvest cleanup is your critical investment in next season’s success—clearing diseased plants, testing soil, and planting cover crops now prevents pest explosions, nutrient depletion, and compaction issues that would sabotage your spring garden before you even plant.
- Soil testing followed by targeted amendments transforms guesswork into precision gardening—pH adjustments, organic matter additions, and cover crops like winter rye or crimson clover rebuild fertility, break up compaction, and suppress weeds while you’re planning next year’s masterpiece.
- Proper tool maintenance and irrigation winterization protect your equipment investment and prevent expensive spring repairs—washing, sharpening, oiling tools plus draining lines and clearing emitters ensures everything fires up smoothly when planting season arrives.
- Strategic crop rotation planning and beneficial insect habitat creation turn your garden into a self-regulating ecosystem—mapping out which crops move where breaks pest cycles, while fall flowers and bee nesting sites bring in the free labor force that controls pests and boosts pollination naturally.
Clear Spent Plants and Garden Debris
The moment your harvest wraps up, your garden beds become a time bomb—spent plants harbor overwintering pests, diseases, and weed seeds that’ll ambush next season’s crops if you don’t act now!
I can’t stress enough how this cleanup phase sets the tone for everything that follows, from soil health to pest pressure. Let’s walk through the essential steps to clear your garden debris the right way.
Remove All Crop Residues to Prevent Overwintering Pests

Every scrap of plant debris you leave behind is an open invitation for pests—aphids, beetles, squash vine borers, nematodes—to hunker down for winter and explode in spring. Clear it all out to break their life cycles!
Thorough crop residue management and garden sanitation drastically reduce overwintering habitats, setting you up for healthier soil, easier weed management, and a triumphant growing season ahead.
Dispose of Diseased Plants Properly

Once you’ve pulled those debris piles, inspect for fungal spots, bacterial ooze, or wilted stems—that’s your cue for serious biosecurity measures. Diseased material spreads pathogens like wildfire through compost, so don’t risk it!
Here’s your sanitation checklist:
- Bag diseased plants in sealed trash, never compost them
- Wear disposable gloves to avoid pathogen transfer
- Sterilize pruners with 1:9 bleach solution after contact
- Wash hands thoroughly post-cleanup
- Record affected crops for next season’s rotation plan
Proper waste disposal keeps your soil healthy and your postharvest garden maintenance on point! Effective research papers require clear science writing.
Compost Healthy Plant Material

Now flip the script—healthy plant material becomes gold for compost basics! Layer green waste like spent tomato vines (nitrogen-rich) with carbon sources such as dried leaves or straw, keeping your pile at 40–60% moisture for vigorous microbe management.
Turn it weekly, and you’ll hit that sweet 55–65°C zone where nutrient cycling accelerates organic gardening magic—transforming postharvest garden maintenance into next season’s soil health powerhouse through outstanding soil conservation!
Rake Soil Surface to Improve Air Circulation

Once your compost pile is humming, grab a sturdy rake for surface raking. This gentle soil aeration loosens the top inch or two, boosting soil porosity and air circulation without wrecking beneficial microbes below.
A looser surface dries residual moisture faster, cutting fungal survival and supporting root respiration come spring.
It’s a simple postharvest garden maintenance win that sets up vigorous soil health and outstanding soil preparation for next season’s crops!
Test and Amend Your Soil

Your soil just worked hard all season—now it’s time to return the favor! Testing reveals exactly what your beds need, whether they’re running low on nitrogen, leaning too acidic, or crying out for calcium and phosphorus.
Here’s how to read your soil’s report card and give it the amendments that’ll set up next year’s harvest for remarkable success.
Conduct PH Testing for Optimal Nutrient Availability
Grab a reliable soil testing kit—think of pH calibration as your garden’s diagnostic tool—because soil pH levels dictate whether your plants can actually absorb nitrogen, phosphorus, and calcium. Most vegetables thrive when you dial in that sweet 6.0–7.0 range through proper soil testing and pH adjustments, which directly aids nutrient cycling and overall soil health and maintenance for outstanding fertility management next season!
Understanding the language resources can also help you better comprehend the importance of precise terminology in gardening.
Perform Granular Tests to Assess Nutrient Levels
Once you’ve nailed down pH, dive into granular tests to assess nutrient levels through soil sampling and nututrient analysis—think phosphorus, potassium, and micronutrients like zinc.
Test calibration against lab standards ensures accurate soil monitoring, letting you tailor fertilizer selection for vigorous soil fertility management and nutrient management that transforms soil preparation and health, boosting your entire soil health and maintenance strategy!
Add Lime or Sulfur to Adjust PH
After pH testing reveals your soil’s baseline, you can fine-tune soil pH balance with targeted amendments. Lime application raises acidity toward neutral (usually 40 to 60 pounds per 1,000 square feet), while sulfur usage drops alkaline readings through bacterial acidic correction.
These soil preparation moves improve soil health and conservation, creating a nutrient-rich foundation that pairs beautifully with compost for long-term soil maintenance!
Incorporate Organic Matter Based on Test Results
Once you have your test results in hand, you can dial in organic amendments—yard-waste compost or well-rotted manure at 2–4 inches—to boost soil organic matter by 0.3–0.8 percentage points within a year.
This surge elevates cation exchange capacity, fueling nutrient cycling and microbe management. Pair it with compost tea for a living soil health cocktail!
Plant Cover Crops for Soil Health

You’ve tested your soil—now it’s time to put it to work rebuilding itself! Cover crops act like a living blanket that doesn’t just sit there looking pretty; they dig deep with their roots, choke out weeds, and pump nutrients back into tired beds.
Let’s look at four game-changing ways these hardworking plants transform your garden while you’re off planning next season’s masterpiece.
Choose Winter Rye or Crimson Clover
You’ve got two outstanding cover crops to pick from—winter rye and crimson clover—and each brings unique soil health and conservation gifts to your rotation!
Rye tolerates a wider pH range (5.5–7.5) and suppresses weeds within six weeks, while crimson clover excels at nitrogen fixation and controls soil erosion on sandy plots.
Match your choice to soil type, frost timing, and crop rotation strategies for maximum sustainable gardening impact.
Break Up Compacted Soil Naturally
Cover crops work like living tillers—their roots reach deep and create natural channels that improve soil aeration and soil structure without mechanical disturbance! Winter rye roots can penetrate 24–36 inches, shattering compacted layers, while crimson clover adds organic matter and boosts soil health through nitrogen fixation.
Here’s what cover cropping delivers:
- Root depth of 2–3 feet physically breaks hardpan
- Earthworm populations triple around decomposing root channels
- Soil conservation improves as aggregates form around root hairs
- Compost-like residue adds 2–4% organic matter annually
- Soil maintenance becomes seamless as natural friability returns
Suppress Weeds During Off-season
Beyond breaking compaction, that same cover crop becomes your prime weed barrier—fundamentally smothering dormant weed seeds before they germinate! A dense canopy of winter rye or clover drops light levels at the soil surface, cutting weed emergence by 40–90 percent through natural soil suppression.
Think of it as winter weeding on autopilot, with mulch benefits built right in—your garden cleanup transforms into proactive weed management and winterization all at once.
Add Nitrogen and Organic Matter
Once that weed barrier establishes itself, here’s the magic—legume cover crops actually pull atmospheric nitrogen fixation into your soil, contributing 40–150 kg per hectare while winter rye and other organic amendments break down to boost soil enrichment and microbial activity!
- Legumes fix nitrogen through root nodules—fertilizer application you don’t have to buy
- Organic matter builds as biomass decomposes, fueling nutrient cycling season after season
- Composting in place transforms those crops into slow-release soil maintenance gold
- Soil conservation improves as structure, water retention, and earthworm populations all climb together
Apply Mulch to Protect Garden Beds

Once your cover crops are tucked in—or if you’re skipping them this year—a layer of mulch becomes your garden’s winter blanket. I’ve seen beds left bare erode badly after a few hard rains, while mulched plots stayed soft and crumbly all season long!
Here’s how to choose and apply the right mulch to keep your soil protected, warm, and weed-free until spring planting rolls around.
Use Straw or Shredded Leaves
You’ll want a 5–7 cm layer of either straw or shredded leaves spread right over your bare beds—both deliver solid Mulch Benefits through Soil Insulation and Weed Suppression!
Shredded leaves win on Microbial Growth and Carbon Sequestration as they break down faster, while straw lasts longer, keeping your Soil Maintenance and Composting game strong all winter.
Prevent Soil Erosion Over Winter
That protective layer you just spread does double duty—it shields your soil from winter’s wind and rain! Winter Mulching delivers powerful Erosion Control by slowing water flow and preventing runoff from carrying your precious topsoil away.
Apply 5–7 cm depth for solid Soil Stabilization, and check bed edges monthly; bare patches need immediate Cover Crop Benefits or fresh mulch to maintain Erosion Prevention all season long.
Insulate Soil and Regulate Temperature
As temperatures drop, your mulch becomes a Thermal Buffer that keeps soil temperature swings under control—a 2 to 4 inch layer of straw or shredded leaves reduces fluctuations by several degrees!
Winter Mulching fosters Soil Insulation and Soil Health by moderating Cold Season extremes, and when you combine this practice with Compost amendments, you’re investing in long-term Soil Conservation that protects root zones and microbial life through Temperature Monitoring and smart Soil Management.
Suppress Perennial Weed Regrowth
A 2- to 3-inch Mulch Layering strategy acts as a natural Weed Barrier, blocking light so perennial crowns can’t resprout—pair that with Soil Solarization during hot spells or Crown Disruption through strategic cultivation after the first frost, and you’ve got powerful Regrowth Prevention!
This Weed Management approach, combined with Perennial Care routines and vigilant weeding, is essential Post-Harvest Care that bolsters thorough Weed and Pest Management season after season.
Top 3 Products for Post-Harvest Garden Care
You’ve done the hard work—clearing debris, testing soil, planting cover crops—and now a few smart tools can make the whole post-harvest routine so much easier.
I’ve watched gardeners struggle with guesswork or flimsy materials, so I’m sharing three products that truly simplify your soil prep and winter protection.
Let’s look at the essentials that’ll save you time and give your beds the best shot at thriving next season!
1. Easy Soil Nutrient Test Kit
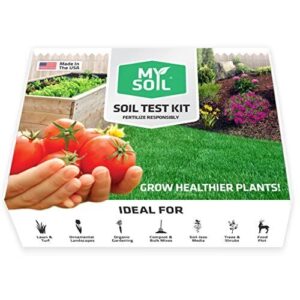
Think of the Easy Soil Nutrient Test Kit as your garden’s report card—it reveals exactly what your beds need before you plan next season’s crops! This mail-in test delivers professional lab analysis for 13 plant-available nutrients, including nitrogen and pH levels, usually within 6–8 days.
You’ll receive custom fertilizer recommendations tailored to your soil’s specific deficiencies, whether you prefer organic or conventional options.
At $31.99, it’s an affordable gateway to precise nutrient management, improved soil fertility, and smarter garden planning that saves you from guesswork.
- Professional lab results for 13 nutrients plus pH in under a week give you a complete picture of your soil’s health
- Custom fertilizer recommendations match your specific deficiencies and preferences, whether you go organic or conventional
- Simple mail-in process with prepaid envelope means no complicated DIY color charts or guesswork
- Only works in the United States, so international gardeners are out of luck
- Doesn’t detect soil diseases like fungus, so you’ll need separate tests if you suspect those issues
- Recommended products might cost more than what you’d find at local garden shops
2. Sunocity Weed Barrier Landscape Fabric
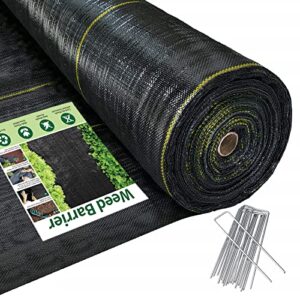
After clearing beds and testing soil, you need a shield against perennial weed regrowth—that’s where Suncity Weed Barrier Landscape Fabric steps in!
This 4ft × 300ft woven polypropylene roll blocks light to weeds for extended periods while allowing water and air penetration, making it ideal for garden bed maintenance and landscape design. At 25.1 pounds, it’s UV-resistant and easy to cut for custom fabric installation.
Proper weeding and soil preparation before laying it down ensures maximum weed suppression, protecting your soil conservation efforts through winter’s harshest months!
- Heavy-duty woven polypropylene resists UV damage and holds up through multiple seasons of sun exposure
- Breathable design lets water and air reach soil while starving weeds of light, reducing watering needs
- Large 4ft × 300ft roll covers extensive areas and cuts easily to fit beds, paths, or garden boxes
- Edges may fray when cut unless you use proper techniques or heat-seal the fabric
- Needs careful overlap at seams and extra staples in windy spots—included stakes might not cover large installations
- Water penetration can be inconsistent depending on soil type, and fabric may trap debris that requires occasional checks
3. No Till Garden Cover Crop Mix Seeds

You’ll want a cover crop that works with the soil—not against it—which is why Mountain Valley’s 9-Seed No Till Cover Crop Mix stands out for sustainable gardening practices and soil conservation.
This 5-pound blend combines nitrogen-fixing legumes like crimson clover and hairy vetch with deep-rooted daikon radish for natural soil enrichment, making it perfect for organic gardening methods and crop rotation strategies.
At 2-4 pounds per 1,000 square feet, it aerates compacted beds, suppresses weeds through no till methods, and delivers genuine cover crop benefits—maturing in just 30-70 days!
- Nine different seed varieties work together to fix nitrogen, break up compaction, and choke out weeds without chemicals or heavy equipment
- Pre-inoculated seeds mean better germination rates right out of the bag, and you can plant in spring or fall depending on your schedule
- Covers a lot of ground for the price—one 5-pound bag handles up to 2,500 square feet, and you’ll see results in about a month
- Runs a bit higher in cost compared to single-species cover crops or basic seed mixes
- Shade and cold climates can prevent some varieties from overwintering successfully, so you might not get full coverage in tougher conditions
- A few of these plants (especially the radishes and clovers) can be stubborn to terminate if you let them go too long
Clean and Store Garden Tools

Your tools have carried you through the entire growing season—digging, pruning, weeding—and now they deserve the same care you’ve given your soil!
Clean, well-maintained equipment doesn’t just last longer; it also prevents disease from spreading between plants and makes next spring’s work so much easier.
Here’s how to give your hardworking tools the end-of-season attention they need.
Wash Tools With Soapy Water or Bleach Solution
Your garden cleanup starts with proper tool sanitation. I grab a bucket of warm, soapy water after every harvest! Soap and water strip away dirt, oils, and microbial hitchhikers that fuel rust and disease.
For serious equipment maintenance and pest control, a 10% bleach cleaning solution kills lurking pathogens on blade surfaces. Rinse everything thoroughly, let tools air-dry completely, and you’ve nailed the foundation of postharvest care and garden hygiene.
Dry and Hang Tools to Prevent Rust
After washing and rinsing, you’re only halfway there—moisture is rust’s best friend! Towel-dry every blade, handle junction, and bolt immediately; even minor dampness triggers corrosion within hours.
Then hang tools on wall racks or pegboards in a dry shed where air circulates freely. Storing gear off damp floors and applying a thin mineral-oil coat to metal surfaces forms a protective barrier that keeps your investment safe all winter.
Sharpen Blades for Cleaner Cuts
Once your pruners and shears are dry, it’s time to put an edge on them! A sharp blade slices cleanly through stems without crushing tissue—reducing disease risk and plant stress during next season’s work.
Use a mill file or ceramic rod at a 15–25 degree angle, stroke lightly and repeatedly, then test on tissue paper to confirm you’ve restored that satisfying, razor-sharp bite.
Apply Oil Coating to Metal Parts
After sharpening, grab a light machine oil—linseed or mineral oil both work beautifully—and wipe down every metal surface. This rust prevention step creates a moisture barrier that stops corrosion before it starts!
I apply a thin layer to blade edges, pivot points, and threaded parts, then wipe off any excess to prevent dust buildup. Your tool maintenance routine isn’t complete without this corrosion control trick.
Inspect and Winterize Irrigation Systems

Your irrigation system worked hard all season—now it deserves a careful once-over before winter shows up. I always check mine right after the last harvest because freezing temperatures can turn tiny cracks into expensive repairs, and clogs that seem minor today become major headaches come spring.
Let’s walk through the essential steps to protect your watering setup and guarantee it’s ready to deliver efficient water flow when you need it most.
Check for Cracks, Clogs, and Leaks
Think of your irrigation system as the garden’s circulatory network—when winter approaches, you don’t want hidden weaknesses to cause a spring catastrophe! Grab a bright flashlight and conduct a thorough pipe inspection at every joint and seam, checking for hairline cracks that signal trouble ahead.
For leak detection, I recommend a simple pressure test: seal the system, fill to the manufacturer’s PSI, then watch your gauge for five minutes—steady pressure means you’re golden, but drops reveal hidden issues demanding irrigation repair.
Clear clogs by gently brushing debris from emitters with a soft brush or pin, then flush lines at low water pressure to restore efficient water management. This system maintenance protects your soil conservation efforts and ensures next season’s garden cleanup starts on solid ground!
Clear Debris Around Emitters
Around each emitter, you’ll want a 6–12 inch clearance radius—leaves, mulch, and spent plant debris can reduce irrigation efficiency by up to 50%, and they harbor overwintering pests!
During postharvest care, use a soft brush or gentle water stream for debris removal, which improves emitter maintenance and bolsters your soil conservation goals.
Winterization tips like this prevent clogged flows and guarantee next season’s garden cleanup starts strong!
Roll Hoses Properly to Prevent Damage
After draining every drop of water from your irrigation systems—freezing can split even the sturdiest rubber—you’ll want to master proper coil management for true damage prevention. Hose storage tips matter more than you’d think, and winterization methods like these guarantee longevity:
- Roll hoses onto a reel or rack to prevent kinks and compression damage
- Store in a dry, shaded spot to reduce UV degradation
- Inspect for leaks before tucking them away
Smart hose maintenance = better water management next spring!
Store Equipment in Protected Areas
Once your hoses are safely coiled, you’ll want to shelter the rest of your irrigation gear from winter’s harsh mood swings. Equipment storage in a dry, elevated shed or secure cabinet—with proper moisture control—prevents rust, cracks, and costly replacements come spring.
| Storage Area | Protection Method | Why It Matters |
|---|---|---|
| Elevated shelves | Keeps gear off damp concrete | Reduces corrosion and freezing damage |
| Lockable cabinets | Secures small tools and chemicals | Deters theft, organizes seasonal maintenance |
| Ventilated shed | Improves air circulation | Minimizes humidity-related tool deterioration |
| Labeled racks | Organizes by type and size | Speeds up garden cleanup and tool care access |
This simple shed organization transforms garden maintenance from frustrating scrambles into smooth, confident garden care and maintenance all year long!
Plan Crop Rotation for Next Season

Planting the same crop in the same spot year after year is like rolling out a welcome mat for pests and pathogens—they’ll settle in and multiply until your soil can’t support healthy plants anymore.
Planting the same crop in the same spot every year invites pests and pathogens to settle in until your soil can’t support healthy plants
A smart rotation plan moves each crop family to fresh ground, breaking those destructive cycles and keeping your beds resilient and productive.
Let’s walk through the key steps that’ll help you map out a rotation schedule that protects your garden’s future.
Move Crops to Fresh Ground
Relocating crops to virgin soil—what I call fresh ground prep—fundamentally robs pests of their favorite host plants while promoting critical soil renewal and rejuvenation. This cornerstone of sustainable gardening practices helps you take command of your garden’s future health through smart crop management and rotation.
- Soil conservation improves as compacted zones recover between plantings
- Pest control intensifies when nematodes lose access to preferred hosts
- Garden planning and design becomes strategic, not reactive
- Fresh ground boosts root penetration and microbial diversity
Break Pest and Disease Cycles
Think of crop rotation as resetting the game board—year after year, your pests expect their favorite host in the same spot, and when you deny them, their life cycles collapse!
Moving crops disrupts disease resistance breakdown, confuses overwintering stages, and strengthens soil biology and ecosystem balance through integrated pest management.
This deliberate shuffle turns pest control from reactive firefighting into proactive disease prevention.
Prevent Soil-borne Pathogen Buildup
You’re building disease prevention from the ground up—soil sanitation and pathogen testing reveal hidden threats before they devastate future crops. When you monitor crop health closely and maintain microbial balance through compost and soil conservation practices, you’re actively strengthening soil biodiversity.
Smart soil management means recognizing that soil health isn’t just about nutrients—it’s about creating conditions where beneficial organisms outcompete pathogens season after season!
Map Out Rotation Schedule
Once you’ve fortified your soil against pathogens, the next move is locking in a rotation schedule that keeps pests guessing. Crop rotation isn’t random shuffling—it’s strategic garden planning and design grounded in soil mapping and pest management data.
- Rotate at least three different crop families within a five-year cycle to reduce pest pressure
- Replace heavy feeders with light feeders to improve soil nutrient balance
- Alternate alliums with legumes to boost nitrogen fixation and reduce pathogen load
- Stagger planting windows across adjacent beds to cut pest carryover by up to 40%
Create Habitat for Beneficial Insects

Your garden doesn’t end at vegetables—it’s a living ecosystem that thrives when you invite the right neighbors in! Beneficial insects like native bees, lacewings, and predatory wasps act as your unpaid pest-control crew, pollinating flowers and keeping aphids in check year after year.
Here’s how you can roll out the welcome mat and give these hardworking allies exactly what they need to stick around.
Plant Pollinator-friendly Fall Flowers
Fall bloomers transform your garden into a bee-friendly sanctuary precisely when late-season pollinators need it most. Pollinator-friendly flowers like New England aster and Autumn Joy sedum provide nectar through October, showcasing gardening for biodiversity at its finest. Here’s a quick guide:
| Native Flowers | Peak Bloom & Pollinator Draw |
|---|---|
| Aster novae-angliae | September–October; Monarchs, bees |
| Sedum spectabile | Late summer to frost; foraging bees |
| Echinacea purpurea | Extended fall nectar; butterflies, bees |
Sustainable gardening practices meet ecological balance when you choose fall bloomers with accessible nectar guides. Pollinator diversity soars, and garden habitats thrive right into November!
Add Goldenrod and Native Asters
You can’t go wrong with goldenrod (Solidago spp.) and native asters (Symphyotrichum spp.)—they’re the backbone of pollinator-friendly flowers that bloom into November!
These native plant benefits extend beyond nectar: goldenrod attracts late-season monarchs, while asters’ fibrous roots drive soil stabilization and biodiversity enhancement.
Space them for air circulation, choose disease-resistant local ecotypes, and watch beneficial insects boost your ecosystem resilience—this is gardening for biodiversity at work.
Build Nesting Sites for Solitary Bees
After attracting pollinators with plants, give solitary bees a safe home—bee nesting boxes with cavity design principles that mimic hollow stems and pre-drilled wood blocks!
Use nesting tube materials with 2–10 mm diameters, face south for morning sun, and surround them with bee-friendly plants. You’re supporting insect conservation while building solitary bee habitats that make your garden a pollinator-friendly flowers paradise.
- Mount bee nesting boxes 3–5 feet high in a south or southeast orientation for thermal regulation and reduced moisture accumulation
- Provide cavity design principles with varied diameters (5–7 mm for Osmia species, smaller for Hylaeus) to accommodate diverse beneficial insects
- Select untreated nesting tube materials like bamboo, paper tubes, or pre-drilled hardwood free from pesticide residues
- Plant bee friendly plants within 300 feet to supply pollen and nectar for provisioning offspring throughout the season
- Maintain bare soil patches for ground-nesting species, enhancing insect conservation and ecology across your biodiversity landscape
Support Ecosystem Biodiversity
You’re creating a living refuge—biodiversity conservation thrives when you layer native plantings, preserve leaf litter, and maintain diverse microhabitats across your plot.
These ecosystem services extend beyond pollinator-friendly flowers: they support predatory beetles, spiders, and parasitoid wasps that regulate pests naturally.
Wildlife habitat flourishes through this ecological balance, turning your garden ecology and biodiversity into a self-regulating system where beneficial insects and insect conservation work hand-in-hand!
Develop Your Next Season Garden Plan

You’ve tended to your soil, winterized your tools, and tucked beneficial insects into their habitats—but the real magic happens when you translate this season’s lessons into next year’s blueprint. A solid garden plan doesn’t just prevent chaos; it transforms random effort into a synchronized system where every crop rotation, every planting date, and every soil amendment works in harmony.
Let’s walk through four essential planning steps that’ll set you up for your most productive season yet.
Assess Previous Season’s Successes and Challenges
You can’t tweak your garden planning and design for next season until you know what worked—and what crashed. Start your seasonal review by digging into performance metrics: record actual crop yield analysis by variety, track pest and disease hits during harvesting vegetables, and note weather quirks that threw off growth patterns. Here’s what I jot down every year for smart postharvest care and seasonal maintenance:
- Yield per plot compared to historical averages—did tomatoes soar or flop?
- Pest and disease severity by crop type and timing
- Soil health observations—color, structure, moisture—and how they linked to harvest evaluation outcomes
Create Detailed Planting Schedule
Once you’ve got your yield data locked down, turn those insights into a rock-solid planting schedule—garden planning and design gets exciting here! Map frost dates against soil temperature windows, then slot in seed selection by variety. Your crop rotation strategy drives the calendar, so weaving garden preparation techniques with seasonal gardening tips ensures every bed hits peak productivity without guesswork.
| Task Component | Timing Anchor |
|---|---|
| Match planting windows to local frost-free dates | Early spring/late fall |
| Set seed selection by germination temp needs | 50–75°F soil range |
| Space crops per root and air-flow requirements | Species-specific guidelines |
| Schedule watering frequency for seasonal moisture | Adjust weekly by weather |
| Time fertilization after cover crop incorporation | Immediate post-amendment phase |
This garden maintenance blueprint keeps your garden planning on track—and your soil thriving!
Plan Succession Planting Strategy
Succession planting is your ticket to yield optimization—harvesting one crop, then slipping another into that same bed before soil cools or weeds wake up! Mix heavy feeders with light feeders to nail soil replenishment, schedule early-mid-late season varieties for continuous harvests, and rotate crop families across your garden mapping grid to dodge disease carryover. You’ll extend production, keep nutrients balanced, and master sustainable gardening in one smart sweep—crop rotation meets harvest scheduling, and your vegetable gardening never sleeps.
- Alternate heavy feeders with light feeders to maintain soil nutrient balance
- Schedule early, mid, and late season crops to reduce gaps between harvests
- Assign crop families to beds to minimize disease carryover and pest pressure
- Incorporate fall and winter crops that can overwinter in milder regions
Set Up Soil Health Improvement Timeline
Soil health won’t fix itself overnight—you need a timeline that tracks soil monitoring, fertilizer scheduling, and organic matter inputs across multiple seasons! Plan cover crop termination before warm-season crops demand nutrients, schedule soil aeration in early spring, rotate families to maintain microbial balance, and re-test annually to verify your soil management gains.
Composting, crop rotation, and steady soil conservation create lasting fertility.
Frequently Asked Questions (FAQs)
When should I start preparing my garden beds?
Begin your bed preparation in late winter to early spring, ideally 2–4 weeks before the last frost date. This timing lets amendments react, soil structure recover, and temperatures climb for ideal planting conditions.
How do I protect perennial plants during winter?
After the first frost—usually when overnight lows dip into the 20s—I apply a thick layer of organic mulch around my perennials’ crowns to insulate root zones and prevent freezing damage.
Can I plant anything immediately after harvest cleanup?
Quick cool-season greens or cover crops work right after cleanup if your soil’s workable—but most vegetables need 2–6 weeks of recovery to avoid germination stress and let residue break down properly.
Should I water my garden during winter months?
Winter water needs drop sharply—most plants go dormant and frozen soil blocks absorption. Check soil moisture before irrigating; overwatering invites root rot.
Proper water management and frost protection mean watering only when temperatures climb above freezing.
Conclusion
Your garden’s entire future literally lives or dies in these next few weeks—and now you know exactly how to tip the scales in your favor.
Preparing garden after harvest isn’t just cleanup; it’s the foundation you’re building for every tomato, every bean, every harvest that follows.
Skip these steps and you’ll spend next season fighting problems that never had to exist. Complete them, and you’ll wonder why gardening ever felt difficult.
- https://dictionary.cambridge.org/dictionary/english/subtopic
- https://onelook.com/?loc=beta3&w=subtopic&related=1
- https://www.sciencedirect.com/science/article/pii/S0749208123000268
- https://www.linkedin.com/posts/bohdanlukianets_tasks-study-research-activity-7373377539521667072-UTEi
- https://www.britannica.com/dictionary/subtopic