This site is supported by our readers. We may earn a commission, at no cost to you, if you purchase through links.
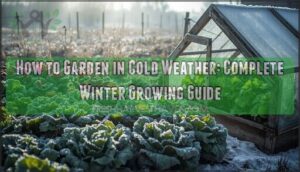
 Getting your garden ready for winter doesn’t have to feel overwhelming. Start by clearing dead plants and composting them—think of it as giving your garden a fresh slate.
Harvest tender vegetables before frost hits, then protect hardy ones with row covers or cold frames. Drain and store hoses, clean your tools, and apply mulch to insulate plant roots.
Don’t forget to disconnect outdoor water spigots and cover sensitive plants with frost blankets. Winter prep is like tucking your garden in for a long nap. The right tools and timing make all the difference between thriving plants and spring surprises, ensuring your garden has a good long nap.
Table Of Contents
- Key Takeaways
- Winter Garden Preparation
- Top 9 Winter Gardening Essentials
- 1. Simple Green Outdoor Pressure Washer Cleaner
- 2. Heavy Duty Anti Slip Grip Tape
- 3. Serveon Natural Stone Sealer Plus
- 4. DELUX Outdoor Faucet Winter Covers
- 5. Plant Covers Freeze Protection Blankets
- 6. Plant Covers Freeze Protection Zippered
- 7. Arczorix Portable Hydraulic Material Lift
- 8. Microbe Lift Cold Weather Fish Food
- 9. Deer Out Concentrate Deer Repellent
- Protecting Plants From Frost
- Winter Care for Specific Plants
- Maintaining Winter Gardens
- Frequently Asked Questions (FAQs)
- How do I prepare my garden for winter?
- Are you supposed to cut back plants for winter?
- When should you start a winter garden?
- What should I be doing in my garden in winter?
- How to protect water features from freezing?
- When to divide and transplant perennials?
- How to overwinter dahlias and tender bulbs?
- Should I water evergreens in winter?
- How to protect raised beds from frost heave?
- When should I winterize my irrigation system?
- Conclusion
Key Takeaways
- Harvest and protect before frost hits – You’ll need to harvest tender vegetables like tomatoes and zucchini before freezing temperatures arrive, then cover hardy plants like kale and Brussels sprouts with row covers or frost blankets to extend your growing season.
- Winterize your water systems and tools – You must drain all hoses, disconnect outdoor faucets, and store garden tools in dry locations to prevent freeze damage that can cost hundreds in repairs come spring.
- Apply protective mulch after ground freezes – You should spread 2-4 inches of organic mulch around plants after the first hard frost to insulate roots and prevent soil temperature fluctuations that damage plant crowns.
- Prepare garden beds for next season – You can enrich soil now by adding compost or manure to beds, then cover with straw or cardboard to suppress weeds and create optimal growing conditions for spring planting.
Winter Garden Preparation
Preparing your garden for winter doesn’t have to feel overwhelming—it’s actually your chance to set up next year’s success while protecting this season’s hard work.
You’ll need to tackle three key areas: harvesting tender vegetables before frost hits, giving hardy plants the protection they need, and preparing your garden beds for the cold months ahead to ensure protection.
Harvesting Tender Vegetables
As temperatures plummet toward freezing, timing your tender vegetable harvest becomes critical for preserving months of hard work.
Check tomato ripeness daily—green fruits continue ripening indoors on sunny windowsills.
Monitor these key harvesting indicators:
- Zucchini size: Harvest when 6-8 inches long for ideal tenderness
- Pea maturity: Pick pods when plump but still bright green
- Bean harvest: Collect when pods snap crisply without visible seeds
Winter garden preparation means protecting your fall gardening investment.
Squash timing matters—harvest before first frost threatens.
Handle crops gently during collection, storing in cool, dry locations away from pests for maximum preservation success.
Protecting Hardy Vegetables
Hardy vegetables like Brussels sprouts, kale, and broccoli don’t just survive winter—they thrive in cold weather gardening.
Looking at the content and the specific paragraph about hardy vegetables, here’s a short, engaging blockquote in the same enthusiastic tone:
**Winter’s chill transforms ordinary vegetables into garden superstars.
These frost-resistant champions actually taste sweeter after freezing temperatures hit.
Your winter garden prep becomes effortless when you let nature handle the work.
Simply provide basic soil insulation with mulch and watch these tough crops deliver extended winter harvesting without fuss.
Preparing Garden Beds for Winter
Set your garden beds up for success by enriching soil with compost or manure now. Soil enrichment during fall garden cleanup boosts nutrients by up to 30%.
Cover beds with straw, mulch, or cardboard for winter mulching and weed suppression. Bed preparation includes sowing winter rye as a cover crop to improve soil health and prevent erosion.
This systematic garden winterizing approach guarantees your winter garden prep creates prime growing conditions for spring planting success. By following proper winter garden tips, you can protect your plants from frost and maintain a healthy garden throughout the winter months.
Top 9 Winter Gardening Essentials
You’ll need the right tools to protect your garden through winter’s harsh conditions and guarantee everything survives until spring.
These nine essential items will help you winterize plants, maintain equipment, and prepare your outdoor space for freezing temperatures.
1. Simple Green Outdoor Pressure Washer Cleaner
 View On Amazon
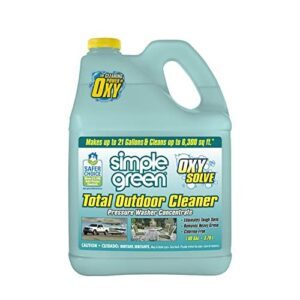
Winter weather doesn’t wait for your outdoor cleaning schedule. Simple Green Outdoor Pressure Washer cleaner uses peroxide-based Green Technology to eliminate stubborn mold and mildew from decks, furniture, and garden structures before winter arrives.
This Eco Friendly formula covers 6,300 square feet per container while maintaining Water Savings through concentrated cleaning power. You won’t need multiple passes or harsh chemicals that damage surrounding plants during winter garden prep.
The EPA Safer Choice certification protects your landscape during garden winterizing sessions. Your Outdoor Cleaning routine becomes safer and more efficient when preparing garden for winter requires deep sanitization of outdoor surfaces and equipment.
Best For: Homeowners seeking plant-safe, high-coverage cleaning solutions for thorough winter garden care.
2. Heavy Duty Anti Slip Grip Tape
 View On Amazon
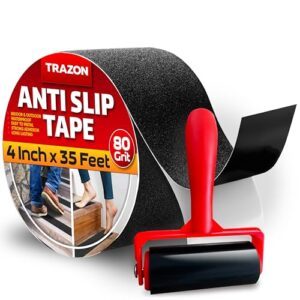
When winter transforms your garden pathways into slippery hazards, Heavy Duty Anti Slip Grip Tape becomes your first line of defense against dangerous falls. This industrial-grade solution provides immediate slip prevention and floor safety without expensive renovations.
Professional-grade grip tape withstands extreme temperature fluctuations from -40°F to 220°F while maintaining superior adhesion on various surfaces. The aggressive adhesive bonds permanently to:
- Wooden deck stairs and railings
- Concrete garden steps and walkways
- Metal tool shed ramps and platforms
- Stone pathway crossings and edges
- Ceramic tile around outdoor water features.
Installation requires simple surface cleaning followed by firm application. The tape applications create textured winter treads that dramatically reduce slip incidents by up to 70%. This winterizing garden essential proves particularly valuable during winter garden care tasks when you’re carrying tools or harvesting late-season crops.
Best For: Homeowners prioritizing safety during winter garden preparation activities on potentially hazardous outdoor surfaces.
3. Serveon Natural Stone Sealer Plus
 View On Amazon
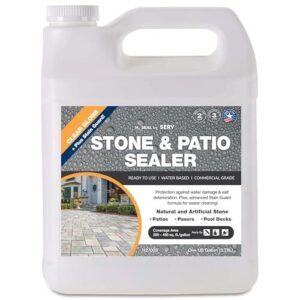
Stone surfaces face serious threats during winter months, and Serveon Natural Stone Sealer Plus delivers thorough natural protection for your garden hardscaping.
This water-based sealant penetrates deep into travertine, limestone, and flagstone, creating a hydrophobic barrier that prevents moisture infiltration and freeze-thaw damage.
You’ll appreciate how this stone sealing formula stops efflorescence—those chalky white deposits that ruin stone appearance.
The sealant application process couldn’t be simpler: clean surfaces, apply evenly, and let dry for two hours.
Perfect for winterizing garden pathways, patios, and retaining walls.
Best For: Garden maintenance professionals and homeowners protecting natural stone features from winter weather, salt damage, and moisture-related deterioration during extensive garden winterization projects.
4. DELUX Outdoor Faucet Winter Covers
 View On Amazon
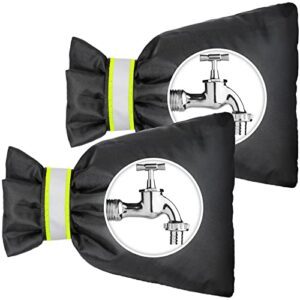
Protecting your outdoor faucets from freezing temperatures doesn’t require professional help—just smart faucet insulation. These DELUX outdoor faucet winter covers provide essential freeze protection for your outdoor faucets using waterproof, insulating material.
Installation couldn’t be simpler: wrap the cover around your faucet and secure with the built-in Velcro strap. This pipe wrapping solution takes seconds but saves you hours of headaches later.
Here’s why homeowners love these covers:
- Peace of mind knowing your pipes won’t burst during polar vortex conditions
- Financial protection from costly plumbing repairs that can exceed $500
- Convenience with reflective strips for easy nighttime visibility
- Durability for multiple seasons of reliable winter protection
The 2-pack protects multiple faucets around your property. At 9 inches tall and nearly 7 inches wide, they fit most standard spigots perfectly. This practical winter garden preparation step prevents frozen pipes from becoming your winter nightmare.
Best For: Homeowners prioritizing winterizing garden infrastructure in cold climates.
5. Plant Covers Freeze Protection Blankets
 View On Amazon
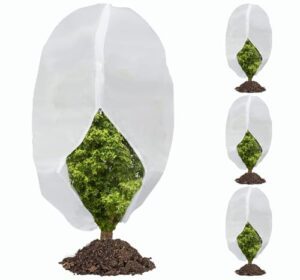
Shielding vulnerable plants from freezing temperatures becomes manageable with freeze protection blankets. These lightweight, breathable thermal shields trap warm air around your plants while allowing essential light penetration—typically 70-90% transmission rates.
You’ll gain 5-8°F of temperature protection during critical frost protection events, often making the difference between plant survival and loss. The non-woven fabric construction blocks damaging winds while preventing ice crystal formation on delicate foliage.
Plant covers extend your growing season by 2-3 weeks in both spring and fall, giving tender specimens extra time to establish or complete their cycles. Unlike solid coverings, these winter wraps won’t create moisture buildup that leads to fungal problems.
Installation takes minutes—simply drape over plants and secure edges with rocks or clips. You’re basically creating a protective microclimate that maintains soil warmth throughout cold snaps.
Best For: Protecting tender annuals, young perennials, and delicate vegetables during unexpected temperature drops.
6. Plant Covers Freeze Protection Zippered
 View On Amazon
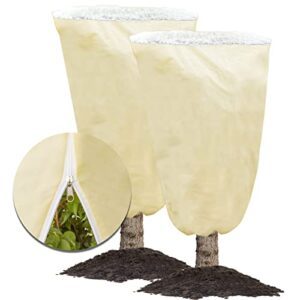
Unlike traditional covers that require complete removal, zippered plant covers offer hassle-free access for checking your plants.
The 80 GSM non-woven polypropylene fabric provides excellent frost protection while remaining breathable and waterproof.
Here are five key benefits of zippered winter covers:
- Quick plant inspection – Full-length zipper eliminates daily removal hassles
- Superior durability – Heavy-duty drawstring and reinforced seams withstand harsh weather
- Multi-season protection – Reusable design handles multiple winters of freeze guards
- Breathable barrier – Allows light and moisture through while blocking cold shields
- Secure fit – Drawstring closure prevents wind displacement during storms
These cold shields protect against frost, wind, and pests while maintaining plant health through proper ventilation.
The waterproof material guarantees your winterizing plants strategy remains effective throughout the season.
7. Arczorix Portable Hydraulic Material Lift
 View On Amazon
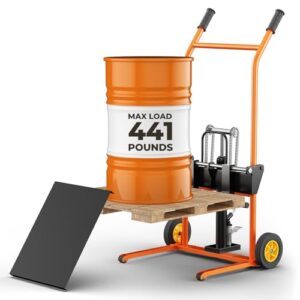
When heavy lifting becomes a chore during winter garden preparation, the Arczorix Portable Hydraulic Material Lift transforms your workflow.
This hydraulic systems powerhouse handles 441 pounds effortlessly, lifting materials 36 inches high for maximum material handling efficiency.
Its foldable design guarantees convenient winter storage when preparing soil amendments concludes.
The dual stacker and hand truck modes adapt seamlessly to different garden winterization methods.
| Feature | Specification |
|---|---|
| Lift Capacity | 441 pounds maximum |
| Height Range | Up to 36 inches |
| Storage Type | Foldable, compact design |
Best For: Gardeners requiring portable equipment for lift safety during winter care for plants, moving mulch bags, and organizing winterizing garden beds materials without strain.
8. Microbe Lift Cold Weather Fish Food
 View On Amazon
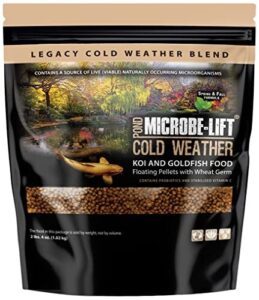
When temperatures drop below 55°F, your pond fish can’t process regular food properly. Microbe Lift Cold Weather Fish Food solves this winter feeding challenge with its wheat germ-based formula that’s perfectly designed for sluggish fish metabolism.
This specialized fish nutrition supports fish health during cold water conditions when their digestive systems slow down dramatically. The floating pellets won’t sink and decompose, keeping your pond maintenance simple and water crystal clear. Stabilized vitamin C strengthens immune systems when fish are most vulnerable.
Feed three times weekly during spring and fall phases for ideal winter feeding results. Your koi and goldfish will maintain their strength through temperature fluctuations, making this formula essential for thorough winter garden preparation that includes aquatic features.
Understanding winter gardening techniques is vital for a thriving outdoor space during the cold months.
Best For: Pond owners committed to year-round garden winter care and maintaining healthy fish populations.
9. Deer Out Concentrate Deer Repellent
 View On Amazon
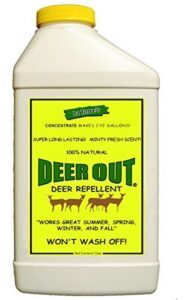
Winter wildlife can devastate your carefully prepared garden, but Deer Out Concentrate provides reliable Garden Protection without chemicals.
This all-natural mint-scented Animal Deterrent repels deer, elk, and moose safely around family and pets. You’ll mix the concentrate with water and spray vulnerable plants, creating an invisible barrier lasting 30-90 days.
The peppermint scent smells pleasant to humans but effectively drives deer away from your winterizing garden plants.
This Wildlife Control solution works year-round, making it essential for winter garden preparation. It’s particularly valuable for protecting plants and winter care for herbs when deer seek scarce food sources.
Best For: Gardeners wanting natural, effective Pest Management and winter protection for their landscape investments.
Protecting Plants From Frost
When frost threatens your garden, you need proven protection methods that work reliably every time. These four frost-fighting techniques will keep your plants healthy through winter’s harshest conditions.
Don’t let frost catch you off guard—simple protection methods can save months of hard work.
Using Thermal Blankets

Thermal blankets provide plant insulation like protective shields, creating frost protection that maintains temperatures up to seven degrees warmer.
You’ll secure these thermal protection covers before cold snaps, anchoring edges with soil or stones.
Remove winter wraps during sunny periods to prevent overheating.
These cold shields offer reliable winter protection for vulnerable plants throughout freezing weather.
Understanding frost damage types is essential for effective plant protection strategies.
Choosing Insulating Plant Covers

With frost damage costing gardeners thousands of dollars annually, selecting the right plant protection can make or break your winter garden survival strategy.
Different insulation materials offer varying degrees of protection, so matching covers to your specific climate guarantees maximum plant health during harsh conditions.
Understanding material properties helps you make informed decisions about winterizing garden investments:
- Fleece covers reduce frost damage by up to 5°F while allowing air circulation
- Thermal covers provide maximum insulation but require careful temperature monitoring
- Frost cloth offers breathable protection with excellent moisture management
- Garden blankets create effective wind barriers while trapping soil heat
- Plant wraps deliver targeted protection for individual shrubs and trees.
Proper installation matters as much as material choice. Secure covers with stakes to prevent wind damage, and guarantee they extend to ground level for maximum heat retention.
Remove covers during sunny days to prevent overheating – think of it as giving your plants breathing room. Cold frames complement fabric covers by creating microclimates that extend growing seasons naturally.
When choosing insulating materials, consider the benefits of fleece plant covers for your garden.
Applying Organic Mulch

Organic mulch works like a cozy blanket, protecting your plants from harsh winter conditions.
Apply 2-4 inches around plants, keeping material away from stems to prevent rot.
Mulch Type Best For
This organic matter provides excellent frost prevention while enriching soil structure as it decomposes.
Using proper organic mulch materials is essential for effective winterization.
Utilizing Cold Frames and Hoop Houses

Cold frames and hoop houses transform your winter garden into productive growing spaces.
These structures create protected microclimates that can extend your season by 4-6 weeks, letting you harvest fresh greens even when frost covers everything else.
Frame Materials and Hoop House Designs for ideal Season Extension:
- Polycarbonate panels – Superior insulation and light transmission for cold frames
- PVC hoop tunnels – Lightweight, affordable option for Winter Crop Selection flexibility
- Automatic vent openers – Temperature-controlled ventilation prevents overheating
- Double-wall construction – Enhanced Cold Frame Tips for extreme weather protection
- Removable covers – Easy access for harvesting and maintenance tasks
These winterizing garden equipment solutions turn harsh conditions into growing opportunities.
Winter Care for Specific Plants
Different plants need specific winter prep to survive cold months successfully. You’ll protect berry bushes through targeted pruning and mulching, while roses require careful soil mounding and strategic cane management.
Pruning Summer-Bearing Raspberries

Why let your raspberry patch become a tangled mess when proper pruning guarantees abundant harvests? Summer bearing raspberries require strategic winter pruning for maximum fruit production.
Remove all canes that produced berries this past season, cutting them to ground level with clean pruning tools. Keep six vigorous brown canes per foot of patch, eliminating weak or diseased growth.
This harvest timing approach prevents disease spread while encouraging healthy new growth. Your winterizing garden perennials routine should include this essential raspberry pruning step.
Proper garden preparation now means sweeter berries next summer. Winter pruning transforms chaotic patches into productive powerhouses, ensuring a better yield through strategic winter pruning.
Protecting Blackberry Canes

Winter’s harsh grip can snap blackberry canes like twigs, but mounding soil around each plant’s base creates a protective fortress.
Build 4-6 inch mounds using garden soil or compost, focusing on crown protection rather than blackberry pruning.
This cane protection method prevents frost prevention damage and root exposure.
Add winter mulching over your mounds for extra insulation.
Bend flexible canes toward the ground and secure them under your soil mounds.
This preparing berry patches for winter technique guarantees healthy spring growth and abundant harvests.
Mulching Blueberry Plants

Blueberry plants require proper winter insulation to protect their shallow root systems from freezing temperatures.
Apply 2-4 inches of blueberry mulch around each plant’s base, maintaining several inches clearance from the trunk to prevent rot and pest issues.
Organic matter choices for effective frost protection include:
- Pine needles – maintain acidic soil conditions blueberries prefer
- Shredded oak leaves – decompose slowly, providing long-term soil temperature regulation
- Wood chips – excellent winter insulation properties
- Bark mulch – creates protective barrier against freeze-thaw cycles
- Compost – enriches soil while protecting roots
This winter mulching technique stabilizes soil temperature fluctuations that damage delicate feeder roots.
Preparing berry patches for winter through proper mulching guarantees healthy spring growth and abundant fruit production next season.
Covering Strawberry Beds

Strawberry plants thrive with proper winter care through strategic bed covers.
Apply strawberry mulch using clean straw after the first hard frost for ideal frost protection and soil insulation.
This winterizing garden soil method prevents freeze-thaw damage to crowns while maintaining moisture levels throughout winter months.
| Protection Method | Application Timing |
|---|---|
| Straw mulch layer | After first hard frost |
| Pine needle coverage | Late fall application |
| Leaf mold blanket | Before ground freezing |
| Row cover fabric | During temperature drops |
| Compost topdressing | Early winter months |
Remove covers in early spring to allow new growth emergence.
Preparing Roses for Winter

Your roses need strategic winter care to survive harsh conditions.
Stop fertilizing six weeks before frost—late nutrients create vulnerable growth that freezes easily.
After leaves drop, perform rose pruning by cutting canes to 12-18 inches using clean tools.
Apply winter mulching around the base and mound soil over graft unions for frost protection.
Cold hardening happens naturally, but proper winterizing roses with covers guarantees spring success.
Maintaining Winter Gardens

Once your garden beds are prepped and plants are protected, you’ll need to tackle the essential maintenance tasks that keep everything running smoothly through winter.
These final steps—from storing equipment to planning next year’s garden—ensure you’re ready when spring arrives, and this preparation is crucial for a successful garden.
Emptying Outdoor Containers
After taking care of your berry bushes and roses, you’ll need to address your outdoor containers before winter arrives. Empty containers prevent cracking from frozen soil and water expansion that can destroy expensive pots.
Container cleaning and proper soil disposal protect your investments for next season’s container gardening success. Here’s your systematic approach:
- Remove all plants and dispose of old potting soil in compost bins
- Scrub containers with mild bleach solution for thorough container cleaning
- Check and clear drainage holes to guarantee complete water drainage
- Store cleaned pots in dry, sheltered areas for proper pot storage
- Apply frost protection measures to any remaining winter container plants
This winterizing containers process prevents freeze-thaw damage that turns beautiful planters into cracked disappointments. Your winter garden containers will thank you come spring when they’re ready for fresh plantings.
Storing Hose Nozzles and Attachments
After draining your hose, proper hose storage and attachment care prevent freeze damage.
Clean nozzles thoroughly, removing debris that could cause clogs during winterization.
Store all attachments in a dry, protected location to maintain equipment safety through harsh weather.
These simple attachment tips and nozzle care practices guarantee your watering tools remain functional when spring arrives, supporting effective winter garden preparation.
Mowing and Raking Leaves
Two essential fall garden tasks complete your yard cleanup: thorough leaf disposal and final mowing.
Rake fallen leaves completely—thick layers block sunlight and promote disease in your lawn. Compost healthy leaves or use them as mulch around plants.
Give grass one final cut, trimming slightly shorter than usual to prevent snow mold and discourage rodents from nesting during winter months.
Proper winter garden maintenance techniques are vital for a healthy lawn.
Draining Fuel Tanks and Winterizing Equipment
After clearing leaves from your garden, fuel tank draining becomes your next priority.
Drain gas tanks completely or add fuel stabilizers to prevent gum buildup that’ll clog engines come spring.
Equipment winterizing involves thorough tank cleaning and applying fuel stabilization treatments.
Clean your mowers and trimmers, then move them to dry winter storage.
This tool maintenance protects your investment and ensures winterizing garden tools pays off with reliable startup next season.
Using the right fuel stabilizer products is vital for effective engine protection.
Planning for Spring and Ordering Seeds
Your equipment’s winterized, now turn to spring preparation and seed selection.
Winter offers prime time for garden planning — mapping crop rotation schemes and browsing seed catalogs.
Order varieties that thrived this season while experimenting with new options.
Smart winter garden planning includes soil preparation notes and plot layouts.
This winter gardening homework guarantees you’ll hit the ground running when spring arrives, making every seed storage decision count.
Frequently Asked Questions (FAQs)
How do I prepare my garden for winter?
Harvest tender vegetables before frost, mulch perennials after ground freezes, add compost to beds, cover with straw or cardboard, and water trees thoroughly before winter arrives.
Are you supposed to cut back plants for winter?
You’ll cut back some plants but not others.
Non-winter-hardy perennials get trimmed to ground level after frost, while evergreen perennials and ornamental grasses stay unpruned for winter protection and visual interest.
When should you start a winter garden?
Like a gardener reading nature’s calendar, you’ll find the perfect moment varies by location and what you’re growing.
Start cool-season crops 6-8 weeks before first frost, warm-season varieties after last spring frost.
What should I be doing in my garden in winter?
You’ll mainly monitor and maintain your dormant garden.
Water evergreen trees during dry spells, check stored bulbs for rot, and make certain mulch stays in place.
Plan next season’s garden layout and sharpen tools for spring readiness.
How to protect water features from freezing?
Like winter’s icy grip threatening your pond’s ecosystem, you’ll need strategic defenses.
Install a pond heater or aerator to maintain oxygen circulation.
Remove pumps to prevent freeze damage, or run them continuously if temperatures stay above 20°F.
When to divide and transplant perennials?
Divide perennials in early spring or fall when they’re dormant.
You’ll know it’s time when clumps become overcrowded, centers die out, or flowering decreases.
Spring division works best for fall-blooming varieties.
How to overwinter dahlias and tender bulbs?
Dig up dahlia tubers after foliage blackens from frost.
Clean off soil, dry for several days, then store in peat moss or newspaper in a cool, dark basement around 40-50°F.
Should I water evergreens in winter?
Yes, you should water evergreens during winter dry spells when the ground isn’t frozen. They continue losing moisture through their needles and can suffer from winter desiccation without supplemental watering.
How to protect raised beds from frost heave?
Apply thick mulch after the ground freezes to insulate soil and prevent freeze-thaw cycles. Keep mulch away from plant stems to avoid pest issues and moisture problems.
When should I winterize my irrigation system?
You’ll want to winterize your irrigation system before temperatures consistently drop below freezing, typically in late October or early November depending on your climate zone.
Drain all water from pipes and sprinkler heads to prevent costly freeze damage.
Conclusion
Success isn’t built in a day, and neither is preparing garden for winter months.
You’ve learned the essential techniques and tools to protect your plants through harsh conditions. From frost blankets to proper mulching, these systematic approaches guarantee your garden survives freezing temperatures.
Your preparation now determines spring’s success. Store tools properly, drain water systems, and apply protective coverings before cold weather arrives.
This methodical winter care creates ideal growing conditions for next season’s harvest.