This site is supported by our readers. We may earn a commission, at no cost to you, if you purchase through links.

Most first-time gardeners give up before the end of summer—not because they lack dedication, but because they’re fighting soil that was never on their side. Compacted clay, rogue weeds, and a back that protests after twenty minutes of crouching can drain enthusiasm faster than a July drought drains the ground.
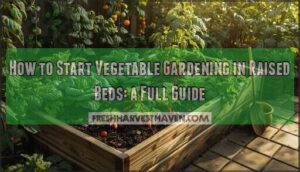
Raised garden beds sidestep most of those obstacles from day one. You control the soil, the drainage, and the depth—which means you’re not inheriting decades of neglect baked into your backyard. Raised garden beds for beginners offer something rare in gardening: a genuine head start.
Table Of Contents
- Key Takeaways
- What Are Raised Garden Beds?
- Choose The Best Garden Location
- Plan Your Raised Bed Size
- Pick Safe Building Materials
- Build Your Raised Garden Bed
- Prepare The Bed Bottom
- Fill Beds With Healthy Soil
- Choose Beginner-Friendly Crops
- Water and Mulch Raised Beds
- Maintain Beds Through The Season
- Frequently Asked Questions (FAQs)
- Conclusion
Key Takeaways
- Raised beds let you skip the headaches of compacted or clay-heavy ground by giving you full control over soil mix, drainage, and depth from day one.
- Picking the right spot matters more than most beginners think — your bed needs six to eight hours of direct sun daily, level ground, and good drainage before you drive a single screw.
- Cedar, redwood, or galvanized steel are your safest material choices; avoid railroad ties, old tires, and pressure-treated wood, which can leach harmful chemicals straight into your food.
- A simple soil blend of 40% topsoil, 40% compost, and 20% aeration material — plus consistent morning watering and a layer of mulch — gives your plants the foundation they need to actually thrive.
What Are Raised Garden Beds?

A raised garden bed is exactly what it sounds like — a growing space built up above the ground, framed by walls of wood, metal, or another material.
The soil inside sits higher than the surrounding ground, which means better drainage and easier control — all reasons why growing vegetables in raised beds tends to outperform traditional in-ground planting.
It provides total control over your soil, your space, and ultimately your harvest. This setup allows gardeners to customize their growing environment with precision.
Here’s what beginners need to know before putting the first board in place.
Raised Bed Gardening Basics
A raised garden bed is exactly what it sounds like — a frame sitting above ground level, filled with a soil mix you control completely. Think of it as building the perfect growing environment from scratch, rather than wrestling with whatever your yard throws at you.
- Framed with wood, stone, or metal to contain rich, custom soil
- Elevated above compaction zones, so roots breathe freely
- Designed for soil preparation for raised beds using customized mixes
- Sized for easy access — no stepping on soil, ever
- Built in variable heights for comfort and mobility
Make sure the bed gets six to eight hours sunlight for healthy vegetable production.
Why Beginners Choose Raised Beds
Starting a garden can feel overwhelming — but that’s exactly why so many beginners land on raised beds. The ergonomic advantages of raised beds alone make a difference: less bending means real back pain relief, not just minor comfort. You also get better soil control, fewer weeds and pests, and an earlier harvest each spring. The benefits of raised garden beds add up fast.
| Benefit | What It Means for You | Beginner Impact |
|---|---|---|
| Back pain relief | Work at a comfortable height | Less fatigue, longer sessions |
| Early harvest | Soil warms faster in spring | 2–3 weeks ahead of ground beds |
| Cost savings | Less soil amendment needed over time | Lower long-term maintenance costs |
| Fewer weeds and pests | Isolated soil limits intrusion | Less time troubleshooting problems |
| Better soil control | Custom mix from day one | Uniform growth, beginner-friendly results |
The manageable learning curve stays manageable because you’re working with a controlled, defined space — not an unpredictable yard. Aesthetic appeal is a bonus too: neat frames look intentional and inviting, even in small yards.
Raised Beds Vs. In-Ground Gardens
Both options grow food — but they work differently. In-ground beds hold moisture longer and tap into existing soil ecosystems, which sounds appealing until you hit clay or compaction.
Raised beds give you full control: custom soil mixes, faster soil temperature gains in spring, built-in drainage, and serious accessibility benefits.
Weed management is simpler too. Long-term costs balance out once you factor in fewer amendments.
Benefits for Small Yards and Urban Gardens
Small yards don’t limit you — they just make you smarter about space. A well-placed raised bed turns a forgotten corner into a productive microclimate creation zone, buffers heat, and even fosters urban wildlife habitat through pollinator-friendly plantings.
Reduced runoff keeps neighbors happy — hello, neighbor harmony — and with year-round harvest potential, small space gardening finally punches above its weight.
- Stack soil depth in a compact footprint for maximum small space gardening output
- Tailor precise raised bed dimensions to fit awkward urban lots
- Support urban wildlife habitat by including pollinator-friendly herbs and flowers
- Reduce runoff and improve drainage with contained, budget-friendly garden construction ideas
- Launch DIY raised garden bed projects that enable year-round harvest across seasons
Choose The Best Garden Location

Before you build a single board, you need to nail down where your bed is actually going to live. The wrong spot can undermine even the best soil mix and most carefully chosen plants.
Here’s what to look for when scouting your space.
Finding Six to Eight Hours of Sun
Most vegetables aren’t subtle about their sun requirements — give them less than six hours of direct light daily, and they’ll tell you with yellowed leaves and poor harvests. Full sun means six to eight hours minimum, ideally eight to twelve for heat-loving crops.
Start with sun map creation before placing anything. Walk your yard at 9 AM, noon, and 3 PM, noting shadow analysis zones where trees or fences block light. Sunlight tracking apps like Sun Seeker make this easy.
| Time of Day | What to Observe |
|---|---|
| 9 AM | Morning sun preference zones |
| 12 PM | Peak light for bed placement |
| 3 PM | Afternoon shade encroachment |
| Full Day | Total sunlight requirements met |
Seasonal sun path shifts also matter — your sunny spot in June may be partially shaded by September.
North-South Bed Orientation
Once you’ve mapped your sun zones, bed orientation becomes your next big decision. Running your bed north to south gives you even light exposure on both sides as the sun tracks east to west — no permanent shadow side, no sun-starved edge. You’ll also get:
- Uniform soil warmth across the bed length during spring
- A natural balanced temperature gradient that reduces hot spots
- Optimized airflow paths along the bed for healthier plants
Symmetrical irrigation layout also gets easier when rows follow the same axis.
Avoiding Shade From Trees and Fences
Even a perfectly oriented bed loses its edge if a nearby oak or wooden fence steals your afternoon light. Smart Tree Canopy Management and Fence Shade Screening are non-negotiable when designing raised garden beds.
| Shade Source | Problem | Fix |
|---|---|---|
| Deciduous trees | Summer canopy blocks full sun | Plant south side; prune lower branches |
| Solid fences | Morning or afternoon shadow | Add reflective surface or lattice panels |
| Structures/pergolas | Permanent shade strips | Use Adjustable Shade Cloth frames |
| Evergreen hedges | Year-round light loss | Relocate bed or use Reflective Mulch |
| Mixed canopy zones | Inconsistent light requirements | Apply Seasonal Sun Mapping across bed |
Bed placement for ideal sunlight means tracking shade patterns across seasons — not just one afternoon.
Choosing Level, Well-Draining Ground
Before conducting any construction, perform a quick infiltration rate test: dig a small hole, fill it with water, and observe drainage. If water drains within an hour or two, conditions are favorable. Additionally, conduct a soil texture test—heavy clay indicates poor drainage and compaction risks.
Aim for a ground slope grading of one-to-five percent to ensure proper water runoff. Pair this with a permeable base layer underneath to maintain reliable soil drainage over time.
Plan Your Raised Bed Size

Getting the size right makes everything else easier — from watering to harvesting to just reaching that back corner without doing a full stretch. Before you start buying lumber or measuring your yard, it helps to know what actually works in practice.
A well-sized bed also makes weekly weed control routines far less daunting when every inch stays within easy arm’s reach.
Here’s what to keep in mind when planning your bed dimensions.
Best Width for Easy Reach
Width is the make-or-break dimension in garden ergonomics. Get it wrong, and you’re hunching over soil every single session.
- 90 cm (36 in) — ideal arm reach range from one side; no stepping required
- 120 cm (47 in) — the ergonomic bed width for comfortable dual-side access
- 70 cm (28 in) — the best width for limited reach or tool handle length restrictions
- 110 cm — wheelchair width standard with full knee clearance
- 60–70 cm aisle spacing — keeps raised bed dimensions practical and paths navigable
Ideal Beginner Bed Height
Height changes everything. Aim for 24 inches — roughly Hip-Level Height for most adults — and you’ll enjoy true Ergonomic Reach without hunching over. That’s the sweet spot for beginner-friendly comfort and Frame Stability. Taller gardeners can push to 28–36 inches. Just remember: Soil Volume Needs climb with height, so plan your budget accordingly.
| Bed Height | Best For | Soil Volume Needs (4×4 ft) |
|---|---|---|
| 12–18 in | Compact, low-cost starter beds | 2–3 cu ft |
| 24 in | Best Raised Bed Dimensions for most adults | 6–8 cu ft |
| 28–36 in | Taller gardeners, Adjustable Height setups | 10–12 cu ft |
These ergonomic advantages are real — your back will thank you by week two.
Standard Raised Bed Lengths
Once you’ve nailed your height, bed length is surprisingly flexible — but Standard Length Guides point to 8 feet as the sweet spot. It matches common Lumber Length Matching perfectly, cuts waste, and keeps typical bed spans manageable.
Twin Bed Dimensions often run 4×8 or 4×10. Push past 12 feet and you’ll want Mid-Span Braces to prevent bowing.
Soil Depth for Common Vegetables
Soil depth matters more than most beginners expect. Leafy greens like spinach and arugula need only 6–12 inches — a shallow soil profile works fine.
Medium root depth crops, including beans and cabbage, require 12–18 inches of soil.
Deep root requirements apply to carrots and parsnips, which demand 18–24 inches.
Use this as your depth measurement guide when planning soil mix recipes and planting depth decisions.
Accessible Bed Dimensions for Limited Mobility
Depth sorted—now let’s talk access. If mobility is a factor, raised bed dimensions shift slightly. Keep width at 36 inches to ensure comfortable wheelchair transfers without overreaching. Target a bed height matching wheelchair height—around 20–24 inches—to enable gardening without strain. Pathway clearance of 36 inches around the frame remains non-negotiable.
- Reach every plant without stepping on soil
- Garden independently, on your own schedule
- Reduce back and joint strain with ergonomic height
- Maintain edge support so transfers feel steady
- Move freely with wide, uncluttered pathway clearance
Pick Safe Building Materials

The material you build with matters more than most beginners expect. The wrong choice can leach chemicals straight into your soil — and eventually your food.
Here are the safest, most practical options to explore.
Cedar and Redwood Boards
Cedar and redwood are the top choice for DIY garden bed construction — and for good reason. Both offer impressive rot resistance thanks to natural oils that repel fungi and insects.
Cedar is more affordable and widely available, making it the practical choice for most beginners. Redwood lasts longer but costs more. Either way, you’re looking at 15–25 years of beautiful, functional material selection for garden beds.
Galvanized Steel Raised Beds
Galvanized steel is worth serious consideration in your material selection for garden beds. Hot-dipped zinc coating delivers reliable corrosion protection that keeps panels rust-free for 15–25 years.
Panel fastening uses simple bolts — no welding required. The modular portability means you can reconfigure or relocate your setup easily.
Thermal regulation is a bonus too: steel reflects heat, keeping roots cooler in summer.
Composite and Recycled Plastic Lumber
If budget-friendly gardening is your goal, composite and recycled plastic lumber deserves a spot on your shortlist. These material options for raised garden beds blend wood fiber with HDPE plastic, delivering significant durability benefits — no rot, no splinters, no termites. Built-in UV stabilization keeps boards from fading.
Just check fastener compatibility before you build, as some formulations require specific screws.
The environmental impact? Largely positive — most use recycled plastics diverted from landfills.
Materials to Avoid
A few materials may look harmless but aren’t. When choosing materials for raised beds, steer clear of anything that could leach into your soil—and your food.
Key hazards to avoid include:
- Asbestos hazards: Disturbing old boards containing asbestos releases dangerous fibers.
- Lead coatings: Old painted hardware or reclaimed wood often contains lead.
- Formaldehyde wood: Pressed-wood products off-gas into surrounding soil.
- PVC off-gassing and mercury bulbs: Both introduce chemicals you genuinely don’t want near edibles.
Railroad Ties, Tires, and Treated Wood
Three materials show up everywhere in DIY builds — and all three belong nowhere near your food.
| Material | Main Risk | Better Alternative |
|---|---|---|
| Railroad ties | Creosote toxicity leaches into soil | Cedar or redwood boards |
| Tires | Tire crumb mulch releases heavy metals | Galvanized steel frames |
| Pressure-treated lumber | Treated wood leaches contaminates roots | Alternative composites or recycled plastic |
Choosing materials for raised beds means thinking long-term. Tie disposal is messy and regulated for good reason — skip the shortcut.
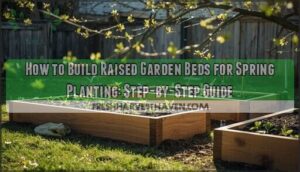
Build Your Raised Garden Bed
Now that you’ve got your materials sorted, it’s time to put everything together. Building the frame is more straightforward than it sounds—requiring a few basic tools and a couple of hours.
Here’s exactly what you’ll need and how to do it right.
Tools and Supplies Needed

Before you cut a single board, gather everything you’ll need — it saves you more trips to the hardware store than you’d like to admit. Your hand tool checklist should include a measuring tape, speed square, spirit level, and claw hammer.
For fastener choices, opt for stainless or deck screws over nails.
Add safety gear — gloves, glasses, and a dust mask — plus a circular saw for clean cuts.
Measuring and Cutting Boards

Accurate cuts start with a reliable measuring board — one with Dual‑Unit Markings so you’re never guessing between inches and centimeters. Use your measuring tape to mark each board, then double-check with Edge Angle Guides for clean 90-degree ends.
Keep these essentials in hand:
- Measuring tape for length accuracy
- Board Calibration marks for repeatable cuts
- Non‑Slip Surfaces under your workpiece
- Edge Angle Guides for square ends
- Circular saw for smooth, precise cuts
Material Safety matters too — always wear your gloves when measuring and cutting materials.
Securing Corners and Stakes

Once your boards are cut, it’s time to lock everything in place. Corner bracket installation keeps joints tight and square—use galvanized screws that penetrate at least an inch into the wood.
Follow stake depth guidelines by driving stakes 12 inches into the ground. This ensures structural stability for your raised bed.
Anchor material selection matters: opt for weatherproof hardware to prevent rust and corrosion over time.
A quick alignment verification ensures your raised bed construction stays true before proceeding. This final check maintains precision in the build.
Leveling The Bed Frame

With corners locked in, ensuring your frame sits level on the ground is critical. A tilted bed leads to uneven watering and rapid soil erosion.
To achieve a stable foundation, follow these methods:
- Shim Placement – Slide plastic or hardwood shims under low spots when building your raised bed frame.
- Adjustable Leg Calibration – Screw adjustable feet clockwise to raise or counterclockwise to lower them.
- Floor Base Platform – On uneven ground, first lay a plywood sheet cut to your bed’s footprint.
- Center Beam Support – Verify the center doesn’t sag; add a support beam if necessary.
Periodic Level Checks are essential to maintain stability—recheck after assembling the frame and again after filling with soil.
Beginner DIY Building Tips

Once your frame is level, the real fun begins. A little prep goes a long way here.
| DIY Tip | Why It Matters |
|---|---|
| Pre-Assembly Layout | Dry-fit boards before driving screws |
| Eco-Friendly Fasteners | Galvanized screws resist rust for decades |
| Tool Safety | Pre-drill to prevent splitting |
| Budget Planning | Buy cedar in bulk to cut costs |
Weather considerations matter too — build on a dry day so wood dimensions stay true.
Prepare The Bed Bottom

The frame is up — now it’s time to think about what goes underneath your soil before you add a single scoop.
Getting the bed bottom right makes a real difference in drainage, weed control, and keeping unwanted visitors out.
Here’s what you need to tackle, step by step.
Removing Grass and Weeds
Grass and weeds aren’t just cosmetic — they’re competition. Before building, thoroughly clear the entire bed footprint. Manual extraction works best in moist soil; use a weeding fork to pull roots clean. For stubborn patches, solarization heating with clear plastic for four to six weeks effectively kills weed seeds.
Pre-build clearing is your first real act of weed control and soil preparation.
Adding Cardboard or Newspaper
Lay down a cardboard base or thick newspaper—this is your first real weed barrier. Use 6–10 sheets of newspaper or single heavy cardboard sheets, overlapping every layer by several inches to close light gaps. Soaking them first helps them conform to the soil.
Both materials act as organic mulch, adding carbon for healthy decomposition and superior moisture retention beneath your soil mix.
Improving Drainage With Coarse Materials
Once your cardboard layer is down, it’s time to build drainage that actually works. Spread 2–3 inches of washed gravel (4–20 mm aggregate size) across the bed bottom — that layer thickness is the sweet spot for soil aeration without over-drying roots.
Think of it as your bed’s foundation for improved drainage:
- Coarse gravel moves water rapidly downward
- Medium stones filter soil fines without clogging
- Clean, washed aggregate keeps your drainage layer clear longer
When to Use Landscape Fabric
Landscape fabric isn’t a one-size-fits-all solution — knowing where it actually helps saves you time and money.
| Use Case | Best Practice |
|---|---|
| Pathway Rock | Layer under gravel for weed suppression and drainage |
| Slope Stabilization | Stake every 1–2 ft with Mulch Overlay on top |
| Ground‑Cover Planting | Use perforated fabric during early establishment only |
For vegetable beds, skip it entirely. It’s a Temporary Bed Barrier during soil preparation and mix recipes for raised beds — remove it before planting so roots can breathe freely.
Preventing Burrowing Pests
Moles and gophers can hollow out a bed from below before you notice anything’s wrong. Line the bottom with Under-Bed Mesh or Hardware Cloth Barriers buried at least 2 feet deep to stop them cold.
Add Dense Allium Borders around the perimeter — pests hate the smell.
A thick Mulch Weight Deterrent seals surface gaps.
Keep a simple Burrow Inspection Log monthly.
Fill Beds With Healthy Soil

What you put inside your raised bed matters just as much as how you build it. The right soil mix gives your plants the nutrients, drainage, and breathing room they need to thrive.
Here’s what you need to know to fill your bed the smart way.
Best Raised Bed Soil Mix
Think of your raised bed soil mix as a recipe — get the ingredients right, and everything else falls into place. A custom blend of compost and topsoil beats bagged mixes every time.
Here’s what builds real soil fertility:
- Topsoil base — structural foundation for even moisture
- Compost proportion — 30–60% organic matter feeds your plants
- Perlite blend — aeration material keeps roots breathing
- Biochar boost — locks in nutrients, nurtures microbes
- pH management — target 6.0–7.0 for vegetable success
Topsoil, Compost, and Aeration Ratios
The sweet spot for raised bed soil mix hinges on three components: 40% screened topsoil, 40% finished compost, and 20% aeration material (coarse sand, perlite, or pumice). This balance ensures optimal drainage, aeration, and prevents soil compaction.
In wet climates, increase aeration material to 30% to enhance drainage. Conversely, in dry regions, slightly boost compost content to retain moisture.
A custom blend of compost and topsoil, tailored to local conditions, outperforms pre-packaged mixes.
Adding Finished Compost
Once your ratio is dialed in, finished compost becomes your soil’s best friend. Spread a 1–3 inch compost layer across the bed, then use your incorporation technique: work it into the top 6–8 inches. This process ensures optimal integration.
The soil microbial boost kickstarts nutrient cycling fast, creating a fertile environment. For safety, use only mature, fully broken-down organic matter — no recognizable scraps should remain. This prevents imbalances and ensures stability.
Proper soil preparation and amendment make everything planted after it thrive. By prioritizing these steps, your garden will flourish with vigor and resilience.
Cheap Filling Methods
Filling your raised bed doesn’t have to drain your wallet. Budget-friendly options like straw core layers, coconut coir, rice hulls, and wood shavings bulk up the lower third cheaply while improving drainage and aeration. These materials offer a practical way to save costs without compromising soil health.
Paper filler or shredded cardboard also work well as base layers, further stretching your budget. Cost-effective methods for filling raised beds let you prioritize quality soil where it matters most—near plant roots—while maintaining optimal growing conditions.
Hugelkultur and Sponge Layers
Want to stretch your budget even further? Try hugelkultur raised beds — a layering technique where logs and branches form the base. As wood decomposition begins, it creates a sponge layer that manages moisture and regulates temperature naturally.
The carbon nitrogen balance nourishes the microbial habitat, transforming the bed into a living soil amendment that sustains root health long after rain stops.
Choose Beginner-Friendly Crops

Now that your bed is built and filled with great soil, it’s time for the fun part — picking what to grow.
The good news is that raised beds are incredibly forgiving, and several crops are practically built for beginners.
Here’s where to start.
Easy Leafy Greens
Leafy greens are your best friends in raised garden beds.
Spinach’s quick harvest means baby leaves in just 25–30 days.
Kale’s frost resilience stretches your season well into fall.
Romaine’s shade tolerance makes it forgiving on trickier sites.
Swiss chard’s color brightens beds visually.
Mustard greens handle heat surprisingly well.
Good soil preparation and smart plant spacing keep all five thriving.
Fast-Growing Radishes and Carrots
Radishes are the confidence boost every beginner needs. With germination temperatures between 55–75°F, they sprout in 3–10 days and reach harvest in about 22 days — practically instant gratification. Carrots require more patience, taking 65–75 days, but thrive in loose, well-amended raised garden beds, which promote clean, straight roots.
Radishes reward beginners with harvests in just 22 days — instant proof that raised beds work
Both crops prefer a soil pH of 6.0–6.8. Radish seeds should be sown ½ inch deep, while carrot seeds need only ¼ inch depth. Proper seed thinning prevents overcrowding, ensuring well-shaped roots and extending the harvest window.
Keep these critical practices in mind:
- Sowing depth matters: Radish seeds go ½ inch deep; carrot seeds just ¼ inch.
- Soil pH target of 6.0–6.8 keeps both crops happy.
- Seed thinning prevents crowded, misshapen roots and maximizes harvest quality.
Bush Beans for Beginners
Bush beans are one of the easiest wins you’ll find in raised garden beds. Compact and self-supporting, varieties like Blue Lake and Provider reward smart planting timing.
Sow seeds after soil reaches 60°F, planting them 1 inch deep with 18–24 inches of row spacing. This ensures proper growth and accessibility.
Moisture management is straightforward: provide 1 inch of water weekly and apply mulch to retain soil moisture.
Disease prevention comes naturally with good air circulation and basal watering, minimizing foliage exposure to excess moisture.
Tomatoes, Peppers, and Squash
Tomatoes, peppers, and squash are the heavy hitters of raised garden beds — and they genuinely thrive here. Good soil preparation and amendment for raised beds gives their roots exactly what they need. Focus on variety selection first: choose compact or determinate types.
- Use staking techniques early, before plants tip.
- Watch ripening indicators — color shift signals harvest time.
- Water deeply; mulching techniques lock in moisture.
- Choose heat-tolerant pepper varieties for summer beds.
- Practice light fruit pruning to direct energy into bigger yields.
Companion Planting in Raised Beds
Think of your raised bed as a tiny ecosystem — every plant you add either helps or competes with its neighbors. That’s the heart of companion planting.
| Companion Plant | Primary Benefit | Best Paired With |
|---|---|---|
| Basil | Aphid deterrents | Tomatoes |
| Marigolds | Nematode suppressors | Peppers, cucumbers |
| Nasturtium | Trap crop for pests | Beans, squash |
| Dill | Pollinator boosters | Cabbage family |
| Chives | Root zone harmony | Lettuce, carrots |
Smart companion spacing and plant selection and layout in raised beds maximizes pest reduction naturally.
Water and Mulch Raised Beds

Getting water right is honestly one of the biggest game-changers in raised bed gardening. Because your beds drain faster than in-ground soil, your usual watering habits probably won’t cut it here.
Here’s what you need to know to keep your plants happy from roots to surface.
How Often to Water
Raised beds dry out faster than in-ground gardens — that’s just the trade-off for better drainage. Aim for about 1 inch of water per week, but your seasonal watering schedule should adjust to the weather.
In spring and fall, watering every 3–4 days works. During peak summer heat, schedule deep watering sessions every 2 days, particularly for tomatoes and peppers.
Checking Soil Moisture
Your finger is the cheapest moisture sensor you own — push it 2 inches into the soil. If it comes out dry, water now. For more precision, digital moisture sensors read volumetric water content instantly and improve your watering schedule dramatically.
- Manual moisture tests — feel and ribbon tests work well for daily checks
- Tensiometer readings — measure actual plant water stress, not just surface dampness
- Sensor calibration — calibrate digital tools to your specific soil mix for accurate soil moisture monitoring
Drip Irrigation and Soaker Hoses
Once you know your soil is dry, getting water there efficiently is the next step. A drip system uses emitters with built-in pressure compensation to deliver consistent flow directly to roots — no guesswork, no waste. Soaker hoses work well for smaller beds.
Add a filter for clog prevention, set up automated scheduling, and use zone isolation to manage multiple beds separately.
Best Time of Day to Water
Early morning is your sweet spot—ideally between 5:00 and 9:00 AM.
Morning watering offers key advantages: evaporation stays low, plant root depth uptake peaks, and foliage dries fast, cutting fungal risk. Evening moisture concerns are legitimate in humid climates.
- Water before sunrise heat builds
- Roots absorb efficiently during morning transpiration
- Leaves dry quickly, reducing disease
- Sandy soils need earlier timing
- Automate your drip system or soaker hose for consistency
Mulching to Reduce Drying
Once your morning watering is done, lay down 2–3 inches of straw, shredded leaves, or wood chips while the soil is still moist. That’s mulch timing done right.
Coarse mulch texture improves water infiltration, and mulch moisture retention reduces evaporation by up to 50%.
Keep a small collar clear around stems.
Mulch benefits your raised garden beds all season long.
Maintain Beds Through The Season

Getting your beds built and planted is a real achievement — but the season’s just getting started.
Consistent care from spring through fall is what separates a so-so harvest from one that keeps giving.
Here’s what to stay on top of as the weeks roll by.
Fertilizing and Compost Replenishment
Your raised bed is hungry after a full growing season — and compost is its best meal. Before adding fresh compost, conduct a quick Compost Maturity Test: finished compost smells earthy, not sour.
Apply a half-inch top-dressing for organic nutrient balancing, then supplement with targeted fertilizer application for heavy feeders.
For nitrogen boosting, try green manure integration using cover crops like clover each fall.
Succession Planting for More Harvests
Once your first harvest wraps up, the bed doesn’t have to sit empty. Staggered sowing every 10 to 14 days keeps production rolling through spring and fall.
Build crop rotation cycles around harvest timing: pull spent greens, drop in bush beans, then relay cool-season kale as summer fades. This sequential approach ensures continuous use of the soil.
Intercrop scheduling and seasonal relay planting transform a single small bed into a near-continuous harvest machine, maximizing yields across seasons.
Weed Control in Raised Beds
Weeding raised beds is far easier than fighting a full garden — but it still takes a system. Lay permeable weed barriers at the base, then stack cardboard on top.
A dense planting canopy shades out most stragglers.
Renew your mulch layer every season, lean on drip irrigation’s advantage of dry surface soil.
Maintain a weekly quick hand weeding schedule to stay ahead.
Pest and Wildlife Protection
Even the tidiest raised bed attracts uninvited guests. Integrated pest management keeps things balanced without heavy chemicals — and a few smart layers go a long way.
- Install 4–6 ft deer fencing with hardware cloth buried 6 inches deep as a rabbit deterrent
- Use netting covers during fruiting and deploy barrier materials like copper tape and diatomaceous earth
- Combine companion planting with marigolds plus regular trap monitoring every 2–3 days
These pest and wildlife protection strategies stack beautifully together.
End-of-Season Soil Care
Think of fall as your bed’s recharge window — skip it and you’re starting next spring in debt.
Clear out spent plants, then add 2–4 inches of compost to replenish soil nutrients and improve structure.
Plant a cover crop like winter rye to fix nitrogen during dormancy.
Apply winter mulch to insulate the soil and retain warmth.
Frequently Asked Questions (FAQs)
What are three mistakes to avoid when gardening with raised beds?
Skip the chemically treated wood, finalize your bed dimensions, and fix your soil mix before planting.
Poor drainage, overcrowding, and building beds too wide are three common raised bed mistakes that quietly sink most first harvests.
How do I winterize raised beds in cold climates?
Winterizing your raised beds starts in fall. Drain and store irrigation lines, apply 3–4 inches of straw mulch, and inspect frames for loose screws before the first frost hits.
Can raised beds be moved or disassembled easily?
Raised beds can pull up stakes. Lightweight modular panel kits with quick-release fasteners or caster wheel beds make relocating straightforward.
Soil weight reduction by partially emptying first is essential to ensure ease of movement.
How do I fix waterlogged or compacted raised bed soil?
Fork the top 6–8 inches when dry, add 2–4 inches of compost, and lay a perforated drain pipe at the base.
A layered gravel base and coarse soil texture amendment fix both problems fast.
Should I cover raised beds during extreme heat waves?
Yes, cover them. A shade cloth with 30–50% density cuts heat without blocking airflow. Use lightweight floating covers at night, vent during the day, and always mulch to lock in moisture.
Conclusion
You’ve got your hands in the soil now—and that changes everything. Raised garden beds for beginners aren’t just a workaround for bad ground; they’re a system that quietly removes the barriers standing between you and a real harvest. You chose the site, built the frame, filled it right, and planted with intention. That foundation doesn’t disappear at season’s end. It compounds.
Each year, your soil gets richer, your instincts sharper, and the garden you imagined gets closer to the one you’re actually growing.
- https://foodgardening.mequoda.com/daily/garden-tools/whats-the-best-type-of-wood-for-raised-beds/
- https://www.gardenary.com/blog/the-best-type-of-wood-to-use-for-a-raised-garden-bed
- https://homegrownandharvested.com/blog-1/best-raised-bed-materials-and-why-i-chose-mine
- https://www.almanac.com/filling-raised-flower-bed-soil-6-steps
- https://awaytogarden.com/soil-preparation-7-ways-to-make-a-garden-bed/