This site is supported by our readers. We may earn a commission, at no cost to you, if you purchase through links.
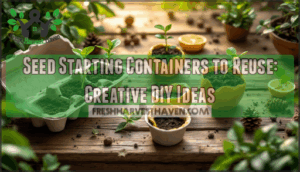
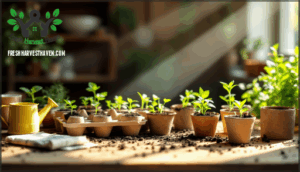
Egg cartons, yogurt cups, and even citrus peels can give your seeds the perfect start while keeping plastic out of the waste stream. The trick isn’t finding containers—it’s knowing which household items have the drainage, size, and sterility your seedlings need to thrive from germination to transplant.
Table Of Contents
Key Takeaways
- Starting seeds in reused household items like egg cartons, yogurt cups, and citrus peels can cut your gardening costs by 70–90% while keeping hundreds of plastic containers out of landfills each season.
- The three essential features for any DIY seed container are proper drainage holes to prevent root rot, appropriate size for your specific plant variety, and thorough cleaning with a bleach solution to eliminate disease-causing pathogens.
- Biodegradable containers like eggshells, paper pulp pots, and avocado shells eliminate transplant shock because you plant them directly into the soil where they decompose and enrich it, with studies showing 13% higher yields in peppers grown this way.
- Your kitchen and recycling bin already contain everything you need—milk jugs create mini greenhouses that extend your growing season by 2–4 weeks, while takeout containers with vented lids reduce mold by 30% and last multiple seasons.
What Makes a Good Seed Starting Container
Before you grab any old container, you’ll want to know what separates a successful seed starter from one that’ll leave your seedlings struggling. The right container makes all the difference between healthy transplants and disappointing failures.
Let’s look at the three must-have features that’ll set your seeds up for success.
Importance of Proper Drainage
Without drainage holes, your seed starting containers become tiny waterlogged disaster zones where roots suffocate and damping-off disease thrives. So before you plant a single seed, make sure excess water has somewhere to escape.
You don’t need fancy equipment—just poke a few holes in the bottom with a nail or screwdriver. This simple step guarantees proper soil drainage and aeration, letting roots breathe while excess moisture drains away instead of pooling around delicate seedlings.
Choosing The Right Container Size
Once you’ve nailed the drainage, the next step is matching your container size to what you’re actually growing—tiny tomato seeds don’t need the same real estate as sprawling squash.
Smaller seedling containers work great for compact plants, while deeper ones with more soil volume support vigorous root growth in larger varieties.
Think about plant height and how much seedling space your starts will need before transplanting—this way, you’re setting them up for success from day one.
Cleaning and Disinfecting Reused Containers
Right-sizing your containers is half the battle—but before you fill them with soil, you need to clean and disinfect any reused seedling containers. Sanitizing methods like washing with soapy water followed by a bleach solution (one part bleach to nine parts water) prevent diseases like damping-off.
These decontamination tips apply to all DIY seed starting containers, from repurposing yogurt cups to recycling old nursery pots—sterilization techniques protect your seedlings from the start. Properly cleaning used plant containers requires understanding container cleaning methods to guarantee healthy plant growth.
Best Household Items to Repurpose for Seed Starting
You probably have everything you need sitting in your kitchen right now. Before you head to the garden center, take a look around your home—recycling bin, refrigerator, and pantry included.
Here are the best household items that make excellent seed starting containers with just a little creativity.
Using Egg Cartons and Yogurt Cups
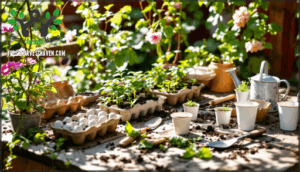
Paper egg cartons are like nature’s perfect starter pots—they hold about 30-35 mL of soil per cell and biodegrade right in the ground when you transplant. Plastic yogurt cups work brilliantly too, lasting multiple seasons once you punch drainage holes in the bottom. Starting seeds in egg cartons offers a cost-effective gardening option.
- Egg Carton Hacks: Cardboard versions absorb excess moisture, cutting damping-off disease risks compared to non-porous containers
- Yogurt Cup Planters: Clean thoroughly and reuse for 3-4 growing seasons as sturdy DIY seed starting containers
- Seedling Transplant: Paper cartons support growth for up to 4 weeks before repurposing household items becomes planting
- Biodegradable Options: Plant cardboard egg cartons directly without disturbing roots during seedling transplant
- Container Crafts: Over 75% of home gardeners already reuse egg cartons or yogurt cups for seed starting each spring
Repurposing Milk Jugs and Bottles
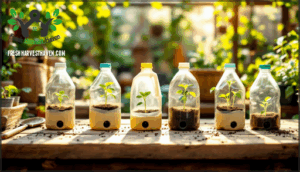
With milk jugs, you can create "winter sowing" mini greenhouses that jump-start germination by 2–4 weeks. These bottle planters trap heat—temperatures inside climb 5–10°C higher than outside air—and last 3–5 seasons when cleaned properly.
Jug seeders cut plastic recycling waste while extending your growing season, and about 40% of gardeners already use this trick. Just punch drainage holes in the base to prevent waterlogging in your DIY seed starters.
Transforming Takeout and Produce Containers
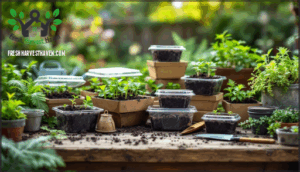
Clear takeout and berry boxes turn container recycling into creative repurposing for seed starting containers—vented boxes slash mold by 30%, while clear lids double as humidity domes. These sustainable planting trays work for multiple seasons of container gardening techniques, cutting material costs by 35%.
Deli containers hold 40 seedlings in shallow soil, making them ideal upcycling household items for gardening that support eco-friendly gardening and reduce waste.
Creative Biodegradable Seed Starter Ideas
If you’re looking to reduce waste while giving your seedlings the best start, biodegradable containers are nature’s gift to gardeners. These earth-friendly options break down naturally in the soil, letting you transplant without disturbing delicate roots.
Here’s a look at some surprisingly effective biodegradable containers you probably already have at home.
Eggshells and Citrus Peels as Seed Pots
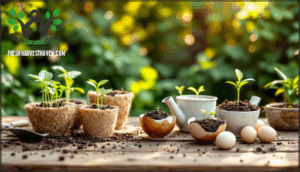
If you’ve ever cracked an egg or squeezed a lemon for breakfast, you’ve already got two of the best biodegradable seed pots sitting in your kitchen—and they’ll give your seedlings a nutrient boost when you plant them straight into the soil.
Here’s how to use these compostable containers:
- Rinse eggshells and citrus peels thoroughly
- Poke drainage holes in the bottom
- Fill with seed starting mix
- Plant seeds and water gently
- Transplant directly into garden beds
These eco-friendly seeds starters decompose naturally, enriching your soil while eliminating transplant shock—that’s sustainable gardening at its simplest.
Ice Cream Cones and Avocado Shells
You might think gardening and dessert don’t mix, but sugar cones and avocado shells are about to prove you wrong—they’re completely biodegradable seed starter pots that break down right in the soil while giving your plants room to grow.
Just fill cone planters with seed starting mix, plant your seeds, and water carefully—they work great for avocado seedlings or any small starts you’re upcycling household items for gardening with.
When it’s time to transplant your DIY seedling containers, bury the whole thing, and these eco-friendly seed shell starters will decompose and feed your soil naturally.
DIY Shredded Paper and Compostable Materials
Shredded paper from junk mail and newspapers becomes something truly outstanding when you blend it into paper pulp—you’re basically crafting biodegradable pots that skip the transplant shock entirely.
Here’s how to make your own DIY shredded paper seed starters:
- Soak torn paper scraps in water overnight until softened
- Blend the mixture into smooth paper pulp for molding
- Press pulp firmly into muffin tins to shape compostable pots
- Let biodegradable seed starter pots dry completely before filling with soil
- Plant the entire seed starter directly into your garden bed
Upcycled newspapers into seed pots break down naturally through composting, adding organic matter while your roots push through these eco-friendly containers without missing a beat.
Tips for Successful Seed Starting Indoors
You’ve got your containers ready—now let’s make sure those seeds actually thrive. Getting the basics right from the start means healthier seedlings and fewer headaches down the road.
Here’s what you need to focus on to give your seeds the best shot at success.
Preparing and Filling Your Containers
Once you’ve picked your perfect seed-starting container—whether it’s a yogurt cup or a citrus peel—the next step is getting it ready to actually do its job. Start by punching drainage holes if your repurposed containers don’t already have them.
Then mix your seed-starting medium—a blend that’s light and sterile works best. Fill your homemade seed pots about three-quarters full, leaving room for proper seed placement and water management without overflow.
Managing Moisture and Light for Seedlings
Getting your containers filled is only half the battle—now you need to nail the balance between keeping your seedlings hydrated and making sure they get enough light to actually grow. Check soil humidity daily—you want it damp, not waterlogged.
Place your seed starting containers near a sunny window or under grow lights for consistent light intensity. If you’re using mini greenhouses or covered setups, open them occasionally to prevent excess moisture and mold.
Preventing Disease and Promoting Root Growth
Healthy roots are your best defense against disease, so keep an eye out for damping-off and other issues that can quickly wipe out your seedlings. Sterilization methods like bleach-washing reused seed starting containers prevent pathogens from hitchhiking into your setup.
Here’s what helps root development and disease resistance:
- Promote proper soil drainage to avoid waterlogged conditions that suffocate roots
- Use quality seed starting mix instead of garden soil for better root growth
- Water from the bottom to keep foliage dry and reduce fungal spread
- Transplant when roots fill biodegradable seed containers to minimize transplant shock
Eco-Friendly and Sustainable Gardening Practices
Starting seeds in upcycled containers isn’t just a clever workaround—it’s a simple way to shrink your environmental footprint while growing healthier plants.
You’ll save money, reduce landfill waste, and give your seedlings everything they need to thrive.
Here’s how sustainable seed-starting practices benefit both your garden and the planet.
Reducing Waste With Upcycled Containers
Every yogurt cup, egg carton, and takeout container you toss could’ve been your next seedling tray—and upcycling them keeps plastic out of landfills while giving your garden a zero-cost head start.
Repurposing household items for seed starting containers transforms waste reduction into green living that’s actually practical.
You’re not just recycling for gardening—you’re cutting costs while embracing sustainable gardening practices that make eco-friendly choices feel easy, not preachy.
Benefits of Biodegradable Seed Starters
Biodegradable pots aren’t just about feel-good sustainability—they dissolve naturally in soil within 6–12 months, eliminating hundreds of plastic containers per season from your gardening footprint.
These compostable materials decompose into organic matter that enriches soil, boosts water retention, and gradually releases nitrogen to nourish roots.
You’ll also skip transplant shock entirely by planting seedlings pot-and-all, which is why peppers grown in biodegradable containers yielded 13% more fruit than those started in plastic.
Biodegradable pots eliminate transplant shock and boost pepper yields by 13% compared to plastic containers
Saving Money and Supporting Healthy Plants
Starting seeds without a store-bought setup can slash your gardening costs by 70–90% compared to purchasing transplants or commercial seed trays—and the plants you grow often outperform nursery stock.
Repurpose household items like yogurt cups and egg cartons as reusable containers, and you’ll master frugal gardening while controlling seedling care from day one.
Biodegradable seed containers boost plant nutrition as they decompose, giving your budget gardening approach the eco-friendly edge that fosters healthier roots without spending extra.
Frequently Asked Questions (FAQs)
Can seedlings be transplanted directly from paper towel rolls?
Yes, you can transplant seedlings directly from paper roll planters. Toilet paper rolls work as biodegradable seed containers that go straight into soil.
The roll planters break down naturally, letting roots grow through without transplant shock—perfect for direct sowing.
How deep should seeds be planted in containers?
Most seeds follow a general planting guideline: sow at a depth roughly twice their diameter. Tiny seeds need minimal soil layers for proper seed germination, while larger ones require deeper sowing techniques in appropriately sized seed starting containers to guarantee healthy seedling care and maintenance with adequate soil drainage.
Whats the best soil mix for starting seeds?
A quality seed starting mix combines equal parts peat moss, perlite, and vermiculite for ideal seed germination.
This balanced fertilizer mix promotes soil health by maintaining proper soil pH levels while adding organic matter through compost ratio adjustments in your soil starting containers.
When should seedlings be moved to larger pots?
Watch for true leaves—those second or third sets that appear after the initial seed leaves. Transplant timing matters most when roots start circling the container’s base, usually within 3-4 weeks of germination.
Proper pot size facilitates root development and soil preparation before transplanting seedlings outdoors.
How often should you water seeds in containers?
Water frequency for seed germination depends on soil moisture and container size. Check daily and keep the growing medium consistently damp but not waterlogged.
Proper soil drainage prevents rot while supporting healthy seedling care and maintenance.
Conclusion
Here’s the surprising truth: that friend who tossed those plastic trays? She spent more replacing them than I’ve spent on seed starting containers to reuse in five years combined.
Your kitchen already holds everything you need—egg cartons that become biodegradable pots, yogurt cups that rival store-bought cells, citrus peels that feed seedlings as they decompose.
Stop buying what you’re already throwing away. Your seeds don’t care about fancy labels; they care about drainage, space, and clean conditions you can create from yesterday’s breakfast.

