This site is supported by our readers. We may earn a commission, at no cost to you, if you purchase through links.

You’ll need to clean and sharpen your gardening tools, test your soil’s pH levels, and remove winter debris from garden beds.
Start by determining your USDA hardiness zone to choose appropriate plants, then decide whether to start seeds indoors or direct sow outdoors.
Focus on cool-season crops first, as they can handle those unpredictable spring temperature swings.
Don’t forget to gradually harden off any indoor seedlings before transplanting them outside, the secret lies in timing each task perfectly with your local climate conditions.
Table Of Contents
- Key Takeaways
- Preparing Garden Tools
- Pruning and Maintenance
- Soil Preparation Tips
- Planning and Plant Selection
- Seed and Planting Preparation
- Frequently Asked Questions (FAQs)
- When should I start preparing my garden for spring?
- What is the most common mistake of first time gardeners?
- What is the gardening 3 year rule?
- How to prepare a garden for the first time?
- How do I prepare my garden for spring?
- How do I prepare my garden for the spring equinox?
- How can I start the spring season successfully?
- How do I prepare my soil for spring?
- How do you prepare a garden before planting?
- How to prepare a vegetable garden in the spring?
- Conclusion
Key Takeaways
- Start preparation 4-6 weeks before your last frost date – Clean and sharpen your tools, test soil pH, and remove winter debris while the ground is still manageable.
- Focus on cool-season crops first – Plant hardy vegetables like spinach, lettuce, and peas when soil reaches 40°F, as they will handle spring’s unpredictable temperature swings.
- Test your soil before adding anything – Use home kits or professional analysis to check pH levels and nutrient needs, then add compost or amendments based on actual results.
- Gradually harden off indoor seedlings – Start with one hour outside daily and increase exposure time to prevent shock when transitioning plants from indoors to your garden.
Preparing Garden Tools
Getting your garden tools ready for spring is essential for a successful growing season.
Clean, sharp tools make your work easier and also prevent the spread of plant diseases throughout your garden.
Sharp tools work smarter, not harder—and keep your garden healthier too.
Inspecting and Cleaning Tools
Your garden tools are your trusty companions, but they need attention before spring planting begins. Start by gathering all equipment for a thorough inspection and cleaning session.
Tool Sanitizing and cleaning essentials:
- Check handles for cracks or splinters requiring Handle Cleaning
- Remove rust with wire brushes, then apply Rust Prevention oil
- Use Garden Hose to rinse debris from larger tools
- Sanitize with 10% bleach solution for disease prevention
- Organize Equipment Storage areas for easy access
Proper garden tool maintenance prevents costly tool replacement later. Clean tools perform better and last longer, making your garden tool essentials investment worthwhile. Regular use of a Garden Tool Cleaner helps maintain their effectiveness.
Repairing and Replacing Broken Tools
Once you’ve cleaned your tools, tool inspection reveals whether repairs are worthwhile.
Check for cracked handles, bent blades, or excessive rust. Handle repair often costs less than replacement—look for ergonomic upgrades when buying new handles.
| Problem | Repair Option | Replace When |
|---|---|---|
| Cracked handle | New handle kit | Multiple cracks |
| Dull blade | Professional blade sharpening | Blade damage |
| Surface rust | Rust prevention treatment | Deep corrosion |
Your garden tool inventory benefits from strategic equipment maintenance. Oil moving parts and store tools properly. Tool replacement makes sense when repair costs exceed half the tool’s value.
Sharpening and Lubricating Pruning Tools
Why settle for dull blades when sharp tools make all the difference?
After repairs, focus on tool sharpening and blade maintenance. Use a whetstone or file to maintain proper angles for precision.
Apply pruning oil or WD-40 for rust prevention and smooth operation. Don’t forget handle care – clean wooden handles and treat with mineral oil.
Regular equipment maintenance and garden tool care guarantee your sharpening tools stay ready for pruning trees all season long.
Proper gardening techniques involve understanding gardening tools to achieve superior results.
Pruning and Maintenance
Proper pruning sets the foundation for healthy plant growth and abundant blooms throughout the growing season.
You’ll want to tackle this essential task before buds break in early spring, when plants are still dormant and can recover quickly from cuts, which is crucial for abundant blooms.
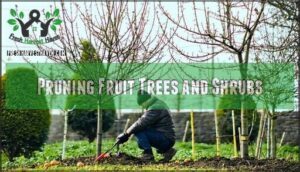
Pruning Fruit Trees and Shrubs
With your tools now properly maintained, it’s time to focus on fruit tree pruning and shrub maintenance for maximum fruit yield. Late winter offers the perfect window for this critical task.
Pruning trees during dormancy prevents disease transmission and maximizes energy for spring growth. Here’s your action plan:
- Remove dead, diseased, or crossing branches first using clean pruning tools
- Limit removal to 30% of branches annually to avoid shocking the tree
- Make 45-degree cuts above outward-facing buds for proper healing
- Open the canopy center to improve air circulation and light penetration
- Install tree support stakes for young trees after pruning
Proper shrub pruning follows similar principles but focuses on shaping for even sunlight exposure. This strategic approach can boost your fruit yield by up to 30% while reducing disease risk substantially.
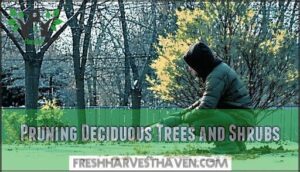
Pruning Deciduous Trees and Shrubs
Late winter’s the perfect time for tree pruning and shrub care—you’ll shape stronger plants before spring’s growth spurt begins.
**Winter pruning shapes stronger plants before spring’s explosive growth begins.
Focus on removing dead, damaged, or crossing branches that compete for nutrients. Make clean cuts at 45-degree angles just above outward-facing buds to encourage proper healing. Never remove more than one-third of any plant in a single session.
Understanding proper pruning techniques is essential for maintaining healthy trees and shrubs.
Task Purpose Timing
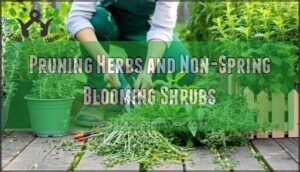
Pruning Herbs and Non-Spring Blooming Shrubs
Moving from tree care to herbs and shrubs requires different pruning techniques.
Herbs like sage and rosemary respond well to selective cutting—remove up to one-third of woody stems to promote fresh growth. For shrub maintenance, timing is everything.
Here’s your herb care and shrub pruning strategy:
- Cut herbs strategically – Trim woody perennials like thyme and oregano by removing old stems, leaving healthy base growth intact
- Prune summer-blooming shrubs – Handle shrub maintenance during dormancy to encourage vigorous flowering later
- Use clean, sharp tools – Proper plant pruning prevents disease transmission and creates clean cuts that heal quickly
This garden trimming approach keeps your plants healthy while maximizing their productive potential throughout the growing season.
Removing Damaged or Diseased Tree Limbs
Dead branch detection starts with careful inspection for cracks, discoloration, or decay.
Use sterilized pruning tools to make clean cuts just above healthy growth points, preventing disease spread.
| Issue | Identification | Action |
|---|---|---|
| Dead branches | Brown, brittle bark | Remove completely |
| Disease spots | Discolored patches | Cut 6" below damage |
| Structural damage | Cracks, splits | Professional assessment |
Proper limb removal and wood disposal prevent further disease control problems while supporting overall garden maintenance through strategic tree pruning guidelines.
Soil Preparation Tips
Your garden’s success starts with healthy soil, and spring is the perfect time to give your beds the attention they deserve.
By removing debris, testing soil conditions, and adding the right amendments, you’ll create the foundation for thriving plants all season long.
Removing Debris and Weeds From Garden Beds
After completing your pruning tasks, focus on garden bed cleanup to create ideal growing conditions. Clean garden beds provide the foundation for healthy plant development throughout the growing season.
Debris clearance and weed removal require systematic attention to detail:
- Remove all fallen leaves, branches, and plant debris – decomposing materials harbor pests and diseases that can damage new growth
- Pull weeds before they set seed – eliminating weeds now prevents thousands of seeds from germinating later in the season
- Clear pathways and bed edges – maintaining clean borders improves air circulation and reduces hiding spots for harmful insects
Thorough spring garden cleanup eliminates overwintering pests and disease spores while improving soil access for amendments. Bed preparation through proper soil purification creates ideal conditions for robust plant establishment and seasonal success. Understanding soil pH levels is essential for perfect plant growth and development.
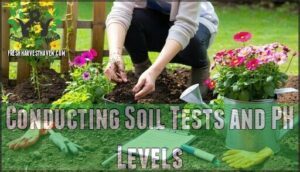
Conducting Soil Tests and PH Levels
Before planting anything, soil testing reveals what your garden truly needs.
Test pH levels every few years using home kits or professional nutrient analysis – most vegetables thrive between 6.0-7.0 pH.
Soil sampling from multiple spots guarantees accuracy.
These fertility checks guide proper soil preparation, preventing costly mistakes and boosting plant health substantially.
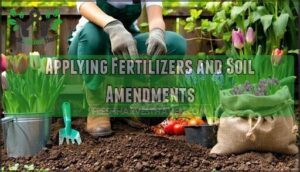
Applying Fertilizers and Soil Amendments
After soil testing reveals your garden’s needs, you’ll apply the right fertilizers and soil amendments to create ideal growing conditions.
Choose between fertilizer types: synthetic options deliver quick results, while organic matter like compost improves long-term soil health.
pH balancing requires lime for acidic soil or sulfur for alkaline conditions.
Apply amendments in early spring, working them into the top six inches of soil.
Compost tea provides gentle nutrition, while granular fertilizer application ensures steady nutrient release for robust plant growth throughout the season.
Understanding soil fertilizers is vital for maintaining a healthy garden ecosystem.
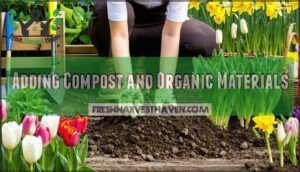
Adding Compost and Organic Materials
Garden soil transformation begins with strategic organic matter additions that boost soil fertility naturally.
- Compost Types: Use finished compost, aged manure, or leaf mold for ideal nutrient cycling
- Application Method: Work 2-3 inches of organic materials into top 6-8 inches of garden soil
- Mulch Benefits: Apply organic mulch around plants for moisture retention and continued soil preparation enhancement
These amendments create thriving microbial communities essential for healthy plant growth.
Planning and Plant Selection
Smart plant selection transforms your garden from a collection of random plants into a thriving, well-coordinated landscape.
You’ll need to match your plant choices to your specific growing conditions while creating a layout that looks intentional and provides season-long interest.
Determining Hardiness Zone and Sun Exposure
Success starts with knowing your garden’s unique personality. Your hardiness zone determines which plants survive winter, while sun exposure dictates growth patterns.
Check USDA zone maps using your zip code, then observe daily sun patterns across your space.
Essential steps for garden planning success:
- Map your hardiness zone – Use online zone mapping tools to identify your specific climate type
- Track sun patterns – Monitor garden orientation and light exposure throughout the day
- Measure soil temperature – Cool soil affects seed starting timing and plant establishment
- Document microclimates – Note areas with different conditions for strategic plant placement
Planning Plant Placement and Color Coordination
Strategic garden layout design transforms chaotic plots into harmonious landscapes.
Position tall plants behind shorter ones to prevent shading issues.
Group plants with similar bloom timing for continuous color displays.
Consider spatial planning that balances textures and heights—think of it as choreographing a dance between colors and forms.
Factor Tip
Deciding on Indoor Sowing or Direct Sowing
When choosing between indoor seed starting and direct seeded methods, consider soil temperature and germination rates.
Cool-season crops like lettuce thrive with direct sowing methods in 40°F soil, while warm-season plants need indoor warmth for better seed germination.
Seed starting timing affects success—tomatoes benefit from indoor starts, requiring plant hardening before transplanting.
Hardening off seedlings gradually acclimates them to outdoor conditions.
Understanding site selection strategies is vital for healthy vegetable growth and development.
Creating a Planting Calendar and Garden Layout
Once you’ve decided on your sowing approach, Garden Mapping becomes your blueprint for success.
Create a planting schedule that aligns with your Garden Zones and frost dates.
Use garden planning tools to design your garden layout, incorporating Space Planning for ideal sun exposure and Crop Rotation to maintain soil health.
Map out seed starting timing for each variety, ensuring your Plant Scheduling maximizes harvest potential throughout the growing season.
Seed and Planting Preparation
Now you’re ready to transform your garden from winter dormancy to spring abundance through strategic seed and planting preparation.
You’ll master the essential steps of checking seed viability, timing your plantings perfectly, and ensuring your plants thrive whether started indoors or sown directly in the garden, to achieve a successful and thriving garden with complete concepts in place.
Checking Seed Inventory and Viability
Take stock of your seed collection before diving into spring planting. This inventory management step prevents duplicate purchases and helps guarantee you’re working with viable seeds.
- Seed Storage – Check that packets stayed cool and dry through winter
- Viability Tests – Place 10 seeds on damp paper towels to test germination rates
- Seed Selection – Discard expired packets and note what needs replacing
- Inventory Management – Organize remaining seeds by days to maturity and hardiness zone
- Seed Ordering – Purchase missing varieties before plant starts become your only option
Effective seed management involves using seed inventory software to track and maintain your seeds.
Starting Seeds Indoors and Direct Seeding
Now that you’ve sorted your seed inventory, it’s time to get those seeds growing. Seed Selection matters—choose varieties suited to your climate and Days to Maturity.
For Indoor Lighting, place seedlings near south-facing windows or use grow lights. Monitor Soil Temperature with a thermometer; most seeds germinate between 65-75°F.
Direct Sowing works for hardy crops like peas and lettuce. Your Seed Germination success depends on consistent moisture and proper timing for healthy Plant Starts.
Planting Cool-Season Crops and Spring Bulbs
Cool-season crops like spinach, lettuce, and peas thrive when soil temperature reaches 40°F.
Plant these hardy vegetables using proper crop rotation principles in your garden layout.
Spring bulb planting requires depths of two to three times their height.
Cool season planting allows successive planting for continuous harvests throughout spring.
Transitioning Indoor Plants Outdoors and Hardening Off
Moving seedlings outdoors requires careful acclimation process to prevent shock. Hardening off strengthens plants for outdoor placement through gradual exposure.
- Start with one hour outside daily, increasing exposure time
- Provide shade adjustment using outdoor furniture setup or cloth
- Monitor weather monitoring for temperature swings and wind
- Watch for wilting or pest damage during hardening techniques
This spring garden preparation guarantees garden readiness after seed starting.
Frequently Asked Questions (FAQs)
When should I start preparing my garden for spring?
The early bird catches the worm" – start preparing your garden 4-6 weeks before your last frost date.
Clean tools, test soil, and plan layouts while soil’s still frozen for ideal spring success.
This preparation is crucial for a successful garden.
What is the most common mistake of first time gardeners?
You’re planting too early before soil warms up properly. Cold, wet soil kills seeds and stunts growth. Wait until soil reaches the right temperature for each crop type.
What is the gardening 3 year rule?
The gardening 3-year rule states that perennial plants typically need three years to establish.
First year they sleep, second year they creep, third year they leap into full, mature growth and blooming potential.
How to prepare a garden for the first time?
Choose your plot location with full sun exposure and well-draining soil. Test soil pH and add compost. Clear weeds, till the top 6-8 inches, then plan your layout before planting.
How do I prepare my garden for spring?
Clean tools with bleach solution, test your soil’s pH levels, remove debris and weeds, turn over the top 6-8 inches of soil, add compost amendments, and plant cool-season crops.
How do I prepare my garden for the spring equinox?
Start by removing winter debris and dead plant material from your beds.
Clean and sterilize your tools with a bleach solution.
Test soil pH and add compost or amendments as needed.
Prune trees and shrubs before buds break for healthy growth.
How can I start the spring season successfully?
Test your soil first—it’s your foundation for success. Clean tools, remove debris, and add compost to beds. Plant cool-season crops when soil reaches 40°F for early harvests.
How do I prepare my soil for spring?
Ironically, everyone talks about soil preparation after plants are already struggling.
Remove debris and weeds, then turn the top 6-8 inches to eliminate overwintering pests.
Test your soil’s pH and add compost or amendments based on results.
How do you prepare a garden before planting?
Remove debris and weeds from your garden beds, then turn the soil six to eight inches deep. Test soil pH and add amendments like compost as needed.
How to prepare a vegetable garden in the spring?
Like Noah preparing for the flood, you’ll need to clear debris, test soil pH, and turn earth 6-8 inches deep.
Add compost, eliminate weeds, and make certain proper drainage before planting.
Conclusion
Ironically, after months of dreaming about perfect gardens, most beginners discover that spring garden preparation for beginners requires more elbow grease than Instagram posts suggest.
Your carefully planned approach to tool maintenance, soil testing, and strategic plant selection sets the foundation for genuine success.
Remember that timing trumps enthusiasm – those cool-season crops won’t wait for your schedule.
By following these systematic steps and respecting your local climate patterns, you’ll transform from hopeful novice to confident gardener before summer arrives.

