This site is supported by our readers. We may earn a commission, at no cost to you, if you purchase through links.

Your spring garden won’t succeed if you crowd heat-loving tomatoes next to frost-hardy kale or plant tall peas where they’ll shade out your lettuce. A smart spring garden vegetable layout separates cool-season crops from warm-weather varieties, places plants by height and light needs, and leaves room for succession planting as temperatures climb.
Most gardeners lose weeks of productivity because they treat spring like summer, ignoring the narrow window when spinach, peas, and radishes thrive before bolting in the heat. You’ll optimize your harvest by mapping out which vegetables go where based on maturity speed, temperature tolerance, and sun exposure—not just cramming seeds wherever space opens up.
Table Of Contents
- Key Takeaways
- What to Plant in Your Spring Garden
- Assessing Your Spring Garden Space
- Choosing The Best Garden Layout Style
- Creating a Square-Foot Garden Layout
- Designing Raised Bed Vegetable Gardens
- Top 5 Products for Spring Garden Success
- Companion Planting and Crop Rotation Strategies
- Frequently Asked Questions (FAQs)
- How do I start seeds indoors before spring?
- What are the best mulching materials for vegetables?
- When should I transplant seedlings outside?
- How do I protect crops from late frosts?
- Can I grow vegetables in partial shade?
- When should I start hardening off spring seedlings?
- How do I protect plants from late frosts?
- What watering schedule works best for spring vegetables?
- Can I plant spring vegetables directly from seed?
- How do I prevent bolting in cool-season crops?
- Conclusion
Key Takeaways
- Your spring garden succeeds when you separate cool-season crops like spinach and peas from heat-loving plants, positioning vegetables by height and light needs rather than cramming seeds wherever space opens up.
- Fast-maturing crops like radishes (25-30 days) and lettuce (30-50 days) let you rotate plantings every two weeks for continuous harvests before summer heat arrives.
- Square-foot gardening and raised beds give you total control over soil quality and spacing—dividing beds into 12-inch squares maximizes yields while simplifying crop rotation and succession planting.
- Strategic companion planting pairs nitrogen-fixing beans with leafy greens and positions pest-deterring herbs like basil near vulnerable crops, creating a self-defending ecosystem without chemicals.
What to Plant in Your Spring Garden
Spring gardening starts with choosing crops that can handle cool temperatures and occasional frost. Your best options include vegetables that mature quickly, leafy greens that don’t need full sun, and sturdy root crops.
Here’s what works well in those first few months of the growing season.
Cool-Season Vegetables That Thrive in Spring
Your spring planting starts with cool-season crops that handle frost like champions. These vegetables germinate when soil temperature hits 40–85°F and tolerate brief dips to 28–32°F:
- Spinach and kale grow vigorously in 35–65°F, perfect for early spring vegetable gardening
- Lettuce varieties thrive at 45–65°F with impressive bolting resistance
- Peas climb happily in 55–65°F conditions
Proper garden preparation and crop rotation set you up for a superb spring harvest.
Fast-Maturing Crops for Early Harvest
Radishes, spinach, and lettuce are fast-growing cool-season crops that allow for early harvests and succession planning. Radishes are the quickest, reaching your plate in just 25–30 days, while spinach and lettuce deliver leaves in 30–50 days. Green onions mature in 20–40 days, and arugula is ready for your salad bowl in under a month.
These crops enable you to rotate plantings every two weeks, ensuring a continuous supply of fresh produce.
| Crop | Days to Harvest |
|---|---|
| Radishes | 25–30 days |
| Spinach | 30–45 days |
| Lettuce | 30–50 days |
| Green Onions | 20–40 days |
| Arugula | 25–40 days |
Leafy Greens for Limited Sunlight Areas
Not every garden gets eight hours of full sun, and that’s where shade tolerant leafy greens shine. Spinach and lettuce thrive with just 3–4 hours of direct light, producing steady harvests in partial shade. Cool-season crops like arugula, Swiss chard, and mustard greens adapt well to garden shade, letting you turn those dim corners into productive small space gardening tips that actually work.
- Leaf lettuce forms mature heads under limited sunlight requirements in cooler spring conditions
- Swiss chard prioritizes rapid leaf production with only 2–4 hours of sun
- Mustard greens produce usable leaves in light-limited areas, though growth slows compared to sunny spots
Root Vegetables and Alliums
While leafy greens love shade, carrots and onions need full sun—ideally eight hours—for strong root development. Radishes mature in 3–4 weeks under consistent moisture, giving you quick wins in your vegetable garden plan. Beets, turnips, and garlic establish well in cool-season temperatures between 40–75°F.
Loose, well-drained raised bed soil prevents forked roots and aids proper allium care through spring harvest timing. Plan your soil preparation now. Deep, friable beds—12 to 18 inches—prevent deformation and give roots room to grow straight. Mix in compost for moisture retention, but skip fresh manure; it causes excessive nitrogen and twisted shapes.
Your storage methods matter too: cure onions before storing, and keep harvested carrots in cool, humid conditions away from ethylene-producing fruits like apples.
| Root Crop | Days to Harvest |
|---|---|
| Radishes | 21–28 days |
| Carrots | 60–80 days |
| Beets | 50–70 days |
| Turnips | 40–60 days |
| Onions | 90–120 days |
Assessing Your Spring Garden Space

Before you drop a single seed in the ground, you need to know exactly what you’re working with. Your garden’s size and light conditions determine which crops will thrive and how many plants you can realistically grow.
Let’s break down how to measure your space and map where the sun actually hits throughout the day.
Measuring Available Area
You need accurate measurements before sketching your garden layout. Start with boundary measurement using a tape measure or laser meter to capture length and width in feet, then multiply for area calculation. For irregular plots, break the space into rectangles and triangles, sum them up, and subtract pathways. Don’t skip soil depth assessment—dig a test pit to verify your raised bed can support deep-rooted crops.
- Use grid mapping to subdivide space into 1-foot squares for precise squarefoot gardening layouts
- Measure existing beds and exclude ornamental areas from your vegetable garden layouts
- Allocate 12–18 inches for walkways in your garden planning and design
- Verify soil depth reaches 12–18 inches for ideal raised bed gardening results
Evaluating Sunlight and Shade Patterns
Your garden’s performance hinges on tracking sun hours daily. Use a sun map app or observe direct sunlight for one spring day, logging each hour from dawn to dusk.
Map your raised bed gardening space to identify full sun (6+ hours), partial (3–6 hours), and shade zones—this sunlight analysis drives smart vegetable garden layouts.
| Light Category | Hours/Day | Best Spring Crops | Garden Planning Notes |
|---|---|---|---|
| Full sun | 6+ | Broccoli, cabbage, peas | Maximizes yields; ideal for raised bed gardening with heat-loving starts |
| Partial sun | 3–6 | Lettuce, spinach, radish | Morning exposure reduces stress; suits microclimate effects near structures |
| Shade | 0–3 | Leafy greens (limited) | Lower light intensity limits production; rotate to sunnier spots mid-season |
| Variable microclimates | Fluctuates | Succession crops | Walls reflect light; use shade mapping to adjust garden orientation and design |
Choosing The Best Garden Layout Style

Your layout style shapes how much you can grow and how easy it is to maintain your spring garden. The right setup maximizes your space while fitting your available time and physical abilities.
Let’s look at three proven layout styles that work well for cool-season vegetables.
Square-Foot Gardening Basics
Square-foot gardening transforms a compact 4 by 4 foot raised bed into a high-yield vegetable garden plan using a simple garden grid. You divide the bed depth—usually 6 to 8 inches of soil mix—into one-foot squares, then adjust plant density by size: one broccoli per square, four lettuces, or sixteen radishes.
This method simplifies crop rotation and garden planning for spring harvest. By utilizing square foot techniques, gardeners can optimize their space and grow a variety of vegetables efficiently.
Traditional Row Vs. Raised Bed Layouts
Your vegetable garden layout choice defines how much you’ll grow and how easily you’ll tend it. Traditional rows spread plants across level ground with wide walkways, while raised garden beds concentrate soil and nutrients in framed boxes.
Key differences between layouts:
- Soil erosion: Raised beds hold soil firmly; rows expose more surface to runoff
- Garden accessibility: Elevated bed construction reduces bending and kneeling strain
- Space efficiency: Beds eliminate wasted inter-row paths, maximizing your SpringHarvest vegetable garden plan
- Irrigation systems: Raised bed layouts allow precise drip lines; rows need broader coverage
- Garden design flexibility: Modular beds adapt to odd yard shapes better than rigid rows
Container and Vertical Gardening Options
Tight on yard space? Container gardening and vertical gardens tap into urban farming potential on patios, balconies, and narrow side yards.
You’ll need 5- to 7-gallon pots with drainage holes, high-quality container soil, and trellis systems for climbers like peas.
This small space gardening approach rivals traditional raised beds for space optimization while letting you rearrange your garden layout as sunlight shifts.
Creating a Square-Foot Garden Layout
A square-foot garden turns your 4-foot raised bed into a simple grid system that maximizes every inch of space. Each square foot becomes its own mini planting zone, with spacing rules based on how much room each crop needs to grow.
Here’s how to set up your grid, position plants strategically, and leave room for continuous harvests all season long.
Grid Setup and Plant Spacing Guidelines

Think of each 12-inch square as its own mini plot. Small vegetables like radishes and lettuce need 4–6 inches between plants, giving you 4–16 per square depending on size. Medium crops such as bush beans fit 1–2 plants per square foot, while large vegetables require multiple squares with trellising.
Orient your grid north-south to prevent shading and maintain airflow between squares for healthier plants. To verify the accuracy of your garden layout, consider using scientific study methods to inform your decisions.
Positioning Plants by Size and Growth Rate

Your grid is ready—now arrange crops so they won’t fight for light. Here’s how to position plants by growth rate and size considerations for spatial efficiency:
- Group fast-growing lettuce and radishes near edges for easy harvest and garden layout flexibility
- Place trellised peas where they won’t cast shading effects on shorter neighbors
- Cluster plants with similar maturity timelines to simplify maintenance
- Position wide-leafed vegetables like cabbage away from delicate seedlings
Leaving Space for Succession Planting

After positioning your first wave of crops, reserve three squares for succession planting. This garden scheduling technique keeps your vegetable garden planner working all season—lettuce follows radishes, then peas slot in after greens finish.
Stagger sowings every two weeks for harvest optimization. Smart crop rotation and succession planting prevent bare patches while extending your yield window without cramping your garden layout.
Designing Raised Bed Vegetable Gardens

Raised beds give you total control over your growing environment, from soil quality to drainage. A well-designed bed makes planting, weeding, and harvesting easier on your back and knees.
Here’s how to build a raised bed that sets your spring garden up for success.
Sizing and Framing Your Raised Bed
Your raised bed dimensions determine how much control you have over your vegetable garden layout. Start with these core decisions:
- Length and width: A 4×4-foot or 4×8-foot bed lets you reach all plants without stepping on soil, protecting root zones.
- Bed height: Build 12–18 inches deep for cool-season crops and root vegetables.
- Frame construction: Use cedar or redwood with reinforced corner braces for lasting stability.
Soil Preparation and Organic Amendments
Once your frame stands ready, focus on what fills it. Soil testing reveals pH levels—aim for 6.0–7.0—and nutrient gaps before you plant. Build your raised bed foundation with these proven layers:
| Amendment Type | Purpose | Application Rate |
|---|---|---|
| Compost | Adds organic matter, improves structure | 2–3 inches mixed in |
| Well-rotted manure | Supplies nitrogen for leafy greens | 1–2 inches (aged only) |
| Alfalfa meal | Slow-release nitrogen, trace minerals | 2–3 lbs per 4×4 bed |
| Kelp meal | Potassium, micronutrients | 1 lb per 4×4 bed |
| Wood ash | Potassium source (use sparingly) | ½ cup per 4×4 bed |
Mix these organic gardening methods into your existing soil or garden soil mix. Compost tea, watered in weekly, feeds beneficial microorganisms. Top with 2 inches of mulch to lock moisture in and keep weeds out—mulch benefits include stable soil temperature for spring crops.
This sustainable gardening approach builds soil health season after season, giving you total control over fertilizer options without synthetic chemicals.
Ensuring Easy Access and Maintenance
Beyond the frame and soil, your raised bed design needs pathways at least 30 inches wide for comfortable movement—wheelchairs require 48 inches. Build beds no wider than 4 feet so you can reach the center without stepping on soil.
Install drip irrigation systems on timers to slash watering labor by 70 percent, and keep ergonomic tools within 15 feet of your garden layout.
Top 5 Products for Spring Garden Success
You’ve planned your layout and prepared your beds. Now you need the right tools and products to protect your spring crops from frost, pests, and soil deficiencies.
Here are five essential products that will help you boost your early-season harvest and keep your garden thriving through unpredictable spring weather.
1. Groundbreaking Food Garden Plans Book
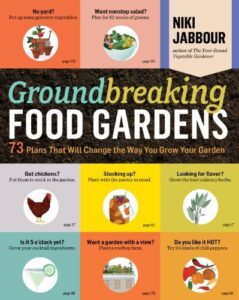
You’ll find 73 unique food garden plans in this illustrated collection from Storey Publishing, released in March 2014. The 272-page book offers garden design and planning strategies for raised beds and succession planting layouts.
Each design includes plant lists and gardening tips from experienced gardeners. While it won’t walk you through step-by-step construction, it’s a strong vegetable garden planner for gathering ideas and inspiration.
Think of it as your visual guide to creative garden layout possibilities rather than a technical how-to manual.
| Best For | Gardeners who want a visual idea book packed with diverse garden layouts and plant combinations rather than a step-by-step construction guide. |
|---|---|
| Primary Use | Garden design inspiration |
| Material/Format | Printed book |
| Weight | 1.88 pounds |
| Target Audience | All gardening levels |
| Durability | Permanent reference |
| Coverage/Scope | 73 garden designs |
| Additional Features |
|
- 73 different garden designs give you tons of layout options for different spaces and climates
- Each plan comes with specific plant lists and personal tips from experienced gardeners
- Works well as inspiration whether you’re just starting out or already have gardening experience
- Doesn’t provide detailed how-to instructions for building gardens from scratch
- Illustrations may lack the depth some readers want for implementation
- More of an idea collection than a comprehensive planning manual with measurements and technical details
2. Niki Jabbour Veggie Garden Book
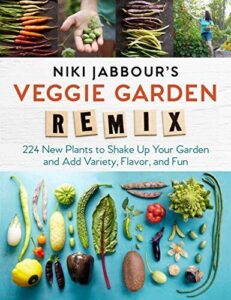
You can tap into Niki Jabbour’s practical veggie garden planning expertise with this 240-page guide, published by Storey Publishing in February 2018. It introduces 224 plants perfect for spring crop selection and cool season strategies, each with detailed growing information customized to your climate.
The ‘Like this? Then try this!’ format encourages experimentation while keeping garden planning simple. You’ll discover soil preparation tips, raised bed designs, and season-extending tricks that work in challenging zones.
While some seeds require specialty sellers, it’s an excellent vegetable gardening reference for expanding beyond traditional choices.
| Best For | Home gardeners who want to move beyond basic vegetables and experiment with unusual varieties while getting practical advice for cool-season planting and succession strategies. |
|---|---|
| Primary Use | Plant variety expansion |
| Material/Format | Printed book |
| Weight | 1.68 pounds |
| Target Audience | Experimental gardeners |
| Durability | Permanent reference |
| Coverage/Scope | 224 plants |
| Additional Features |
|
- 224 plants with detailed growing info and a “like this, try this” approach that makes experimentation feel manageable instead of overwhelming
- Solid foundation in soil prep, raised beds, and season-extending techniques that work in tougher climates like Zone 5
- Fun facts and plant history add personality to what could otherwise be just another reference book
- You’ll likely need to order from specialty seed sellers online since many plants aren’t available at typical garden centers
- Doesn’t dive deep into exotic perennial vegetables, so if that’s your focus you might need additional resources
- Growing advice may need tweaking depending on your specific zone and microclimate
3. Dr Earth Organic Fertilizer
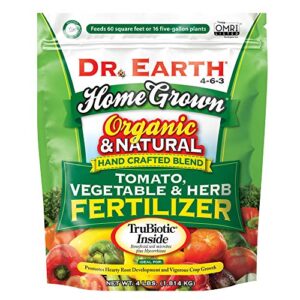
You need vigorous soil health and preparation to grow nutrient-dense vegetables season after season. Dr Earth Organic Fertilizer delivers slow-release garden nutrition through a 4-4-4 NPK blend plus beneficial soil microbes and mycorrhizae that colonize root zones for months.
This sustainable gardening staple requires just one fertilizer application at planting for cool-season crops like lettuce and spinach. It contains no synthetic additives, supporting organic and sustainable gardening practices while improving drought tolerance.
Calculate rates carefully for raised beds to avoid over-application and maintain balanced fertility throughout your vegetable gardening calendar.
| Best For | Organic gardeners who want slow-release, all-natural nutrition that feeds vegetables for months while building long-term soil health with beneficial microbes. |
|---|---|
| Primary Use | Vegetable fertilizer |
| Material/Format | Organic granules |
| Weight | 4 pounds |
| Target Audience | Organic vegetable growers |
| Durability | Feeds several months |
| Coverage/Scope | Container to large gardens |
| Additional Features |
|
- One application at planting feeds cool-season crops through harvest, saving time and reducing fertilizer costs
- Contains seven strains of beneficial microbes and mycorrhizae that colonize roots and improve drought tolerance
- OMRI-listed for organic gardening with no synthetic chemicals, GMOs, or sewage sludge
- Strong smell when mixed as compost tea can be unpleasant during preparation
- Requires careful calculation for small raised beds or containers to avoid over-fertilizing
- Customer support may be slow to respond when you need application guidance for specific garden setups
4. Agfabric Garden Insect Netting Barrier
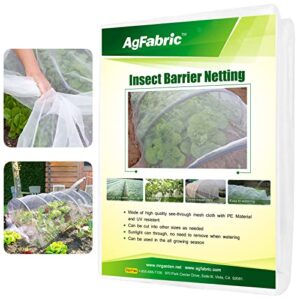
You can’t harvest what bugs destroy first. Agfabric Garden Insect Netting Barrier shields your raised bed garden from flea beetles, cabbage worms, and aphids while letting water and sunshine through.
This fine-mesh crop protection reduces insect damage by up to 90 percent when you secure edges properly and keep seams tight. The 0.03×0.03-inch openings block most pests without chemicals, supporting integrated pest control methods in your vegetable garden.
Proper netting installation means anchoring borders and using hoops to prevent sagging for season-long garden pest and disease management.
| Best For | Organic gardeners and vegetable growers who want chemical-free pest protection that maintains airflow and light while blocking insects from eating crops. |
|---|---|
| Primary Use | Pest protection netting |
| Material/Format | HDPE mesh cloth |
| Weight | 1.01 pounds |
| Target Audience | Vegetable/fruit gardeners |
| Durability | Multi-season use |
| Coverage/Scope | 180″ x 78″ |
| Additional Features |
|
- Cuts insect damage by up to 90% when installed correctly, protecting plants from flea beetles, cabbage worms, and aphids without pesticides
- Breathable mesh lets water, air, and sunlight reach your plants while keeping pests out
- Lasts 2–5 growing seasons with proper care, and you can cut it to fit different bed sizes
- Seams and edges can come apart or develop holes if you’re not gentle during installation
- The 78-inch width might not cover wider garden beds without piecing sections together
- Takes time to install properly—you need to anchor edges, use hoops, and check for gaps regularly
5. Greenscapes Heavy Duty Wildlife Netting Barrier
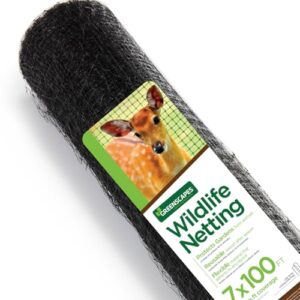
Deer and rabbits don’t respect your spring gardening plans. Greenscapes Heavy Duty Wildlife Netting Barrier uses 7lb UV-stabilized polyethylene mesh to defend your vegetable garden when larger pests threaten raised bed gardens and perimeter fencing.
The 7-foot-by-100-foot coverage fits multiple garden layout ideas while netting materials stay lightweight for flexible netting installation. Secure edges to frames or ground stakes so wind won’t lift corners.
This wildlife protection complements insect netting for complete pest control across cool-season plantings, supporting practical vegetable gardening tips without chemicals.
| Best For | Gardeners protecting large vegetable plots, raised beds, or perimeter areas from deer, rabbits, and birds without using chemicals. |
|---|---|
| Primary Use | Animal barrier netting |
| Material/Format | Plastic netting |
| Weight | 7 pounds |
| Target Audience | Large garden owners |
| Durability | Multi-season use |
| Coverage/Scope | 1200″ x 84″ |
| Additional Features |
|
- 7′ x 100′ coverage handles multiple garden beds or wraps entire small gardens in one piece
- UV-stabilized polyethylene holds up across multiple growing seasons with proper care and storage
- Lightweight mesh installs quickly on frames or stakes and repositions easily as garden layouts change
- Fine mesh tangles during setup and requires patience to unroll and position without snags
- May not stop determined deer or large animals that push through lightweight barriers
- Quality inconsistencies reported by some users, with thinner-than-expected material in certain batches
Companion Planting and Crop Rotation Strategies

Your spring garden thrives when you pair the right plants together and give your soil what it needs. Smart companion planting boosts growth naturally, while crop rotation keeps nutrients balanced and pests at bay.
Here’s how to put both strategies to work in your layout.
Pairing Compatible Vegetables for Better Growth
Companion planting transforms your vegetable garden into a self-supporting ecosystem. You’ll optimize space while reducing pest management headaches through strategic crop diversity.
Smart pairings for your cool-season crops include:
- Beans with leafy greens – legumes provide soil enrichment through nitrogen fixation
- Deep-rooted carrots alongside shallow lettuce – allows vertical gardening underground
- Early broccoli shading heat-sensitive spinach – extends your succession planting window
- Onions near cabbage – natural pest deterrent combinations
- Peas climbing above radishes – efficient garden layout ideas using complementary growth patterns
Rotating Crops to Maintain Soil Health
Beyond pairing plants, you’ll rebuild your soil through strategic crop rotation. Moving vegetable families to different beds each season disrupts pest lifecycles and balances nutrient cycling.
A simple three-year rotation keeps microbial balance thriving while your cool-season crops and succession crops deliver ecosystem services.
Document your layout annually—this vegetable garden maintenance prevents soil fertility decline and puts you in control of seasonal gardening strategies that actually work.
Incorporating Herbs for Pest Management
Strategic herb pest control transforms your vegetable garden into a self-defending ecosystem. Plant basil within 12 inches of peppers to suppress aphids, or position sage near carrots to reduce rust fly damage. These natural repellents work as organic barriers through volatile compounds that disrupt pest feeding patterns—companion planting that delivers measurable protection while you reclaim control over gardening strategies.
Strategic herbs like basil and sage turn your garden into a self-defending ecosystem, blocking pests through volatile compounds without chemicals
- Parsley beside spinach invites leaf miner predators into your rows
- Thyme flowers draw hoverflies that devour aphid colonies by the hundreds
- Chives near cucumbers create fragrant deterrents that block aphid colonization
- Oregano reduces general pest pressure across bean plantings without chemicals
Frequently Asked Questions (FAQs)
How do I start seeds indoors before spring?
Getting the jump on spring means starting seeds indoors six to eight weeks before your last frost. You’ll need sterile seed starting medium, proper indoor lighting, and consistent soil temperature between 65 and 75°F for successful germination.
What are the best mulching materials for vegetables?
You’ll want organic mulch like straw or shredded leaves for weed control and moisture retention.
Grass clippings add nitrogen, while compost benefits soil structure.
Each material offers excellent soil insulation for your vegetable garden.
When should I transplant seedlings outside?
Transplanting is like opening a door to freedom—seedlings step outside when frost dates pass, soil temperature hits 40–60°F, and you’ve completed hardening through outdoor acclimation over seven to fourteen days.
How do I protect crops from late frosts?
Cover your crops with row covers or cold frames when frost threatens. These lightweight barriers trap warmth and can raise temperatures by 2 to 4 degrees, protecting cool-season vegetables during unpredictable spring weather.
Can I grow vegetables in partial shade?
Most leafy greens tolerate partial shade with 3–6 hours of sun. Shade-tolerant crops like spinach, lettuce, and herbs thrive with soil optimization, light reflection, and microclimate management in small gardens.
When should I start hardening off spring seedlings?
Start hardening off your seedlings 7 to 14 days before your last expected frost date. Gradually expose them outdoors for 1–2 hours daily, increasing sun exposure and reducing watering to strengthen roots.
How do I protect plants from late frosts?
You’ll want to use frost protection covers before temperatures drop below freezing.
Cold frames raise air temperature by 5–10°C, while irrigation strategies before frost events increase thermal mass and reduce rapid temperature drops.
What watering schedule works best for spring vegetables?
Don’t let your watering routine become a drip in the bucket—spring vegetables need consistent soil moisture, about 1 inch weekly through deep soaks, adjusted for rainfall and crop stage.
Can I plant spring vegetables directly from seed?
Yes, you can direct sow most cool-season crops when soil temperature reaches 40–50°F. Check seed catalogs for germination rates and sowing depth. Peas, radishes, and spinach establish quickly from seed.
How do I prevent bolting in cool-season crops?
Choose bolt-resistant Broccoli and Lettuce varieties, maintain cool temperatures between 52–65°F, and provide consistent soil moisture.
Use succession sowing for continuous harvests while shading crops during afternoon heat to delay vernalization and prevent premature flowering.
Conclusion
Garden layouts fail when you force plants into spaces that don’t match their biology. Your spring garden vegetable layout works when you respect temperature zones, light requirements, and maturity timelines instead of guessing.
Map cool-season crops in early spring, reserve sunny spots for heat-lovers you’ll transplant later, and leave succession-planting gaps. This isn’t decorative landscaping—it’s strategic food production. Plan with precision now, and you’ll harvest continuously while your neighbors wait for summer.