This site is supported by our readers. We may earn a commission, at no cost to you, if you purchase through links.

A spring renovation addresses more than aesthetics. It rebuilds the foundation your plants depend on, from compacted soil that chokes roots to drainage problems that drown perennials.
Done right, these five focused steps transform your yard from winter-worn to summer-ready, creating a landscape that works harder and looks better with less effort all season long.
Table Of Contents
Key Takeaways
- Spring garden renovation starts with a thorough assessment and cleanup—inspecting for winter damage, removing debris, cutting back dead growth, and preparing lawn edges—because clearing this foundation reveals problems and creates space for healthy new growth.
- Hardscape repairs in early spring prevent expensive failures later, from leveling sunken stepping stones and fixing retaining walls to cleaning gutters and applying fresh protective coatings to wood features before planting season demands your attention.
- Soil improvement through testing, topdressing with compost, and applying targeted amendments based on actual nutrient needs creates the foundation for thriving plants, while no-till techniques and mulching reduce maintenance and build long-term soil health.
- Strategic plant selection using natives and keystone species, combined with multi-season design and thoughtful outdoor living enhancements like efficient irrigation and comfortable gathering spaces, transforms your yard from a maintenance burden into a functional, beautiful landscape that works harder with less effort all season.
Assess and Clean Up Your Garden
Before you plant, you need to see what winter left behind. This first step is about walking your yard, spotting problems, and clearing out anything that’s getting in the way of new growth.
Here’s what to check and clean up now.
Inspect for Winter Damage and Animal Activity
Once the snow melts and those first spring days arrive, walk your property with a careful eye to spot what winter left behind. Your spring inspection reveals what needs attention before you invest time and money.
- Ice damage – Check for broken branches, split bark, or crushed perennials from frost heave
- Animal burrows – Look for fresh holes from skunks, chipmunks, moles, and voles
- Deer damage – Examine woody plants for stripped bark and browsed tips
- Rodent damage – Assess shrub bases where voles gnaw under snow cover
Remove Debris From Beds and Water Features
After you’ve flagged what’s broken or nibbled, clear out all the dead weight cluttering your beds before those spring bulbs push through. Rake up matted leaves, fallen branches, and last year’s perennial foliage—this winter debris smothers new growth and harbors pests.
Remove pond algae and old plant matter from water features to jumpstart clear, healthy water.
Composting this organic material recycles nutrients back into your garden naturally.
Cut Back Grasses, Perennials, and Annuals
With the clutter gone, grab your shears and cut back ornamental grasses and perennial hibiscus to about 4–6 inches from the ground. This ornamental grass pruning clears dead foliage and makes room for fresh shoots.
Pull out annuals that overwintered but won’t bloom again—their removal timing matters for spring cleanup flow.
While you’re at it, deadhead last year’s perennials and consider dividing perennials that have outgrown their space, using sharp cutting tools for clean, healthy cuts.
Clean Bird Feeders and Bird Baths
Birds bring life to your garden, but dirty feeders and baths can do more harm than good. To ensure bird safety and water quality, scrub them down with a dilute bleach solution (one part bleach to nine parts water) to kill bacteria and mold. Rinse thoroughly and refill with fresh water.
This routine cleaning promotes disease control and algae prevention, keeping your outdoor space healthy as part of your spring garden renovation.
Prepare Lawn and Edging
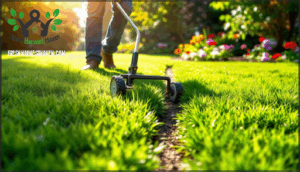
Once your beds are cleared and your hardscape is squared away, turn your attention to the lawn’s edges—they frame everything else and signal whether your garden looks intentional or overgrown. Use a sharp edging tool or lawn mower to trim clean lines along beds and walkways.
This is also the time for lawn aeration, overseeding lawns, and applying organic treatments for weed control and soil enrichment, setting your grass up for thick, healthy growth all season.
Repair and Refresh Hardscape Elements
Once the beds are tidy, turn your attention to the bones of your yard. Hardscape elements like walls, paths, and wooden structures take a beating through winter and need some care before planting begins.
Here’s what to tackle first to get everything stable and looking sharp again.
Fix Retaining Walls, Fences, and Structures
After a long winter of freezing and thawing, your hardscape elements have likely taken a beating—and spring is the time to catch small problems before they turn into expensive repairs.
Walk your yard and check retaining walls for bowing or shifting, inspect fences for loose boards, and examine decks, trellises, and raised beds for rot.
Repairing hardscaping elements now prevents bigger headaches later and protects your structural integrity for years to come.
Level Stepping Stones and Paths
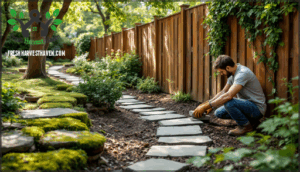
If your stepping stones wobble or have sunk into the ground, you’re not just facing a tripping hazard—you’re also disrupting the flow and safety of your entire landscape. Leveling paths now prevents injuries and keeps your hardscape elements looking sharp. Lift uneven stones, add compacted gravel or sand beneath, and reset them firmly. Proper base preparation and drainage considerations guarantee stability. This simple fix makes your entire landscape design feel more polished.
Essential path leveling priorities:
- Remove sunken stepping stones and add fresh base material underneath
- Check stone size matters—larger pavers distribute weight better and stay level longer
- Mix paver materials along paths to add visual interest and texture
- Confirm safety and accessibility by creating smooth, even transitions between stones
- Address drainage considerations by sloping paths away from structures to prevent erosion
Clean Gutters and Outdoor Structures
Clogged gutters don’t just overflow—they send water cascading down onto your foundation, eroding soil, flooding garden beds, and turning your spring cleanup into a soggy mess. Clear out gutter debris now, before plants leaf out.
Inspect sheds, fences, and decks for structural wood repair needs. Fence maintenance and shed restoration prevent costly replacements. This yard cleanup step protects your entire garden renovation investment.
Paint, Stain, or Seal Wooden Features
A fresh coat of protection now can add years to your deck, fence, or trellis—and save you from replacing rotted boards next season.
Choose wood protection options that suit your landscape design goals—stain highlights natural grain, paint offers bold color palette choices, and sealant provides invisible defense.
Proper surface preparation tips include sanding rough spots and removing old flaking finishes before application.
Schedule this hardscaping refresh every two to three years for a lasting garden makeover.
Mix Paver Materials and Add Curved Beds
Breaking up straight lines with mixed materials and flowing curves turns your yard from predictable to memorable.
Try these paver material variety approaches for landscape design impact:
- Combine flagstone with gravel for rustic texture contrast
- Weave brick borders around concrete for visual interest
- Alternate bluestone and decomposed granite paths
- Layer cobblestones alongside wood planks for softening angles
- Pair slate stepping stones with ground cover plantings
Curved beds carve movement through rigid hardscaping and guide visitors naturally through your garden renovation.
Improve and Feed Your Soil
Your soil is the foundation of everything that grows, so treating it right matters more than you might think. Spring is the perfect time to assess what’s missing, add what’s needed, and set up your beds for the season ahead.
Here’s how to improve your soil and give your plants the fuel they need to thrive.
Test Soil and Interpret Results
Testing garden soil every 3–5 years reveals what your plants actually need. Collect at least five subsamples from the top six inches where 90% of roots live, then mix them into one composite sample. You’ll get pH levels, nitrogen-phosphorus-potassium readings, and organic matter percentages. Most plants thrive between 6.3 and 7.0 pH.
In urban areas, contaminant screening for lead matters too—nearly 25% of U.S. residential soils exceed safe levels. Sampling strategies and statistical significance help you interpret results accurately. Understanding the soil’s pH level is vital for best plant growth.
Topdress With Compost, Manure, or Humus
Once you know your soil’s story, it’s time to feed it with a fresh layer of organic matter spread right on top. Topdressing in early spring delivers compost benefits like moisture retention and slow nutrient release.
Here’s what works:
- Compost: Finished, dark, crumbly material improves soil structure
- Well-aged manure: Cow, horse, or chicken—aged six months minimum
- Humus: Leaf mold or mushroom compost adds long-term stability
- Application timing: Before bulbs emerge and plants break dormancy
- Soil enrichment: Spread 1–2 inches, keeping it off plant crowns
Apply Fertilizer and Amendments as Needed
After topdressing, you’ll want to target specific plant needs with the right fertilizer or amendment—not everything thrives on a one-size-fits-all approach. Soil testing reveals nutrient deficiencies that guide your choices.
Apply organic slow-release fertilizer around perennials and shrubs. Use aluminum sulfate for acid-loving evergreens. For vegetables, amend the soil with aged manure.
Choose fertilizer types based on what your plants actually need, not guesswork.
Practice No-Till and Regenerative Techniques
You don’t have to rip up your beds to build healthier soil—leaving it undisturbed actually protects the ecosystem working beneath the surface. No-till gardening aids the soil food web by keeping beneficial fungi and microbes intact.
Topdressing with compost instead of digging reduces compaction and boosts water conservation. Over time, this approach improves carbon sequestration and creates resilient, eco-friendly gardening habits that require less work and deliver stronger plants.
Use Mulch and Eco-Friendly Weed Barriers
Mulch does more than tidy up your beds—it locks in moisture, cools roots, and naturally crowds out weeds before they get started. Choose organic mulch like shredded bark or compost to improve soil as it breaks down.
- Weed control: Layer 2-3 inches to block light and suppress germination
- Soil improvement: Organic types add nutrients and feed beneficial microbes
- Eco-friendly gardening: Skip plastic barriers and use cardboard or newspaper instead
- Cost analysis: Bulk mulch saves money compared to bagged options
Choose and Plant for Spring Success
Now that your soil is rich and ready, it’s time to think about what you’ll actually plant. The right choices can transform your garden from a one-season wonder into a year-round showpiece.
Let’s look at how to select plants that thrive in your space and keep your garden looking good from spring through fall.
Benefits of Native and Keystone Plants
Native plants are like insurance policies for your spring garden—they lock in wildlife support, cut water use, and prevent invasive species from taking over. Choosing the right plants means leaning on species that naturally thrive in your region, which boosts plant diversity and strengthens ecosystem stability.
Oaks support over 395 caterpillar species, feeding local birds without extra effort. Native landscapes slash outdoor water use by 60% and need no fertilizers, delivering real economic benefits and long-term water conservation for your yard. They also help to create healthy, balanced ecosystems that support local wildlife.
Planting Annuals, Perennials, and Shrubs
Layering annuals, perennials, and shrubs in your spring garden builds structure that carries you through every season without starting from scratch each year.
Match planting techniques to each plant’s sunlight needs and soil preferences—shrubs anchor the back, perennials fill the middle, and annuals pop color up front.
Set watering schedules based on root depth, and apply pruning methods that encourage blooms instead of blocking them.
Flowers and Bulbs to Plant in Early Spring
Early spring bloomers like crocuses, daffodils, and pansies hit the ground running when soil temps climb above 40°F and your beds are hungry for that first splash of color.
Plant bulbs at the right depth for solid soil drainage, stagger bloom times for weeks of spring garden action, and pair deer-resistant varieties with companion planting strategies that keep wildlife from turning your flower beds into a buffet.
Multi-Season Interest and Color Schemes
Plant selection drives garden renovation success when you layer bloom sequencing across three or four seasons. Mix early spring bulbs, summer perennials like daylilies, and evergreen shrubs to maintain color palettes from March through December.
Foliage texture and winter interest from ornamental grasses or colorful bark fill gaps between seasonal bloom peaks, creating layered plantings that never go dark.
Starting Seeds and Planning Vegetable Gardens
Map your vegetable garden like you’re planning a small neighborhood—each crop needs the right spot, good neighbors, and room to thrive without crowding the block.
Seed starting indoors gives heat-lovers like tomatoes a head start, while crop rotation keeps soil balanced season after season.
Record what you planted where, order varieties early, and prep garden beds with compost before planting season hits full stride.
Enhance Outdoor Living and Garden Design
Your garden isn’t just about the plants—it’s about creating spaces where you actually want to spend time. Spring is the perfect moment to rethink how your outdoor areas work and feel.
Here are five ways to turn your yard into a place that draws you outside and keeps you there.
Create Comfortable Patios and Seating Areas
A well-designed patio works like an outdoor living room—it needs good furniture, clear flow, and a reason to linger. Start by choosing weather-resistant patio furniture that can withstand rain and sun without constant upkeep.
Layer in outdoor rugs to soften hardscaping and define seating zones. Add shade solutions like umbrellas or pergolas, and don’t skip weather protection—covers and storage keep everything looking fresh season after season.
Install Outdoor Fireplaces and Lighting
Once the sun sets and the chill rolls in, the right fire feature and lighting can turn your patio from a daytime retreat into an evening destination. Installing outdoor fireplaces made from stone, brick, or metal extends your outdoor living season and creates natural gathering spots.
Layer in garden lighting—string lights for warmth, path lights for safety, and spotlights to highlight hardscaping. Good ambiance creation balances function with mood while keeping cost analysis and safety considerations front of mind.
Use Tall Containers and Outdoor Rugs
Tall containers and outdoor rugs work like furniture for your patio—they define zones, add height, and make the space feel intentional instead of accidental. Drop tall containers at key junction points to control foot traffic and add seasonal changes with rotating plantings.
Choose rug materials designed for weather resistance, and layer them under seating areas to add texture while defining spaces during your spring garden renovation.
Add Living Boundaries and Hide Eyesores
Strategic plantings turn problem areas into assets, screening out utility boxes, air conditioners, and neglected corners while creating natural borders that feel intentional. Layer evergreen shrubs with climbing perennials on trellises to build green fences that camouflage eyesores year-round.
Privacy screens and vertical gardens transform dead zones into focal points, using strategic planting to reclaim wasted space while strengthening your landscape design through living boundaries.
Set Up Efficient Watering Systems
When drip irrigation replaces traditional sprinklers, your garden gains over 90% water efficiency while cutting monthly costs and dodging drought restrictions. Smart controllers adjust watering based on real-time weather data, trimming water use by 20–50%.
Install pressure regulators and filters during setup to prevent emitter clogs, then schedule seasonal system maintenance—cleaning lines and calibrating flow rates—to keep your irrigation system running strong and your plants thriving with minimal waste.
Frequently Asked Questions (FAQs)
How do I protect spring plants from late frosts?
Think of frost protection as wrapping your garden in a safety blanket. Cover tender plants with breathable cloth or cold frames when freezing temperatures threaten.
Water beforehand—moist soil holds heat better, shielding roots through cold snaps.
When should I prune spring-blooming shrubs and trees?
Pruning timing matters—wait until after spring-blooming shrubs and trees finish flowering. They set next year’s buds on new growth, so cutting too early removes blooms.
For non-blooming types, prune before buds break.
What pests emerge in spring and how to control them?
Aphids, slugs, and caterpillars show up as temperatures rise. Handpick larger pests, spray aphids with water, and encourage beneficial insects like ladybugs.
Apply organic neem oil or diatomaceous earth for persistent problems without harming pollinators.
How often should I water newly planted spring gardens?
Newly planted gardens need daily watering for the first week, then every 2-3 days depending on soil type and weather.
Check moisture an inch below the surface—if it’s dry, water deeply until soil feels damp but not soggy.
Can I transplant perennials during early spring months?
Yes, spring transplant timing works well for most perennials. Transplanting when new spring growth emerges minimizes perennial transplant shock.
Prepare soil with compost, water post-transplant deeply, and dividing perennials now encourages healthy perennial care throughout the season.
Conclusion
Your yard won’t transform itself while you scroll through Pinterest boards dreaming of magazine-worthy borders. Real spring garden renovation happens in soil-stained knees and pruner-calloused hands—one deliberate step building on the last.
This spring gardening renovation guide gives you the roadmap, but your yard needs your presence: the cleanup that prevents disease, the hardscape repairs that last decades, the soil work that feeds everything above it.
Skip a step and you’ll chase problems all summer. Follow through, and your garden stops demanding constant rescue and starts delivering the easy beauty you imagined.
- https://www.youtube.com/watch?v=A_9l1ku58rs&list=PLOCd6lFGB16zxYhzGxrZYxgMzpmDhtNqr&index=7
- https://www.pinterest.com/provenwinners/perennials-for-spring/
- https://sharon.audubon.org/staff/sunny-kellner
- https://www.rhs.org.uk/soil-composts-mulches/ph-and-testing-soil
- https://news.agu.org/press-release/millions-households-exceed-soil-lead-epa/


