This site is supported by our readers. We may earn a commission, at no cost to you, if you purchase through links.
Clear debris, prune damaged branches, and test soil temperature before planting cool-season crops like potatoes and lettuce once it reaches 50°F.
Watch for nutrient deficiencies – yellowing leaves signal nitrogen shortage, while purple tints indicate phosphorus problems. Apply fertilizer 2-3 weeks before planting when soil crumbles in your hand.
Inspect for frost damage, animal burrows, and hardscaping shifts that winter may have caused.
Time your spring vegetable garden maintenance correctly, and you’ll set the foundation for months of successful harvesting ahead, avoiding nutrient deficiencies and ensuring a healthy start by checking for soil temperature.
Table Of Contents
- Key Takeaways
- Spring Garden Preparation
- Fertilization Strategies
- Garden Inspection Tips
- Noting Cold, Ice, or Snow Damage on Plants
- Identifying Garden Beds Needing Cleanup
- Inspecting Hardscaping for Shifts, Bows, or Rot
- Looking for New Animal Burrows or Damage
- Documenting Deer or Rodent Damage on Woody Plants
- Avoiding Fertilizers High in Phosphorous
- Adding Aluminum Sulfate for Alkaline Soil
- Topdressing Soil With Compost, Humus, or Manure
- Applying Organic Slow-release Plant Food
- Maintenance Schedules
- Frequently Asked Questions (FAQs)
- What is the 3 year rule in gardening?
- What do I do with my vegetable garden at the end of the season?
- What is the gardening 3 year rule?
- How to prepare a vegetable garden in spring?
- What is the most common mistake of first time gardeners?
- What to put on a vegetable garden in spring?
- How to maintain a garden in spring?
- How often should I water my vegetable garden in the spring?
- How do you fertilize a vegetable garden in the spring?
- How do I prevent pests in vegetable gardens?
- Conclusion
Key Takeaways
- Test soil temperature before planting – You’ll need consistent readings of 50°F at a 6-inch depth before planting cool-season crops like potatoes and lettuce for proper germination.
- Watch for nutrient deficiency signs – You can identify problems early by checking for yellowing leaves (nitrogen shortage) or purple tints (phosphorus deficiency) to address issues before they impact growth.
- Time fertilizer applications correctly – You should apply fertilizer 2-3 weeks before planting when the soil crumbles in your hand rather than forms muddy clumps for optimal nutrient uptake.
- Inspect for winter damage systematically – You need to check for frost damage, animal burrows, and hardscaping shifts to address structural issues before they compromise your garden’s foundation.
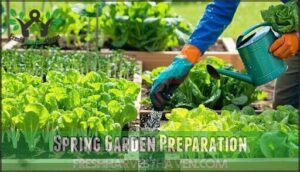
Spring Garden Preparation
Your vegetable garden needs a thorough spring cleanup to set the stage for a productive growing season.
Start by clearing winter debris, pruning damaged branches, and preparing your soil once temperatures consistently reach the 50s°F.
Cleaning Up Flowerbeds and Debris
Winter’s debris becomes spring’s obstacle course for your emerging vegetables. Start your spring garden cleanup by removing fallen branches, matted leaves, and last year’s plant residue from flowerbeds.
Clear away winter’s mess to unlock your garden’s spring potential.
Essential debris removal tasks include:
- Clearing dead annuals and perennial foliage
- Removing winter mulch from plant crowns
- Disposing of diseased plant material properly
- Checking for pest-harboring yard waste.
This flowerbed care prevents disease spread while exposing soil to warming sunlight. Garden cleanup also reveals winter damage and soil compaction issues that need attention before planting begins.
Proper soil preparation techniques(spring garden soil) are vital for a thriving garden.
Pruning Trees and Shrubs Before Buds Break
After cleaning debris from your flowerbeds, shift your focus to pruning tools and tree care.
Dormant-season shrub maintenance prevents stress and disease when you make clean cuts above outward-facing buds. Garden pruning techniques improve air circulation and remove damaged branches.
Proper bud removal and spring garden maintenance shape plants for better fruit production. Follow basic pruning rules during garden cleanup for healthier woody plants.
Effective use of pruning shears is essential for successful shrub maintenance and tree care.
Planting Cool-season Vegetables Like Potatoes and Lettuce
Early spring presents the perfect opportunity to establish your cool-season vegetables for a productive harvest. These hardy crops thrive when soil temperature reaches 40-50°F, making proper seed selection and vegetable variety choices vital for success.
Here’s your spring garden preparation checklist for planting:
- Choose proven vegetable varieties like Yukon Gold potatoes and Buttercrack lettuce for reliability
- Plan your garden layout with 12-inch spacing for potatoes and 6-8 inch spacing for lettuce
- Implement crop rotation principles by avoiding areas where nightshades grew last season
- Select certified seed potatoes and fresh lettuce seeds for maximum germination rates
Following these spring gardening tips guarantees your coolseason vegetables establish strong root systems before summer heat arrives, setting you up for an abundant harvest.
Ensuring Soil Has Thawed Before Planting
Before rushing to plant your vegetable garden, you’ll need to confirm soil temperature reaches the magic number for successful germination rates.
Test soil at a 6-inch depth using a thermometer—if it reads consistently above 40°F, your thaw timing is perfect for cool-season crops.
Soil moisture should crumble in your hand rather than form muddy clumps, indicating proper drainage for healthy root development.
Expecting Harvest by Early Summer for Cool-season Crops
You’ll reap the rewards of your spring vegetable garden maintenance when cool-season crops reach maturity by early summer.
Proper crop rotation and soil temperature monitoring guarantee the best harvest timing for your spring gardening efforts.
Here’s what to expect from your coolseason vegetables:
- Lettuce and leafy greens – Ready for harvest 45-60 days after planting, providing fresh salads throughout late spring
- Peas and snap peas – Mature in 60-70 days, delivering sweet pods before summer heat arrives
- Radishes and turnips – Quick-growing crops ready in just 30-45 days for early season satisfaction
- Potatoes and carrots – Longer-season varieties that reward patient gardeners with substantial harvests by midsummer
Fertilization Strategies
Proper fertilization transforms struggling vegetable plants into productive powerhouses that’ll reward your efforts with abundant harvests.
You’ll need to recognize nutrient deficiencies early and apply the right fertilizers at ideal times to maximize your garden’s potential.
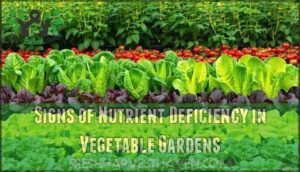
Signs of Nutrient Deficiency in Vegetable Gardens
Recognizing nutrient deficiencies early gives you control over your garden’s success. Plant symptoms reveal exactly what your soil lacks through visual cues.
Watch for these key deficiency indicators:
- Nitrogen shortage – Older leaves turn yellow and drop while growth stalls
- Phosphorus deficiency – Purple leaf tints appear, especially in cold soil conditions
- Potassium problems – Leaf edges brown and scorch, fruit develops poorly
- Iron issues – New leaves yellow between green veins, particularly noticeable
Soil testing confirms nutrient levels before fertilization strategies begin. Understanding soil nutrient deficiencies is essential for maintaining a healthy garden.
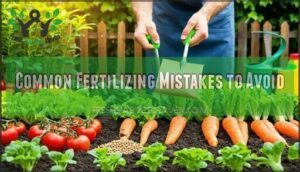
Common Fertilizing Mistakes to Avoid
Understanding nutrient deficiency symptoms helps you recognize when your plants need help, but avoiding fertilization mistakes prevents problems from occurring in the first place.
Over fertilizing ranks as the most damaging error you can make in vegetable garden fertilization. This practice burns roots and foliage, creating more harm than benefit.
Wrong fertilizer choice leads to nutrient imbalances that stunt growth or cause excessive leaf production at the expense of fruit development. Timing errors prove equally problematic when you apply nutrients during dormancy periods, wasting materials and potentially damaging plants.
growth periods
regularly
Soil testing eliminates guesswork from your fertilization strategies, revealing exactly which soil nutrients your garden lacks and preventing nutrient deficiencies before they appear.
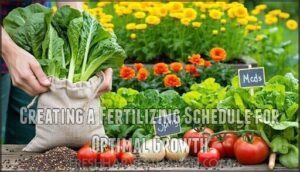
Creating a Fertilizing Schedule for Optimal Growth
Successful vegetable garden fertilization starts with soil testing each spring to determine your garden’s nutrient balance.
Create your fertilizing schedule around your crops’ growth phases—heavy feeders like tomatoes need more frequent applications than leafy greens.
Consider fertilizer types carefully: organic options provide slow-release nutrition, while synthetic blends offer quick results.
Crop rotation affects nutrient deficiencies, so adjust your fertilization strategies accordingly for vital plant health.
Understanding the soil nutrient needs is essential for a thriving garden.
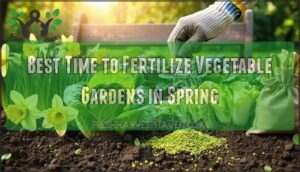
Best Time to Fertilize Vegetable Gardens in Spring
Timing your fertilization right can make or break your spring garden maintenance success. Apply fertilizer when soil temperature consistently reaches 50°F, as nutrients become available to plant roots at this threshold.
Your fertilizing schedule should align with early spring growth phases, typically 2-3 weeks before planting cool-season crops. Garden planning becomes vital here—test nutrient levels first, then choose appropriate fertilizer types based on your soil preparation methods.
Understanding the role of spring fertilizer applications is essential for ideal garden growth.
- Early spring: Begin garden fertilization when soil warms to 50°F
- Pre-planting: Apply nutrients 2-3 weeks before seeding for optimal uptake
- Spring blooms: Time applications with emerging perennial growth patterns
- Cool seasons: Prioritize vegetable garden care before warm-weather planting begins
Key Nutrients and Their Roles in Plant Growth
You’ll need nitrogen role in leafy growth, phosphorus needs for flowers, and potassium benefits for sturdy roots.
Proper nutrient balance starts with testing your soil pH first.
Phosphorusfree amendments help prevent overfeeding while supporting healthy nutrient uptake.
| Nutrient | Primary Function |
|---|---|
| Nitrogen | Promotes vigorous leaf development |
| Phosphorus | Supports root establishment and flowering |
| Potassium | Enhances disease resistance and water regulation |
| Calcium/Magnesium | Maintains cell structure and chlorophyll production |
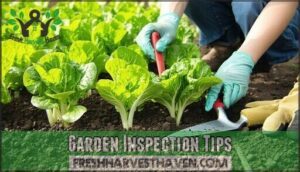
Garden Inspection Tips
A thorough spring inspection helps you catch winter damage early and plan your maintenance priorities effectively.
You’ll want to systematically check your plants, soil conditions, and garden infrastructure before the growing season begins in earnest.
Noting Cold, Ice, or Snow Damage on Plants
After winter’s harsh grip loosens, you’ll spot telltale signs of frost damage and freeze injury scattered throughout your garden beds.
Plant inspection reveals the winter’s toll: blackened stems, mushy crowns, and brittle branches that snap at your touch.
Look for these key indicators during your spring assessment:
- Frost damage appearing as dark, water-soaked patches on leaves and stems
- Split bark or cracked branches from repeated freeze-thaw cycles
- Winter debris masking damaged plant crowns beneath matted foliage
- Soil erosion around root zones where freeze injury has compromised plant stability
Identifying Garden Beds Needing Cleanup
After checking for winter damage on plants, you’ll want to systematically assess each garden bed’s condition. Start your bed cleaning by examining areas for debris removal needs – fallen leaves, broken stems, and accumulated organic matter that blocks sunlight.
Your soil inspection should identify compacted areas where water pools, indicating drainage problems that’ll hinder root development. Weed control becomes easier when you spot emerging invasives early in your spring garden cleanup.
This garden renewal process sets the foundation for healthy growing conditions.
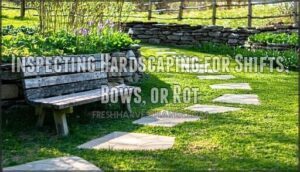
Inspecting Hardscaping for Shifts, Bows, or Rot
Your garden’s foundation deserves attention after winter’s harsh treatment.
Inspect retaining walls, pathways, and structures for damage that could compromise safety and functionality.
- Shift Detection: Check stepping stones and pavers for movement or settling that creates uneven surfaces
- Bow Correction: Examine retaining walls for outward bulging caused by soil pressure and frost heave
- Rot Prevention: Inspect wooden decks, benches, and trellises for soft spots indicating moisture damage
- Fence Inspection: Test posts and panels for looseness from soil compaction and erosion around foundations
Looking for New Animal Burrows or Damage
Spring garden inspections reveal winter’s unwelcome guests through fresh animal burrows and disturbed soil patches.
Check fence lines, raised beds, and mulched areas where rodent damage typically appears first.
Document hole sizes and locations for targeted pest management strategies.
Install wildlife deterrents like mesh barriers or motion sensors to prevent wildlife damage.
Effective burrow detection and animal control measures protect your vegetable crops before growing season begins.
Documenting Deer or Rodent Damage on Woody Plants
Documenting deer damage and rodent damage helps you target your wildlife management strategy effectively.
Look for gnawed bark, chewed branches, and distinctive bite patterns on your woody plants during your garden inspection.
Take photos and note which species suffered damage – this garden surveillance creates a roadmap for future wildlife deterrents and garden pest management efforts.
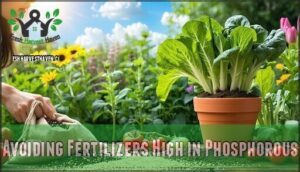
Avoiding Fertilizers High in Phosphorous
After documenting animal damage, you’ll want to protect your plants from another hidden threat.
High-phosphorus fertilizers can create toxic soil conditions that stunt growth and block nutrient absorption.
- Soil Testing reveals excess phosphorus levels before damage occurs
- Fertilizer Alternatives like feather meal provide nitrogen without phosphorus buildup
- Phosphorus Reduction requires avoiding manure and bone meal amendments
- Organic Fertilizers such as kelp products maintain Nutrient Balance safely
Adding Aluminum Sulfate for Alkaline Soil
Testing your soil pH levels reveals whether aluminum sulfate can transform stubborn alkaline ground into thriving acidic conditions.
Garden soil testing first prevents costly mistakes—apply 1-3 pounds per 100 square feet based on current pH readings.
Aluminum application creates acidic soil benefits for blueberries and azaleas while improving soil health.
Monitor sulfate effects after two weeks, adjusting rates for proper soil balancing without risking plant toxicity.
Understanding the importance of soil preparation techniques is vital for maintaining healthy soil conditions.
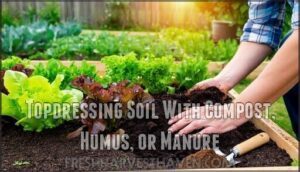
Topdressing Soil With Compost, Humus, or Manure
Your garden’s success depends on proper soil enrichment through strategic topdressing methods.
Here’s how to maximize compost benefits and organic gardening practices:
- Apply composted materials in 1/4 to 1/2-inch layers for ideal soil health
- Choose well-aged manure over fresh varieties to prevent plant damage
- Keep topdressing away from plant stems to avoid rot issues
- Mix humus application with existing soil for enhanced nutrient cycling
This organic fertilizers approach supports your fertilizing schedule while improving overall composting techniques effectiveness.
Understanding compost fertilizer options is vital for a thriving garden.
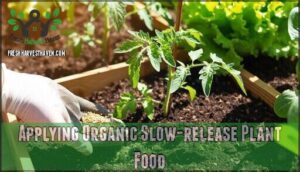
Applying Organic Slow-release Plant Food
Organic slow-release fertilizers deliver steady nutrition throughout your growing season, mimicking nature’s gradual nutrient release.
These natural amendments support soil enrichment while promoting healthy nutrient uptake for stronger vegetable plants.
- Apply organic fertilizers around plant bases after soil enrichment with compost
- Water lightly after application to activate slow-release nutrients
- Follow your fertilizing schedule based on crop requirements and soil health
- Choose compost tea or granular options suited for organic gardening practices
- Monitor plants for improved growth while avoiding over-fertilization that disrupts soil balance
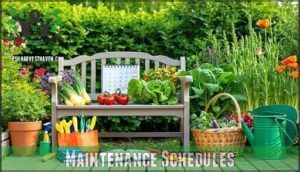
Maintenance Schedules
Creating a maintenance schedule guarantees your vegetable garden receives proper care throughout the growing season.
You’ll maximize yields and plant health by timing fertilization and other tasks with your plants’ natural growth cycles, which helps to ensure proper care.
Aligning Fertilization With Active Growth Cycle
Once you’ve inspected your garden, you’ll need to time your fertilizer applications correctly. Matching fertilization with growth phases maximizes nutrient uptake and prevents waste.
Your plants absorb nutrients most efficiently during active vegetative growth, typically when soil temperatures consistently reach 50°F. Understanding cycle optimization helps you choose the right fertilizer types at ideal moments.
Early spring demands nitrogen for leaf development, while flowering requires phosphorus and potassium. Soil testing reveals exactly what your garden needs before you start.
Here’s your fertilizer timing guide:
| Growth Phase | Timing | Primary Nutrients | Best Fertilizer Type |
|---|---|---|---|
| Early Growth | Early Spring | Nitrogen | Balanced 10-10-10 |
| Establishment | Mid-Spring | Phosphorus | High-phosphorus starter |
| Flowering | Late Spring | Potassium | Slow-release organic |
Following proper garden fertilizing guidelines means applying nutrients when plants can actually use them, not just when it’s convenient for you.
Setting a Consistent Routine for Fertilization
Most successful vegetable gardeners know that consistent fertilizer timing creates thriving plants.
You’ll want to establish a garden maintenance schedule that applies nutrients every 4-6 weeks during active growth phases.
Base your fertilization rates on soil testing results and track applications in a garden journal.
This routine approach maintains proper nutrient balance while supporting long-term soil health throughout your spring garden maintenance efforts.
Regular soil health checks are essential for identifying nutrient deficiencies and adjusting fertilization strategies accordingly.
Adjusting Schedule Based on Plant Response
Establishing consistent fertilization creates a foundation, but smart gardeners know when to break their own rules. Plant Monitoring becomes your best tool when vegetables send distress signals through pale leaves or stunted growth.
Growth Tracking reveals when your garden maintenance schedule needs fine-tuning:
- Test soil pH monthly during active growing seasons
- Adjust nitrogen levels when leafy greens show yellowing
- Reduce feeding frequency if plants develop excessive foliage over fruit
Yield Optimization requires reading your garden like a weather forecast—anticipating needs before problems arise.
Avoiding Fertilization During Dormancy
While consistent fertilizing guidelines support plant growth, dormancy changes everything.
Your plants enter a dormant period where they can’t absorb nutrients effectively, making fertilizer timing critical for root protection.
Here’s why you should avoid fertilizing during dormancy:
- Nutrient cycling slows dramatically – dormant roots can’t process balanced fertilizers efficiently
- Soil testing reveals excess buildup – unused nutrients alter soil acidity and harm beneficial microbes
- Slowrelease fertilizer becomes counterproductive – excess salts burn sensitive dormant root systems
Smart gardeners wait until spring’s active growth resumes before applying nutrients.
Reviewing Past Garden Plans for Successes and Failures
The smartest garden planning starts with honest garden reflection on past seasons.
Your garden journal becomes your roadmap, documenting which crop rotation strategies worked, where past errors occurred, and how soil testing results matched actual plant performance.
This seasonal gardening review transforms failures into wisdom, ensuring your spring garden maintenance builds on solid ground rather than repeating costly mistakes that drain your time and energy.
Frequently Asked Questions (FAQs)
What is the 3 year rule in gardening?
The 3-year rule suggests you’ll test soil every three years to monitor nutrient levels and pH changes.
You’ll make informed fertilization decisions, preventing over-application while ensuring your plants receive proper nutrition for ideal growth.
What do I do with my vegetable garden at the end of the season?
Like clearing a canvas for your next masterpiece, you’ll clean up spent crops, pull weeds, and add compost.
Remove dead plants, test soil pH, and plant cover crops to enrich nutrients for spring’s fresh start, which is akin to preparing for a fresh start.
What is the gardening 3 year rule?
Patience pays when you’re establishing new perennials.
The rule states "sleep, creep, leap" – plants sleep their first year, creep the second, then leap in the third.
Don’t expect instant gratification from your newly planted garden stars.
Understanding the root system development is key to a successful perennial garden, following the principle that plants need time to establish, which is often summarized as they "leap" in growth after initial development.
How to prepare a vegetable garden in spring?
Picture cracked earth softening under spring rain, ready for transformation.
You’ll clear winter debris, add compost to enrich soil, then plant cool-season crops like lettuce and peas once temperatures consistently hit 50°F.
What is the most common mistake of first time gardeners?
You’ll likely over-fertilize your plants, thinking more nutrients always mean better growth.
This common rookie mistake burns roots and creates weak, leggy plants that attract pests and diseases instead of thriving, which is a result of over-fertilize.
What to put on a vegetable garden in spring?
You’ll want to add compost, balanced fertilizer like 10-10-10, and organic matter to enrich your soil.
Apply these amendments when soil warms above 50°F and has thawed completely for best results.
How to maintain a garden in spring?
Clear winter debris, test soil temperature, and add compost for nutrients. Prune damaged branches, plant cool-season crops like lettuce and peas, and inspect for pest damage or frost issues.
How often should I water my vegetable garden in the spring?
Water your vegetable garden 1-2 times weekly during spring, providing about one inch total.
Check soil moisture by inserting your finger two inches deep—if it’s dry, it’s time to water deeply.
How do you fertilize a vegetable garden in the spring?
Many gardeners think spring fertilization means dumping nutrients everywhere, but timing trumps quantity.
Test your soil first, then apply balanced fertilizers like 10-10-10 when soil warms above 50°F for ideal nutrient uptake.
How do I prevent pests in vegetable gardens?
You’ll prevent vegetable garden pests by maintaining clean beds, removing debris that harbors insects, rotating crops annually, encouraging beneficial predators, and using row covers.
Applying organic treatments like neem oil when needed is also an effective method to prevent pests in your vegetable garden.
Conclusion
Tomorrow’s harvest depends on today’s spring vegetable garden maintenance decisions.
You’ve learned the essential steps: clear debris when soil temperature hits 50°F, test for nutrient deficiencies through leaf color changes, and inspect for winter damage before planting cool-season crops.
Don’t rush the process—proper timing prevents costly mistakes.
Your garden’s success starts with methodical spring preparation that addresses soil conditions, plant health, and structural integrity systematically.
- https://envii.co.uk/blogs/news/10-tips-to-prepare-soil-for-spring
- https://libguides.nybg.org/vegetablegarden
- https://www.americanmeadows.com/content/early-spring-soil-preparation
- https://www.thrivelot.com/resources/study-seasonal-watering-and-vegetable-growth
- https://joegardener.com/podcast/identifying-controlling-garden-pests-susan-mulvihill/

