This site is supported by our readers. We may earn a commission, at no cost to you, if you purchase through links.

Most gardeners blame poor harvests on bad weather or the wrong seeds. Rarely do they look down.
Beneath every thriving vegetable bed lies soil that was deliberately built—not just dug up and hoped for.
The difference between scraggly tomatoes and ones that split from their own weight often comes down to what happened before a single seed hit the ground.
Good vegetable garden soil preparation isn’t complicated, but it does follow a sequence. Get the steps right, and your soil becomes a living engine that feeds your plants all season long.
Table Of Contents
- Key Takeaways
- Pick The Right Garden Spot
- Test Soil PH and Nutrients
- Add Compost and Organic Matter
- Loosen, Level, and Improve Drainage
- Remove Weeds, Sod, Rocks, Roots, and Buried Debris
- Turn Soil Gently With a Shovel or Broadfork
- Break Up Compacted Layers Without Overworking The Bed
- Create Raised Beds or Drains for Poor Drainage Areas
- Rake The Bed Smooth and Let It Settle Before Planting
- Add 2–3 Inches of Mulch to Conserve Moisture and Suppress Weeds
- Top 10 Soil Prep Tools
- 1. Ashman Bow Rake Rubber Grip
- 2. CobraHead Original Garden Weeder Cultivator
- 3. Rapitest Soil Test Kit
- 4. Ames Forged Steel Manure Fork
- 5. Garden Weasel Long Handle Garden Claw
- 6. Luster Leaf Rapitest pH Soil Tester
- 7. Vertical Vegetables Gardening Projects
- 8. Wiggle Worm Organic Worm Castings
- 9. Dave Thompson Organic Vegetable Herb Fertilizer
- 10. Sustane Natural Plant Fertilizer
- Frequently Asked Questions (FAQs)
- How do you prepare soil for a vegetable garden?
- What is the 70 30 rule in gardening?
- How do you prepare the ground for a vegetable garden?
- What is the best soil mixture for a vegetable garden?
- What should I amend my vegetable garden soil with?
- How do I prepare my garden for planting?
- How do you prepare a vegetable garden?
- How do you make a good soil mix for vegetables?
- How do you grow vegetables in a garden?
- Why is soil preparation important for a vegetable garden?
- Conclusion
Key Takeaways
- Test your soil’s pH and nutrient levels before adding anything — a simple kit tells you exactly what’s missing, so you’re not guessing with amendments.
- Work 2–3 inches of well-rotted compost into the top 6–8 inches of soil — this single step feeds your plants, improves drainage, and activates the microbes that keep everything running.
- Location isn’t just about sun — your bed needs 6–8 hours of direct light, level ground, and no low spots where water pools and suffocates roots.
- Finishing touches matter more than most gardeners think — rake the surface smooth, let it settle 24–48 hours, then top it with 2–3 inches of mulch to lock in moisture and keep weeds down before a single seed goes in.
Pick The Right Garden Spot

Everything starts with location — get this wrong and even the best soil won’t save you.
Most vegetables need at least six hours of direct sun, so check how sunlight and spacing affect your garden layout before you plant a single seed.
Before you dig a single shovelful, there are a few key things worth checking off. Here’s what to look at when sizing up your spot.
Choose a Level Area With 6–8 Hours of Direct Sun
Before you dig a single shovelful, spend a few days on sun mapping — walk your yard at different hours and note where light actually lands. Vegetable garden beds need 6–8 hours of direct sun daily, so slope orientation and microclimate assessment matter more than you’d think.
A simple sunlight measurement app helps confirm your site selection and sunlight requirements.
Level the soil on flat ground, and your garden planning starts strong.
Avoid Low Spots Where Water Pools After Rain
Sun sets the stage — but water tells the real story. Low spots can pool more than half an inch of runoff fast, and saturated soil suffocates roots within 24 hours.
Watch for these five warning signs before you level the soil:
- Standing water after light rain
- Dark, soggy patches that stay wet for days
- Compacted clay slowing drainage below 0.25 inches per hour
- Ground that slopes toward your house foundation
- Spongy soil that squishes underfoot
Fix it with slope adjustment — a simple 2–5% grade redirects runoff safely. Drainage swales, French drain installations, and site grading all support smart runoff management. Prioritize soil aeration and soil texture checks early to prevent soil compaction issues before planting day arrives. Addressing improper grading solutions early can prevent pooling.
Check Easy Access to Water Before Breaking Ground
Once you’ve solved drainage, don’t break ground until you’ve confirmed your water source proximity. Your main spigot should sit within 50 feet of your beds — anything farther turns watering into a chore.
Do a quick hose pressure check to confirm 40–60 psi for drip irrigation or soaker hoses.
Also install backflow prevention to keep drinking water safe, and sketch your irrigation line layout before planting.
Measure Enough Space for Multiple Vegetable Crops
Now that your water access is sorted, it’s time to map your space. Keep vegetable garden beds 4 feet wide — easy to reach from both sides without stepping on soil.
Use these plant spacing standards as your baseline:
- Tomatoes: 18–24 inches apart
- Carrots and radishes: 2–4 inches
- Cucumbers and squash: 24–36 inches, with vertical trellis planning to save ground space
Plan Soil Work for Early Spring or Late Fall
Timing your soil work matters more than most gardeners realize. early spring and late fall are your best windows — soil is workable, not waterlogged.
For Amendment Timing, factor in your climate zone: colder zones need Frost Protection Strategies and Soil Temperature Monitoring before touching beds.
Fall is the Ideal Time to lay compost, plan Cover Crop Planning, and set your seasonal garden bed preparation schedule.
Test Soil PH and Nutrients

Before you add a single amendment, you need to know what you’re actually working with. A simple soil test takes the guesswork out of the equation and tells you exactly what your garden needs.
Here’s what to check and how to do it right.
Collect a Composite Sample From 4–6 Bed Locations
One weak sample can throw off your entire amendment plan. That’s why spreading your collection points matters — pull 15 to 20 cores per bed from 4 to 6 locations, spacing them evenly between center and edges.
Your Core Distribution Strategy ensures Depth Consistency at 6 to 8 inches. Follow a solid Sample Labeling Protocol, avoid cross‑contamination between beds, record environmental conditions, and seal each soil sample for accurate soil testing.
Test for PH, Nitrogen, Phosphorus, and Potassium
Once you’ve collected your composite samples, run them through a soil test kit to check four key values: pH, nitrogen, phosphorus, and potassium — your NPK baseline. Testing soil pH and nutrient levels together gives you the full picture of soil nutrient balance.
- Sampling Timing affects results — moisture and temperature shift nitrogen availability
- Test Interpretation guides Amendment Calibration to match actual crop needs
- Seasonal Variability means NPK readings can differ between spring and fall tests
Aim for a PH Range of 6.0–7.0
Most vegetables thrive when soil pH sits between 6.0 and 7.0 — that sweet spot where nutrients stay available and pH and microbes work together efficiently. Outside this range, roots struggle to absorb what’s already there.
| pH Level | Effect on Crops | Fix Needed |
|---|---|---|
| Below 6.0 | Limits phosphorus uptake | Garden lime |
| 6.0–7.0 | Ideal pH Root Development | None |
| Above 7.0 | Blocks micronutrients | Elemental sulfur |
pH Buffer Capacity varies by soil type, so pH Adjustment Rates differ — clay soils need more amendment than sandy ones. Seasonal shifts also cause pH Seasonal Variations, making soil pH testing and amendment a regular part of pH balancing for vegetable crops.
Re-test After Major Amendments to Confirm Results
Amending your soil without retesting is like cooking without tasting — you won’t know if it worked.
Wait one to two weeks, then use your soil test kit for soil pH testing and amendment verification.
Follow the same Composite Sampling Strategy, include a Control Area Comparison, and log everything for Documentation and Review.
Consistent soil testing and analysis confirms your Amendment Effect Timing actually delivered results.
Adjust PH With Lime or Elemental Sulfur as Needed
If your soil test shows pH is off, here’s how to fix it. To raise pH, apply garden lime at 2–3 lb per 100 sq ft — split-rate pH management works better than one heavy dose.
To lower it, use powdered sulfur with proper sulfur incorporation depth of 6–8 inches. Watch lime application timing and monitor pH changes after 2–3 weeks.
Add Compost and Organic Matter

Good soil doesn’t come from luck — it comes from what you put into it. Compost and organic matter are the backbone of any productive vegetable garden, feeding your plants and improving your soil all at once.
Great soil isn’t luck — it’s built layer by layer with compost and organic matter
Here’s what you need to do to get it right.
Spread 2–3 Inches of Well-rotted Compost or Manure
Two to three inches of well-rotted manure or compost is the sweet spot for adding compost and organic matter to your bed.
This soil amendment delivers:
- Steady nutrient release timing that feeds crops without overwhelming them
- Boosted soil microbial activity for better nutrient cycling
- Natural weed suppression and moisture retention
Mature compost also lowers disease reduction risks compared to fresh material.
Work Amendments Into The Top 6–8 Inches of Soil
Once that compost layer is down, work it into the top 6–8 inches using a broadfork or shovel. Uniform mixing matters here — no dense clumps, no dry pockets.
Depth consistency gets organic matter like compost where young roots actually reach. Microbial activation kicks in fast when amendment timing is right and moisture is balanced.
Leave the surface with a loose, crumb-like tilth — never a hard crust.
Use Balanced Organic Fertilizer to Support Plant Growth
Compost sets the stage — but organic fertilizer keeps the show running. A balanced blend like a 4-4-4 mix delivers steady nutrient release timing, so roots get fed without sudden spikes. That’s your root development boost and yield quality improvement working together.
Look for products that include:
- Micronutrient benefits like calcium, magnesium, and zinc
- Soil microbe activation through slow organic breakdown
- Sustained soil fertility beyond what organic matter like compost or well-rotted manure alone provides
Improve Sandy Soil With Compost, Peat Moss, or Coir
Sandy soil drains fast — sometimes too fast. That’s where organic compost, peat moss, and coir come in.
Mix in 2–3 inches of compost to kick off Microbial Activity Promotion and improve Soil Structure Amendments. Peat moss boosts Water Holding Capacity dramatically, while coir regulates Drainage Balance Optimization without waterlogging.
Together, they support pH Stabilization Techniques and give roots a moisture retention environment worth growing in.
Build Clay Soil With Compost and Gypsum, Not Sand Alone
If your clay soil feels more like concrete than garden bed, skip the sand — it only makes things worse.
smart fix starts with organic compost and gypsum. Gypsum drives Clay Flocculation, loosening particles so Root Penetration becomes possible.
Follow a simple Compost Ratio: spread 2–3 inches and work it in 6–8 inches deep. With Amendment Scheduling, that heavy soil structure transforms season by season.
Loosen, Level, and Improve Drainage
Once your compost is worked in, it’s time to get the bed physically ready for planting. This means clearing out anything that doesn’t belong, improving how water moves through the soil, and finishing the surface so seeds and transplants have the best possible start.
Here’s exactly how to do it, step by step.
Remove Weeds, Sod, Rocks, Roots, and Buried Debris

Think of your garden bed as a blank canvas — but right now, it’s cluttered.
Before anything else, step 1 is clear and simple: remove weeds and grass, then tackle everything hiding beneath.
- Weed uprooting pulls competition before it steals your nutrients.
- Sod cutting exposes clean soil ready for shaping.
- Rock extraction protects roots and your tools.
- Root removal stops perennial weeds from bouncing back.
- Debris disposal keeps irrigation and tilling smooth.
Grab your shovel, garden gloves, and a reliable weeding tool — then clear it all out.
Turn Soil Gently With a Shovel or Broadfork

Once the bed is clear, step 2 is all about gentle soil aeration — and your tool choice matters. A broadfork is ideal here: its tines reach 12–18 inches deep, preserving root structure while opening air channels.
If you’re using a shovel, watch your angle and moisture level. Slightly damp soil loosens cleanly without clumping or compacting.
Break Up Compacted Layers Without Overworking The Bed

Over-tilling is one of the fastest ways to ruin bed’s structure. Focus on gentle aeration — use your broadfork in a tined stepping pattern, working 6–10 inches deep without inverting layers.
Where soil compacts hard below the surface, a subsoil rip targets those packed zones without disturbing healthy horizons. Light mechanical loosening preserves soil structure preservation and keeps beneficial microbes right where they belong.
Create Raised Beds or Drains for Poor Drainage Areas

Poor drainage doesn’t mean a failed garden — it means you need a smarter setup. Raised beds 6–12 inches high naturally improve soil drainage using gravity. Add a Gravel Base Layer beneath, plus Ventilation Gaps at the bottom, for soil aeration techniques that work.
- Use Bed Slope Design to direct runoff toward an outlet
- Cut a trench for French Drain Integration with perforated pipe
- Add Perforated Pipe Installation at the bed base to redirect water
- Layer landscape fabric over gravel to prevent soil intrusion — improving soil drainage and structure long-term
Rake The Bed Smooth and Let It Settle Before Planting

Once your drainage is sorted, rake timing matters more than most gardeners realize. Use a bow rake to break clumps down to pea-sized pieces — this is step 5 of your soil preparation steps for vegetable gardens.
Watch surface moisture: soil should be damp, not wet.
A 24–48 hour settling period reduces air pocket reduction issues and prevents bed compaction before you plant.
Add 2–3 Inches of Mulch to Conserve Moisture and Suppress Weeds
Once your bed is raked and settled, lay 2–3 inches of straw, shredded leaves, or wood chips across the surface.
Mulch material selection matters — lighter organics settle evenly without compacting.
This depth hits the sweet spot for mulch depth benefits: mulch helps keep weeds down by blocking sunlight, while mulching for moisture retention and weed control keeps evaporation low and soil temperature moderation steady all season.
Top 10 Soil Prep Tools
The right tools make soil prep faster, easier, and a lot less frustrating. You don’t need a shed full of equipment — just a handful of well-chosen ones that actually do the job.
Here are ten worth having before you break ground.
1. Ashman Bow Rake Rubber Grip

The Ashman Bow Rake is one of those tools that earns its place fast. Its 14 evenly spaced, bow-curved tines covers good ground per stroke — great for breaking clods, leveling amendments, and finishing a seedbed.
The fiberglass shaft keeps it light without sacrificing strength, and the rubber‑grip handle stays comfortable even when your hands are sweaty or muddy.
At $43.99, it’s solid value for a go-to leveling rake you’ll reach for every single season.
| Best For | Home gardeners and hobbyists who need a reliable, everyday tool for digging, weeding, and seedbed prep without tackling heavy-duty or large-scale work. |
|---|---|
| Primary Use | Soil digging and cultivation |
| Price | $43.99 |
| Organic Friendly | Yes |
| Skill Level | Beginner to intermediate |
| Indoor/Outdoor | Outdoor |
| Product Type | Hand tool |
| Additional Features |
|
- Razor-sharp, L-shaped blades with a rust-proof coating that cut through different soil types without much effort.
- Solid build with a tightly coupled blade and shaft, so it handles deep digging and soil uprooting with ease.
- Rubber-grip handle gives you a secure hold whether you’re pushing, pulling, or working with wet hands.
- The handle diameter runs a bit small, which can wear your hands out faster on longer sessions.
- A shorter handle means less leverage — not ideal if you prefer working from a more upright stance.
- Single-rivet construction and some reported blade defects make it a questionable pick for heavy-duty or backcountry use.
2. CobraHead Original Garden Weeder Cultivator
Where the bow rake covers the broad strokes, the CobraHead Original gets into the details. This compact, single-blade weeder is built for tight spaces — between rows, around seedlings, wherever a full-size tool can’t reach.
The curved, tempered steel blade slices through soil and pries out deep-rooted weeds without disturbing nearby plants. At about 13 inches long and barely 9 ounces, it moves fast.
For $39.00, it’s a smart addition to any serious soil prep kit.
| Best For | Gardeners who work in tight spaces and want a fast, precise tool for pulling deep-rooted weeds and prepping small planting rows. |
|---|---|
| Primary Use | Weeding and cultivating |
| Price | $39.00 |
| Organic Friendly | Yes |
| Skill Level | Beginner to intermediate |
| Indoor/Outdoor | Outdoor |
| Product Type | Hand tool |
| Additional Features |
|
- The curved forged-steel blade digs out tap roots and stubborn weeds without yanking up everything around them.
- Light and compact enough to tuck in a belt or bucket — easy to grab and go between rows or in raised beds.
- Works for right- or left-handed gardeners, and the ergonomic grip cuts down on wrist fatigue compared to a basic trowel.
- Short handle means you’re bending over the whole time — not great for your lower back on longer sessions.
- Too narrow for transplanting bigger seedlings or doing any serious digging — it’s a detail tool, not a workhorse.
- A few users find the tip slips off tap roots and end up notching the blade themselves to get a better grip.
3. Rapitest Soil Test Kit
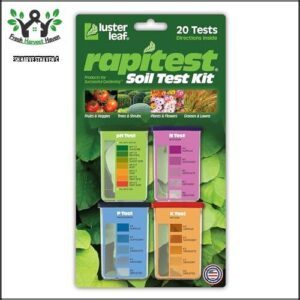
Once you’ve done the hands-on weeding and loosening, it’s time to listen to what your soil is actually telling you. The Rapitest Soil Test Kit makes that easy.
For $18.97, you get 40 tests — 10 each for pH, nitrogen, phosphorus, and potassium — using a simple capsule-and-color-chart system. Just mix soil with water, drop in the capsule, and compare the color. It’s accurate enough for home gardens and even includes pH preferences for over 450 plant species.
| Best For | Home gardeners and hobbyists who want a quick, affordable way to check soil health before planting or fertilizing. |
|---|---|
| Primary Use | Soil nutrient testing |
| Price | $18.97 |
| Organic Friendly | Yes |
| Skill Level | Beginner to experienced |
| Indoor/Outdoor | Both |
| Product Type | Test kit |
| Additional Features |
|
- Covers all four key soil metrics (pH, N, P, K) for under $20 — solid value for a backyard setup
- The included plant pH guide (450 species) is genuinely useful when you’re planning what to grow
- No lab wait times — you get results on the spot, right in your garden
- Color-matching the results can be tricky, especially for pH, and wet hands make the capsules a pain to handle
- You only get 10 tests per nutrient — once they’re gone, you’re buying a whole new kit
- It doesn’t tell you what type of nitrogen is in your soil, which limits how useful the reading actually is
4. Ames Forged Steel Manure Fork
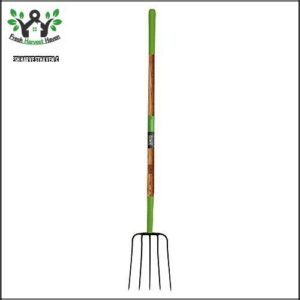
For handling moving bulk organic material — compost, manure, straw, mulch — a good pitchfork is worth its weight. The Ames Forged Steel Manure Fork has five tempered steel tines that punch through dense material without bending.
The hardwood handle runs long enough to give you real leverage, and the cushioned grip keeps your hands comfortable during extended use.
At around $40–$60, it’s a solid workhorse for turning and spreading amendments across your vegetable beds.
| Best For | Gardeners and small-farm owners who regularly move bulk materials like compost, manure, or mulch and need a durable, comfortable fork that won’t break the bank. |
|---|---|
| Primary Use | Moving organic materials |
| Price | Not listed |
| Organic Friendly | Yes |
| Skill Level | Beginner to small farm |
| Indoor/Outdoor | Outdoor |
| Product Type | Long-handle tool |
| Additional Features |
|
- Five forged steel tines hold up to heavy, dense loads without bending
- Cushioned grip makes long sessions noticeably easier on your hands
- Priced around $40–$60, it punches above its weight for the cost
- Wooden handle has been known to split under heavy stress, with some warranty claims going poorly
- The polyurethane finish can feel thick and rough straight out of the box
- Not a great fit for lighter, fine materials like pine straw or bark chips
5. Garden Weasel Long Handle Garden Claw
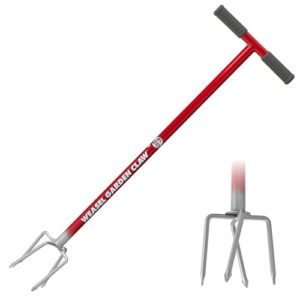
Twisting through compacted soil is where the Garden Weasel Long Handle Garden Claw earns its keep. At 38 inches tall, it lets you cultivate, aerate, and weed without bending down — your back will thank you.
The carbon steel tines break up clumps and work amendments into the topsoil in one smooth motion.
It manages everything from raised beds to traditional plots with ease.
At $29.66, it’s a smart, affordable pick for any vegetable gardener.
| Best For | Gardeners who want to cultivate, weed, and aerate standing up — especially those with back or knee pain. |
|---|---|
| Primary Use | Tilling and aeration |
| Price | $29.66 |
| Organic Friendly | Yes |
| Skill Level | Beginner to intermediate |
| Indoor/Outdoor | Outdoor |
| Product Type | Long-handle tool |
| Additional Features |
|
- 38-inch handle keeps you upright while you work, no bending or kneeling required
- Alloy steel tines are built to last, and the lifetime warranty backs that up
- At $29.66, it’s a solid tool without breaking the bank
- Struggles in very wet or bone-dry soil, so timing matters
- The handle can feel narrow if you need extra leverage for tougher ground
- Packaging is hit or miss — the tines sometimes poke through the box during shipping
6. Luster Leaf Rapitest pH Soil Tester
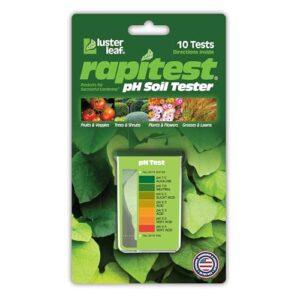
Knowing your soil’s pH before you plant makes everything else easier. The Luster Leaf Rapitest 1612 gives you results in 2–3 minutes, right there in the garden.
Mix a small soil sample with water, drop in a capsule, and match the color to the chart — simple as that.
Each kit includes 10 tests, so you can check multiple beds in one session. At under $10, it’s a low-cost way to catch pH problems before they cost you a harvest.
| Best For | Home gardeners who want a quick, affordable way to check soil pH without sending samples to a lab. |
|---|---|
| Primary Use | Soil pH testing |
| Price | Not listed |
| Organic Friendly | Yes |
| Skill Level | Beginner to experienced |
| Indoor/Outdoor | Both |
| Product Type | Test kit |
| Additional Features |
|
- Fast results in 2–3 minutes — no waiting, no lab fees
- Covers 450 plant species so you know exactly what your soil can support
- At under $10, it’s hard to beat for routine garden monitoring
- Color matching can get tricky, especially in the pH 6.0–7.0 range
- Results are approximate — not reliable enough for precision growing
- Only 10 single-use capsules per kit, so it runs out fast if you’re testing multiple beds
7. Vertical Vegetables Gardening Projects
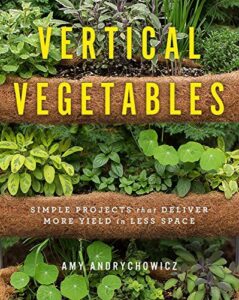
Small spaces don’t have to mean small harvests. Vertical Vegetables by Cool Springs Press walks you through 24 DIY structures — trellises, towers, wall pockets, and more — with full-color photos and step-by-step instructions.
It’s especially useful if you’re working with limited ground space or poor horizontal soil. Projects use lumber, rebar, fabric, and upcycled materials, so you’re not locked into expensive supplies.
At $26.99 and 192 pages, it’s a solid visual reference for planning a productive vertical setup from the ground up.
| Best For | Small-space and urban gardeners who want to grow more vegetables without needing a big yard. |
|---|---|
| Primary Use | Vertical garden building |
| Price | $26.99 |
| Organic Friendly | Yes |
| Skill Level | Beginner to advanced |
| Indoor/Outdoor | Outdoor |
| Product Type | Gardening book |
| Additional Features |
|
- Covers 24 hands-on projects with full-color photos, so you can actually see what you’re building before you start.
- Works with affordable and upcycled materials, which keeps costs low and reduces waste.
- Beginner-friendly layout makes it easy to pick up even if you’ve never built anything in a garden before.
- Published in 2018, so some newer techniques and plant varieties won’t be covered.
- Advanced gardeners may find the content a bit surface-level.
- The book is a little bulky to carry outside while you’re mid-project.
8. Wiggle Worm Organic Worm Castings
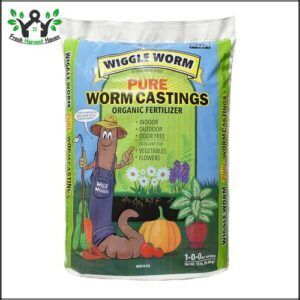
Worm castings might be the quietest powerhouse in your soil prep toolkit.
Wiggle Worm’s 15 lb bag delivers 100% pure earthworm castings — OMRI-listed, odorless, and safe for both indoor pots and outdoor beds.
Those tiny, football-shaped particles open up soil structure, boost drainage, and feed beneficial microbes that keep your plants thriving long-term.
The NPK runs light on paper, but the slow-release nitrogen and trace minerals add up.
A handful at transplant time goes a long way.
| Best For | Home gardeners and organic growers who want a gentle, long-term soil booster for houseplants, veggie beds, or seedlings without dealing with harsh chemicals. |
|---|---|
| Primary Use | Soil amendment and fertilizing |
| Price | Not listed |
| Organic Friendly | Yes, OMRI listed |
| Skill Level | Beginner to experienced |
| Indoor/Outdoor | Both |
| Product Type | Soil amendment |
| Additional Features |
|
- 100% pure OMRI-listed castings — no fillers, no odor, totally safe indoors and out
- Improves soil structure and feeds beneficial microbes for steady, lasting plant health
- A little goes a long way — just a handful three times a year keeps things rolling
- Light on phosphorus and potassium, so you may need to pair it with other amendments for a full nutrient profile
- Results are slow to show up — don’t expect an overnight transformation
- The 15 lb bag costs more per pound than conventional fertilizers and isn’t exactly easy to lug around
9. Dave Thompson Organic Vegetable Herb Fertilizer
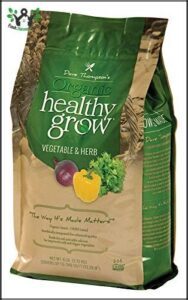
Chicken litter doesn’t sound glamorous — but Dave Thompson’s Organic Vegetable Herb Fertilizer turns it into something your soil actually loves.
It’s aerobically composted, so the odor stays low and the microbial boost stays high. The added calcium helps stronger plants and bigger yields, and gardeners report visible improvement in about five days.
Work the granules into your top 6–8 inches, water thoroughly, and let the biology do the rest. OMRI-listed, so it’s fully approved for organic growing.
| Best For | Home gardeners and small-scale organic farmers growing vegetables, herbs, roses, or flowers who want a low-odor, OMRI-listed fertilizer that works with the soil’s natural biology. |
|---|---|
| Primary Use | Organic fertilizing |
| Price | Not listed |
| Organic Friendly | Yes, OMRI listed |
| Skill Level | Beginner to small farm |
| Indoor/Outdoor | Outdoor |
| Product Type | Granular fertilizer |
| Additional Features |
|
- Fast results — most gardeners notice healthier, more vigorous plants within about five days
- OMRI-listed and fully organic, with added calcium to support stronger growth and bigger yields
- Low odor for a chicken litter-based fertilizer, thanks to aerobic composting
- Some users report gnat problems after application, which can stress or damage plants
- Needs a good, thorough watering after each application to actually activate the nutrients
- Not a fit if your crops need the higher nutrient concentrations that synthetic fertilizers provide
10. Sustane Natural Plant Fertilizer
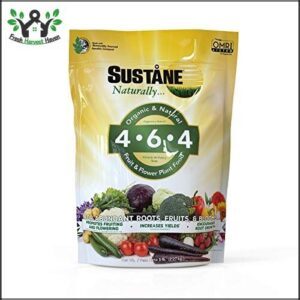
If Dave Thompson’s formula got you thinking about compost-based nutrition, Sustane takes that idea further.
This granular fertilizer packs all 17 essential plant nutrients into one OMRI-certified bag — slow-release nitrogen included.
That steady nutrient flow means your vegetables get fed gradually, not all at once.
Work it into your top 6–8 inches at planting time, and it’ll support microbial life while improving soil structure season after season.
At $24.24 for 5 lbs, it’s a solid investment for any organic garden.
| Best For | Organic gardeners who want a slow-release, all-in-one fertilizer for vegetables, flower beds, raised beds, or containers. |
|---|---|
| Primary Use | Soil amendment and fertilizing |
| Price | $24.24 |
| Organic Friendly | Yes, all-natural |
| Skill Level | Beginner to experienced |
| Indoor/Outdoor | Both |
| Product Type | Granular fertilizer |
| Additional Features |
|
- All 17 essential nutrients in one bag — no need to stack multiple products.
- Improves soil structure and feeds beneficial microbes over time, not just your plants.
- Works in a wide range of setups, from in-ground beds to wicking tubs and self-watering containers.
- Harder to find in local stores — you’ll likely need to order it online or through a specialty supplier.
- Slower results than synthetic fertilizers, so it’s not great if you need a quick fix.
- Easy to over-apply, which can throw off your soil’s nutrient balance if you’re not careful with the label rates.
Frequently Asked Questions (FAQs)
How do you prepare soil for a vegetable garden?
Think of your soil as the foundation of a house — get it wrong, and everything built on top will struggle.
Test pH, add compost, loosen compacted layers, and choose a sunny, well-drained spot.
What is the 70 30 rule in gardening?
The 70/30 rule says 70 percent of your garden’s success comes from healthy soil and structure, while the remaining 30 percent comes from your plant choices and seasonal maintenance.
How do you prepare the ground for a vegetable garden?
Start with the right spot — level ground, six to eight hours of sun, and good drainage.
Then test your soil, add compost, loosen it deeply, and let it settle before planting.
What is the best soil mixture for a vegetable garden?
The best soil mixture blends equal parts compost, topsoil, and a drainage material like perlite or coarse sand. This combo gives roots steady nutrients, good structure, and moisture without waterlogging.
What should I amend my vegetable garden soil with?
Amend your soil with well-rotted compost, balanced organic fertilizer, and targeted nutrients like bone meal for phosphorus or aged manure for nitrogen — matching amendments to what your soil test actually shows.
How do I prepare my garden for planting?
Think gardening is just throwing seeds in dirt? Surprise — it’s not.
Pick a sunny, level spot, clear the debris, test your soil, add compost, loosen everything, and let it settle before planting.
How do you prepare a vegetable garden?
To prepare a vegetable garden, pick a sunny spot, test your soil, add compost, loosen the ground to 8–12 inches, and mulch the surface before planting.
How do you make a good soil mix for vegetables?
Solid soil starts simple: blend compost, quality topsoil, and a touch of peat moss or coconut coir.
That trio builds the drainage, nutrients, and moisture retention your vegetables need to truly thrive.
How do you grow vegetables in a garden?
Growing vegetables starts with picking a sunny spot, testing your soil, adding compost, and keeping the bed weed-free. Give plants consistent water, good drainage, and enough space to thrive.
Why is soil preparation important for a vegetable garden?
Soil is the silent engine beneath every harvest. When it’s healthy, your plants have everything they need to thrive — proper nutrients, drainage, and structure.
Skip this step, and even great seeds struggle to perform.
Conclusion
The secret to a jaw-dropping harvest isn’t the seeds you choose or the variety you plant—it’s the ground you never see. Solid vegetable garden soil preparation happens before anything grows, quietly doing the hard work beneath the surface.
Test your soil, feed it with compost, loosen it, and let it breathe. Do that, and your garden won’t just survive the season. It’ll embarrass every neighbor who blamed the weather.