This site is supported by our readers. We may earn a commission, at no cost to you, if you purchase through links.

Most gardeners pack it in when the first frost warning rolls across the weather app—but that’s often a month or two earlier than necessary.
Kale, spinach, and root vegetables don’t just survive cold; they thrive in it, with carrots and parsnips actually sweetening after a light freeze as their starches convert to sugar.
Extending the fall growing season isn’t about fighting the weather; it’s about working with it. The right crops, a well-timed planting schedule, and a few smart protective measures can keep fresh food coming out of your garden well into winter.
Table Of Contents
- Key Takeaways
- Choose Cold-Hardy Fall Crops
- Time Plantings Before Frost
- Protect Beds With Covers
- Build Season-Extending Structures
- Manage Soil, Light, and Moisture
- Frequently Asked Questions (FAQs)
- How to extend the growing season?
- What does a longer growing season mean?
- How to manage pests during autumn gardening?
- What are the best tools for fall gardening?
- How to prevent soil compaction in fall gardens?
- What irrigation methods work best in cooler weather?
- How to store harvested crops for longer freshness?
- How do I protect plants from wind damage?
- When should I remove summer crops for fall?
- Can I grow herbs indoors during winter?
- Conclusion
Key Takeaways
- Cold-hardy crops like kale, spinach, carrots, and parsnips don’t just survive frost—they actually taste better after a light freeze, making them your best bet for a fall garden that keeps giving.
- Timing your plantings right means counting backward from your first frost date, adding a two-week buffer for slower cool-weather growth, and staggering sowings every 7–14 days so harvests trickle in steadily instead of all at once.
- Simple protective layers—row covers, frost blankets, low tunnels, and cold frames—can buy your garden weeks of extra production by holding enough warmth to keep crops alive and growing well past the first frost warning.
- Managing soil, light, and moisture makes the real difference: mulch insulates roots, moist soil holds heat better on cold nights, and south-facing beds catch the low autumn sun that keeps your plants actively growing instead of just surviving.
Choose Cold-Hardy Fall Crops

Not every vegetable taps out when the calendar flips to fall. Some crops actually thrive in the cold, growing sweeter and tougher as temperatures drop. Here’s where to start when you’re building your cold-weather garden lineup.
Leafy greens and root vegetables are great places to begin — check out these autumn garden planting ideas for cool-season crops that actually sweeten up after the first frost hits.
Leafy Greens
When the days shorten and temperatures dip, cold-hardy leafy greens like kale, spinach, collards, and mâche keep producing long after summer crops have quit.
They stay productive until air temps fall below 28 °F, and they’re packed with vitamins A, C, and K — real nutritional workhorses worth growing into the cold months.
Sweetened Root Crops
Root vegetables take fall gardening in a completely different direction. Carrots, beets, parsnips, and turnips actually get sweeter after frost — a light freeze triggers starch-to-sugar conversion inside the roots, improving flavor naturally.
A light frost doesn’t ruin root vegetables — it sweetens them
- Harvest after the first frost for peak sweetness
- Mulch roots heavily to extend your picking window
- Cure harvested roots in cool, humid conditions to deepen flavor
Frost-Tolerant Brassicas
Brassicas bring a different kind of toughness to the fall garden. Kale, collards, cabbage, and Brussels sprouts don’t just survive frost — they genuinely improve because of it. That same sugar sweetening process that works on root crops also transforms brassica leaves and sprouts, concentrating flavor as temperatures dip.
Their leaf structure resilience is what sets them apart. Dense, waxy leaves shed moisture efficiently, which means a hard frost night won’t leave your kale looking scorched by morning. Applying row covers on nights below 32°F locks in warmth without smothering the plants, and cold frames can stretch your harvest weeks further. Kale’s exceptional cold tolerance even lets it survive snow cover.
Best Fall Varieties
Variety choice is where good fall gardens are made.
Winter Bloomsdale spinach, Toscano kale, Scarlet Nantes carrots, and Hollow Crown parsnips are proven cold-hardy varieties that hold up when nights turn serious. Savoy cabbage and Red Russian kale sweeten after frost.
Match your picks to your USDA hardiness zone, and you’re already ahead.
Time Plantings Before Frost

Timing is everything when you’re trying to squeeze more weeks out of your garden. Plant too late, and your crops won’t reach maturity before the cold shuts everything down. Here’s how to map out your fall planting schedule so nothing goes to waste.
Find First Frost Date
Your entire fall planting strategy hinges on one number: your average frost date. This is the date when frost is likely to hit for the first time in autumn — not a guarantee, but a historical average pulled from years of weather records.
- Regional frost trends vary widely, even within Germany
- Valleys and inland areas often see frost earlier than coastal zones
- Climate change frost patterns are shifting dates by 1–2 days per decade
- Local meteorological services offer frost date prediction tools using exact coordinates
Check your national weather service or an online frost calculator to find your first frost date. Always aim for the 70% probability date — it gives you a safer planning window than the basic 50% estimate.
Once you’ve locked in that date, pairing it with organic spring pest control methods helps you plan row cover timing around both frost risk and early-season insects.
Count Back Maturity Days
Once you have your first frost date, the real planning begins. Subtract your crop’s days to maturity directly from that date to find your latest safe sowing window.
Radishes mature in 25–40 days, spinach in 40–50, carrots in 70–90. Pull those numbers straight from your seed packet days to maturity — they’re your most reliable guide for accurate backdating.
Add Cool-Weather Buffer
Even after backdating from your frost date, cool autumn weather slows growth — so add two extra weeks to your calculation. Plants harden off gradually, and shorter days mean slower energy production.
Think of this buffer as insurance: a cold snap arrives early, and your crops still have time to reach maturity inside a row cover or cold frame.
Plan Succession Sowing
Succession sowing is your secret weapon for a steady harvest all the way into winter. Instead of planting one big seed batch and hoping for the best, stagger your sowing every 7 to 14 days. Here’s a simple plan:
- Sow intervals of fast crops like radishes or arugula every week.
- Rotate crop families across beds to manage soil health naturally.
- Mark each sow date on a calendar planning sheet for easy tracking.
This keeps your harvest staggered, not all-at-once.
Track Harvest Results
Tracking your harvest results turns guesswork into a real growth strategy. Log marketable yield by block, note picking dates, and record weight losses during storage. Over time, these numbers reveal which varieties and beds consistently outperform others.
Even simple notes on temperature at harvest help you correlate conditions with quality, so next season’s planting decisions get sharper, smarter, and more profitable.
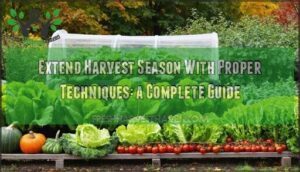
Protect Beds With Covers

Once temperatures start dipping, the right cover can mean the difference between a thriving bed and a lost harvest. The good news is you don’t need anything fancy — just the right material for the right situation. Here are five options worth knowing.
Lightweight Row Covers
Think of lightweight row covers as your garden’s first line of defense.
Made from nonwoven porous polypropylene fabric — often sold as Agribon or horticultural fleece — these covers transmit around 85–95% of available light, so your crops keep photosynthesizing normally underneath.
They also block insects like beetles and moths, buying you clean, undisturbed growth without chemicals.
Medium Frost Blankets
When you need more muscle than a lightweight cover can offer, medium frost blankets step up. Made from nonwoven porous polypropylene fabric, they deliver 6–8°F of frost protection while still passing roughly 50% of light through — enough for steady photosynthesis in leafy crops.
Here’s how to get the most from them:
- Lay flat over beds and secure edges with soil, rocks, or clamps to seal out cold drafts.
- Stack two layers in colder snaps for extra thermal insulation without blocking too much light.
- Remove during warm daylight hours to prevent overheating and moisture buildup under the fabric.
- Use UV-stabilized blankets — the UV protection features extend fabric life across multiple seasons.
- Store dry and rolled, away from sunlight, to preserve the fiber structure between uses.
The heat retention benefits are real: the microclimate underneath stays several degrees warmer and far more stable than open beds on frosty nights.
Supported Low Tunnels
When frost blankets alone aren’t enough, supported low tunnels take protection a step further.
By arching PVC or conduit hoops over your rows and draping fabric or poly film across them, you create a stable microclimate that can raise night temperatures 3–6°F—enough to keep leafy greens and root crops producing well into the cold months.
Individual Plant Cloches
Low tunnels shelter whole rows, but sometimes you just need to wrap up one vulnerable plant. That’s where cloches come in.
- Glass cloches trap heat beautifully and last for years
- Plastic dome cloches are lightweight and heat up fast
- Bottle cloches repurpose old jugs into instant mini-greenhouses
- Venting control prevents overheating on unexpectedly warm afternoons
Cover Removal Timing
Knowing when to pull covers is just as important as putting them on.
Wait until daytime temperatures consistently hit 10°C (50°F) for at least three days in a row. Check soil surface warmth too — once it holds above 7°C for a week, your plants are ready.
Scout for pests first, then remove covers gradually from the outer edges inward.
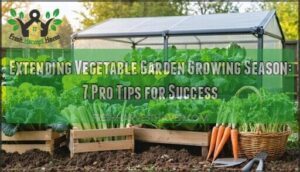
Build Season-Extending Structures
If you’re ready to stop babying your plants with covers and actually give them a proper home, building a structure changes everything. A little investment in materials can stretch your season by weeks, even months.
Here are five solid options to explore, from small and simple to go‑big‑or‑go‑home.
DIY Cold Frames

A cold frame is one of the simplest ways to extend the growing season without spending much money.
All you need is a basic box — untreated cedar or pine works well — topped with a clear polycarbonate lid.
Position it south-facing on bare soil, prop the lid open on warm days to vent heat, and mulch the base for extra insulation on cold nights.
Hoop House Basics

A hoop house takes your garden from seasonal to serious. Arch hoops — commonly galvanized steel or PVC — curve overhead to form a sheltered growing tunnel, while UV-stabilized cover material stretched across them traps warmth and filters light. Here’s what holds it all together:
- Ground anchors and frame anchors keep hoops firm against wind
- Width design allows easy walking access and airflow
- Rolled-up sidewalls handle ventilation and temperature regulation
- Double-layer covers boost insulation on hard nights
High Tunnel Benefits

Step up from a hoop house, and the high tunnel changes everything. These structures extend your season by 2 to 8 weeks on both ends, shielding crops from frost while stabilizing temperatures and cutting disease pressure. Here’s a quick look at what you gain:
| Benefit | What It Means for You |
|---|---|
| Season extension | Earlier springs, later fall harvests |
| Temperature regulation | Fewer frost events, steadier crop growth |
| Yield increase | More harvests per year, better marketability |
Ventilation on Warm Days

Warm fall days inside a high tunnel can actually work against you — heat builds fast, and without proper airflow, crops stress and disease takes hold. Cross ventilation is your first move: open end closures on opposite walls to push air through quickly. That single step can drop interior temps by several degrees within minutes.
- Open both ends to create a direct airflow path and clear stale, humid air
- Use automatic timers to schedule fresh air exchange during early morning and late evening
- Add shade cloth on sun-facing sides to reduce heat gain without blocking airflow
- Run fans briefly on very warm days to boost circulation without adding heat load
Night brings its own opportunity. Once the sun drops, open vents after sunset to let cooler outside air pull down interior temperatures — a simple technique that steadies overnight growing conditions and keeps humidity in check.
Snow and Wind Management

Wind and snow can quietly undo weeks of careful work if your structures aren’t ready for them.
Windbreak placement matters most before the first hard freeze. Position dense shrub or evergreen rows on the windward side, usually 50–100 feet from your beds, to intercept drifting snow and drop wind speed before it reaches your cold frames or hoop houses.
| Structure | Wind Protection | Snow Management |
|---|---|---|
| Cold frames | Blocks direct gusts | Brush snow off lids daily |
| Hoop houses | Moderate with end closures | Monitor roof load after storms |
| Row covers | Light wind reduction | Remove before heavy accumulation |
Snow drift barriers concentrate accumulation away from growing beds, cutting snow depth in protected zones by up to 50 percent. After heavy snowfall, clear drifts promptly — regular windbreak maintenance keeps barriers working efficiently and directs meltwater toward irrigation reserves rather than low-lying beds.
Manage Soil, Light, and Moisture

Once your structures are in place, the real work shifts to what’s happening at ground level. How you manage soil, water, and light through fall and winter can be the difference between a thriving harvest and crops that just barely survive. Here’s how to get all three working in your favor.
Mulch for Insulation
Think of mulch as your soil’s winter coat. Spread a 3–4 inch layer of straw, shredded leaves, or wood chips over your beds to trap heat and block freeze-thaw damage. Here’s what to keep in mind:
- Organic mulches like straw and leaf mold slowly improve soil as they break down.
- Darker materials absorb daytime heat and release it gradually at night.
- Keep mulch a few inches from plant stems to prevent rot.
- Apply after planting and water thoroughly so it settles and insulates effectively.
- Replenish as needed — thermal mass drops when layers thin out.
Water Before Cold Nights
Mulch keeps your soil snug, but moist soil holds heat far better than dry soil. Saturated soil loses heat more slowly, giving your root zone a natural buffer when nighttime temperatures drop sharply.
That’s why watering your beds the evening before a cold night is one of the simplest frost defenses you have.
Reduce Fall Irrigation
As days shorten and temperatures ease off, your plants simply need less water.
Reduce irrigation frequency to every 7–14 days in fall, watering deeply each time to encourage roots to grow downward rather than staying shallow.
A smart controller takes the guesswork out by adjusting schedules automatically based on temperature and evapotranspiration data — no more overwatering after a rainy week.
Use Warm Microclimates
Your garden already has hidden heat — you just need to find it. South-facing walls absorb sunlight all day and release warmth overnight, often boosting nearby soil temperatures by 2–5°C. Position your most cold-sensitive crops there first.
Thermal mass materials like bricks and stones work the same way — storing daytime heat and slowly releasing it after sunset.
Maximize Autumn Sunlight
Walls release warmth, but light is what keeps your plants growing.
South-facing beds catch the sun’s lower autumn angle far better than beds pointing any other direction.
Align your rows east to west, trim overhanging branches to stop shading, and lay reflective mulch to bounce extra light into the lower canopy — small moves that add up fast.
Frequently Asked Questions (FAQs)
How to extend the growing season?
You can extend the growing season using cold frames, row covers, hoop houses, and greenhouses—each trapping heat and shielding crops from frost, giving you weeks or even months of extra harvest time.
What does a longer growing season mean?
A longer growing season simply means more frost-free days — giving your crops extra time to germinate, mature, and produce. Earlier soil warmth, multiple harvests, and greater crop calendar flexibility all become possible.
How to manage pests during autumn gardening?
Autumn pests don’t clock out when temperatures drop. Use row cover or horticultural fleece to block cabbage worms, and try slug night patrol to catch snails before they shred your lettuce.
What are the best tools for fall gardening?
The right tools make fall gardening feel easy. A garden fork, sharp spade, hand trowel, leaf rake, and garden kneeler cover most tasks, while row covers, cloches, and low tunnels protect your crops.
How to prevent soil compaction in fall gardens?
Keep foot traffic off beds with narrow pathways and stepping stones. Add compost incorporation and mulch to protect soil structure, retain moisture, and regulate soil temperature through fall.
What irrigation methods work best in cooler weather?
Drip irrigation timing works best in cool weather. Run your lines in the early morning, and let smart moisture sensors do the heavy lifting so you never overwater cold, slow-draining soil.
How to store harvested crops for longer freshness?
The longer you wait to chill a harvest, the faster it fades. Cool storage at 32–40°F with 90–95% humidity keeps roots and greens fresh for weeks.
How do I protect plants from wind damage?
Wind can snap stems and dry out roots fast. Orient beds parallel to prevailing winds, stake plants with soft ties, and layer mulch 2–3 inches deep to shield soil and lock in moisture.
When should I remove summer crops for fall?
Slowing stems, sparse fruit, and sagging leaves signal it’s time. Once your tomatoes and peppers stop setting fruit, pull them at the base before the first frost claims the decision for you.
Can I grow herbs indoors during winter?
Yes, you can. Keep herbs like basil and chives on a kitchen windowsill or under a grow light for 12–16 hours daily, at 18–22°C, using containers with drainage holes.
Conclusion
Picture jars of fresh greens on your counter while your neighbors’ gardens sit bare and brown—that’s what extending the fall growing season actually looks like in practice. Cold-hardy crops, smart timing, and a few simple covers can keep your beds producing long after the first frost warning fades from the forecast.
The cold isn’t a signal to stop; it’s just a new set of conditions to work with. Your garden isn’t done yet.
- https://www.finegardening.com/article/extend-the-seasons-with-a-cold-frame
- https://www.groundedandgrowing.com/5-tips-for-easy-and-successful-fall-vegetable-gardening
- https://veggiegardeningtips.com/using-row-covers-in-the-veggie-garden
- https://agwaycapecod.com/fall-garden-tips
- https://joegardener.com/podcast/what-to-plant-now-fall-vegetable-garden