This site is supported by our readers. We may earn a commission, at no cost to you, if you purchase through links.
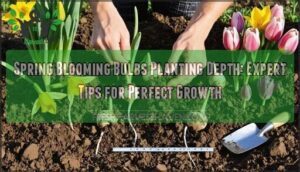
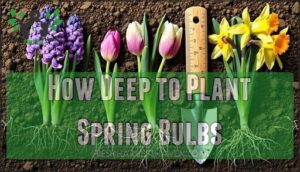
Large bulbs like tulips and daffodils need 6-8 inches deep, while smaller crocuses thrive at 3-4 inches.
This depth protects them from freezing while ensuring they don’t exhaust their energy reaching the surface.
Container plantings require 25-30% less depth than garden beds.
Plant 4-6 weeks before your first fall frost to allow proper root development during winter’s chill period.
Getting this timing and depth combo right means the difference between a stunning spring display and bare soil where flowers should be blooming, which can be a critical factor.
Table Of Contents
Key Takeaways
- Plant bulbs at 2-3 times their height – Large bulbs, like tulips and daffodils, need to be 6-8 inches deep, while smaller crocuses thrive at 3-4 inches to protect from freezing without wasting energy.
- Time your planting 4-6 weeks before the first fall frost – This window allows proper root development during winter’s chill period, which is essential for spring blooms to emerge successfully.
- Reduce depth by 25-30% for container plantings – Pots create different drainage conditions than garden beds, so you’ll need shallower planting depths while maintaining proper bulb care.
- Measure depth from the bulb bottom to the soil surface – Use a ruler or a marked garden tool to ensure accurate placement, as incorrect depth causes delayed blooms, rot, or pest damage.
When to Plant Spring Bulbs
Timing your spring bulb planting correctly guarantees vibrant blooms when winter finally releases its grip on your garden.
Plant these bulbs 4–6 weeks before your area’s first fall frost to give roots time to establish before the ground freezes.
Timing is everything—plant spring bulbs before winter’s grip takes hold for spectacular spring rewards
Best Time for Autumn Planting
Time your autumn scheduling to plant spring bulbs 4-6 weeks before your area’s first frost timing.
This window allows proper soil prep and root establishment before winter dormancy.
Store bulbs in cool, dry conditions until planting schedules align with ideal soil temperatures.
Spring flowering bulbs need this autumn foundation for spectacular blooms, making proper planting depth vital for success.
Understanding summer bulb care techniques is essential for achieving healthy growth and vibrant blooms, and it is crucial for the overall success of your spring flowering bulbs.
Timing for Root Development
After planting your spring bulbs 4–6 weeks before fall frost, they’ll establish essential root growth during autumn’s cooling soil temperature.
This root development period allows bulbs to anchor themselves and absorb nutrients before winter dormancy.
Strong root systems guarantee reliable spring planting success, as established roots support healthy shoots when soil warms and bulb planting timing pays off with spectacular bloom schedules.
Chilling Requirements for Spring Blooms
Most spring bulbs require cold stratification—a winter chill period that triggers bloom mechanisms.
You’ll need 12-16 weeks of temperatures below 50°F for proper winterization.
Without adequate chill hours, your bulbs won’t produce spring flowers despite correct planting depth.
This natural frost timing guarantees blooming bulbs emerge reliably when warmth returns.
Differences for Summer-flowering Bulbs
Unlike spring flowering bulbs that need cold stratification, summer bulbs thrive with warm season planting after soil temperatures reach 60°F.
These heat tolerance champions require different timing and bulb storage tips.
Here’s your summer bulb care roadmap:
- Timing matters: Plant gladioli, dahlias, and begonias in late spring when frost danger passes
- Planting depth: Follow the same depth-to-diameter rule as spring varieties for ideal root development
- Storage strategy: Dig up tender bulbs before first frost and store indoors over winter
Summer flowering varieties can’t survive freezing temperatures like their spring counterparts.
How Deep to Plant Spring Bulbs
Getting spring bulb planting depth right makes the difference between spectacular blooms and disappointing duds.
Plant bulbs at proper depth for spring success—too deep delays blooms, too shallow invites trouble
You’ll need to follow specific depth-to-diameter ratios and adjust for bulb size to guarantee your garden thrives come spring.
Depth-to-height and Depth-to-diameter Guidelines
Proper bulb measurement determines your planting success.
You’ll plant flower bulbs at two to three times their height—a simple rule that guarantees favorable root growth and flower emergence.
For garden bulbs measuring one inch tall, dig down three inches.
This depth-to-height ratio protects bulbs from temperature fluctuations while allowing adequate soil preparation above for healthy sprouting, ensuring a successful planting experience with proper bulb measurement.
Planting Depth for Large Vs. Small Bulbs
Large flower bulbs require deeper soil placement than their smaller counterparts.
Bulb size directly influences planting techniques, with tulips and daffodils needing 6-8 inches for proper root growth.
Small bulbs like crocus thrive at 3-4 inches, preventing delayed flower emergence.
Match soil depth to bulb dimensions—your garden bulbs will reward careful attention to these spring blooming bulbs fundamentals.
Understanding the correct planting depth guidelines is essential for healthy bulb growth and health.
Measuring Planting Depth Correctly
Accurate depth measurement starts from the bulb’s bottom to the soil surface—not the top of your planting hole.
Use a ruler or hori hori garden knife for precise garden calibration.
Mark your planting tools with tape at common bulb depth intervals. This simple trick prevents guesswork and guarantees your spring blooming bulbs hit their sweet spot for ideal flower depth and healthy emergence, ensuring healthy emergence.
Adjusting Depth for Jumbo or Miniature Bulbs
Bulb Size Matters when determining proper planting depth for your spring blooming bulbs.
Jumbo bulbs need an extra 1-2 inches beyond standard depth recommendations, while miniature varieties perform best at shallower 3-4 inch depths.
This Variable Depth approach guarantees efficient energy use—oversized tulips won’t struggle reaching the surface, and tiny crocuses won’t rot from excessive moisture.
Understanding the correct soil preparation techniques is also vital for the health and growth of spring blooming bulbs, ensuring a successful spring blooming experience.
Planting Depth Chart for Common Bulbs
Getting the depth right for your spring bulbs means the difference between spectacular blooms and disappointing no-shows next season.
Here’s your go-to reference chart with precise planting depths and spacing for the most popular spring-flowering varieties.
Tulip Planting Depth and Spacing
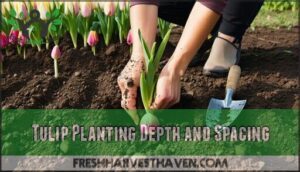
Six key factors determine successful tulip planting depth for vibrant spring flowering bulbs.
Plant standard tulip bulbs 6-8 inches deep, measuring from the bulb’s base to soil surface.
This depth protects against frost while ensuring proper root development in garden soil.
| Tulip Type | Planting Depth | Bulb Spacing |
|---|---|---|
| Large Bulbs (2+ inches) | 6-8 inches | 4-6 inches apart |
| Standard Tulips | 6 inches | 4-5 inches apart |
| Species Tulips | 4-5 inches | 3-4 inches apart |
Proper tulip care starts with correct bulb planting techniques.
Dense spacing creates stunning flower arrangements but requires fertile soil to prevent competition between bulbs.
To achieve ideal growth, consider the cold climate requirements for planting tulip bulbs.
This will ensure that your spring flowering bulbs receive the best conditions for a vibrant display.
Daffodil Planting Depth and Spacing
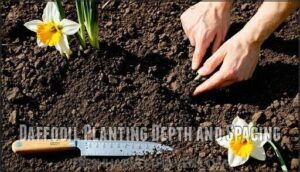
Daffodil planting depth requires precision for robust spring flowering bulbs success.
These hardy performers need strategic garden layout planning and proper bulb measurement techniques.
| Daffodil Type | Planting Depth | Spacing |
|---|---|---|
| Standard bulbs | 6-8 inches | 4-6 inches apart |
| Miniature varieties | 3-4 inches | 3-4 inches apart |
| Jumbo bulbs | 8-10 inches | 6-8 inches apart |
| Naturalizing clusters | 6 inches | 2-3 inches apart |
| Container planting | 4-6 inches | 2-3 inches apart |
Quality planting tools like hori hori knives guarantee accurate depth measurement.
Proper soil quality with good drainage prevents rot while supporting daffodil care throughout the growing season.
Garden maintenance becomes easier when you follow these depth guidelines for ideal bulb planting results, ensuring robust spring flowering bulbs success.
Crocus Planting Depth and Spacing
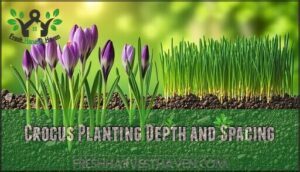
Crocus bulbs prefer planting depth of 3-4 inches, with their pointy end facing up.
These hardy spring blooming bulbs thrive in well-draining soil and adapt to various sunlight exposure conditions.
Space them 2-3 inches apart for natural clustering effects.
| Crocus Variety | Planting Depth |
|---|---|
| Standard crocus | 3-4 inches |
| Large-flowered crocus | 4 inches |
| Species crocus | 3 inches |
| Naturalizing crocus | 3-4 inches |
Crocus bulb size determines exact depth requirements.
Smaller species varieties need shallow placement, while larger cultivars benefit from deeper positioning.
Regional climate affects timing—plant 4-6 weeks before first frost.
These bulbs excel at naturalizing, spreading gradually through underground offsets and self-seeding.
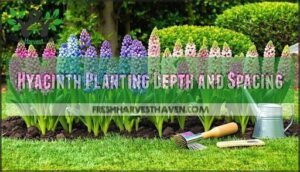
Hyacinth Planting Depth and Spacing
Plant hyacinth bulbs 6-8 inches deep with pointy side up for ideal spring flowering.
These fragrant beauties need proper spacing and depth to showcase their vibrant color variations effectively.
| Planting Specification | Measurement |
|---|---|
| Planting Depth | 6-8 inches |
| Bulb Spacing | 4-6 inches apart |
| Hyacinth Bulb Size | Standard to jumbo varieties |
Choose well-draining, fertile soil for best results.
Display ideas include clustering multiple bulbs together for maximum fragrance impact in garden beds or containers.
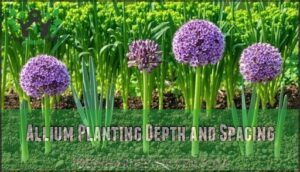
Allium Planting Depth and Spacing
Allium size matters when determining proper planting guidelines.
Giant allium bulbs need 6-8 inches depth, while smaller varieties require 4-6 inches.
Soil type impact affects drainage – add compost to clay soils.
Sunlight exposure effects bloom quality, so choose sunny locations.
Follow these planting tips for success:
| Allium Type | Planting Depth | Spacing |
|---|---|---|
| Giant Allium | 6-8 inches | 8-10 inches |
| Standard Allium | 4-6 inches | 4-6 inches |
| Miniature Allium | 2-4 inches | 2-3 inches |
Companion planting tips include pairing with tulips or daffodils.
For aesthetic arrangement ideas, plant in clusters of odd numbers to enhance the visual appeal.
Additional Popular Spring Bulbs
Beyond the common spring favorites, several specialty blooming bulbs deserve space in your spring garden.
These lesser-known varieties offer unique textures and early-season color when planted at proper depths.
| Bulb Type | Planting Depth | Spacing |
|---|---|---|
| Iris Reticulata | 4 inches | 3 inches |
| Snowdrop Varieties | 3 inches | 2 inches |
| Lily-of-the-Valley | 2 inches | 4 inches |
| Fritillaria Planting | 8-12 inches | 6 inches |
For Anemone Planting, soak tubers before setting them 2 inches deep.
These spring flowering bulbs create stunning naturalized displays when grouped together, transforming ordinary gardens into vibrant showcases of bulb flowers.
Tips for Planting Bulbs in Pots and Gardens
Whether you’re planting in containers or garden beds, successful spring bulb cultivation requires specific depth adjustments and proper soil preparation.
Container plantings need slightly shallower depths than garden installations, while both require well-draining soil amended with organic matter to prevent rot and guarantee healthy root development.
Depth Adjustments for Containers
Container gardening changes the game for spring flowering bulbs.
You’ll need to reduce planting depth by 25-30% since containers create unique microclimates and drainage patterns.
A 6-inch tulip bulb becomes 4 inches deep in pots.
Container size matters—deeper pots allow proper layering bulbs for successive blooms.
Choose quality potting mix over garden soil for better drainage.
For ideal results, consider using a specialized soil blend.
Your bulb planting success depends on these container-specific adjustments, making proper layering crucial for the best outcome.
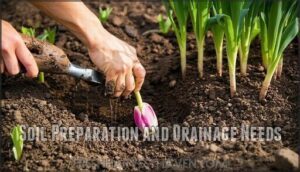
Soil Preparation and Drainage Needs
Proper soil preparation creates the foundation for healthy bulb growth and prevents common planting failures.
Your bulbs need well-draining soil that won’t waterlog their roots during winter dormancy.
Here’s your soil prep game plan:
- Test and amend clay soil – Mix in coarse sand or perlite to break up dense clay that traps moisture
- Add organic compost – Work 2-4 inches into planting areas for improved soil structure and nutrient availability
- Create drainage solutions – Install raised beds or mounded rows where water tends to pool
These soil amendments prevent bulb rot while supporting strong root development.
Understanding the loamy soil characteristics can further help in achieving the ideal soil composition.
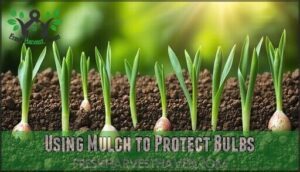
Using Mulch to Protect Bulbs
Applying mulch after planting bulbs creates a protective barrier that serves multiple functions.
Layer two inches of organic mulch over your planted spring flowering bulbs to provide insulation properties against temperature fluctuations.
The mulch benefits include moisture retention, pest deterrent effects, and weed suppression. Choose bark chips, shredded leaves, or straw as effective mulch types for ideal bulb care during dormancy periods.
Fertilizer and Compost Recommendations
Your bulbs’ success depends on proper fertilization during planting.
Mix bone meal or balanced fertilizer (10-10-10 NPK) directly at the bulb’s planting depth for maximum phosphorus uptake.
Organic amendments like compost improve soil pH and drainage.
- Bone meal: Provides slow-release phosphorus for strong root development
- Balanced fertilizer: Guarantees complete nutrient availability throughout growing season
- Compost types: Well-aged manure or leaf mold enhances soil structure and nutrient timing
Hori Hori Garden Knife for Precise Planting
A sharp Hori Hori knife transforms bulb planting from guesswork into precision gardening. Its marked blade eliminates depth measurement confusion while the serrated edge cuts through tough soil effortlessly.
You’ll appreciate how this versatile tool creates perfect holes for spring flowering bulbs without disturbing surrounding roots. You can even purchase a Hori Hori for your gardening needs.
| Feature | Benefit | Planting Application |
|---|---|---|
| Depth markings | Accurate measurements | Consistent planting depth for bulbs |
| Sharp blade | Clean soil cuts | Minimal root disturbance |
| Serrated edge | Tough soil penetration | Works in clay or compacted earth |
| Narrow profile | Precise placement | Exact bulb positioning |
| Durable steel | Long-lasting performance | Handles rocky garden conditions |
Common Mistakes and Troubleshooting
Even experienced gardeners can sabotage their spring display by planting bulbs at incorrect depths or ignoring basic care requirements.
Understanding these common pitfalls will help you avoid disappointing blooms and guarantee your bulbs thrive for years to come, ensuring a beautiful and long-lasting spring display.
Risks of Planting Bulbs Too Deep or Too Shallow
Getting planting depth wrong spells trouble for your spring flowering bulbs.
Plant too deep and you’ll face delayed blooms, rotting, and energy waste as bulbs struggle to surface.
Too shallow invites pest damage from hungry squirrels and temperature swings that harm poor roots.
Both extremes create weak plants that disappoint come spring.
To avoid these issues, make certain well-draining soil for your bulbs.
Preventing Bulb Rot and Pest Damage
Proper soil drainage prevents waterlogged conditions that cause bulb rot.
Choose firm, healthy bulbs without soft spots or mold.
Apply mulch benefits like temperature regulation and moisture control.
Well-draining soil management reduces fungal issues.
Consider fungicide use in wet climates.
Space planting bulbs adequately for air circulation.
Sterilizing garden tools prevents pathogen spread.
Monitor flower care throughout growing season for early pest detection.
Naturalizing and Invasive Bulb Varieties
Selecting the right spring flowering bulbs prevents ecological headaches down the road.
Some bulbs spread aggressively, creating problems for your garden and local ecosystems.
Three key strategies for responsible planting:
- Choose controlled spreaders – Daffodils and tulips multiply slowly through bulb division rather than aggressive seeding
- Research local invasive lists – Star of Bethlehem and Siberian squill are banned in many regions for good reason
- Consider native alternatives – Spring beauties and wild ginger provide naturalizing benefits without invasive control concerns
Bulb spread varies dramatically between species, making research essential before planting bulbs in your landscape.
Ensuring Healthy Emergence and Blooms
When bulbs receive ideal depth placement, they channel energy efficiently toward root development rather than struggling through excessive soil.
Correct planting depth guarantees timely flowering by allowing proper sprout emergence without energy expenditure waste.
Spring flowering bulbs planted at recommended depths establish strong foundations, delivering reliable spring displays.
Monitor emergence timing—delayed sprouting often indicates depth miscalculations during bulb planting season, which can affect the overall spring displays.
Frequently Asked Questions (FAQs)
Can bulbs be planted in frozen ground?
Like Jack Frost’s icy grip on the earth, frozen ground creates a barrier that’s nearly impossible to penetrate.
You can’t plant bulbs in frozen soil—it’s too hard to dig and won’t allow proper root establishment before winter dormancy sets in.
Do bulb depths change in clay soil?
Yes, plant bulbs slightly shallower in clay soil—about 25% less deep than normal recommendations.
Clay’s density makes sprouting harder, so you’ll help your bulbs break through more easily while still protecting them, which is the key reason to follow this shallower approach.
Should bulbs be watered immediately after planting?
Studies show 60% of gardeners water bulbs immediately after planting, but you shouldn’t flood them right away.
Light watering helps settle soil and establish contact, but excessive moisture can trigger rot.
Wait for natural rainfall or water sparingly if soil’s bone-dry.
Can different bulb types share planting holes?
You can absolutely layer different bulb types in the same planting hole, creating stunning "bulb lasagna" displays.
Plant larger bulbs deeper, then add soil and place smaller bulbs above them for extended blooming seasons.
How does slope affect bulb planting depth?
Slope affects drainage, not planting depth. You’ll plant bulbs at standard depths regardless of slope steepness. However, improve drainage on slopes with organic matter to prevent waterlogging and root rot.
Conclusion
Like gardeners tending their underground treasures through winter’s trials, your careful attention to spring blooming bulbs planting depth determines whether you’ll reap nature’s colorful rewards.
Proper depth—two to three times bulb height—ensures roots develop strength while shoots conserve energy for spectacular blooms.
You’ve learned the fundamentals: large bulbs need 6-8 inches, smaller ones 3-4 inches, with container adjustments reducing depth by 25-30%.
Master these techniques, and you’ll transform bare soil into vibrant spring displays that reward your autumn planning efforts, allowing you to enjoy the beauty of nature’s colorful rewards.
- https://extension.unh.edu/blog/2020/10/which-bulbs-are-best-naturalizing
- https://www.gardenersworld.com/plants/guide-to-bulb-planting-depths/
- https://www.gardendesign.com/bulbs/how-to.html
- https://journeynorth.org/tm/tulips/plant_detailed.html
- https://www.threeacrefarm.net/blog/2024/10/23/how-to-plant-tulip-bulbs

