This site is supported by our readers. We may earn a commission, at no cost to you, if you purchase through links.
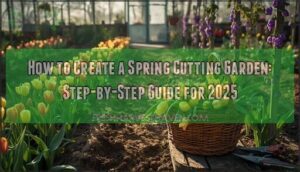
A well-designed cutting garden doesn’t just produce beautiful bouquets—it generates continuous harvests from March through June by combining early bulbs, cold-hardy annuals, and strategic succession planting.
The difference between a few scattered stems and weekly armloads comes down to location choices, soil preparation, and knowing which flowers to plant when.
Table Of Contents
- Key Takeaways
- Choosing The Best Location
- Preparing Soil for Flower Growth
- Designing Your Cutting Garden Layout
- Selecting Flowers for Spring Cutting
- Maximizing Continuous Blooms
- Sowing Seeds Vs. Planting Starts
- Watering and Fertilizing Strategies
- Managing Pests and Diseases
- Harvesting and Arranging Fresh Bouquets
- Frequently Asked Questions (FAQs)
- Conclusion
Key Takeaways
- You’ll get continuous spring blooms from March through June by starting your cutting garden in late winter, choosing a sunny spot with wind protection, and planting a mix of early bulbs, cold-hardy annuals, and perennials that overlap in bloom time.
- Raised beds with 2–4.5 cubic yards of compost per 1,000 square feet warm up faster than traditional plots, giving you earlier harvests and better drainage while making succession planting every 10–14 days much easier to manage.
- The difference between a few scattered stems and weekly armloads comes down to grouping flowers by bloom time, layering heights strategically, and combining at least three varieties that flower together at any given moment.
- Cutting flowers early morning when stems hold 15–30% more moisture, recutting underwater at 45 degrees, and using commercial preservatives can extend vase life by 6–10 days compared to casual harvesting methods.
Choosing The Best Location
Picking the right spot for your cutting garden makes all the difference in how your flowers grow and bloom. There are a few key things you’ll want to keep in mind before you start planting. Let’s look at what matters most when choosing your location.
Evaluating Sunlight Exposure
When you’re evaluating sunlight exposure, start with sunlight mapping—track how many hours of direct sun each spot gets. Full sun means at least six hours, which optimizes sunlight for flowers. Exposure duration and light quality matter, especially with seasonal shifts.
To determine plant placement, consider how cardinal directions impact sunlight. If your site falls short, consider artificial lighting to supplement. Careful assessment ensures your spring cutting garden blooms to its full potential.
Wind and Microclimate Considerations
Sunlight isn’t the only factor—wind can make or break your spring cutting garden. Smart Windbreak Design shields delicate stems, while Garden Sheltering boosts Humidity Control and Temperature Regulation. To improve flower quality, consider: Windbreaks can also provide significant wind reduction to protect your plants.
- Planting hedges or permeable fences
- Positioning beds for ideal Soil Moisture
- Avoiding wind tunnels
- Using thermal mass for warmth
Accessibility for Harvesting
Now, after you’ve considered wind, think about how you’ll move through your cutting garden. Wide, smooth paths—ideally at least 48 inches—make Wheelchair Access simple and harvesting flowers less of a chore.
Raised beds and Ergonomic Tools support Inclusive Design, while Adaptive Techniques and Sensory Gardens invite everyone to enjoy the space and participate in arranging spring blooms.
Preparing Soil for Flower Growth
Getting your soil in top shape is the secret to healthy, productive flowers. There are a few key ways to give your plants what they need right from the start.
Let’s look at the most effective options for preparing your garden beds.
Compost and Organic Amendments
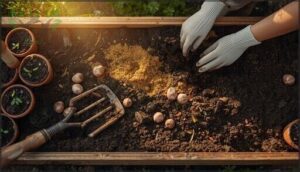
Did you know overusing compost can actually stunt flowering? For your spring cutting garden, aim for 2 to 4.5 cubic yards per 1,000 square feet, blending it into the top 6–8 inches.
Too much compost can stunt flowering—aim for 2 to 4.5 cubic yards per 1,000 square feet for best results
The right compost application rates boost organic matter, improve soil quality, and fuel plant growth outcomes—without tipping nutrient balances. Thoughtful soil preparation sets the stage for healthy, abundant blooms.
Benefits of Raised Beds
A raised bed is your secret weapon for spring flowers. Soil warming speeds up germination, while drainage benefits keep roots healthy. You’ll notice fewer weeds and pests thanks to defined borders and barriers. Plus, crop rotation is easier in small, organized plots. Raised beds make soil preparation, watering, and sunlight management more efficient, maximizing every inch of garden space.
- Faster soil warming for early growth
- Enhanced weed control and pest barriers
- Improved drainage benefits and easier crop rotation
Designing Your Cutting Garden Layout
Designing your cutting garden layout is all about making the most of your space while keeping things easy to manage. You’ll want to think about how you move, plant, and harvest.
Here are a few key layout ideas to help you get started.
Space Efficiency and Pathways
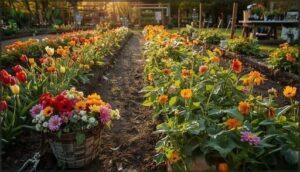
Ever wonder how professional growers squeeze every stem from a small plot? Smart garden layout starts with bed widths of 30–42 inches and pathways at least 18 inches wide for easy harvest. Mulched or gravel pathway materials keep maintenance low.
Intensive planting and accessible design—think raised beds and optimized layouts—help you get the most from garden space without sacrificing comfort or workflow.
Plant Height and Layering
With smart Garden Design, Layering Benefits come to life—tall sunflowers anchor the back, mid-height snapdragons fill the middle, and short pansies brighten the edges. Sunlight Optimization and Spacing Strategies keep every Flower Variety thriving.
Vertical Elements like trellises boost yields, while Height Combinations and Planting Strategies help you manage mature height for a cutting garden that’s both productive and easy to harvest.
Grouping by Bloom Time
Imagine your spring cutting garden blooming in waves—each group timed for an extended harvest and visual cohesion. By organizing flowers by bloom sequence and planting schedule, you’ll get uniform arrangements and efficient pollination. Early spring blooms lead into mid and late varieties, reducing labor and weaving a tapestry of color. Succession planting ensures no gap in your bouquets.
Selecting Flowers for Spring Cutting
Spring offers a wide range of flowers perfect for cutting and bringing indoors. Choosing the right mix is key to keeping your garden vibrant and your vases full.
Here are some options to think about as you plan your spring cutting garden.
Early Spring Bulbs and Annuals
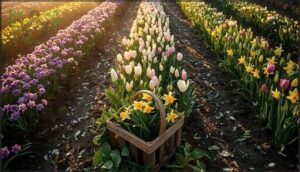
Did you know that the secret to a vibrant spring cutting garden starts underground? Early spring bulbs like tulips and daffodils demand precise planting depth and Bulb Pre-Chilling for reliable early spring blooms. Annual flowers—think ranunculus—need Annual Pre-Sprouting.
To spark emotion, focus on:
- Bloom Succession
- Maximizing Vase Life
- Strategic bulb planting
Hardy Perennials for Spring
Did you know peonies can thrive in one spot for fifty years, anchoring your perennial cutting garden with reliable spring blooms? Planting flowers like bearded iris and Sweet William brings color and resilience—these perennial flowers act as bloom extenders.
For better perennial lifespan, use soil amendments and companion planting. Overwintering tips? Dianthus and Bergenia offer foliage and vigor, even under snow.
Choosing Foliage and Fillers
After hardy perennials anchor your spring garden, it’s time to weave in foliage and filler plants. Bupleurum, feverfew, and eucalyptus offer fragrance, long stems, and notable vase life—goldenrod lasts over two weeks.
Foliage diversity boosts bouquet impact, while filler water needs stay manageable with mulching. Fast growth rates mean cosmos greens and feverfew fill gaps as blooms unfold.
Maximizing Continuous Blooms
If you want fresh flowers all season, timing is everything.
There are a few practical ways to keep your garden blooming without gaps.
Here’s how you can plan for continuous color and harvests.
Succession Planting Techniques
When you weave succession planting into your spring cutting garden, you’re setting yourself up for continuous blooms. By staggering your planting intervals, using varietal selection, and practicing seasonal rotation or intercropping flowers, you extend harvests and get the most from every inch.
A well-planned planting schedule lets you keep the garden productive, extending the blooming season and ensuring fresh flowers all spring.
Staggered Planting Dates
Stagger your planting dates every 10–14 days, and you’ll stretch your Extending Bloom season far beyond the usual window. This approach smooths Labor Distribution, boosts Yield Optimization, and keeps your Planting Schedule tuned for Market Alignment. Space Efficiency improves, too—beds are never sitting idle. Timing for continuous blooms is the backbone of Succession Planting.
- 10–14 day intervals
- Multiple sowings per bed
- Reduced peak labor
- Continuous harvest
- Better market timing
Overlapping Bloom Periods
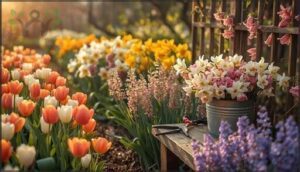
Beyond staggered dates, compatible flower selection builds bloom time overlap—you want at least three varieties opening together at any moment. Early daffodils pair with late tulips and early violas, creating a successive bloom design that fills gaps.
This timing for continuous blooms turns six-week spring blooms into eight. Weaving overlapping species into your planting schedule maximizes bloom duration trends, amplifies cut flower benefits, and truly extends your extending bloom season.
Sowing Seeds Vs. Planting Starts
You’ll face one of the most practical decisions in your cutting garden: whether to start from seed or buy young plants ready to go. Each method has its own timing, cost, and success rate, and understanding the differences helps you plan smarter.
Let’s look at three approaches that work well for spring cutting gardens.
Starting Seeds Indoors
Starting seeds indoors allows you to control critical factors such as light requirements, temperature, and moisture levels—essential for strong flower seeds. Most species require soil temperatures between 70°F and 80°F for seed germination, along with 16–18 hours of light daily. Use a sterile seed-starting medium in divided trays to prevent root disturbance. Timing is crucial: start seeds 4–12 weeks before your last frost, depending on the variety.
| Factor | Best Range | Common Pitfall |
|---|---|---|
| Light Intensity | 25,000–35,000 lux | Leggy, weak stems |
| Soil Temperature | 70–80°F (21–27°C) | Slow or failed germination |
| Daily Light Duration | 16–18 hours | Stunted seedling growth |
| Sowing Depth | 2–3× seed diameter | Uneven emergence |
| Hardening Off | 7–10 days gradually | Transplant shock |
Direct Sowing in Garden Beds
When you direct sow seeds straight into garden beds, seedbed preparation becomes your foundation for success. Soil preparation involving fine tilth and debris removal boosts germination by 12%. Hardy annuals like larkspur and bachelor buttons reach 90% emergence under ideal conditions, while cosmos and zinnias hit 75–95% when soil warms above 55°F. Post-sowing care—consistent watering every 2–4 days and weed removal—prevents up to 50% seedling loss during establishment.
| Crop Type | Germination Rate | Soil Temperature |
|---|---|---|
| Larkspur, Poppies | 85–90% | 55–60°F |
| Cosmos, Zinnias | 75–95% | 60–65°F |
| Sunflowers, Marigolds | 80–92% | 60–70°F |
| Dill, Fennel | 80–85% | 55–65°F |
| Nigella, Calendula | 85–90% | 55–62°F |
Environmental factors like late spring frost can increase failure rates by 25%, so use row covers during germination challenges. Direct sowing works best for self-sowing varieties and fast-growing annuals that resent root disturbance. Planting seeds in shallow trenches improves consistency by 10% compared to surface broadcasting.
Transplanting Young Plants
With 2–3 true leaves visible, your seedlings are ready for the garden. Acclimatization methods matter: harden off plants for 7–10 days to prevent shock. Handle by the root ball, plant at the original depth, and water immediately.
Proper spacing and post-transplant care—consistent watering, starter fertilizing, and mulching—boost establishment rates by addressing rootbound solutions and soil contact needs.
| Timing Factor | Best Practice |
|---|---|
| Soil temperature | 60–75°F for warm-season crops |
| Planting depth | Match original container level |
| Watering schedule | Twice weekly first 10–14 days |
Watering and Fertilizing Strategies
Once your cutting garden is planted, keeping your flowers healthy comes down to two essentials: water and nutrients. You’ll need a consistent watering routine and the right fertilizers to fuel those blooms from spring through harvest.
Here’s how to set up systems that keep your garden thriving without constant fussing.
Establishing a Watering Schedule
Watering frequency matters more than you might think—one inch of water per week keeps spring cut flowers thriving. Deep watering once or twice weekly encourages sturdy root development, while irrigation timing in early morning reduces disease risk.
Soil moisture monitoring prevents the pitfalls of over or under watering. For efficient methods, drip systems and soaker hoses target root zones directly, improving water retention and growing conditions throughout your beds.
Using Slow-Release Fertilizers
Slow-release fertilizers deliver nitrogen gradually over months, feeding your cutting garden without the guesswork of repeated applications. These formulations improve soil nutrition while reducing runoff by up to 50%, making them solid eco-friendly practices for any plot.
Consider these fertilizer types for spring beds:
- Coated granular products synchronize nutrient release with temperature and moisture.
- Organic blends with compost boost soil quality and microbial activity.
- Methylene urea formulas extend nitrogen release throughout your bloom cycle.
Apply 0.2 to 0.3 pounds of nitrogen per 100 square feet during soil preparation for gardens, banding fertilizer beside rows where roots develop. This single spring fertilizer application ensures garden productivity all season, preventing root burn while maintaining steady growth—no midseason scrambling required.
Mulching for Moisture Retention
Spread 2 to 3 inches of organic mulch around your cutting flowers to lock in soil moisture and slash watering frequency by up to two-thirds. Organic matter like wood chips or straw insulates roots against temperature swings while decomposing into compost that boosts water retention over time. Leave an inch of space near stems to prevent fungal growth—your blooms will thank you.
Managing Pests and Diseases
Even the healthiest cutting garden won’t escape the occasional pest or disease challenge, but catching problems early makes all the difference. You’ll want to walk through your garden regularly, checking leaves and stems for any signs of trouble before small issues become full-blown infestations.
Here’s how to protect your spring blooms using smart monitoring, organic solutions, and prevention strategies that keep your flowers thriving naturally.
Monitoring and Early Detection
Vigilance is your best defense against spring garden setbacks. Survey your flower beds twice weekly during warm periods—this practice cuts major pest outbreaks by up to 60%.
Use sticky traps and careful crop inspection to catch aphids and thrips early, often within 2–3 days of emergence. Regular pest surveillance and disease tracking preserve plant health and protect your harvest before problems spiral.
Organic Pest Control Methods
Once you spot trouble, shift to organic gardening solutions that work. Biological control with natural predators like ladybugs confronts aphids head-on—they consume up to 5,000 during their lifetime.
Layer these approaches for sturdy pest and disease management in gardens:
- Release parasitic wasps and apply neem oil as organic pesticides
- Install pest barriers like row covers and sticky traps
- Plant companion planting mixes with marigolds and basil
- Encourage predatory beetles through permanent flower strips
Disease Prevention Practices
Organic pest control gets you halfway there. Now lock in disease prevention through sanitation methods and smart garden habits. Disinfect your shears between cuts—Lysol wipes work well and won’t corrode your tools. Rotate flower families yearly to slash soil-borne disease by 90%, and choose resistant varieties that naturally fend off infection. Good spacing, mulch benefits, and removing plant debris complete your defense.
| Prevention Strategy | Action | Disease Reduction |
|---|---|---|
| Tool Disinfection | Clean shears with wipes | Blocks pathogen transfer |
| Crop Rotation | Switch plant families | Up to 90% fewer issues |
| Resistant Varieties | Select hardy cultivars | 40% lower infection rates |
| Proper Spacing | Allow 10–15 feet | 60% less disease pressure |
Harvesting and Arranging Fresh Bouquets
After all your work tending your spring cutting garden, you’re ready for the best part—bringing those blooms indoors. Knowing when and how to harvest makes the difference between flowers that wilt in a day and arrangements that brighten your home for a week or more.
Let’s walk through the timing, handling techniques, and arranging strategies that’ll help you get the most from every stem you cut.
Best Time to Cut Flowers
Timing your morning harvest transforms how long your blooms last indoors. Cutting techniques matter just as much as your cutting garden design, especially when you understand flower development and stem quality. Here’s what you need to know about harvesting flowers:
- Cut early morning (before 10 a.m.) when stems hold 15–30% more moisture, extending vase longevity by several days
- Avoid midday harvesting—heat stress reduces lifespan by up to 50%
- Match bloom periods to development stage; some flowers need tight buds, others full openness
- Use sharp pruning techniques for clean cuts that preserve stem integrity
Techniques for Longer Vase Life
Proper stem conditioning immediately after harvesting your cutting garden blooms makes all the difference. Recut stems underwater at a 45-degree angle to prevent air blockage—this single step extends vase life by up to 4 days. Strip lower foliage to reduce bacterial growth, then hydrate stems in warm water (90–110°F) for 2 hours before arranging.
These vase maintenance practices work together to keep your flower arrangements fresh. Temperature control matters more than most gardeners realize—storing cut flowers at proper refrigeration temperatures reduces deterioration rates by up to 400% compared to warmer storage. Keep arrangements away from direct sunlight, which can reduce bloom duration by 40%.
Commercial floral preservatives aren’t just marketing—they genuinely extend vase life for most spring cutting garden varieties by 6–10 days. These solutions stabilize pH, provide nutrients, and control bacterial growth simultaneously, making them worth the investment when you’re creating floral arrangements from your harvest.
| Technique | Method | Impact on Vase Life |
|---|---|---|
| Stem Conditioning | Recut underwater; remove lower leaves | +30% average extension |
| Water Quality | Use clean vases; change water every 2 days | +3 days for mixed bouquets |
| Floral Preservatives | Add commercial solution to vase water | Doubles longevity (4.5 to 10.6 days) |
| Temperature Control | Store at 32–35°F; avoid direct sunlight | +25% increase in longevity |
| Vase Maintenance | Clean containers reduce bacteria by 75% | +4–7 days with proper care |
Creating Balanced Floral Arrangements
Visual weight determines whether your bouquets feel harmonious or lopsided. When creating floral arrangements from your cutting garden, balance techniques rely on offsetting darker blooms with lighter ones—a deep purple iris counterbalances three pale tulips.
Apply the 3:5:8 ratio for arrangement principles: 60% focal flowers, 30% secondary stems, and 10% fillers create floral harmony. Color theory guides placement, distributing hues strategically rather than clustering them in your flower garden bouquets.
Frequently Asked Questions (FAQs)
Can I grow cutting flowers in containers?
Yes, container gardening lets you grow stunning cut flowers on patios and balconies. Selecting deep containers with proper drainage systems and quality container soil ensures vigorous blooms, even in compact spaces.
How do I overwinter perennial cut flowers?
To overwinter perennials successfully, apply 3 inches of mulch after the first hard frost for soil insulation.
Move containers to sheltered spots, maintaining 35-50°F, ensuring frost protection and proper temperature control throughout your plant hardiness zone.
What tools do I need for harvesting?
You’ll need sharp pruning shears or floral scissors with quality shear blade types, a clean bucket for fresh bouquets, and gloves.
These tools make cutting flowers easier while protecting your hands during garden harvest sessions.
Should I deadhead flowers in a cutting garden?
It’s the secret many growers know but few beginners practice. Regular pruning redirects energy from seed production to new blooms, doubling flower output while improving stem quality and extending your harvest window substantially.
How do I store cut flower seeds?
Store your seed packets in airtight containers at 32-41°F with humidity below 25%. Mason jars work perfectly.
This approach maintains seed viability for years, ensuring reliable germination when you’re ready for seed starting next season.
Conclusion
The early bird really does catch the worm when creating a spring cutting garden—those late-winter preparations translate directly into March bouquets while others are still browsing seed catalogs.
Your combination of strategic planning, soil preparation, and succession planting creates a system that delivers fresh stems weekly rather than sporadically.
Each decision you’ve made—from bulb placement to fertilizer timing—compounds into armloads of blooms that keep vases full through early summer.
- https://homegarden.cahnr.uconn.edu/2024/05/02/diy-grow-flowers-for-cutting/
- https://pmc.ncbi.nlm.nih.gov/articles/PMC10962335/
- https://www.canr.msu.edu/news/plan_now_for_a_beautiful_cutting_garden
- https://www.sierraflowerfarm.com/blog/2024/1/22/maximizing-cut-flower-production-on-a-small-scale
- https://www.hobbyfarms.com/cut-flowers-market-farmers/

