This site is supported by our readers. We may earn a commission, at no cost to you, if you purchase through links.

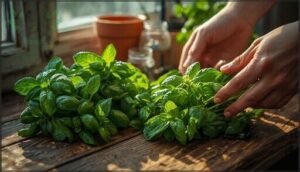
Most indoor gardeners buy new herb plants every season, unaware they’re sitting on a renewable supply. A single basil stem snipped and placed in water can root in under ten days, delivering over 85% success with zero experience required.
Growing herbs indoors from cuttings transforms one plant into dozens, cutting costs while filling your kitchen with fresh flavor year-round. The secret isn’t luck or a green thumb—it’s choosing the right stems, matching propagation methods to each herb’s biology, and creating conditions that trigger rapid root development.
Soft-stemmed herbs like mint and basil thrive in water, while woody varieties demand soil and rooting hormone to hit 90% success rates. Master these fundamentals, and you’ll never pay for parsley again.
Table Of Contents
Key Takeaways
- Soft-stemmed herbs like basil and mint root in water with 85-90% success in just 7-10 days, while woody varieties like rosemary need soil and rooting hormone to hit 90% success rates
- Cutting technique matters more than luck—use sterilized stainless steel blades at 45-degree angles just below nodes, which boosts success rates by 25-40% over regular scissors
- Spring and summer timing delivers 80%+ rooting success for most herbs, but winter drops rates by 30% without supplemental LED grow lights positioned 1-3 inches above foliage
- Transplant only when roots stretch 2-4 inches with visible white branches, then maintain 65-72°F temperatures and 60-70% humidity to prevent the 80% failure rate caused by overwatering and root rot
Choosing The Best Herbs for Indoor Cuttings
Not all herbs are created equal in terms of indoor propagation. Some plants practically root themselves in a glass of water, while others need soil and a bit more patience to get going.
Let’s break down which herbs will give you the best shot at success, which methods work for each, and which ones you’re better off skipping until you’ve got more experience under your belt.
Easiest Herbs to Propagate Indoors
Starting your indoor herb gardening journey? You’ll want to pick the winners—herbs that root reliably and forgive beginner mistakes. These three stand out:
- Basil – Achieves over 85% basil propagation success in water, rooting in just 7–10 days
- Mint – Demonstrates above 90% success rates with aggressive root development within a week
- Chives – Delivers 80%+ rooting performance with minimal fuss in various containers
These champions turn herb cuttings into thriving plants fast. For optimum growth, consider the herb growing tips to guarantee healthy plants.
Herbs That Root Best in Water Vs. Soil
Once you know which herbs work, choosing between water rooting and soil preferences matters for your success. Soft-stemmed herb species like basil and mint achieve 85–90% rooting in water propagation within days, developing roots fast but delicate.
Woody herbs—rosemary, lavender—prefer a soilless medium or soil, hitting 90% success with rooting hormones. Match your propagation mediums to stem type, and you’ll propagate like a pro.
Understanding the basics of vegetative propagation is essential for successful herb growth.
Herbs to Avoid for Indoor Cuttings
Not all herbs make the cut for indoor propagation. Woody stem issues plague rosemary and lavender, rooting below 40% without hormones. Node activation fails in dill and cilantro—under 10% success. Pathogen risks spike with parsley and tarragon, causing rot in 35–45% of attempts. French tarragon and saffron need division instead.
Skip these rooting challenges when growing herbs from cuttings indoors, and your herb gardening wins multiply.
Preparing Healthy Herb Cuttings
Your cutting technique can make or break your propagation success. The way you select stems, time your cuts, and handle your tools directly impacts how quickly—and how well—your herbs develop roots.
Let’s walk through the three essential steps that set you up for strong, healthy starts.
Selecting The Right Stems
Your success starts with choosing vigorous, disease-free stems—because weak parent plants slash rooting rates by 72%.
Look for these winners:
- Softwood stems from active growth with at least two fully developed leaves (boosts success by 64%)
- First-year shoots 5–15 cm long with 2–4 nodes for ideal root formation
- Non-flowering stems cut just below a leaf node to improve rooting time by 59%
Healthy stem cuttings mean thriving herb propagation.
Ideal Timing for Taking Cuttings
Timing dramatically shapes rooting success—spring and summer cuttings of basil and mint exceed 80% success rates, while woody herbs like rosemary peak in late summer or early fall at 60–75%.
You can propagate year-round indoors, though winter’s low light drops success by 30% without supplemental LED grow lights.
Take cuttings from actively growing, non-flowering stems for 40% faster root initiation and stronger water propagation outcomes.
Proper Tools and Cutting Techniques
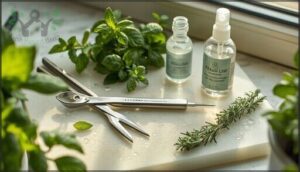
Your blade makes all the difference—stainless steel scalpels boost rooting success 25–40% over household scissors through cleaner cuts that prevent tissue crushing.
Stainless steel scalpels boost herb cutting success by 25–40% over scissors through cleaner cuts that prevent tissue damage
Essential cutting propagation techniques include:
- Sterilize tools with 70–95% ethanol between cuts to prevent 50% rooting failures from contamination
- Cut at 45-degree angles just below nodes for 30–55% higher success with rooting herbs
- Apply rooting hormones (800 mg/L ABT-1) to lift success from 60% to 95%
- Remove lower leaves immediately to reduce rot by 35–50%
- Use swift, single-motion cuts to accelerate root development 20–30%
Sharp blade maintenance and proper sterilization methods transform amateur herb propagation techniques into reliable plant propagation methods that consistently deliver professional results.
Rooting Herb Cuttings in Water or Soil
Once you’ve prepared your cuttings, the next step is getting them to develop roots—and you’ve got two solid methods to choose from. Water propagation is faster and lets you watch the progress, while soil or sand rooting builds stronger plants from the start.
Here’s how to use each method effectively and when to pick one over the other.
Step-by-Step Water Propagation Method
Water propagation transforms your indoor herbs into a thriving propagation pool with surprising simplicity.
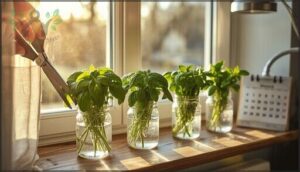
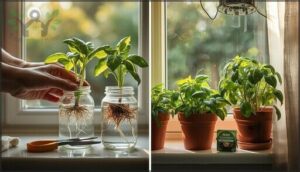
Start by selecting 4 to 6-inch cuttings with at least one node, then snip at a 45° angle for faster water uptake. Strip the bottom leaves, place stems in chlorine-free water covering the nodes, and set in indirect light at 65–75°F.
Change water every two days—root formation begins within 7 to 14 days.
Step-by-Step Soil/Sand Propagation Method
You’ll achieve stronger root development with sand propagation by mixing equal parts coarse sand and sterilized potting soil for an ideal soilless medium.
Prepare 4–6-inch herb cuttings at a 45° angle, strip lower leaves, then create holes in your pre-moistened propagation pool. Insert cuttings firmly, maintain medium moisture through daily misting, and keep temperatures at 70–75°F—roots emerge in 4–6 weeks.
When to Choose Water Vs. Soil Rooting
Your herb selection drives your propagation method—soft-stemmed varieties like basil and mint thrive with water propagation’s speed and simplicity, while woody herbs such as rosemary demand soil benefits for stronger roots.
Choose water advantages when you’re prioritizing quick results and easy monitoring, but opt for a soilless medium when long-term establishment matters most for your indoor herbs.
Transplanting and Caring for Rooted Cuttings
Once your herb cuttings develop a healthy root system, the real work begins—getting them settled into their permanent home and keeping them thriving. Transplanting at the right moment and dialing in their care conditions makes all the difference between scraggly stems and vigorous, healthy plants.
Here’s what you need to know about recognizing when roots are ready, choosing the right setup, and maintaining the environment your herbs need to flourish indoors.
Signs Roots Are Ready for Transplanting
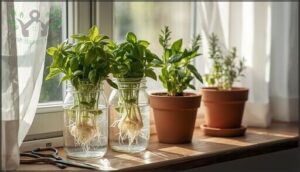
Think of your herb cuttings as athletes warming up—you can’t rush them to game day. Root development signals transplant timing when you spot bright white, visible roots stretching 2 to 4 inches long with multiple branches.
Test root stability by gently tugging; if they resist without breaking, your water propagation has succeeded. Healthy root color and density matter more than speed for plant propagation success.
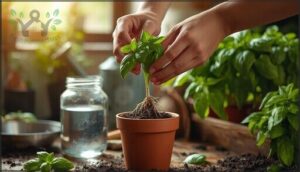
Potting and Soil Mix Recommendations
Once your roots pass the stability test, give them a home that drains fast and feeds well. Your potting mix should blend equal parts soilless medium with perlite for drainage systems that prevent root rot.
Add 10–20% worm castings or quality compost as organic amendments to fuel growth. Commercial organic potting mixes with coconut coir and vermiculite deliver consistent results—look for blends specifically formulated for edible plants.
Light, Temperature, and Humidity Needs
Your potting mix sets the stage, but light intensity, temperature control, and humidity levels run the show. Most herbs demand 6 hours of direct sunlight or 12–16 hours under grow lights positioned 1–3 inches above foliage—aim for 2,100+ lumens at 5,000 Kelvin.
| Environmental Factor | Optimal Range | Impact on Growth |
|---|---|---|
| Light (photoperiod effects) | 12–16 hours daily | 47–69% yield increase |
| Temperature | 65–72°F day, 55–60°F night | Faster root development |
| Humidity | 60–70% established cuttings | Prevents wilting, bolsters vigor |
Maintain daytime temperatures between 65–72°F—basil fails below 50°F, while most herbs slow above 75°F. Climate optimization means keeping humidity at 60–70% once roots establish, preventing stress without inviting disease. Bottom heat accelerates root development by 30–40% in controlled indoor gardening setups.
Watering and Fertilizing Tips (Including Alaska Fish Fertilizer)
Light and temperature lay the groundwork, but water quality and fertilizer ratios determine whether your herb cuttings thrive or merely survive. Check soil moisture by feeling the top two inches—water when dry, roughly twice weekly for basil and mint. Alaska Fish Fertilizer at 2 tablespoons per gallon every two weeks delivers root nutrition without burn, supporting indoor gardening success through balanced pH and gentle feeding.
- Change water every 3 days during water propagation techniques to prevent bacterial buildup
- Use room-temperature, chlorine-free water to avoid transplant shock and salt accumulation
- Begin fertilizing only after roots appear—half-strength solution protects young herb cuttings
- Monitor for yellowing leaves or wilting as signs you need to adjust your herb gardening tips approach
Troubleshooting and Maximizing Success Indoors
Even with the right technique, rooting cuttings indoors doesn’t always go smoothly—some stems fail to root, others grow leggy or weak, and a few may struggle after transplant. The good news is that most problems have simple fixes you can apply right away.
Below, you’ll find practical solutions to common setbacks, strategies to strengthen your transplanted herbs, and sustainable habits that keep your indoor herb garden thriving year-round.
Common Rooting Problems and Solutions
Failed cuttings usually tell a clear story. Overwatering Prevention starts with proper drainage—up to 80% of failures trace back to soggy conditions and Root Rot Causes like fungal pathogens.
Soil Quality Matters: light, airy mixes prevent disease. Humidity Management balanced with good airflow, clean tools to stop Fungal Disease Control issues, and consider Rooting Hormone to boost success when you Propagate.
Vegetative Propagation of Herbs and Plant Propagation and Growth improve dramatically with these fixes for Herb Cuttings.
Encouraging Strong Growth After Transplant
Success after transplant depends on giving your young herbs exactly what they need. Ideal Lighting means 12–16 hours under full-spectrum LEDs placed 20–30 cm above the pots, boosting Root Development and Plant Propagation and Growth by nearly 50%.
Keep Soil Quality light and airy, fine-tune Water Management by letting topsoil dry between drinks, and hold off on Fertilizer Application for two weeks to avoid shocking delicate Herb Propagation progress during Indoor Plant Propagation.
Use gentle Pruning Techniques once new leaves appear to strengthen your Herb Cultivation and Care routine.
Sustainable Practices for Ongoing Herb Propagation
Building resilience into your Herb Propagation routine means embracing Sustainable Gardening Practices that close the loop. Reuse spent Soilless Medium by mixing it with compost or worm castings for Organic Media Use, repurpose trimmed leaves as seasoning to slash Waste Reduction, and swap cuttings with neighbors through Community Engagement—turning Propagating Herbs into an Eco Friendly Methods success story that feeds both your garden and your values in Herb Cultivation and Care using Closed Loop Systems.
Frequently Asked Questions (FAQs)
How long do indoor propagated herbs live?
Your herb’s lifespan depends on its type—annuals last about a year, while perennials can thrive 3–5 years indoors. Water-only roots decline faster; soil-grown herbs, with proper care, live longest.
Can you propagate herbs from grocery store packages?
Yes, you can propagate herbs from grocery store packages with impressive rooting success rates exceeding 75% for basil, mint, oregano, and thyme. This is achievable when using proper herb cutting tips and indoor growing conditions within 72 hours of purchase.
What containers work best for indoor herb cuttings?
Plastic pots with drainage holes are your best bet—they’re affordable, low-maintenance, and retain moisture well. Terracotta works too, though you’ll water more often. Size matters: aim for 6–8 inches minimum.
How often should you prune indoor propagated herbs?
Like clockwork on a well-tended garden, prune your indoor herbs every 1–2 weeks for basil, and every 4–6 weeks for woody varieties, never removing more than one-third at once.
Conclusion
Six months from now, you’ll walk into your kitchen and snip fresh rosemary without a second thought—because growing herbs indoors from cuttings made it simple. One parent plant, a glass of water, and ten minutes of work unlocked a steady supply that outlasts any grocery store bundle.
The stems you nearly composted hold next season’s garden. Stop buying what you can multiply, and let your windowsill become the most productive square foot in your home.
- https://growcycle.com/learn/high-yield-indoor-plants-top-choices-for-maximum-growth
- https://homesteadingfamily.com/a-guide-to-propagating-herbs/
- https://pmc.ncbi.nlm.nih.gov/articles/PMC11608432/
- https://www.gardenary.com/blog/how-to-start-an-herb-garden-indoors
- https://www.greenhousemag.com/article/protection-from-propagation-through-finish-syngenta/

