This site is supported by our readers. We may earn a commission, at no cost to you, if you purchase through links.

That basil you bundled last week? Probably still limp, maybe a little sad, and definitely not dry. Most people hang herbs and hope for the best — then wonder why the leaves turn brown and dusty instead of staying green and fragrant.
Here’s the truth: drying speed depends on airflow, humidity, and timing more than luck. Get those three right and you can air dry herbs quickly without losing flavor or color.
This guide walks you through picking, prepping, and drying herbs the smart way — so your harvest ends up in jars, not the compost bin.
Table Of Contents
- Key Takeaways
- Harvest Herbs for Fast Drying
- Prep Herbs to Prevent Mold
- Air-Dry Herbs Quickly Indoors
- Top 3 Items for Faster Drying
- Store Dried Herbs for Fresh Flavor
- Frequently Asked Questions (FAQs)
- What is the fastest way to dry herbs?
- Which herbs can you air dry?
- How long does it take to air dry herbs?
- What herbs should you not dry?
- Can dried herbs be dried using a dehydrator machine?
- Is oven drying safe for delicate herb varieties?
- Can microwave drying work for small herb batches?
- Should chives or cilantro be frozen instead of dried?
- How long do properly dried herbs stay flavorful?
- Conclusion
Key Takeaways
- Harvest herbs after dew dries and before flowering to lock in essential oils and cut drying time, then prep them by rinsing only if dirty, patting or spinning dry, and stripping lower leaves to prevent mold.
- Separate herbs by type before drying: hang woody herbs like rosemary and thyme in loose bundles, while spreading tender herbs like basil and mint flat on mesh trays in a single layer.
- Keep room humidity below 40% and place herbs near steady, gentle airflow, since these two factors matter more than luck for fast, mold-free drying.
- Confirm dryness with a clean stem snap, discard any moldy pieces, then store herbs in airtight glass jars in a cool, dark spot labeled with the harvest date to preserve flavor for months or years.
Harvest Herbs for Fast Drying
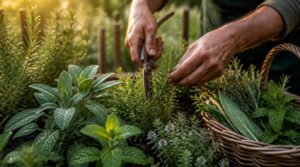
Good drying starts way before you turn on a fan or fill a dehydrator. It starts out in the garden, with how and when you pick. Here’s what to get right at harvest time.
If you’re new to this, brushing up on knowing when vegetables are ready to harvest will save you from drying produce that was picked too early or too late.
Pick After Dew Dries
Right after sunrise, once the dew’s gone but before the heat kicks in, that’s your window. Leaves still hold full turgor and cool moisture without sitting wet — perfect for cutting.
To make sure you succeed, you should pick foliage herbs before they begin to flower.
Why it matters:
- Preserves essential oils for stronger flavor
- Cuts drying time by skipping excess water weight
- Lowers mold risk right from the start
- Leaves feel cool, dry to the touch
Harvest Before Flowering
Timing beats everything when you’re chasing fast, potent dried herbs. Snip before flower buds pop and you’re locking in peak essential oil concentration — less water, more flavor.
| Harvest Stage | Result |
|---|---|
| Pre-flowering | Faster drying, bolder taste |
| Flowering | Slower drying, milder oils |
| Bud burst | Best flavor window |
| Full bloom | Lower potency |
| Post-flower | More biomass, less punch |
Smaller yield, sure. But flavor retention wins.
Choose Healthy Vibrant Leaves
Once you’ve got the timing right, it’s time to play favorites — and your leaves will tell you exactly who deserves a spot in the drying rack.
Look for deep, even color. Skip anything yellowing, spotted, or chewed on. Check texture too — leaves should feel supple, not crispy or limp.
- Vibrant color, no discoloration
- Firm, springy texture
- No holes or insect damage
- No wilting or drooping
- Full-sized, mature leaves
Good picks mean better potency and flavor once dried.
Shake Off Insects
Bugs love to hitch a ride on your harvest, so give each bundle a good shake before it hits the drying rack.
Hold stems firm and snap the tops — check leaf undersides where pests hide most. Let insects fall onto a tray or cloth below, then inspect and clear it.
For a closer look at which bugs to watch for and how to spot early damage, this guide to common vegetable garden pests breaks down the usual suspects by plant type.
Do a double shaking method: shake twice per bundle. It keeps leaf integrity intact and stops infestation from spreading indoors.
Cut Above Leaf Nodes
Look close before you snip — that little bump on the stem is a leaf node, and cutting just above it triggers node regrowth. This spot holds a dormant bud waiting for dormant bud activation.
- Angled cut, quarter-inch above node
- Preserve at least one healthy node below
- Leave clean stem for airflow
Good cuts mean stronger plants and better propagation success later.
Prep Herbs to Prevent Mold
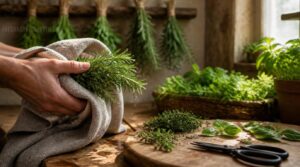
Mold is the enemy here, and it loves damp, crowded herbs. Good news: five quick prep steps knock out most of the risk before your herbs even start drying. Here’s exactly what to do.
Rinse Only When Needed
Water isn’t always your friend here. Only rinse if you spot actual grit or dust — clean garden herbs don’t need a bath. Extra moisture just invites mold later.
Skip rinsing when leaves look clean, and you’ll cut drying time a lot while saving water too. When in doubt, a quick shake beats a full rinse.
Spin or Pat Dry
Shake off any rinse water fast — wet herbs invite mold. A salad spinner works wonders here, using centrifugal force to fling water outward in seconds.
No spinner? Pat leaves dry with a clean towel, pressing gently to pull surface moisture without bruising. Either method preps herbs for faster, cleaner drying — and better airflow once bundled.
Strip Lower Leaves
Those bottom leaves aren’t just dead weight — they trap moisture right where mold loves to start. Pull them off by hand or snip close to the stem, working bottom to top.
This improves airflow around the base, cuts down on pest hiding spots, and lets you spot any early disease before it spreads. Fewer leaves down low means faster, cleaner drying up top.
Trim Bare Stem Ends
Grab your scissors and cut each stem at a diagonal angle — this trick opens up more surface area for airflow instead of trapping moisture at a flat cut.
Trim just above a node, since that’s where tissue is denser and less likely to harbor bacteria.
Keep your depth consistent across the batch for even drying, then move stems straight into your drying setup.
Separate Tender Woody Herbs
Basil and rosemary are not the same animal, and drying them together just slows everything down.
Woody herbs — rosemary, thyme, sage — have rigid stems built for hang drying. Tender herbs like basil and mint hold more moisture, so they need flat-tray airflow instead. Sorting by texture keeps moisture control tight, protects flavor-packing tannins and resins, and gets every batch dry on its own schedule.
Air-Dry Herbs Quickly Indoors
Herbs are prepped and ready. Now it’s time to set them up right so they dry fast without losing flavor or growing mold. Here’s exactly how to bundle, space, and place them for the best results.
Bundle Woody Herbs Loosely
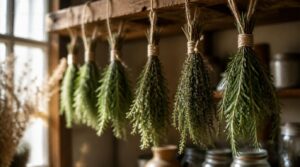
Tie rosemary and thyme into loose bundles — 5 to 8 stems, uniform stem diameter, cut ends down to stop sap pooling. A twine loop at the base gives just enough bundle tension without crushing anything.
- Leave 1–2 cm airflow gaps
- Loop twine loosely at base
- Hang cut-ends down
Loose beats tight. Every time.
Use Ventilated Paper Bags
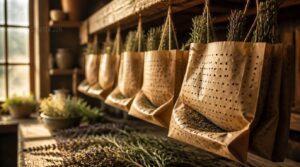
Once bundles hang, slide a brown paper bag over each one, cut-ends poking through the top.
Poke a few holes for good air circulation, and the bag blocks light while catching leaf litter as stems shrink.
| Feature | Benefit |
|---|---|
| Perforated sides | Steady airflow |
| Opaque paper | Light protection |
| Loose fit | Mold prevention |
Low humidity inside does the rest.
Spread Tender Herbs Flat
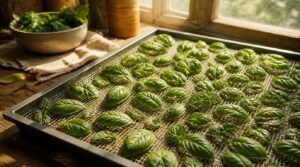
Basil, mint, and other tender herbs don’t like bundling — they trap moisture and turn spotty fast.
Lay them flat on a mesh tray, single layer, no overlap. This boosts surface area contact with air, giving uniform moisture loss and cutting drying time by up to 30%.
Tear big leaves into smaller pieces. More exposed surface, faster evaporation, less mechanical damage than crushing whole leaves in a bunch.
Keep Humidity Below Forty Percent

Once your herbs are spread out and drying, watch the room’s humidity — not just the herbs. Above 40% RH, drying slows and mold risk climbs fast.
Grab a hygrometer to track actual readings. Run a dehumidifier or crack a window for extra air exchange. Skip cooking or showering nearby — that moisture sneaks right into your drying space.
Place Near Steady Airflow
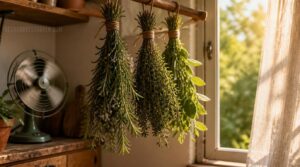
Under a window cracked open, or near a door with a slight gap — that’s where your herbs want to sit. Cross ventilation speeds up evaporation without any fuss.
- Aim for gentle movement, not a gust
- Skip corners near walls or furniture
- A small fan works if there’s no breeze
- Keep herbs waist-high for even exposure
Steady airflow beats stagnant air every time. Your nose will thank you.
Top 3 Items for Faster Drying
You don’t need a fancy setup to dry herbs fast — just the right tools doing the right job. A few smart picks can shave hours off your drying time and keep mold from crashing the party. Here are three worth having on hand.
1. OXO Good Grips Salad Spinner
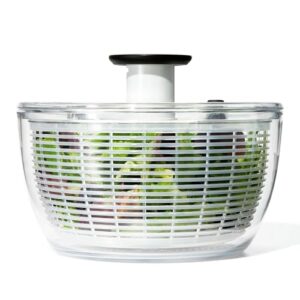
Wet herbs take forever to dry, so get the water off fast. This spinner uses a one-handed pump to whip greens dry in seconds, no arm workout required.
The bowl holds 6.22 quarts, the basket 4.4 quarts — plenty for a big herb haul. Hit the brake button and the basket stops on a dime for clean unloading. Clear sides let you check dryness at a glance.
Bonus: the bowl doubles as storage once you’re done.
| Best For | Home cooks who prep a lot of fresh greens, herbs, or veggies and want a fast, fuss-free way to dry them without extra arm effort. |
|---|---|
| Material | Plastic/BPA-free |
| Herb Drying Function | Air dries herbs via spinning |
| Ease of Cleaning | Dishwasher safe (top rack) |
| Countertop Use | Yes |
| Reusability | Reusable, durable design |
| Multi-Purpose Use | Bowl, colander, lettuce keeper |
| Additional Features |
|
- One-handed pump mechanism makes spinning quick and effortless
- Brake button stops the basket instantly for mess-free unloading
- Doubles as a bowl, colander, or lettuce keeper for extra kitchen versatility
- Lid needs manual disassembly for a truly deep clean
- Only top-rack dishwasher safe, so care is needed when washing
- At 6.22 quarts, it may be bulkier than needed for small-batch prep
2. Stainless Steel Herb Stripping Tool
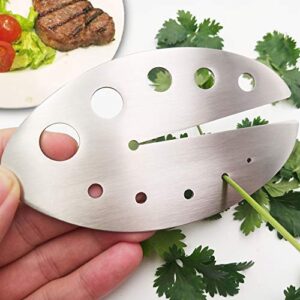
Stripping stems by hand is slow and honestly a little tedious. This little gadget fixes that — eleven holes sized for everything from skinny thyme to thick rosemary. Slide the stem in, pull, done. Leaves land in a pile, stems stay behind.
It’s built from food grade 304 stainless steel, so it won’t rust or pit after repeated use. Works great on kale and collards too. One tool, most of your herb prep — and it cleans up in seconds.
| Best For | Home cooks who use woody herbs like rosemary, thyme, and oregano often and want a quick, no-fuss way to strip stems without the finger work. |
|---|---|
| Material | Stainless Steel |
| Herb Drying Function | Strips herb stems for drying |
| Ease of Cleaning | Easy hand wash |
| Countertop Use | Yes |
| Reusability | Reusable and eco-friendly |
| Multi-Purpose Use | Kale stripper, snack prep |
| Additional Features |
|
- Eleven different hole sizes handle everything from thin thyme to thick rosemary stems
- Food grade 304 stainless steel resists rust and corrosion, so it holds up over time
- Doubles as a kale and collard green stripper, plus it’s quick to wipe clean
- Only one tool, so switching between very different stem sizes means repositioning each time
- Still requires manually pulling every stem through by hand, no automation involved
- Very lightweight (0.18 lb) and thin design might feel less sturdy to some users
3. Excalibur Electric Food Dehydrator Clear Door
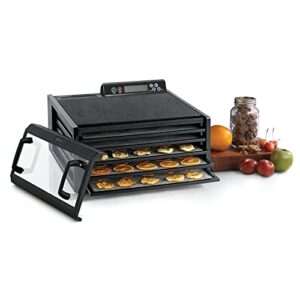
Want herbs done in hours, not days? This countertop unit runs 95°F to 165°F, so you control drying speed instead of waiting on the weather.
The clear polycarbonate door lets you check progress without losing heat or humidity — no more peeking and letting warmth escape.
Five trays give you 8 square feet of space, and Hyperwave horizontal airflow dries everything evenly. No flipping, no guessing, no burnt edges.
| Best For | Home cooks who want to make their own jerky, dried fruit, or preserved herbs without babysitting the process. |
|---|---|
| Material | Plastic |
| Herb Drying Function | Dehydrates herbs with heat |
| Ease of Cleaning | Wipeable trays and door |
| Countertop Use | Yes |
| Reusability | Reusable long-term unit |
| Multi-Purpose Use | Jerky, yogurt, bread proofing |
| Additional Features |
|
- Clear polycarbonate door lets you monitor drying without opening it and losing heat
- Hyperwave horizontal airflow dries food evenly, so there’s no need to rotate trays
- 48-hour digital timer with dual time/temperature settings makes it easy to set and forget
- Only works with 110/120V outlets, so it won’t work internationally
- Plastic housing isn’t as sturdy as metal dehydrators
- 5 trays may not offer enough space for large batches or commercial use
Store Dried Herbs for Fresh Flavor

Drying is only half the battle. All that hard work goes to waste if you toss your herbs in a random cabinet and forget about them. Here’s how to lock in that flavor for the long haul.
Use The Snap Test
How do you know your herbs are actually done? Bend a stem — a clean snap means you’re set. If it just folds, keep drying. This quick check confirms moisture’s gone before storage.
A clean snap of the stem tells you your herbs are fully dry and ready to store
Crumbly leaves, brittle aroma, papery texture — all signs your natural drying method worked, and it’s time to jar them up.
Remove Any Moldy Pieces
One bad leaf can spoil the whole batch — so don’t skip this step. Scan every piece for powdery patches, black specks, or a slimy stem. Trust your nose too — musty odor means toss it.
Cut moldy sections with sanitized scissors on a clean board, away from your drying area. Check yield after, then move on fast to stop spread.
Store in Airtight Jars
Once your herbs pass inspection, jar them up right away. Glass jars with a rubber gasket create a true vacuum seal, blocking air and stopping oxidation loss cold.
- Musty, stale herbs by spring
- Crisp, potent flavor for months
- Mold sneaking back into your stash
Check the gasket before sealing — cracked ones ruin airtight performance no matter how tight you twist.
Keep Jars Cool and Dark
Sealing the jar’s only half the job — where you put it matters just as much. Aim for 50°F to 70°F, away from stoves or sunny windows.
Light fades color fast, so a dark cabinet beats an open shelf every time. Amber glass helps block UV rays, but darkness still does the heavy lifting.
Label Harvest Dates
Grab a marker and jot the date right on the lid — future you will say thanks. This tiny habit is the backbone of good postharvest handling and keeps your harvest log honest.
Try Harvested July 2026 for date format clarity. That one glance boosts freshness perception and makes inventory management a breeze.
Frequently Asked Questions (FAQs)
What is the fastest way to dry herbs?
A dehydrator set to 95°F–115°F beats every other method for speed and control. No dehydrator? Try the oven on low with the door cracked, or microwave leaves between paper towels for quick, small batches.
Which herbs can you air dry?
Woody herb varieties like rosemary, thyme, sage, and oregano are your best drying candidates. Lavender works too. Tender leaf challenges show up with basil, mint, and cilantro — they mold fast, so treat these fragile herbs with extra care.
How long does it take to air dry herbs?
Hardy herbs like rosemary and thyme take 7 to 14 days. Tender herbs dry faster but risk mold—humidity, airflow, and moisture control all affect evaporation rate, so watch closely and trust the snap test over the calendar.
What herbs should you not dry?
Basil, mint, chives, and cilantro don’t air dry well — they’re too high in moisture and mold-prone. Freezing preserves their aroma and nutrients better, avoiding the volatile oil loss and browning that plague slow air drying methods.
Can dried herbs be dried using a dehydrator machine?
Like a mini oven built just for leaves, a food dehydrator works great. Set it 95–115°F, and uniform airflow locks in essential oils fast — usually 1 to 4 hours, way quicker than the oven method.
Is oven drying safe for delicate herb varieties?
Yes, with care. Keep oven heat between 90–110°F, prop the door open, and use a thermometer for accurate monitoring — hotspots and trapped moisture cause scorching or mold, so a dehydrator’s convection airflow is often gentler.
Can microwave drying work for small herb batches?
Nuke your herbs into oblivion? Not quite — small batches actually thrive here. Layer leaves between paper towels, microwave in 30-60 second pulses at 800 watts. This prevents thermal degradation while locking in flavor better than slow oven drying.
Should chives or cilantro be frozen instead of dried?
For chives and cilantro, freezing beats drying every time. It locks in essential oils and that fresh oniony or citrusy punch, keeping cells intact so texture stays closer to fresh. Toss frozen portions straight into soups and sauces — no thawing needed.
How long do properly dried herbs stay flavorful?
Grandma’s basil jar, sealed and shelved for two years, still smelled sharp when opened. That’s potency at work: whole dried herbs hold flavor 1-3 years airtight, dark, and cool — woody types like thyme lasting longest, delicate leaves fading closer to six months.
Conclusion
Funny thing: the herbs you once ignored on the counter are now saving your soup, your tea, and your grocery bill. Airflow, low humidity, and patience are the real secret — not luck, not fancy gear.
Once you learn to air dry herbs quickly, the process stops feeling like a gamble and starts feeling like routine. Snap-test them. Jar them. Label them. That’s it.
Your pantry just got a lot greener, one dusty bundle at a time.