This site is supported by our readers. We may earn a commission, at no cost to you, if you purchase through links.

Most people assume growing strawberries requires a sprawling garden and years of horticultural experience. Neither is true.
A single plant tucked into a hanging basket or a 12‑inch container can produce berries sweeter than anything you’d find at the grocery store—because homegrown fruit ripens fully before it’s picked, not in a shipping truck. The difference in flavor is that dramatic.
Whether you’ve got a sunny backyard, a south‑facing balcony, or just a spare corner of a raised bed, there are easy ways to grow strawberries that fit your space and skill level.
This guide walks you through every step, from choosing the right variety to harvesting your first perfectly ripe berry.
Table Of Contents
- Key Takeaways
- Choose Easy Strawberry Varieties
- Pick The Best Planting Spot
- Prepare Strawberry Soil Properly
- Plant Strawberries Step-by-Step
- Grow Strawberries in Small Spaces
- Water, Feed, and Mulch Strawberries
- Manage Runners, Pests, and Winter
- Harvest and Store Fresh Strawberries
- Top 10 Strawberry Growing Supplies
- 1. Goottan Hydroponic Herb Garden Kit
- 2. Michigan Peat Garden Magic Organic Potting Soil
- 3. Espoma Organic Land Sea Compost
- 4. Square Foot Gardening 3rd Edition
- 5. Professional Grade Super Coarse Vermiculite
- 6. Fertilome Compressed Peat Moss
- 7. Grow Organiks Organic Coco Coir Brick
- 8. VermisTerra Organic Worm Castings Fertilizer
- 9. Rabbit Hill Farms Rabbit Manure Fertilizer
- 10. Espoma Organic Chicken Manure Fertilizer
- Frequently Asked Questions (FAQs)
- Can I grow strawberries in October?
- What is the easiest way to grow strawberries?
- Do strawberries grow better in pots or the ground?
- Do coffee grounds help strawberries grow?
- How do you grow a good strawberry plant?
- How do you grow strawberries in a small space?
- Can you grow strawberries directly in the ground?
- How do you grow strawberries in a basket?
- How to grow strawberries for beginners?
- How do you plant strawberries in a container?
- Conclusion
Key Takeaways
- Matching your strawberry variety to your harvest goals — one big flush with June-bearers, steady picks with day-neutrals, or low-fuss production with alpine types — is the single biggest factor in long-term success.
- Soil prep matters more than most gardeners expect: aim for a pH of 5.5–6.5, fix drainage before planting, and never follow nightshade crops like tomatoes or peppers in the same bed.
- Crown placement is the make-or-break moment — set it exactly at soil level, spread roots outward, and water deeply right after planting to lock in a strong start.
- You don’t need a yard to grow strawberries; containers, hanging baskets, vertical towers, and gutters all produce real harvests when you give plants 6+ hours of sun and about one inch of water per week.
Choose Easy Strawberry Varieties

Picking the right strawberry variety is the first step to a successful harvest.
Your choice should also account for soil quality, since different varieties thrive in different conditions—check out this guide to the best soil for growing strawberries to set your plants up for success.
Some types give you one glorious burst of fruit, while others keep producing all season long. Here are the main varieties worth knowing before you plant.
June-bearing Strawberries for One Big Harvest
If you’re after one glorious, all-at-once harvest, June-bearing strawberries are your best bet.
They produce a focused three-week flush of large, uniform berries — fruit uniformity at its finest.
Plant them in well-prepped garden beds, time your fertilizer application to early new growth, and mulch well to keep roots cool during heat stress.
Pollinators do the rest.
A full sun requirement is essential for a healthy crop.
Ever-bearing Strawberries for Multiple Harvests
Unlike the June-bearer’s single grand finale, everbearing strawberries spread the joy across the season — two to three harvests from late spring through fall.
Here’s what makes them worth growing:
- Harvest Timing Strategies align naturally with summer rhythms
- Fruit Size Consistency stays steady across picks
- Fertilizer Rotation after each flush keeps plants productive
- Mulching benefits regulate soil temperature between harvests
- Winter protection for perennial strawberries extends your seasonal yield forecast year after year
Day-neutral Strawberries for Steady Fruiting
Day-neutral strawberries take a different approach entirely — they don’t care about day length at all. That Photoperiod Independence means flowering starts in spring and keeps going until hard frost hits.
Varieties like ‘Albion’ and ‘Seascape’ reward Continuous Harvest Scheduling with steady picks every few days.
Keep temperatures moderate, nail your Nutrient Timing, and these reliable producers stay productive all season long.
Alpine Strawberries for Containers and Small Spaces
If day-neutrals feel too hands-on, alpine strawberries are your low-fuss answer for small-space strawberry gardening. These compact plants — just 6 to 8 inches tall — fit beautifully in low-height containers, hanging baskets, or a vertical strawberry garden on your balcony.
Early blooming kicks off the season ahead of most varieties.
Reflective pots support microclimate cooling, and their legendary flavor concentration makes every tiny berry worth it.
Disease-resistant Varieties for Easier Care
Choosing disease-resistant plants takes a lot of guesswork out of disease management. Varieties bred for fungal resistance — including gray mold and powdery mildew — naturally hold up better in wet springs without constant intervention. Verticillium tolerance keeps roots healthy even in heavy soils.
The payoff? Reduced fungicide use, low maintenance routines, and improved yield season after season. These are the strawberries that practically look after themselves.
Pick The Best Planting Spot

Where you plant your strawberries matters more than most people think. The right spot can mean the difference between a bumper crop and a handful of sad, small berries.
Here’s what to look for before you dig your first hole.
Choose 6–10 Hours of Direct Sun
Strawberries are sun lovers — they need 6–10 hours of direct sunlight daily to fruit well. A south or southwest-facing bed is your best bet for full sun exposure across the season.
Morning sun orientation dries dew quickly, reducing disease. In hot climates, light afternoon shade helps with shade mitigation.
Nearby light concrete acts as reflective surfaces, boosting your garden microclimate utilization naturally.
Avoid Low Frost Pockets
Low spots in your garden are frost traps. cold air sinks and pools in depressions, and even a 1–2 meter elevation difference shifts frost risk dramatically. Choose higher, gently sloping ground where slope grading channels cold air away naturally.
Watch out for these frost and cold weather considerations for strawberries:
- Drainage swales redirect cold runoff before it settles under crowns
- Thermal mass from nearby stone walls releases stored daytime heat overnight
- Reflective barriers boost garden microclimate utilization around vulnerable plants
- Windbreak placement at pocket edges prevents cold air from stagnating
Select Areas With Good Airflow
Good airflow is your first defense against powdery mildew and wet-rot issues.
Cross‑breeze placement means positioning your beds where wind naturally moves from two directions — think open‑corridor design between rows, not blocked by fences.
Air‑gap spacing between plants helps dry the leaf canopy fast after rain.
Slatted bed sides and light‑colored mulch further reduce moisture buildup around crowns.
Use Raised Beds for Heavy Soil
Heavy clay soil drains like a clogged sink — and strawberry roots hate wet feet.
That’s why raised beds are a real asset.
sturdy bed frame with good bed frame durability, filled with a perlite soil mix and garden compost, delivers root zone aeration that clay simply can’t.
coarse gravel base for soil drainage, and adjustable bed height makes every square inch of soil amendment work harder for you.
Use Containers for Patios and Balconies
Don’t have a garden? No problem — your balcony can grow a surprisingly productive strawberry patch. Container strawberry growing works beautifully on patios when you get a few basics right:
- Balcony Sun Positioning: Place pots on south-facing spots for 6–8 hours of direct sun
- Compact Container Materials: Lightweight plastic or resin pots keep loads under 20 kg
- Self‑Watering Reservoirs: Built‑in reservoirs cut daily watering by about 30 percent
- Wind Protection Strategies: Use decorative lattice or grouped planters as a windbreak
- Decorative Container Layouts: Arrange containers by water needs to simplify your routine
Prepare Strawberry Soil Properly

Strawberries are picky about their soil — get it right, and they’ll reward you with a bumper crop. A few simple adjustments before you plant can make all the difference between thriving plants and struggling ones.
Here’s what your soil needs to set your strawberries up for success.
Aim for Soil PH 5.5–7.0
Strawberries are picky about soil acidity — they grow best when your soil pH sits between 5.5 and 7.0, with 6.0 being the sweet spot for nutrient availability.
Before any soil preparation for strawberry cultivation begins, grab a pH testing kit to check your buffer capacity.
If your soil reads too acidic, apply lime; if too alkaline, use sulfur.
Organic adjusters like compost also support stable soil pH and acidity management, but amendment timing matters — apply several months before planting for best results.
Improve Clay Soil With Compost
Clay soil drains poorly and compacts fast — not ideal for strawberry roots. Work at least 4 inches of compost into your beds as part of soil preparation for strawberry cultivation.
This compost incorporation improves structure enhancement almost immediately: pore spaces open up, roots breathe more easily, and moisture retention improves. Microbial boost follows naturally, supporting steady nutrient release that feeds plants without overwhelming them.
Add Organic Matter to Sandy Soil
Sandy soil is basically the opposite problem — it drains too fast and holds almost nothing back for your roots. That’s where organic matter earns its keep.
For solid soil preparation for strawberry cultivation, work these in:
- Compost Layer Depth — spread 2–4 inches, then dig it into the top 6–8 inches
- Peat Moss Benefits — holds moisture where sand lets it escape
- Biochar Integration — locks nutrients in place so they don’t wash straight through
- Leaf Mold Application — light, easy to work with, and feeds soil microbes well
Well-rotted manure and organic fertilizer round things out nicely — just time your Manure Timing right, adding it a few weeks before planting.
Use Well-draining Potting Mix for Containers
Container strawberries need a mix that drains fast but still holds some moisture — think of it like a sponge with big holes. Aim for 50–70% pore space optimization by blending coir or peat with drainage enhancers like perlite.
Here’s how common mix components compare:
| Component | Role | Best For |
|---|---|---|
| Coconut Coir | Moisture retention, aeration | Coir vs Peat balance |
| Perlite | Drainage enhancer, air pockets | Perlite Ratio adjustment |
| Compost | Nutrients, structure | Organic potting soil base |
| Peat Moss | Water retention | Drier climates |
| Bark/Pumice | Coarse drainage layer | Heavy-watering gardeners |
Refresh your mix every 1–2 years — compaction quietly kills drainage over time.
Avoid Planting After Tomatoes, Peppers, or Eggplant
If you’ve grown tomatoes, peppers, or eggplant in a bed, don’t rush to plant strawberries there. These nightshade crops leave behind real pathogen carryover risks — Fusarium, Verticillium, and root-knot nematodes can linger in the soil for years.
Soil nutrient depletion is another concern, since calcium and phosphorus often take a hit. Crop rotation benefits kick in after a three-year break, giving soil time to recover.
Plant Strawberries Step-by-Step
Getting strawberries in the ground the right way makes everything else easier. Timing, spacing, and how you set each plant all play a bigger role than most people expect.
Here’s exactly what to do, step by step.
Plant in Early Spring After Frost

Early spring is your window — but timing matters. Wait until both soil and air temperatures climb above 40°F, and you have a stable frost-free window of two to three weeks.
soil warming speeds root development and reduces transplant shock. Focus on crown level planting with moisture management from day one, and add a light straw mulch for unexpected cold snaps.
Plant in Early Fall for Root Establishment

Fall planting is a smart move that most gardeners overlook. When you plant in early fall, the still-warm soil — that’s root zone warming at work — drives strong root development before winter sets in.
Keep an eye on fall soil temperature; roots thrive above 50°F.
Add a pre-winter nutrient boost with compost, layer mulch for frost protection, and your crowns head into dormancy well-anchored.
Space Plants 18–24 Inches Apart
Think of spacing as your plants’ personal breathing room. Aim for 18–24 inches between each plant — this directly promotes healthy root development, reduces plant density pressure, and keeps soil moisture from pooling around crowns.
Tighter gaps invite disease; wider gaps enhance yield.
Whether you’re working a garden bed or container, proper plant spacing is the foundation of any smart, space-efficient strawberry strategy.
Space Rows 3–4 Feet Apart
Row spacing does more than just organize your garden bed design — it’s what keeps your plants breathing. Leave 3–4 feet between rows for airflow benefits that directly support disease reduction, especially against Botrytis and mildew.
That gap also ensures soil moisture uniformity and gives you clear equipment access for mulching and harvesting. Good plant spacing here is the backbone of yield consistency.
Set Crowns at Soil Level

Crown placement is the make-or-break moment in planting strawberry plants.
Set each crown exactly at soil level — not buried, not raised.
Too deep blocks crown airflow and invites rot; too high dries out the root zone access point fast.
Avoid letting any soil mound technique cover the crown during backfilling.
Do regular crown health checks during the first week, since settling soil can shift things unexpectedly.
Spread Roots Before Backfilling

Once the crown is level, gently spread the roots outward in a natural root fan shape — like fingers fanning open. This helps with air pocket elimination as you gradually backfill soil around them.
Work the soil in layers, firming gently to maintain root ball integrity. Never twist or force roots into tight spots.
Good soil preparation for strawberry cultivation starts right here, at the roots.
Water Thoroughly After Planting

With the roots settled in, give your plants a thorough drink right away. Aim for root zone saturation — water slowly using a gentle soak technique until moisture reaches 6 to 12 inches deep.
Soil moisture monitoring starts now: check daily for the first week. Morning watering benefits your plants the most, reducing disease pressure. Avoid overwatering — damp soil, not soggy, keeps crowns healthy.
Grow Strawberries in Small Spaces

No yard? No problem — strawberries don’t need much room to thrive.
Whether you’ve got sunny balcony, a fence wall, or just a spare corner of your patio, there’s a setup that works for you.
Here are seven small-space growing options worth trying.
Container Strawberry Growing
Even a small patio can become a productive berry patch with the right container strawberry growing techniques. Container strawberry cultivation gives you full control over soil, drainage, and light exposure — no yard required.
- Use 12–16 inch pots with multiple drainage holes as your go-to drainage solution
- Fill with a portable soil mix of compost, perlite, and quality potting medium
- Follow light exposure tips: aim for 6+ hours of direct sun daily
- Explore vertical container systems like stacked pots or tower planters to multiply your harvest space
- Stay on top of seasonal maintenance by renewing soil each spring
Hanging Basket Strawberries
Hanging baskets take container strawberry growing techniques to a whole new level — literally. A good Basket Design starts with a coco coir-lined basket, roughly 12–14 inches wide, with solid Drainage Solutions built in.
Hang them at a comfortable Hanging Height, around eye level, so Light Adjustment is easy and pollinators can reach the blooms.
Everbearing varieties trail beautifully and fruit all season long.
Vertical Strawberry Towers
Stacking your harvest upward is what makes vertical strawberry towers such a smart move for tight spaces. Each tower’s Modular Pocket Design holds individual plants at staggered intervals — that’s Tiered Light Optimization in practice.
A top reservoir manages Gravity Irrigation, feeding every level evenly. Good Airflow Management keeps disease low.
Best of all, Portable Tower Relocation means you can chase the sun all season.
Raised Bed Strawberry Planting
Raised beds give you control that in-ground planting simply can’t match. Build your Bed Frame Materials from cedar or redwood — both resist rot through several seasons.
Add a Weed Barrier Installation along the bottom, then layer in a Drainage Layer Design of coarse sand before your strawberry soil mix.
Space plants 12–18 inches apart, lay drip irrigation beneath mulch, and practice crop rotation every few years.
Pallet Strawberry Planters
Got an old pallet collecting dust? You’re sitting on one of the best DIY garden projects around. A heat-treated wooden pallet becomes a vertical strawberry bed that fits a fence, balcony, or patio corner. Line it with landscape fabric for solid Drainage Solutions, fill it with a rich mix, and you’ve got a compact upcycled garden project ready to grow.
- Pallet Construction Materials like exterior screws and burlap lining to secure the frame
- Modular Planting Zones by tucking plants into each slat gap for Root Space Optimization
- Seasonal Maintenance Tips: refresh soil yearly and mulch crowns before winter
Gutter Strawberry Gardens
Rain gutters aren’t just for rooftops. Mount them horizontally on a fence or wall, and you’ve got a tidy vertical gutter design that turns dead wall space into a productive strawberry row.
| Gutter Setup Detail | Recommendation |
|---|---|
| Gutter length | 6–8 feet |
| Plants per gutter | 8–12 plants |
| Spacing between plants | 6–8 inches |
| Drainage management | Drill holes every 12 inches |
| Seasonal gutter maintenance | Flush and sanitize each fall |
Use a lightweight potting mix, run a drip line along the channel, and your compact harvesting methods stay simple — just walk the row and pick.
Hydroponic Strawberry Growing
No soil? No problem. A hydroponic strawberry garden lets you grow berries year-round with precise control over nutrients and environment.
Keep your nutrient solution’s pH between 5.5 and 6.5, and use a drip irrigation system to deliver it directly to the roots. Good media aeration — coco coir works well — prevents rot.
Add LED lighting for 12–16 hours daily, and your hydroponic strawberry production stays consistent season after season.
Water, Feed, and Mulch Strawberries

Once strawberries are in the ground, how you water, feed, and mulch them makes all the difference between a few sad berries and a bumper crop. The good news is that none of it is complicated — you just need to know the right amounts and the right timing.
Here’s what to do at each stage.
Provide About 1 Inch of Water Weekly
Think of water as your strawberries’ weekly paycheck — they need about one inch to stay productive. That’s roughly 0.62 gallons per square foot, delivered consistently to the root zone.
A reliable watering schedule prevents the wet-dry swings that crack fruit and stress roots. Smart irrigation timing with a drip irrigation system keeps soil water capacity balanced while cutting evaporation loss and guesswork substantially.
- Use drip irrigation or soaker hoses for direct root zone hydration
- Check soil moisture monitoring techniques by probing two inches deep
- Factor in rainfall integration before running your irrigation system
- Apply mulching to slow surface evaporation and retain moisture longer
- Track weekly water requirements with a simple rain gauge near the bed
Increase Watering During Hot, Dry Weather
When temperatures climb, your strawberries’ water requirements jump from one inch to nearly 1.5 inches weekly. Morning deep soak sessions reduce evaporation and cool the root zone before midday heat peaks.
soil moisture monitoring — a quick finger check two inches down — with a consistent irrigation scheduler and mulching layer.
Container water retention drops quickly in heat, so check pots twice daily.
Use Drip Irrigation or Soaker Hoses
Drip irrigation and soaker hoses keep foliage dry — and that’s a big deal for preventing fungal issues. Both systems deliver water right to the root zone, cutting evaporation losses substantially.
- Place emitters 6–12 inches from each plant for precise watering and irrigation
- pressure compensation to maintain steady flow across your whole bed
- filtration system to prevent emitter clogging
- automated scheduling for consistent soil moisture monitoring techniques
- Winterizing irrigation lines before freezing temps prevents costly cracking
Fertilize When New Growth Appears
Once you spot first green tips unfurling, that’s your cue to fertilize. Application timing matters — feeding too late means missing the growth window.
Use a balanced NPK ratio like 10-10-10, applying at half strength to avoid root burn. Water it in well; moisture linked feeding helps roots absorb nutrients efficiently.
For a gentler approach, an organic liquid feed or well-rotted manure works beautifully for steady soil fertility.
Feed After Fruiting to Support Runners
Once fruiting winds down, your plants shift focus to runner production — and that’s when feeding really pays off.
Apply a balanced NPK fertilizer about two weeks after fruiting, then side-dress with post-harvest compost or worm castings a month later.
Keep runner soil moisture consistent with drip irrigation delivering around one inch weekly.
A microbial inoculant application at this stage helps nutrient cycling beautifully.
Use High-potassium Fertilizer During Flowering
When flower buds first appear, switch to a high-potassium fertilizer — this is your most important application timing window. Potassium strengthens cell walls, facilitates carbohydrate transport to blooms, and directly improves fruit set.
Liquid potassium sources like tomato feed work fast; organic foliar sprays from kelp extract offer gentler nutrient supplementation.
Watch for yellowing between leaf veins — a classic deficiency symptom.
Always balance potassium with calcium to avoid hollow fruit.
Mulch With Straw, Pine Needles, or Leaves
Mulching does more work than most gardeners realize.
2–3 inch layer of straw cuts soil evaporation by roughly 30 percent — that’s real moisture retention without extra watering.
It also manages weed suppression, temperature regulation, and disease prevention by stopping soil from splashing onto leaves.
Good mulch options include:
- Straw — light, affordable, slow to decompose
- Pine needles — slightly acidic, great for pH management
- Shredded leaves — excellent nutrient enrichment as they break down
- Black plastic — maximum weed control, minimal organic benefit
Manage Runners, Pests, and Winter

Once your strawberries are growing strong, a little ongoing maintenance goes a long way toward keeping them healthy and productive. That means staying on top of runners, watching for pests, and making sure your plants survive the winter without a hitch.
Here’s what to do at each stage.
Remove Excess Runners for Bigger Berries
Think of strawberry runners as tiny energy thieves — each one you leave unchecked steals from your berries. Smart runner removal is core to your seasonal care schedule for strawberry plants. Consistent pruning redirects Energy Allocation toward fruit, improving Nutrient Balance and boosting Fruit Sweetness noticeably.
Every runner you leave unchecked steals energy from your berries — prune consistently for sweeter fruit
| Timing Strategies | Pruning Tools | Result |
|---|---|---|
| Weekly during fruiting | Sharp bypass pruners | Larger, sweeter berries |
| Early season removal | Sterilized scissors | Better Energy Allocation |
| Throughout for day-neutrals | Clean snips at crown | Improved Nutrient Balance |
Root Selected Runners for New Plants
Not every runner deserves a spot in your garden — but the right ones are basically free plants. Runner Selection Criteria comes down to choosing vigorous, low-stress stems with visible root initials at the node. Once you’ve picked your candidates, follow these steps for successful propagation of strawberries using runners:
- Pin the node firmly to moist, well-draining soil — Node Moisture Management prevents both drought stress and rot
- Wait 7–14 days for Root Initiation Timing — tiny root primordia appear by week two
- Maintain Temperature Optimization by keeping the rooting area between 60–75°F for faster establishment
- Practice careful Separation Care once roots hit 2–3 inches — then treat them like bareroot strawberries
Keep Weeds Away From Strawberry Crowns
Weeds growing right up against strawberry crowns are trouble — they steal moisture, invite disease, and crowd out your plants fast.
Start with Preplant Weed Barriers, like cardboard during soil preparation, then practice Mulch Depth Control by keeping 3–4 inches of straw between rows.
Use Crown Zone Monitoring weekly, pulling anything within 2–3 inches of the crown.
Raised Bed Design and smart Groundcover Selection between rows make weed control much easier long-term.
Use Mulch to Reduce Soil-splash Disease
soil splash is one of the sneakiest ways disease reaches your strawberries — a single raindrop can flick pathogens like gray mold straight onto developing fruit. Smart mulching stops that cycle before it starts.
Follow these Mulch Depth Guidelines and Mulch Placement Techniques for solid pest and disease management in your strawberry garden:
- Spread 1–2 inches of straw or pine needles around each plant — these Disease‑Suppressive Mulch Types resist compaction and block splash effectively
- Keep mulch 1–2 inches away from crowns for proper airflow — a key Mulch Placement Technique
- Stick to a Mulch Refresh Schedule, replenishing material monthly to maintain a consistent protective barrier
- Use Mulch Moisture Management to retain 5–10% more soil moisture, which reduces stress-related cracking that invites disease
- Combine mulching and weed suppression — fewer weeds mean fewer disease vectors sheltering near your fruit
Inspect Leaves for Pests Regularly
Mulch keeps disease off the soil, but you still need to watch the leaves themselves. Flip them over weekly — pale stippling signals spider mites, sticky residue means aphids, and silvery streaking reveals thrips.
Early Damage Detection through Leaf Surface Scanning is your best organic pest control.
Catch Pest Indicator Signs early, and a simple rinse or insecticidal soap addresses most problems before they spread.
Cut Foliage Back After First Frosts
Once pests are handled, shift your attention to Post-Frost Pruning. After the first hard frost hits, use sharp Pruning Tools to cut foliage down to about an inch above the crowns — this Leaf Removal Technique keeps disease from overwintering in dead tissue.
Crown Insulation starts here.
Begin Recovery Monitoring within a few weeks, watching for healthy new growth as a sign your winterizing worked.
Add Winter Mulch for Cold Protection
Once the foliage is trimmed back, it’s time to tuck your plants in for winter. Your mulch material choice matters here — straw, pine needles, or shredded leaves all work well.
For winterizing strawberry beds, apply a 2–4 inch layer after the first hard frost. This depth guideline balances insulation benefits with moisture management, shielding crowns without suffocating them.
Remove Mulch in Spring After Frost Danger
Spring doesn’t give you a clean signal — it creeps in. That’s why mulch timing matters more than the calendar. Wait until soil temperature at root depth climbs reliably above 40°F before pulling back your winter cover.
- Check overnight lows for frost pocket management before removing anything
- Rake mulch gently away from crowns to avoid stem damage
- Leave a light ring around plants for crown protection and weed suppression
- Inspect drip lines for clogs, then make your irrigation adjustment
- Apply a thin compost layer to feed roots as growth resumes
Harvest and Store Fresh Strawberries

All that care you’ve put into your strawberry patch comes down to this moment — picking and keeping those berries right. Getting the timing and handling right makes all the difference between sweet, firm strawberries and mushy ones that don’t last.
Here’s what you need to know to harvest and store them properly.
Pick Berries When Fully Red
Think of your berries as a stoplight — only green means go if you’re talking about traffic, but in your garden, you’re waiting for full red.
Color indicators, aroma cues, and texture checks work together: look for uniform crimson, sniff for that sweet fragrance near the stem, and press gently for slight give.
Morning harvest, with gentle snipping, keeps quality at its peak.
Harvest Every Three Days During Peak Season
During peak season, stick to a three-day harvest schedule — your fruit ripeness indicators will tell you it’s time, and waiting longer invites overripening, sunburn, and pest damage.
This harvest frequency helps yield maximization by signaling plants to keep flowering.
For heat stress mitigation, pick in the morning while berries are firm.
Good harvest scheduling also keeps your labor efficiency high and your seasonal care schedule for strawberry plants on track.
Snip Stems Instead of Pulling Fruit
Snipping stems instead of pulling fruit is one of the simplest disease prevention techniques you can add to your harvest routine. A clean cut just above the calyx delivers real stem removal benefits:
- Reduces berry bruising from tugging
- Prevents calyx tearing that invites mold
- Speeds harvest — a genuine harvest speed boost
- Extends storage freshness
- Protects crown tissue from damage
Use sharp, clean shears every time.
Refrigerate Unwashed Berries for 3–5 Days
Your berries’ shelf life depends almost entirely on what you do in the first few minutes after picking. Skip washing them — moisture is the enemy of mold prevention techniques.
Instead, place harvested strawberries in breathable storage containers, single-layered to avoid bruising. Keep them away from bananas for ethylene exposure reduction.
Cooler humidity control at 1–4°C preserves texture beautifully. Label containers for shelf life monitoring — you’ve got a 3–5 day harvest window.
Wash Berries Only Before Eating
Washing strawberries too soon is one of the fastest ways to ruin them. Always do a Cold Water Rinse right before eating—not before. When you’re ready, here’s the method:
- Place berries in a clean colander, using cool running water for 30 seconds.
- Gently agitate with your fingers—avoid soaking at all costs.
- Pat dry immediately; gentle drying prevents mold from taking hold.
Freeze Whole Strawberries for Later Use
Flash freezing is your best friend for postharvest storage. Wash and dry the berries, then spread them in a single layer on a parchment-lined tray.
Freeze for 2–3 hours, then move them into airtight packaging with the air pressed out.
Good labeling rotation keeps your storage lifespan on track — quality holds for 6–9 months at 0°F.
Thaw overnight in the fridge before using.
Top 10 Strawberry Growing Supplies
Having the right supplies makes strawberry growing a whole lot easier — and more rewarding. Whether you’re working with containers, raised beds, or a hydroponic setup, a few key products can give your plants a serious head start.
Here are ten supplies worth having on hand before you get started.
1. Goottan Hydroponic Herb Garden Kit
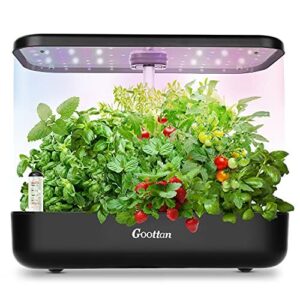
The Goottan Hydroponic Herb Garden Kit is a smart pick if you want to grow strawberries year-round without a patch of soil. Its 12 detachable pods let you run several varieties at once, and the built‑in 36W full‑spectrum LED light fills the sunshine gap automatically.
Setup is straightforward — no prior hydroponic experience needed.
Just note that replacement pods run about $16 for three, and some users report electrical issues after 8–12 months, so factor that into your budget.
| Best For | Home cooks and beginners who want fresh herbs or greens year-round without any outdoor space or gardening experience. |
|---|---|
| Product Type | Hydroponic Garden Kit |
| Organic Suitable | No |
| Indoor Use | Yes |
| Outdoor Use | No |
| Primary Benefit | Year-round growing |
| Skill Level | Beginner |
| Additional Features |
|
- Grows up to 12 plant varieties at once with the detachable pod system
- The built-in LED light and auto timer do the heavy lifting for you
- Most herbs sprout within two weeks — fast results with minimal effort
- Electrical failures (lights and pump) have been reported after 8–12 months of use
- Replacement pods cost around $16 for just three, which adds up quickly
- Seeds aren’t included, so your total startup cost is higher than it first appears
2. Michigan Peat Garden Magic Organic Potting Soil
If you’d rather skip the DIY soil blending and just get your hands dirty, Michigan Peat Garden Magic is worth keeping on hand.
This 40 lb bag ($26.99) blends reed sedge peat, perlite, and sand into a ready-to-use mix that works straight from the bag — no measuring required. It loosens clay soil, holds moisture in sandy beds, and drains well enough for containers. One thing to note: it occasionally contains wood fragments, so sift it first for young transplants.
| Best For | Gardeners who want a no-fuss, ready-to-use mix for containers, raised beds, or improving problem soils without any blending. |
|---|---|
| Product Type | Potting Mix |
| Organic Suitable | No |
| Indoor Use | Yes |
| Outdoor Use | Yes |
| Primary Benefit | Soil structure |
| Skill Level | Beginner |
| Additional Features |
|
- Works straight out of the bag — no mixing or measuring needed
- Handles both ends of the soil spectrum, loosening clay and adding moisture retention to sandy ground
- Versatile enough for indoor pots, outdoor beds, and lawn top-dressing
- May contain wood fragments, so you’ll want to sift it before using with delicate seedlings
- Pricier than bulk topsoil you’d grab at a local hardware store
- Bags occasionally arrive damaged, which means dealing with a replacement or cleaning up a mess
3. Espoma Organic Land Sea Compost
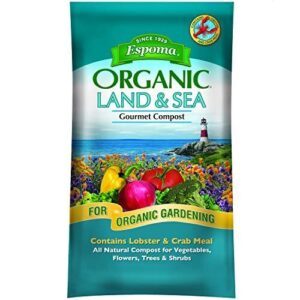
If you want to give your strawberries a real head start, Espoma Organic Land and Sea Compost brings something a little different to the bed. It blends land-based peat and humus with marine-derived crab and lobster meal — a nutrient combination most standard composts skip entirely. The Myco-Tone mycorrhizal fungi blend helps roots establish faster and pull in more nutrients from day one.
Mix it into your planting beds or use it as a top-dressing every couple of months. No synthetic chemicals, just solid organic support.
| Best For | Gardeners who want a premium organic boost for vegetables, flowers, or container plants and don’t mind paying a little extra for marine-derived nutrients. |
|---|---|
| Product Type | Organic Compost |
| Organic Suitable | Yes |
| Indoor Use | Yes |
| Outdoor Use | Yes |
| Primary Benefit | Nutrient enrichment |
| Skill Level | Beginner |
| Additional Features |
|
- The lobster and crab meal adds nutrients most composts don’t, giving plants a richer, more varied diet.
- The Myco-Tone fungal blend helps roots establish faster, so plants hit the ground running.
- Works in almost any setup — mix it into beds, containers, or use it as a top-dressing.
- It’s pricier than standard compost, which makes it tough to justify for larger garden areas.
- Not always easy to find in stores, so you may end up ordering online and waiting.
- A few customers have gotten bags that arrived torn or damaged, which can be a hassle.
4. Square Foot Gardening 3rd Edition
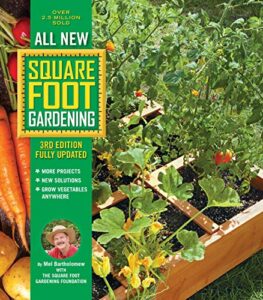
Once your soil is dialed in, knowing where to put each plant makes a real difference — and that’s where Square Foot Gardening, 3rd Edition, earns its place on the shelf. Mel Bartholomew’s grid system breaks your raised bed into 1-foot squares, so spacing strawberries becomes almost foolproof.
The book walks you through building your bed, mixing the ideal lightweight soil blend, and fitting more plants into less space.
At $23.69 for 272 pages of practical guidance, it’s genuinely worth it.
| Best For | Beginner and urban gardeners who want to grow more food in less space — balconies, patios, and small backyards included. |
|---|---|
| Product Type | Gardening Book |
| Organic Suitable | N/A |
| Indoor Use | Yes |
| Outdoor Use | Yes |
| Primary Benefit | Gardening knowledge |
| Skill Level | Beginner |
| Additional Features |
|
- Breaks down planting into a dead-simple grid system, so even total beginners can get it right the first time
- Covers 42 vegetables with specific guides, so you’re not guessing when to plant or harvest
- Less digging, less weeding, less water — it genuinely cuts down the work compared to traditional gardening
- Vermiculite and cedar lumber (key materials for the method) can be pricey or hard to find depending on where you live
- Watering and spacing advice may need tweaking if your climate runs hot, cold, or dry
- Not the best fit for deep-rooted crops or sprawling plants like zucchini without extra planning
5. Professional Grade Super Coarse Vermiculite
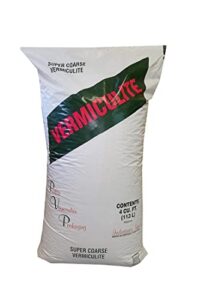
If your strawberry mix is prone to dry out fast or compact over time, professional grade super coarse vermiculite is worth adding. These large mineral granules absorb more than three times their volume in water, then release it slowly — so roots stay consistently moist without sitting in soggy soil.
Vermiculite also holds potassium, calcium, and magnesium, feeding your plants between waterings. At $57.08 for 4 cubic feet, it blends easily into raised beds, containers, or any custom potting mix.
| Best For | Gardeners growing strawberries in raised beds or large containers who deal with fast-draining or compacting soil and want a low-maintenance way to keep moisture and nutrients consistent. |
|---|---|
| Product Type | Vermiculite |
| Organic Suitable | Yes |
| Indoor Use | Yes |
| Outdoor Use | Yes |
| Primary Benefit | Aeration & moisture |
| Skill Level | Intermediate |
| Additional Features |
|
- Absorbs over 3x its volume in water and releases it slowly, so your plants stay hydrated between waterings without getting waterlogged.
- Naturally holds onto key nutrients like potassium, calcium, and magnesium — meaning your strawberries get a steady feed without extra effort.
- Big, chunky granules keep soil loose and well-aerated, which helps roots spread faster and anchor more firmly.
- At $57.08 for 4 cubic feet, it’s pricier than standard vermiculite grades — probably overkill if you’re only filling a small pot or two.
- The large particle size doesn’t mix as smoothly into fine seed-starting mixes, so it’s better suited for established plants than delicate seedlings.
- Some dust and smaller fragments tend to settle at the bottom of the bag, so expect a little cleanup before use.
6. Fertilome Compressed Peat Moss
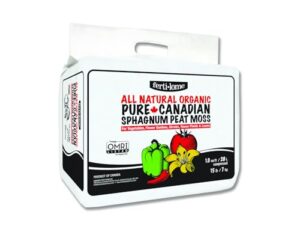
Think of peat moss as your soil’s structural backbone. Fertilome Compressed Peat Moss is 100% sphagnum peat — OMRI-listed and completely free of synthetic additives — so it fits right into an organic growing setup.
It loosens compacted soil, improves drainage in heavy clay, and holds moisture in sandy beds where water slips away too fast.
One 1 cu ft compressed block expands substantially once hydrated, giving you plenty of material to blend into raised beds or containers for your strawberries.
| Best For | Gardeners working with compacted, sandy, or clay-heavy soils who want an organic way to improve drainage, moisture retention, and overall soil structure. |
|---|---|
| Product Type | Sphagnum Peat Moss |
| Organic Suitable | Yes (OMRI-listed) |
| Indoor Use | Yes |
| Outdoor Use | Yes |
| Primary Benefit | Moisture retention |
| Skill Level | Beginner |
| Additional Features |
|
- OMRI-listed and additive-free, so it works right in an organic garden without any compromises.
- One compressed block goes a long way — it expands significantly once hydrated, stretching your dollar further.
- Works in both directions: loosens heavy clay and helps sandy soil hold onto water longer.
- It’s a soil amendment, not a standalone mix — you’ll need to blend it with other materials for most plants.
- Bigger projects can get pricey fast since it only comes in a 1 cu ft package.
- You need to follow the label’s mixing ratios closely — too much or too little and you won’t get the results you’re after.
7. Grow Organiks Organic Coco Coir Brick
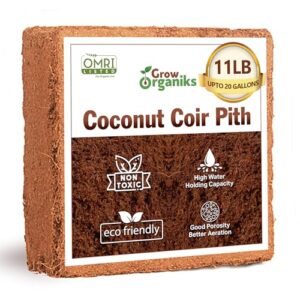
Switching from peat to coco coir is one of those small changes that pays off fast. Grow Organiks Organic Coco Coir Brick is 100% organic coir pith — OMRI-listed, odorless, and pathogen-free.
Each brick expands 5–7 times its size once hydrated, giving you roughly 70–75 liters of lightweight, moisture-retentive medium. It drains well without drying out too quickly, which strawberry roots genuinely appreciate.
Mix it with compost and vermiculite for a balanced container blend that keeps your plants growing strong all season.
| Best For | Organic gardeners and container growers who want a clean, sustainable alternative to peat moss for starting seeds, building potting mixes, or improving heavy garden soil. |
|---|---|
| Product Type | Coco Coir Brick |
| Organic Suitable | Yes (OMRI-listed) |
| Indoor Use | Yes |
| Outdoor Use | Yes |
| Primary Benefit | Drainage & aeration |
| Skill Level | Beginner |
| Additional Features |
|
- Expands to a huge 70–75 liters from one compact brick — great value for the size
- OMRI-listed and pathogen-free, so it’s ready to use straight out of the bag (after hydrating)
- Reusable after a rinse, which saves money over time
- Some batches carry residual salts, so you may need a few extra rinses before planting
- One big unsplit brick can be awkward to break apart once it’s soaked
- You’ll need a large container and plenty of water to fully expand it — don’t underestimate the space it needs
8. VermisTerra Organic Worm Castings Fertilizer
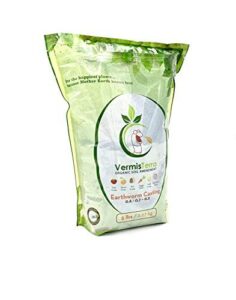
Worm castings might just be the quietest powerhouse in your growing kit. VermisTerra’s organic worm castings are 100% pure vermicompost — no fillers, no synthetic additives, no harsh smell.
That matters when you’re amending containers or raised beds where balance is everything.
Mix a few handfuls into your strawberry potting blend to improve drainage, boost beneficial microbes, and support steady root development. It’s gentle enough that you won’t burn your plants, even in summer heat.
A reliable top-dressing every couple of months keeps nutrients flowing all season.
| Best For | Home gardeners and container growers who want a gentle, organic soil booster that feeds plants slowly without the risk of burn. |
|---|---|
| Product Type | Worm Castings |
| Organic Suitable | Yes (Certified) |
| Indoor Use | Yes |
| Outdoor Use | Yes |
| Primary Benefit | Soil enrichment |
| Skill Level | Beginner |
| Additional Features |
|
- 100% pure worm castings — no fillers, no synthetic junk, just clean organic matter that actually improves your soil.
- Safe for sensitive plants and hot-weather use; you won’t accidentally fry your strawberries or herbs.
- Works great in multiple ways — mix it into soil, use it as a top-dressing, or brew it into compost tea.
- At $17.99 for 5 lbs, it’s pricier than bulk organic fertilizers, so covering a large garden gets expensive fast.
- Low N-P-K numbers mean heavy feeders like corn or tomatoes might need an extra nitrogen boost alongside it.
- Live worms occasionally show up in the bag — totally harmless, but worth knowing if that kind of surprise isn’t your thing.
9. Rabbit Hill Farms Rabbit Manure Fertilizer
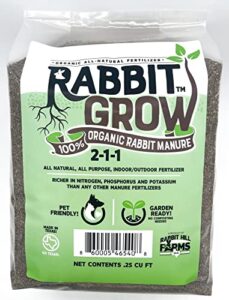
Rabbit manure is one of the gentlest organic fertilizers you can use around strawberries — and Rabbit Hill Farms bottles it in liquid form for easy application. It supplies nitrogen, phosphorus, potassium, and trace minerals like zinc, copper, and iron, supporting both leafy growth and fruit set.
Just apply directly to the soil every six to eight weeks during the growing season. Low odor, clean residue, and certified organic — it fits naturally into any raised bed or container routine without overcomplicating things.
| Best For | Home gardeners who want an easy, low-odor organic fertilizer for vegetables, herbs, fruit trees, and raised beds. |
|---|---|
| Product Type | Liquid Fertilizer |
| Organic Suitable | Yes (Certified) |
| Indoor Use | Yes |
| Outdoor Use | Yes |
| Primary Benefit | Plant growth boost |
| Skill Level | Beginner |
| Additional Features |
|
- Liquid form makes it simple to apply straight to soil or mix into potting media
- Certified organic with a gentle nutrient profile that works across a wide range of plants
- Low odor and clean residue — no mess, no fuss
- No usage directions on the packaging — you’ll need to visit the manufacturer’s website for dilution rates
- N-P-K ratios aren’t disclosed, so dialing in precise fertilization is tricky
- Results can vary depending on plant type and soil conditions, with some users seeing only modest improvements
10. Espoma Organic Chicken Manure Fertilizer

Chicken manure is a time-tested soil builder, and Espoma’s granular version makes it easy to use safely. With a 5-3-2 N-P-K ratio and 8% calcium, it feeds your strawberries steadily without the risk of burning roots — a real plus for beginners.
It’s certified organic and ready to use straight from the bag. Just work it into the soil every two to three months.
The smell fades quickly once watered in, and your plants will thank you for it.
| Best For | Organic gardeners — especially beginners — growing vegetables, berries, or flowers in small to mid-size plots who want a safe, no-fuss soil builder. |
|---|---|
| Product Type | Granular Fertilizer |
| Organic Suitable | Yes (Certified) |
| Indoor Use | Yes |
| Outdoor Use | Yes |
| Primary Benefit | Balanced nutrition |
| Skill Level | Beginner |
| Additional Features |
|
- Certified organic and ready to use right out of the bag — no mixing, no measuring
- Balanced 5-3-2 N-P-K plus 8% calcium feeds plants steadily without burning roots
- Improves soil structure over time, which pays off season after season
- Strong odor straight from the bag (though it does fade once watered in)
- The 3.75 lb bag runs out fast if you have more than a small garden
- Light nutrient levels may not cut it for heavy feeders without adding a supplement
Frequently Asked Questions (FAQs)
Can I grow strawberries in October?
Yes, you can plant strawberries in October — but timing matters.
In mild climates, fall planting gives roots time to establish before winter, setting you up for a solid harvest next spring.
What is the easiest way to grow strawberries?
Skip the complicated setups — the easiest way to grow strawberries is to pick a sunny spot, plant disease-resistant crowns in well-draining soil, water weekly, and mulch. That’s genuinely it.
Do strawberries grow better in pots or the ground?
Both work well, but it depends on your space and goals. In-ground plants spread freely and produce more fruit over time.
Pots give you more control — perfect for patios or tricky soils.
Do coffee grounds help strawberries grow?
Coffee grounds can help — but only in moderation. Their slightly acidic pH and slow-release nutrients suit strawberries well. Mix small amounts into soil rather than applying them directly around crowns.
How do you grow a good strawberry plant?
Start with the right variety, full sun, and well-drained soil with a pH of 5–
Plant crowns at soil level, water consistently, mulch well, and harvest only when berries are fully red.
How do you grow strawberries in a small space?
Think you need a big yard to grow strawberries? You don’t. Containers, hanging baskets, vertical towers, and raised beds all work beautifully — even on a tiny balcony or patio.
Can you grow strawberries directly in the ground?
Yes, you can absolutely grow strawberries directly in the ground. Prepare well-drained soil with a pH of 5–5, space plants 18–24 inches apart, and mulch well for best results.
How do you grow strawberries in a basket?
Fill a basket with well-draining potting mix, plant crowns at soil level, and space plants evenly. Water about 1 inch weekly, fertilize after flowering, and harvest berries once fully red.
How to grow strawberries for beginners?
Growing strawberries is simpler than you’d expect.
Pick a sunny spot, prepare well-drained soil, choose a beginner-friendly variety, plant at the right depth, water consistently, and you’ll be harvesting fresh berries in no time.
How do you plant strawberries in a container?
Turns out, strawberries don’t need a garden at all. Fill a 12-inch container with moist, well-draining mix, set crowns at soil level, space plants 6 inches apart, and water thoroughly.
Conclusion
You don’t need a big yard or a green thumb to enjoy fruit you actually grew yourself.
The easy ways to grow strawberries outlined here work just as well in a hanging basket on a balcony as they do in a dedicated garden bed.
Pick your variety, get your soil right, and stay consistent with watering and feeding.
Do that, and your first bite of a fully ripe, homegrown strawberry will make the whole process feel completely worth it.
- https://yardandgarden.extension.iastate.edu/how-to/how-grow-strawberries-containers
- https://extension.umn.edu/fruit/growing-strawberries-home-garden
- https://harvestny.cce.cornell.edu/uploads/doc_219.pdf
- https://www.apieceofrainbow.com/diy-strawberry-tower/
- https://www.finegardening.com/article/how-to-build-a-strawberry-tower